I mentioned before that from middle school to high school I was dead set on becoming an Architect. That never panned out. I DID spent many years learning how to hand draft, as well as draft using AutoCAD.
My last post was about a fresnel lens I just got which will be set up in an outdoor kitchen. I don't have the ability to use AutoCAD now, as it's much too expensive for the non professional. Instead I am learning to use LibraCAD. It's an opensource program which has many of the same great features of AutoCAD, although not quite the same.
When I was a student I was able to use AutoCAD free through my school, but I don't have that option anymore. Anyway, I've been bouncing various designs around in my head of my ideal outdoor kitchen for many months now. I've come to a point where I need to put this design into accurate dimensions. This post will be a short overview of the beginning of that process.
For those unfamiliar with the acronym CAD it stands for Computer Aided Drafting. Below you will see the progress of the first draft of my future outdoor kitchen. The ultimate design might end up being totally different by the time the kitchen is made, but gotta start somewhere, right?
In the past month I've had some issues come up which have limited my time in garden. Additionally I've been struggling to post at least once a week here on steemit generally. To make things worse there've been intermittent problems with my internet connection which have taken me offline several times. I hope that's all been sorted now. The good thing to come of this is that I've had a little more time and focus to start on this design.
The start of this drawing requires me to lay down the foundation first. What I mean by that is the existing structures need to be plotted out. Once the bones of the design are there, I can add, delete, rearrange, etc elements of the design. For example, where the cob oven will be, where the sink will be, how tall, etc. But, as there are currently stairs, retaining walls, a sidewalk, light pole, gravel, etc, those things need drawn first and foremost.
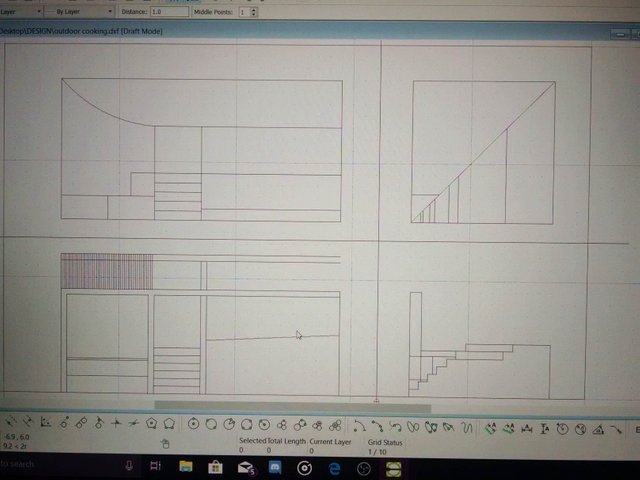
This first drawing is split into 4 sections. The bottom left is the Front View. The top left is the top view. The bottom right is the side view, and the top right is the drafting method used to transfer the lines from the top view to the side view so they end up in the right places. Sorry the pictures are not better quality. I have not learned how to screen shot on this computer yet so I had to take a picture of the computer screen lol.

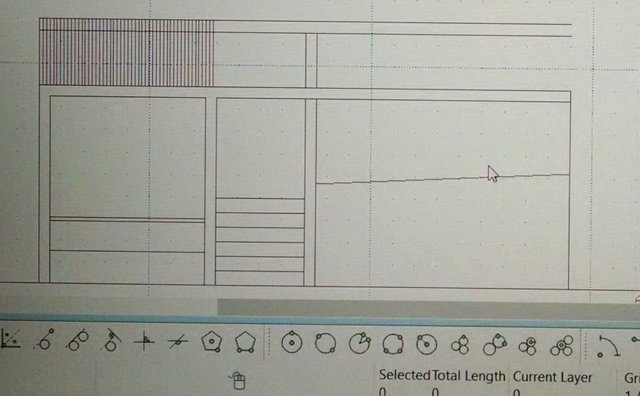
Next is closer detail of the front view. Nearly in the center of the image is where some steps are. To give context to this design, this area is on the side of a basement garage. To the right of the steps is a concrete foundation wall that extends past the basement garage. To the left of the steps are where two 2'x4' concrete blocks are stacked two high as a retaining wall. The area above the walls doesn't exist yet. It's the sketched part of what I hope will be built later on; a tin covered roof over the stairs and sidewalk.

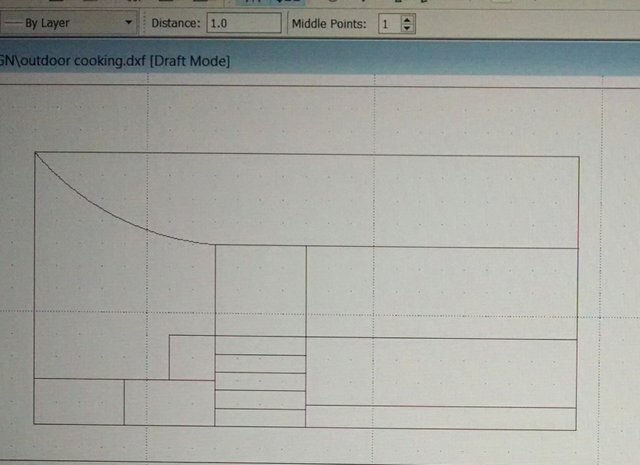
This is the top view. Again, in the middle are the stairs which lead up to connect to the sidewalk which goes right. On the left of the stairs is a gravel area that is located between the yard in the upper part of the drawing and the concrete blocks on the bottom left of the drawing.

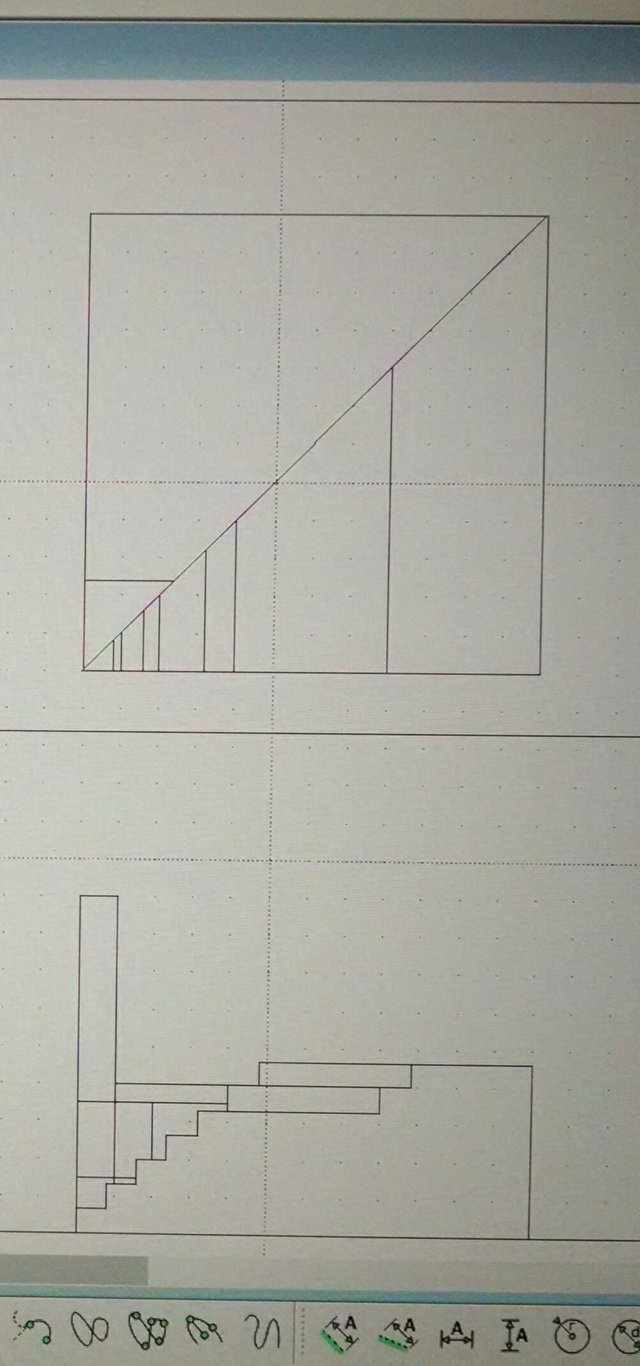
Finally, this is the side view. The top square image is the box of lines created to transfer the lines from the top view to the sideview where they should be. You basically extend all of the horizontal lines from the top view to the rectangle. Where they intersect the diagonal line they are then extended down vertically. When this overall drawing if finished, this square transfer box will be erased.
The bottom of this image is the side view. The left is the concrete basement wall. Next to that is the side view of the stairs. This is probably the most difficult of the 3 angles to "see". The way I learned to draft was to have the easiest to understand section of the drawing be the Front drawing, then move on to the top view, then side view last.

Because this is just the first draft of the first draft, it might not be easy for other people to visualize what this is if they are unfamiliar with drafting drawings. It'd be a lot easier to picture what my design is if it were a finished drawing but I'm not very far along yet.
While Computer Aided Drafting is much faster than hand drafting, it still takes time. I'm still learning this program, too. Sketching first is the efficient way to design. I find not being able to sketch to scale, using accurate measurements, makes designs pretty difficult because they end up needing to be redesigned because they don't work. Can't put an air duct where a doorway is. That sort of thing. Well, thanks for reading!
First draft still has a ways to go. That's what I've got so far. If you found this post enjoyable, please consider upvoting, resteeming, following, and commenting! Thank you kindly for reading...
ALL IMAGES ARE COPYRIGHT 2018 BY ME, @phedizzle. Hope you enjoyed them!
Here are previous posts of mine:
STORIES:
2011 GARDEN:
RECIPES:
POEMS:
PLANTS AND ANIMALS-EDUCATIONAL:
WALK ALONG WITH ME:
2018:
CONTESTS/REVIEWS
SUSTAINABILITY

Phedizzle signature created by @bembelmaniac


Come say hello in the following Discord chat rooms:
 #homesteadersonline: https://discord.gg/VKCrWsS
@qurator: https://discord.gg/pJtWp57M
#minnowsupport & #PAL: www.minnowpond.org


Congratulations! This post has been upvoted from the communal account, @minnowsupport, by phedizzle from the Minnow Support Project. It's a witness project run by aggroed, ausbitbank, teamsteem, someguy123, neoxian, followbtcnews, and netuoso. The goal is to help Steemit grow by supporting Minnows. Please find us at the Peace, Abundance, and Liberty Network (PALnet) Discord Channel. It's a completely public and open space to all members of the Steemit community who voluntarily choose to be there.
If you would like to delegate to the Minnow Support Project you can do so by clicking on the following links: 50SP, 100SP, 250SP, 500SP, 1000SP, 5000SP.
Be sure to leave at least 50SP undelegated on your account.
It's only a drawing and it's already nicer than the place I live :) You got skills
This is the awesome drawing with full of space...
How cool! An outdoor kitchen!
I also have been fooling with drawing, having designed both sections of our house in past years. But I work on graph paper! I leave the AutoCAD to my husband who did it for work for many years. He gets to transfer my drawings and work out the bugs.
I love designing stuff on graph paper. He HATES seeing me working on graph paper, because it means another project. LOL
For most Windows computers, holding down the Windows button (somewhere between the left Ctrl and Alt buttons), and pressing the Prt sc (short for print screen, usually after f12 button on the topmost row of keys) button will grab a screenshot. You will notice the screen momentarily dim when you press both. Then navigate to your file explorer, open your Pictures folder and you should see a sub-folder named Screenshots. I hope that helps.
I love outdoor kitchens! Thanks for sharing your beautiful design! I look forward to see how this progresses. I will be watching with a keen eye as having an outdoor kitchen is something I'd like to see in my future homestead :)
Building an outdoor kitchen in phases is an affordable approach because you can add on as budget allows. In stage one, tackle hardscapes – patio pavers, retaining walls, benches, arbors, fences, etc. Stage two: Install your grilling area or “hot zone.” Stage three: Install a “cool zone” station for beverages and for serving. Suggest you visit our site for more information - https://marble.com/articles/waterfall-countertops-what-to-consider-before-buying
Thanks for sharing with us the ideas on countertops https://www.glumber.com/wood-countertops/wood-kitchen-countertops/
Thaou, as a professional in your field, what can you advise in my situation? My bathroom, only 9 square meters, in which I would like to place all the necessary household appliances so that there would still be at least a little space for a bath or a small Jacuzzi. The guys helped me to choose the best portable washing machines with their chic review on them, but for the rest, I need the help of a designer like you.nk you for the excellent article.