SLC21W1: Measurements and submeasures necessary for class # 1 layout - Task 1
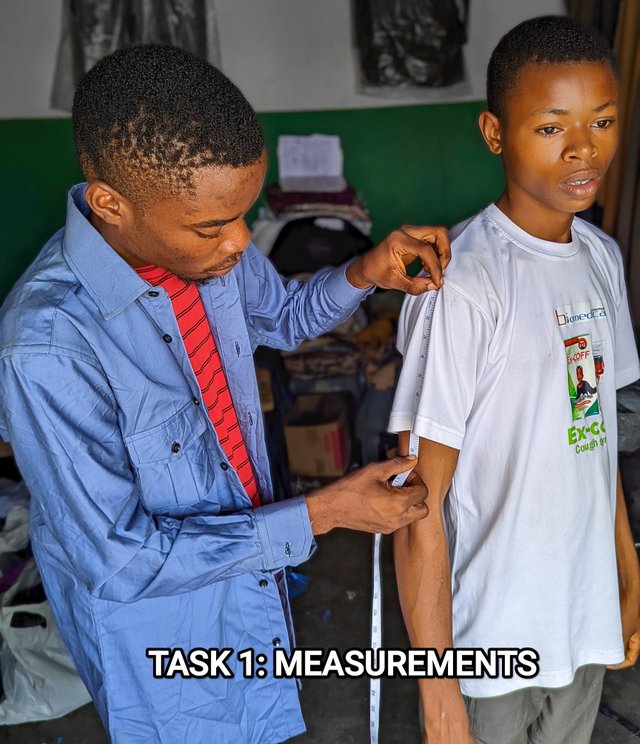
I find it very interesting to see that this season's course focuses on men's wear, which is my line. In every garment sewn, measurements serve as the basis for knowing how to draft basic body patterns to sew. Last season's course on women's dressing exposed me to the basics of measurements and pattern draughting of women's wear, which included skirts and blouse.
I got to know a new way of patterning, which is not something I'm familiar with in my country. So even though I'm used to men's wear, there are still lots of things I can learn in the course of this mentorship by our able coach, who's versatile.
TASK 1 |
|---|
It surprises me to see the splitting of tasks for the challenge, but that's very much okay with me. For task 1, we were told to show with our own images how to take the measurements of our model. We were also told to describe the steps. So for my model as to shirt and pants, I'll go with men's fit or style in the course of this tutorial.
We were taught last season that measurements are based on industrial and personal sizes and that industrial sizes have fewer measurements while personal sizes have lots of measurements. I'll be working extensively on personal sizes, and I'll try to make this scenario a live one. Okay, let's assume I have a customer who comes to my shop to sew a shirt and trousers.
I've taken down his name for emphasis's sake. It's very important to take down the names of those you sew for so as to ease remembrance, as not all tailors can store information for long, especially someone you barely sew for. Taking down the name of the customer shows I have personal interest in the person I want to service for. What did I use to write his name? The following are very essential when it comes to measurements.
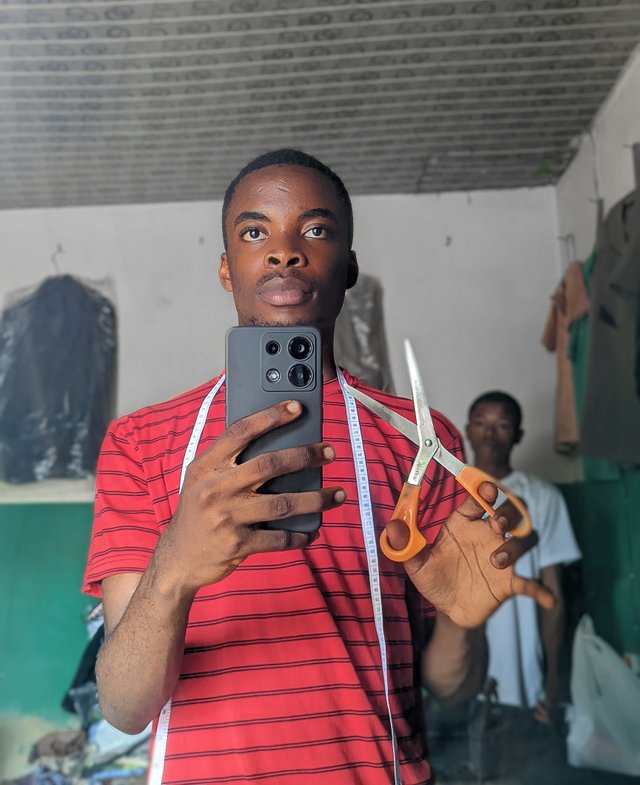
- Measuring tape: You basically can't do without a measuring tape if you want to sew a dress. The tape gives you the layout, size, and shape of the clothes you want to sew. Without it, there's no sewing except improvisation is done. You can't basically assume measured values on fabrics with your eyes without the use of a tape.
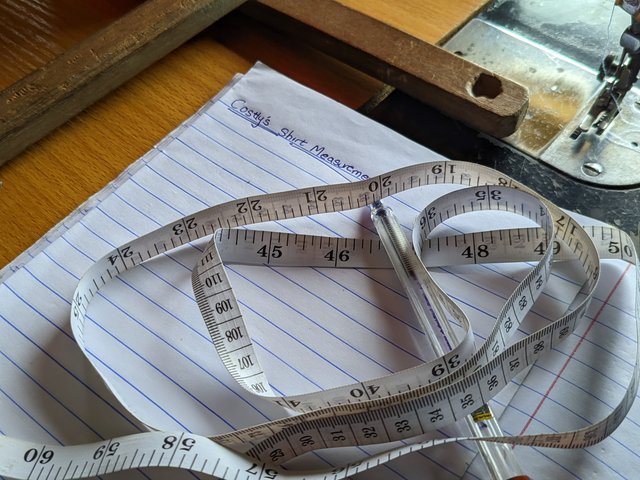
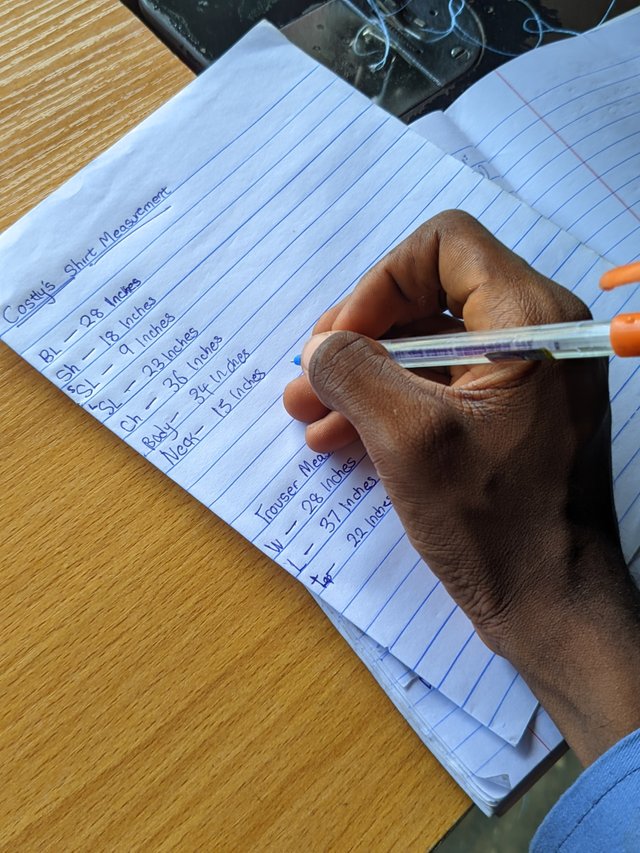
- After using the tape, you'll need a pen and book to write down the measurements of the person you want to sew for. Some people don't see this as necessary because they store it on their mobile devices or have it at their fingertips. I see it as important even though I'm professional in the field. Either way can be useful as long as the measurements are inscribed somewhere for remembrance or emphasis sake.
- To avoid problems, it's always good to ask the person you're measuring of a comfortable size with your tape instead of assuming, especially if you're a learner or beginner.
So I have a customer who wants me to sew a shirt and trouser for him. His name is so important to me.
| Costly | Customer Name |
|---|---|
| Shirt and Trouser | Service |
Now, this is costly in my shop, and I want to take measurements of his shirt. Since I'm taking his measurements, it would be classified as a personal-sized measurement and points to take note of when measurements includes;
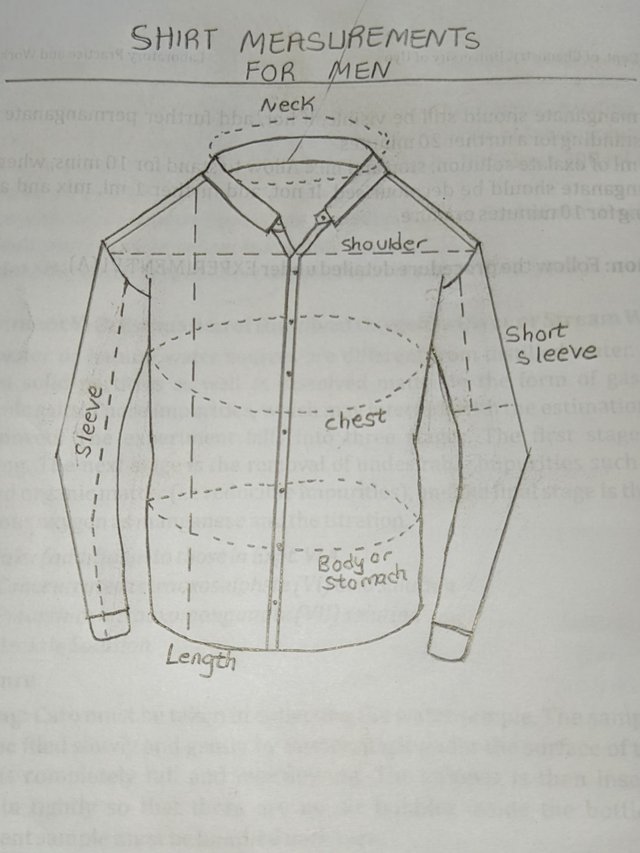
- Length of the shirt [Front length and back length for justification]
- Shoulder - SH
- Sleeve [Long or short] He wanted long sleeve
- Chest
- Body or stomach
- Arm circumference
- Neck Circumference
- Armhole length
- Cuff circumference
With my book and pen, I'm ready to take down Costly measurements. The below measurements are basic measurements I took down though others were part of the measurements but weren't written down. Starting with the length.
Length of Shirt [Front and Back Length] |
|---|
When measuring this, you need to consider the position of your customer. I considered his position and ensured he was standing upright. Then I took my tape and placed it on the centre back neckline, which is slightly below the back width, and then I took my tape down to the hemline, which is the bottom of where he wants the short to be.
He wanted a standard shirt, so I used standard measurements considering his height and the allowance. The shoulder slope and armhole death were taken into consideration while I did my back length. The essence of this back length is so as to ensure accuracy on both front and back. I measured the front length starting from the centre front neckline.
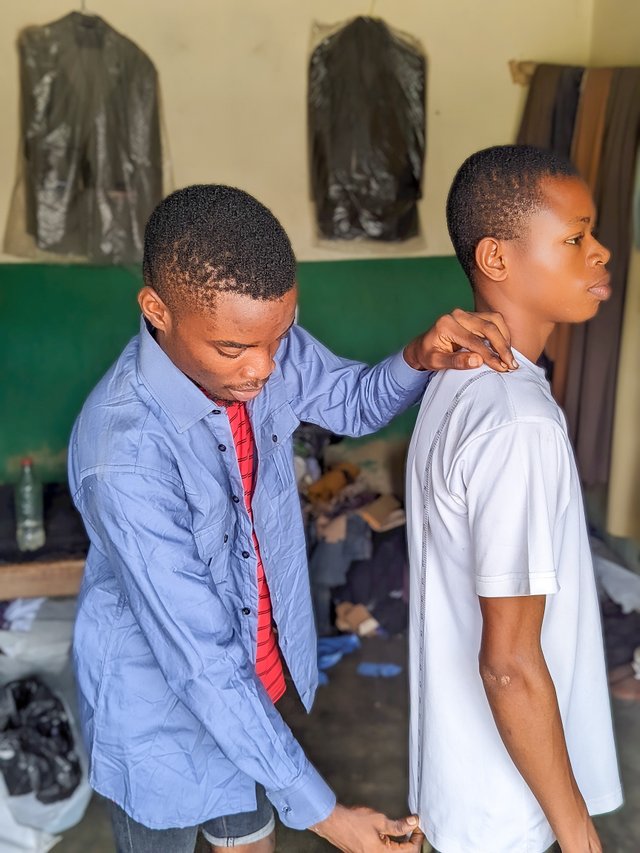
The front measurement provides the overall length, while the back measurement ensures balance. Normally, I love using the back length to give out standard sewing. I was used to using the front, which sometimes varies based on the individual. I wrote the measurement down on my measurement book, which was.
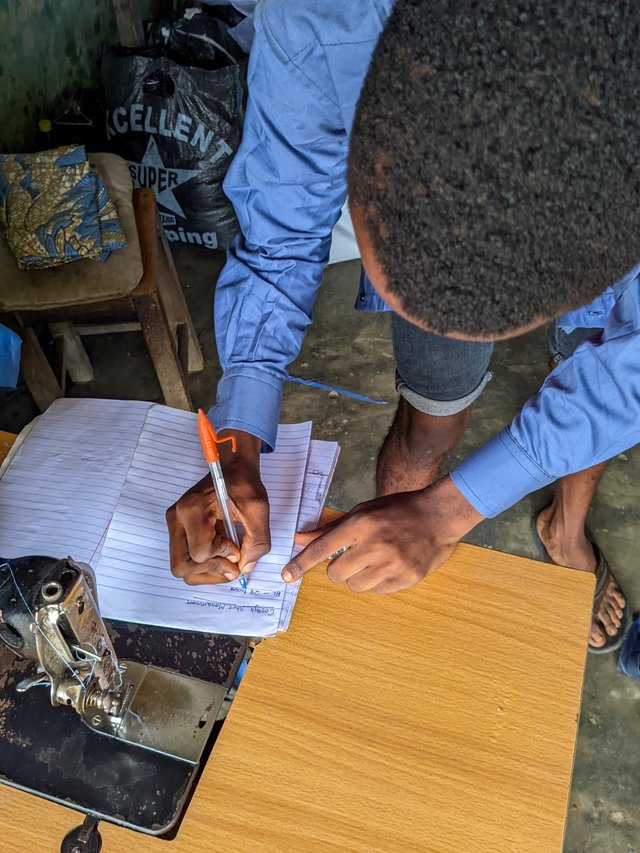 | writing down measurements |
|---|---|
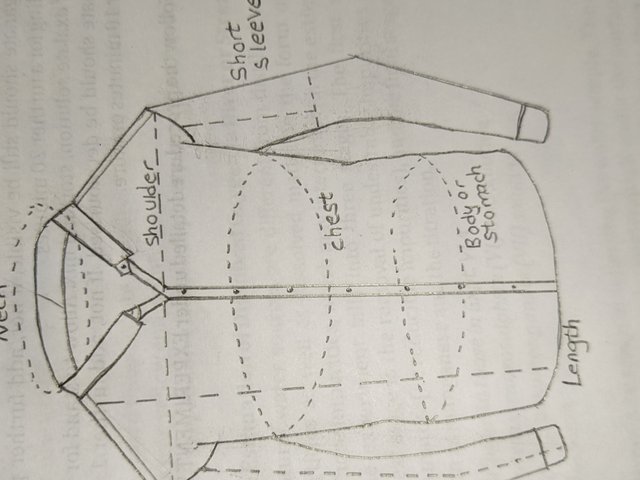 | length |
| Length | 28 inches | 30 inches |
|---|
Shoulder |
|---|
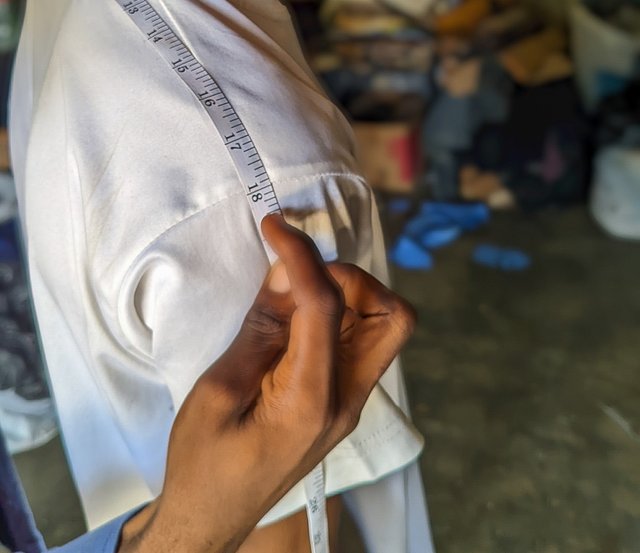
This is another important measurement to take when measuring a shirt. This is a measurement from the distance of one shoulder tip to the other. It is usually taken across the top of the shoulders. You must follow the natural shoulder slope and measure across the shoulders to the far end of the other.
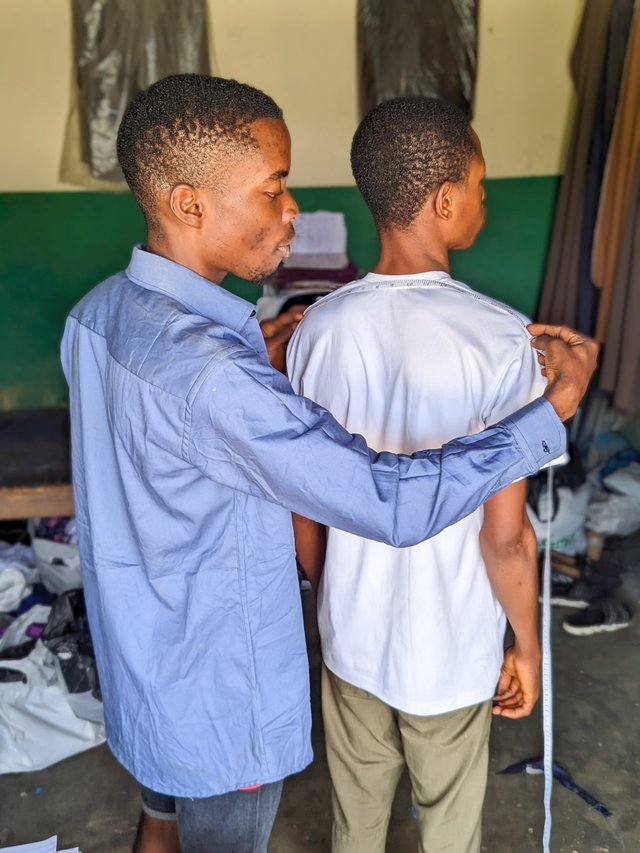
Some people do make mistakes with the shoulders. The shoulder stops where it meets the armhole. I took the measurement of my client's shoulder, and it was:
| Shoulder | 18 inches |
|---|---|
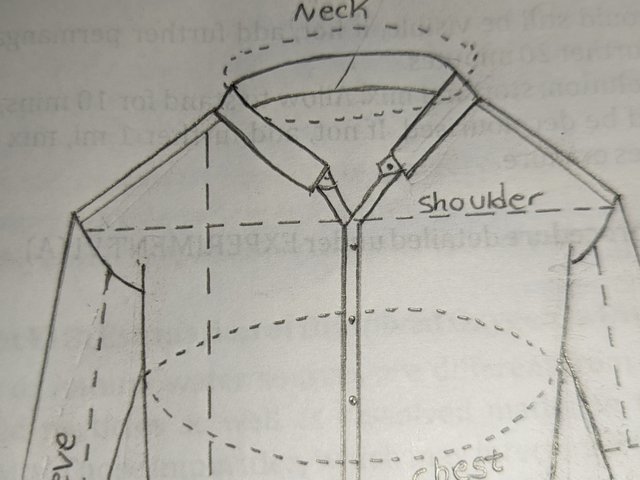 |  |
Sleeves |
|---|
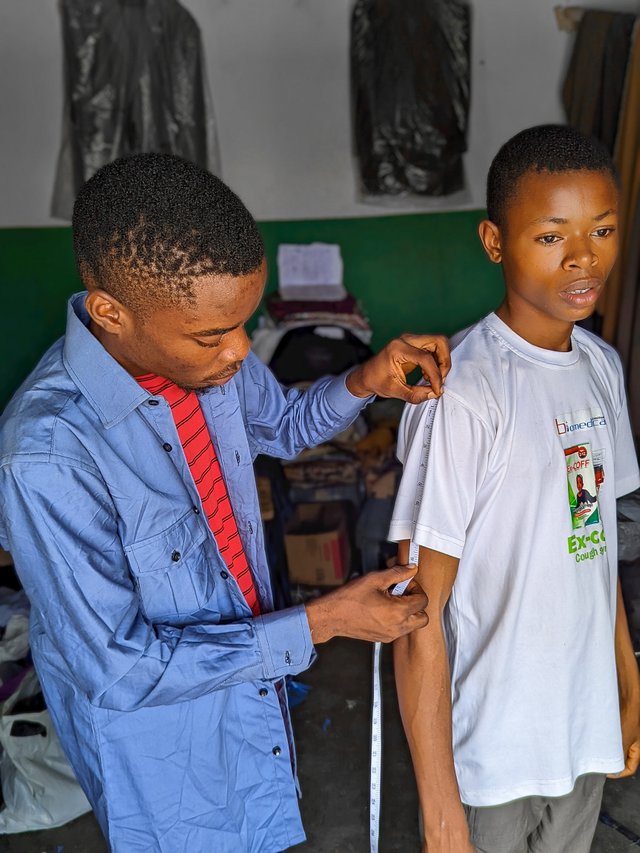
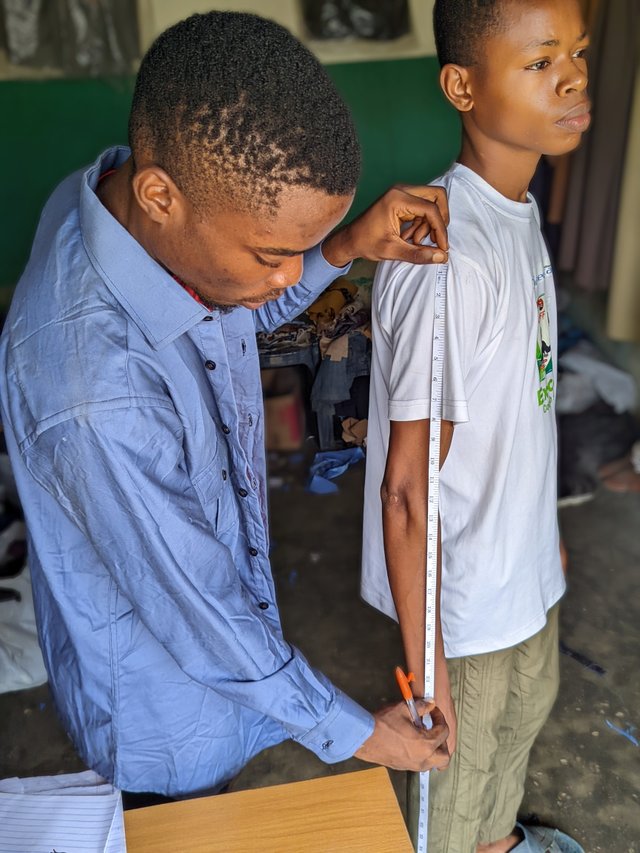
This was taken from the tip of the shoulder round the armhole down to the arms before the elbow if it's for short sleeves, but if for long sleeves, it's taken down to the wrist. I took the measurement of my client, and he was:
 |  |
|---|---|
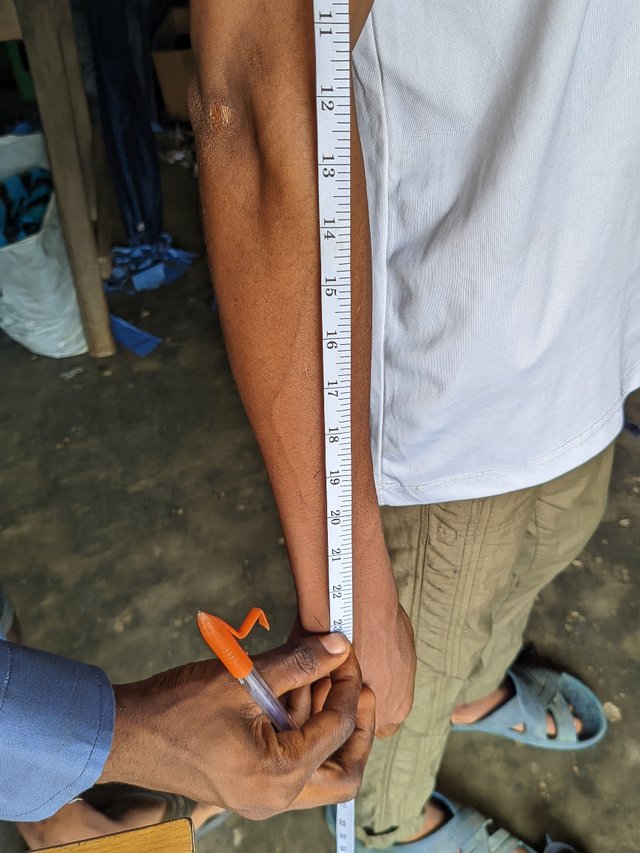 | 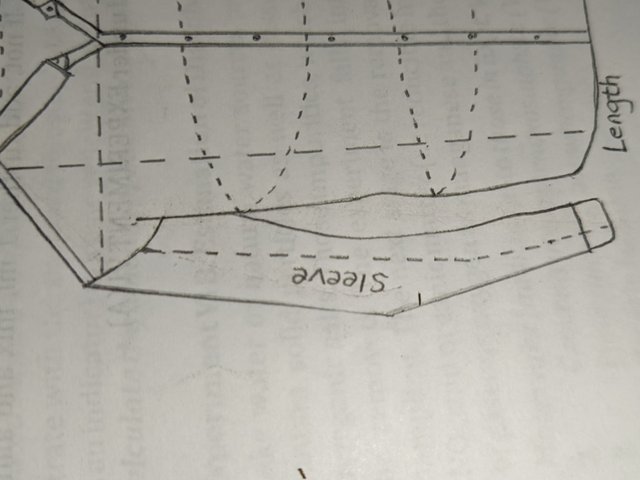 |
| Long sleeve | 23 inches |
|---|
Cuff Circumference and Arm circumference |
|---|
These two measurements are very important, though I don't like recording them. I measured the arm circumference to know the size of his arm so I could make a perfect shape when cutting the sleeves. The wrist is also important as it's usually taken to fit the long sleeve.
Not all wrists are the same, so it must be taken to ensure perfection in sewing. I took measurements of his wrist or cuff and got:
| Cuff circumference | 9 inches |
|---|---|
| Arm circumference | 13 inches |
Chest and Body Circumference |
|---|
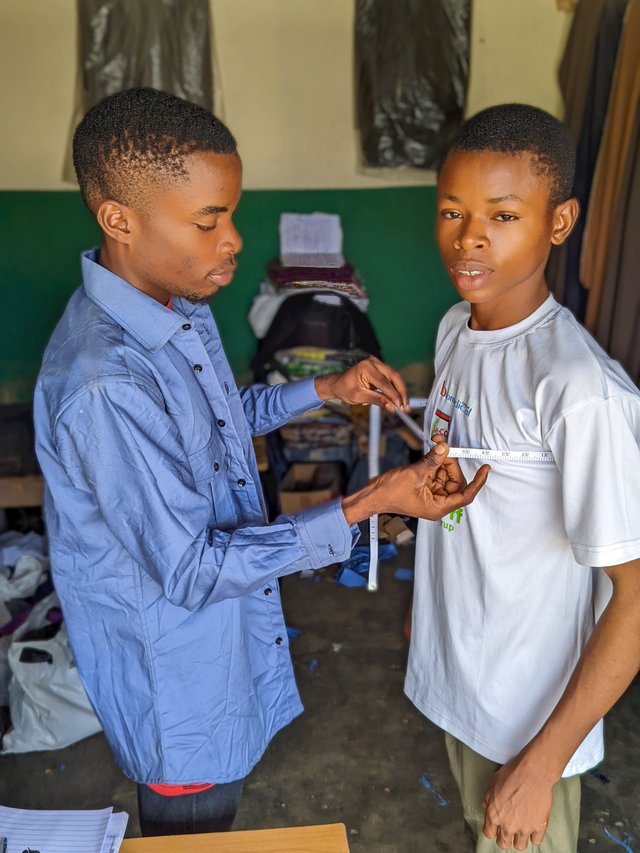
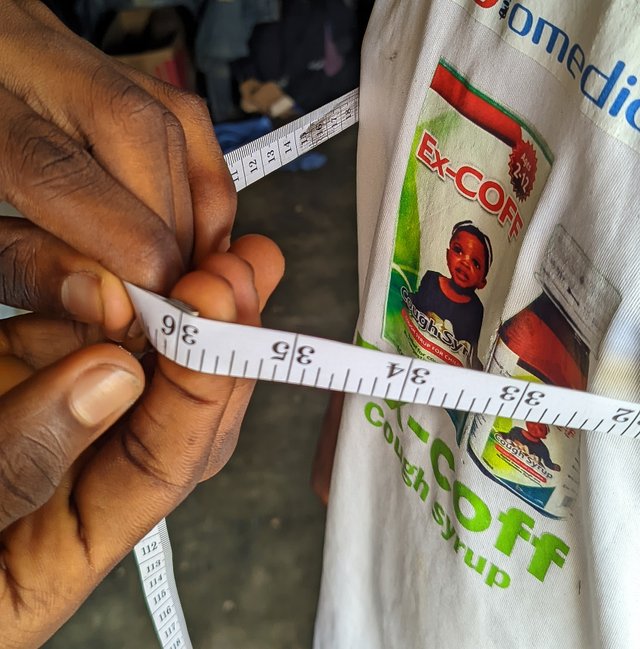
This was taken around his chest region and lower abdomen. I did this by wrapping the tape around his body and then folding it up to his chest. I made allowances in my measurements to assume a shirt from and then asked him if he wanted a fitted or normal shirt. He wanted a normal shirt, and I gave him a chest measurement of 36 inches.
 |  |
|---|---|
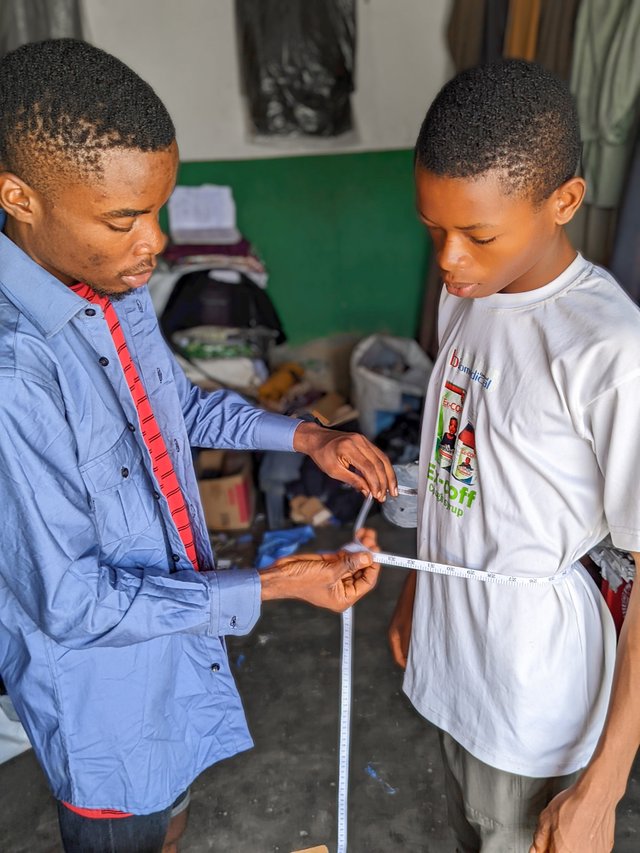 | 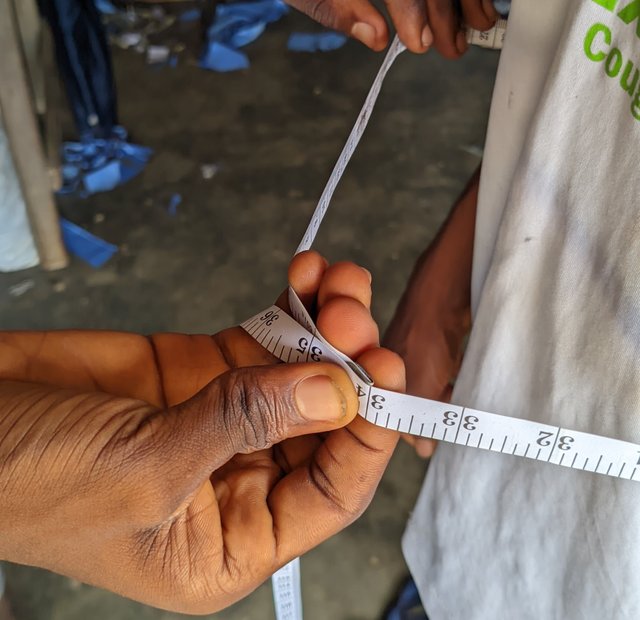 |
This varies with individuals, as most have broader chest regions. The body or stomach circumference is taken around the lower abdomen of the body, and the measurement is always lower than that of the chest region, where the chest is more like a curve with the breast while the abdomen is free and down. I took his body measurement and got 34 inches.
 |  |
|---|
| Chest circumference | 36 inches |
|---|---|
| Body circumference | 34 inches |
Neck Circumference |
|---|
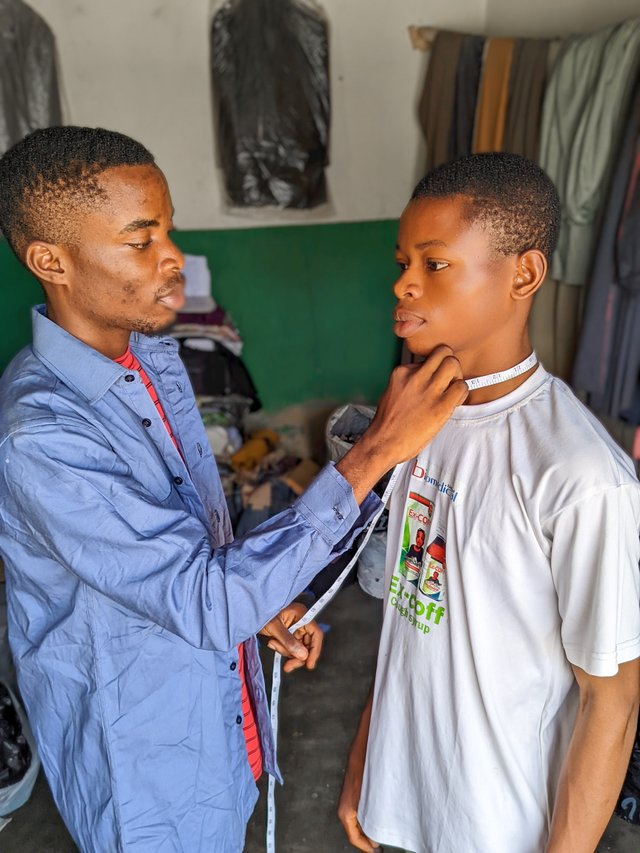
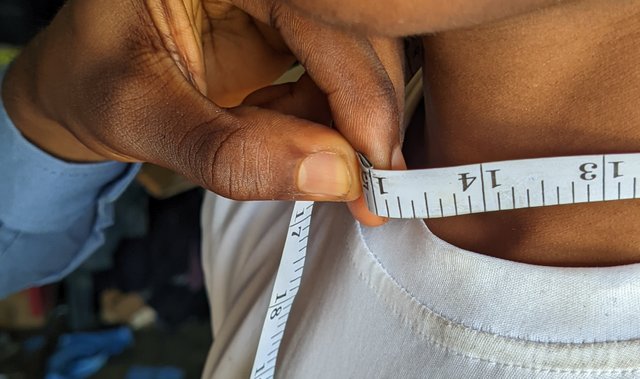
This is the most critical measurement to take, as the beauty of the shirt is around the neck, the collar in particular. So I was careful about this and ensured it wasn't too expansible since it's a curve and I'll be making use of buttons. I gave him a measurement of 15 inches
 |  |
|---|
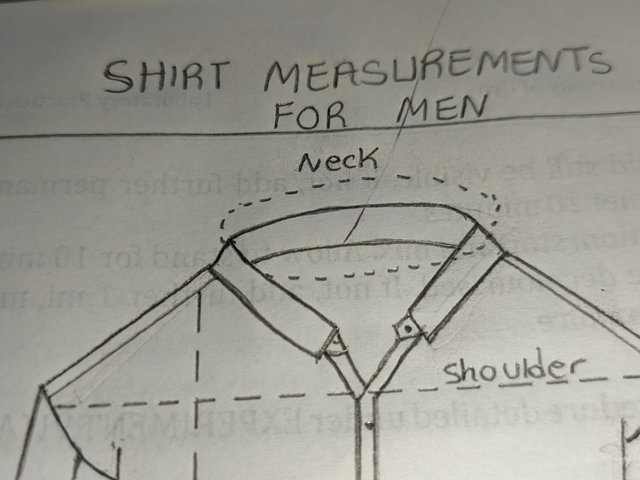
| Neck circumference | 15 inches |
|---|
| I was done with measuring his shirt now to the pant or trouser. |  |
|---|---|
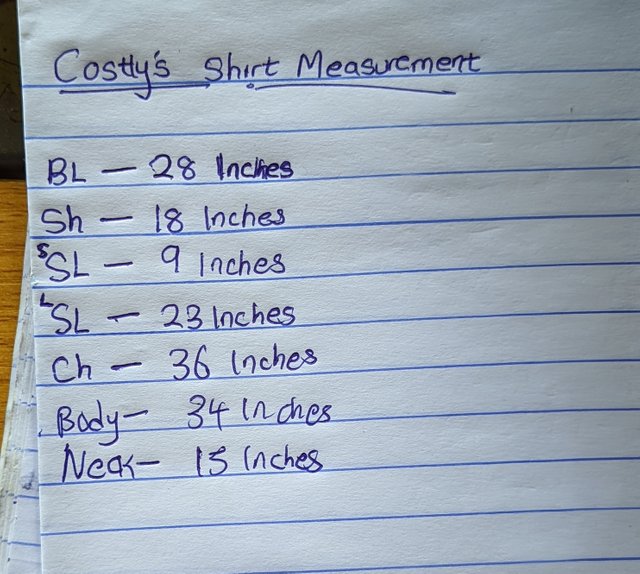 | Measurements for shirt |
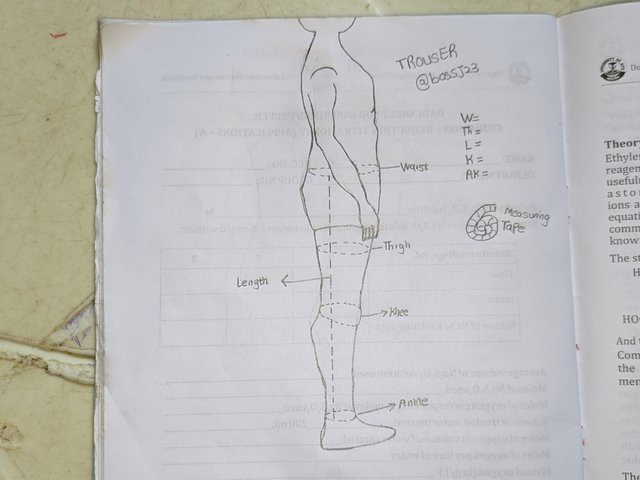
Trouser or Pant Measurements
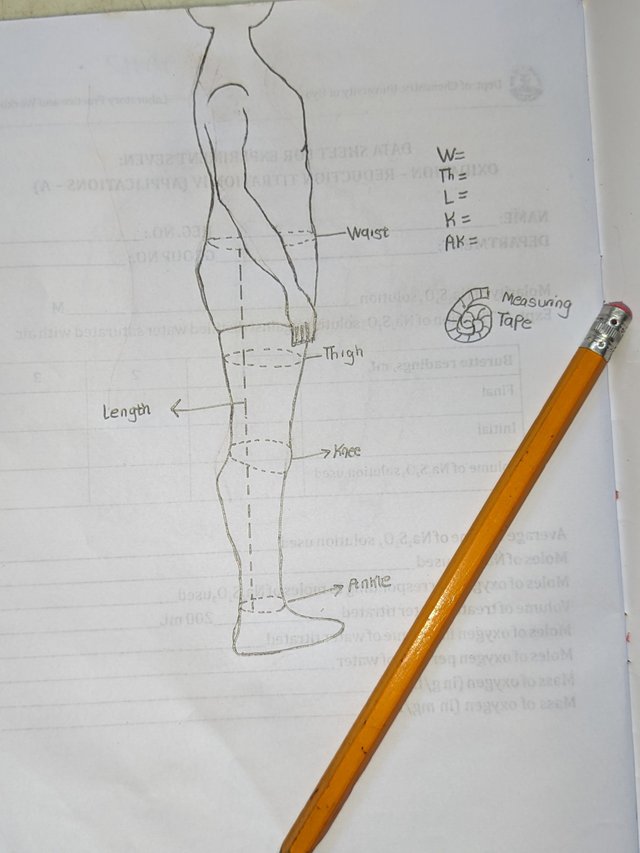
People do make mistakes when measuring trousers, especially around the waist region and ankle. These are the measurements and steps I took in ensuring this was carried out. This trouser measurement is for personal size, so the measurements would be much.
Waist circumference |
|---|
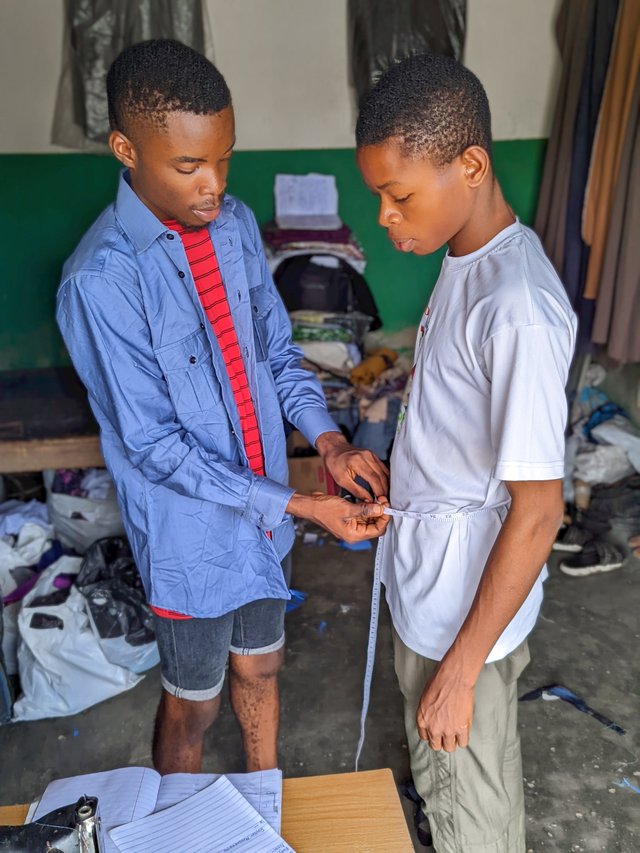
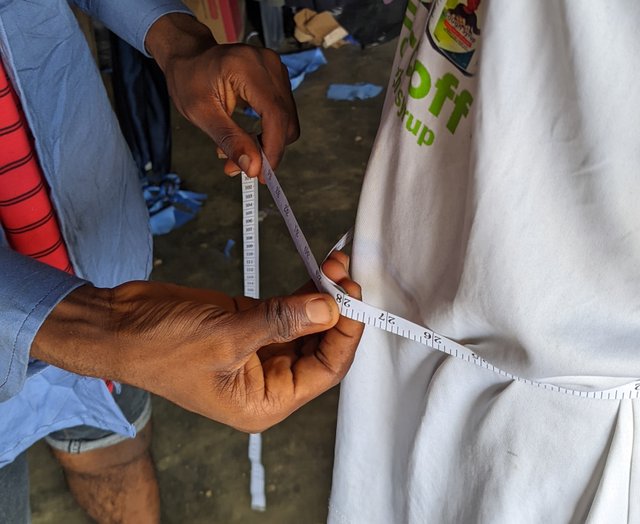
I took my tape and wrapped it around his waist and then held on to the front line of my tape while shaking it to fit in with the measurement and his waist. I got a desired waist measurement of 28 inches. He does have a small waist though, compared to those I usually measure. The waist is the beauty of the trouser, even though at times it's not seen but the curves are visible.
 |  |
|---|
| Waist | 28 inches |
|---|
Length |
|---|
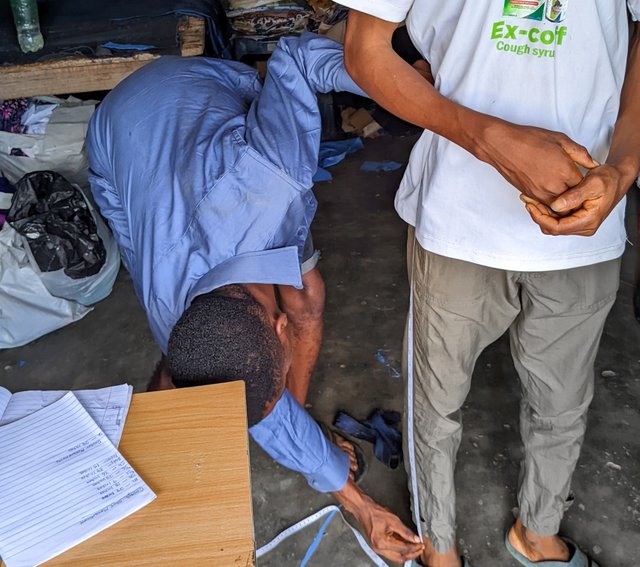
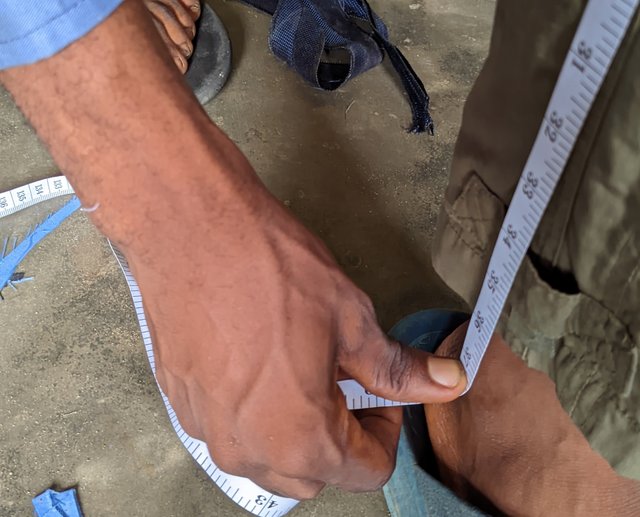
I ensured that my client was upright and not bending when carrying out this measurement to avoid inaccurate measurement. I took my tape, placed it on his waist, and then drew it down to his ankle and ensured the tap was still upright.
 |  |
|---|
Note: You don't measure the length of a trouser in front of the person but by the person's side, as you can see me do. This ensures accuracy in measurements and prevents curves from the hips and knees.
| Length | 37 inches |
|---|
Hip or thigh |
|---|
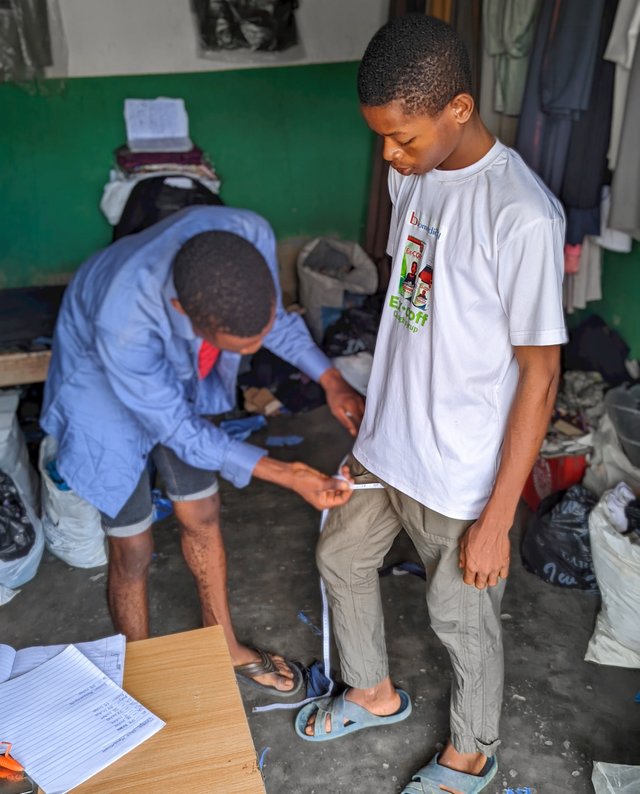
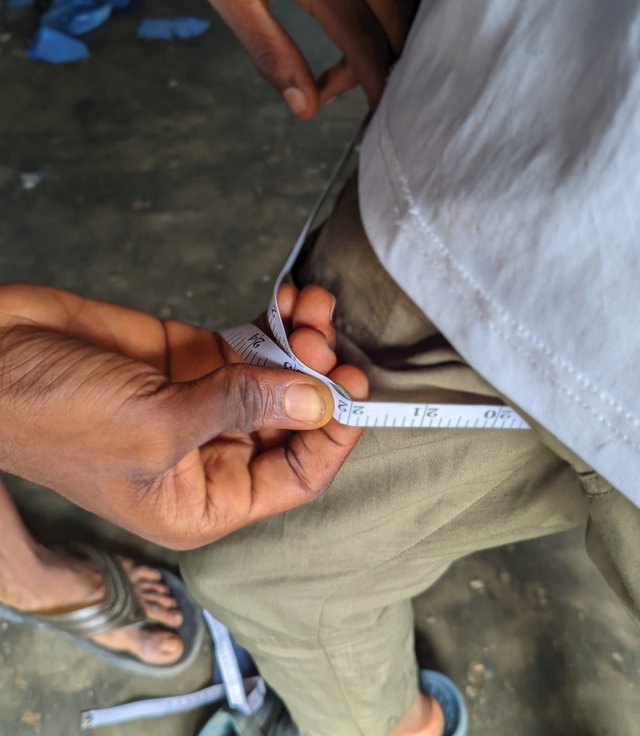
This is the most critical part of measuring a trouser, as not getting this place accurately can spoil the trouser. Not everyone has the same hip size, and it's this hip size that makes the trouser comfortable for the wearer. It doesn't make it too tight or too loose.
 |  |
|---|
So getting an accurate measurement can bring them comfortability. I got a measurement of 22 inches and then measured the hip height before moving to the knee region and ankle.
Knee and Ankle |
|---|
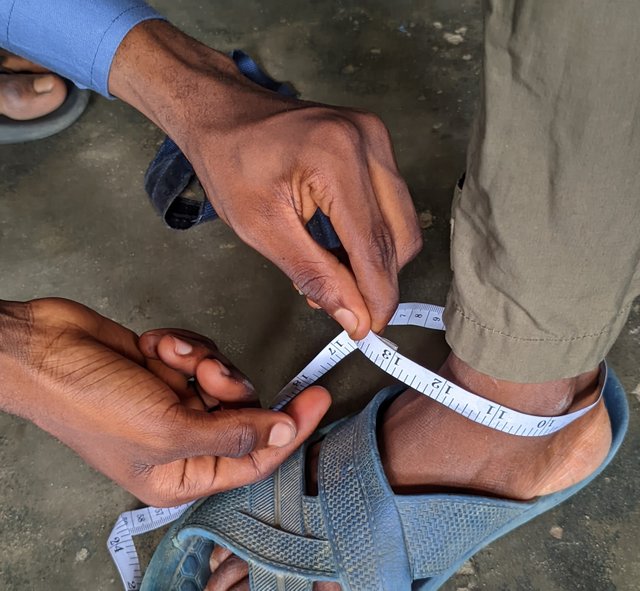
These are critical points, though sometimes I don't measure the knees. The ankle is the entrance of the trouser. If the ankle isn't accurate, the legs can't enter; the trouser is sewn so tight, and if sewn so loose, it becomes like a flair, which may not be the need or interest of the client.
 |  |
|---|---|
 |  |
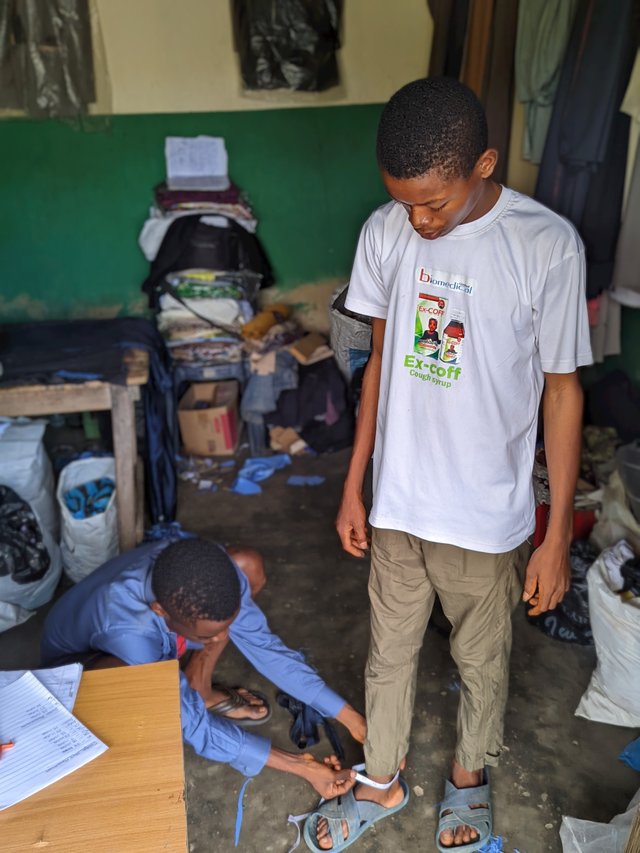
So I made my client comfortable by wrapping the tape around his ankle, which is that place or part where the bone of the leg clothes to the feet protrudes sideways. I got
| Ankle | 15 inches |
|---|
And I asked my client if that size would be okay for him or if he would want a reduced size like pencil or buguz. That's the end of my measurements. I wrote them down and allowed him to go.
 |  |
|---|
Places to be Extra cautious when measuring |
|---|
Length both shirt and trouser
Chest region
Neck Circumference
Thigh
Sleeve and
Ankle
What is your reason to learn in this season 21 of the new Steemit Learning Challengers (SLC)?
As stated at the onset, I do sew men's wear, and I'm good when it comes to measurements, sewing, and patterning. No knowledge is wasted; that's why I'm going to take this course seriously. There are a lot of things I can learn as a result of this teaching course. My reason to learn in this new challenge is to add to my wealth of knowledge, or storehouse, so to speak. There may be others who know how to strategise a particular fabric easily, whereas I don't.
Last season, I learnt a lot of things from the pattern-making course as I got to know how it was done in other countries and strategies and steps I'm not used to in my region. It has helped me a lot, and when I learn physically, I'll definitely put my great wealth of knowledge from last season into practice. I want to commend @lunasilver again for this opportunity to develop interest in the sewing and fashion industry
I invite @victorlives, @megareigns and @radleking
I hoped you would teach and something tradutional since my son would love that. MKing men suits is a waste of time and money since cloth is way too expensive.
I guess men have never a swallon belly after a meal or a few drinks. Also it depends on the job if the measurement taken fits comfortable.
Good luck to you dear friend.
🍀♥️
0.00 SBD,
0.00 STEEM,
0.42 SP
I'm telling you ma. The cost for buying just the material talk more of sewing is way too expensive. This is one of the reasons why most people don't venture into suits. They'll just have one for official invitations. Which style of dressing does your son like? Corporate or senator wear?
He likes both and wears at home different from at work and university. For the senator wear style he goes more now and looks around at second-hand shops although men wear seems to be rare.
Are you able to buy the material cheaper or does the customer bring it along?
It's the same here. A good outfit for celebrations (school included it should always be black and white and shoes are a huge problem) and the rest is whatever is available. Exceptions you find everywhere. There are always people who spent a fortune on clothes (and easily throw it away) and have hours per day to get dressed well.
♥️
Hello @bossj23, no doubt our teacher @unasilver was right, you have done an impeccable job which serves as a guide for the rest, especially for me.
This newbie hats off, I learn and will make the necessary corrections in my case, thank you very much for this valuable content, it's nice to learn from other course mates.
0.00 SBD,
0.20 STEEM,
0.20 SP
Thank you so very much for the commendation. You did great in your second attempt
Es un placer leer tu participación, en la cual compartes tus conocimientos y amplia experiencia en este oficio para los caballeros. Sin duda alguna serás un gran apoyo para todos los participantes.
0.00 SBD,
0.20 STEEM,
0.20 SP
It's my passion and work for the past 14 years. I learn from the best which is my father and it would be a honour learning how men's wears are sewn in your country. Thanks for the comment.
https://x.com/bossj23Mod/status/1851750524657320363?t=uaYtHlXdlI5Txqa8vSsZvQ&s=19