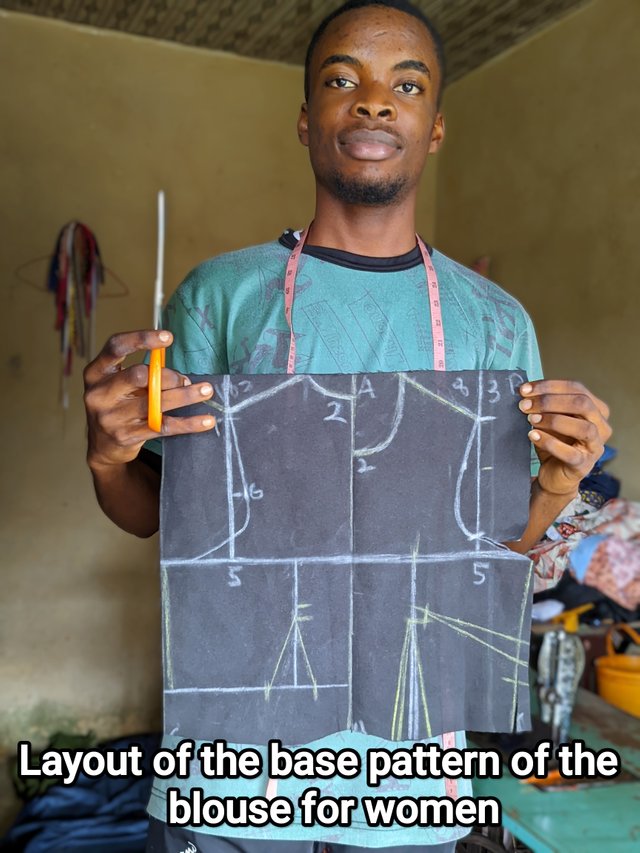
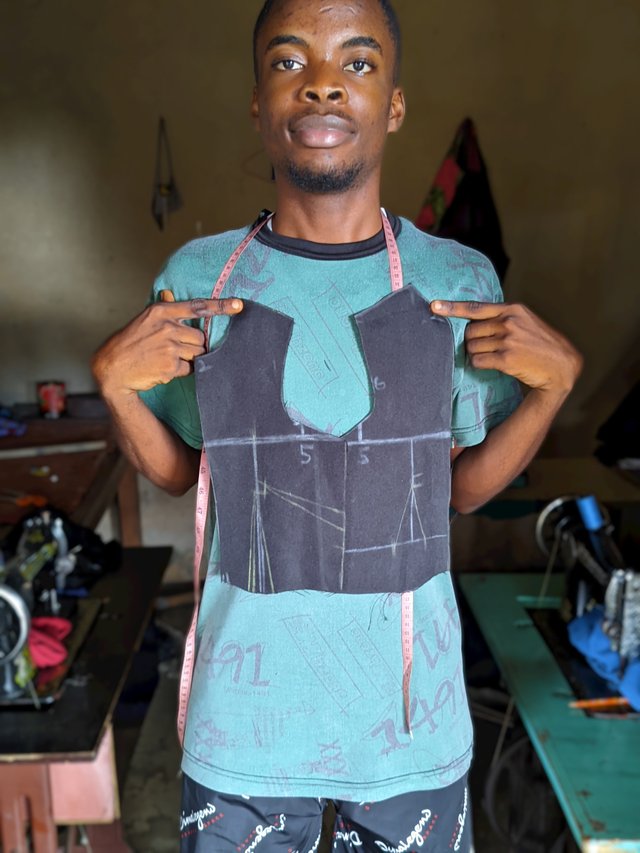
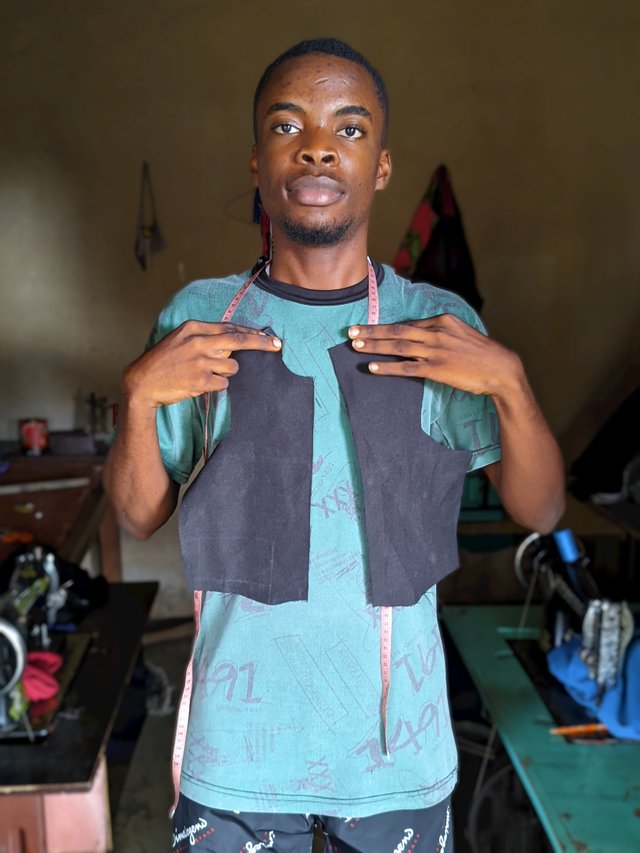
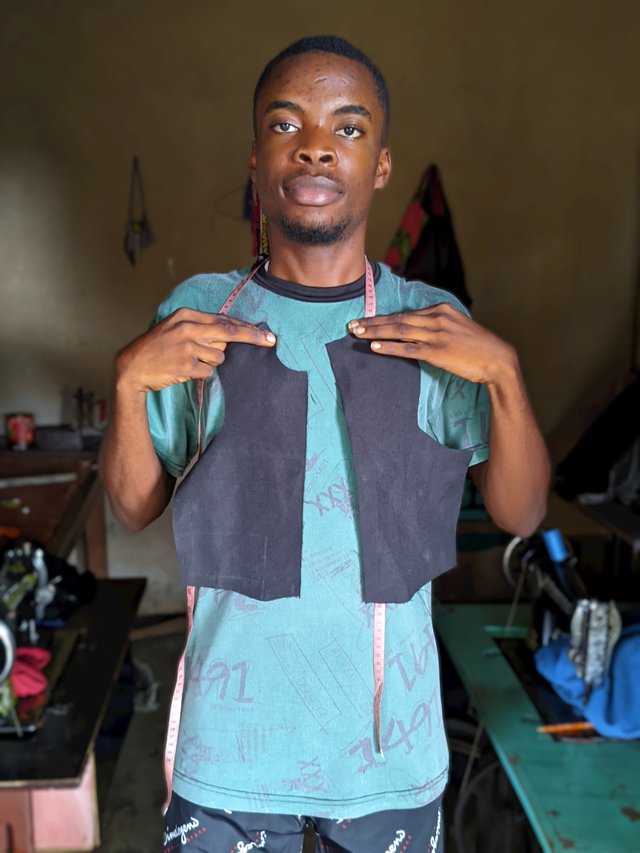
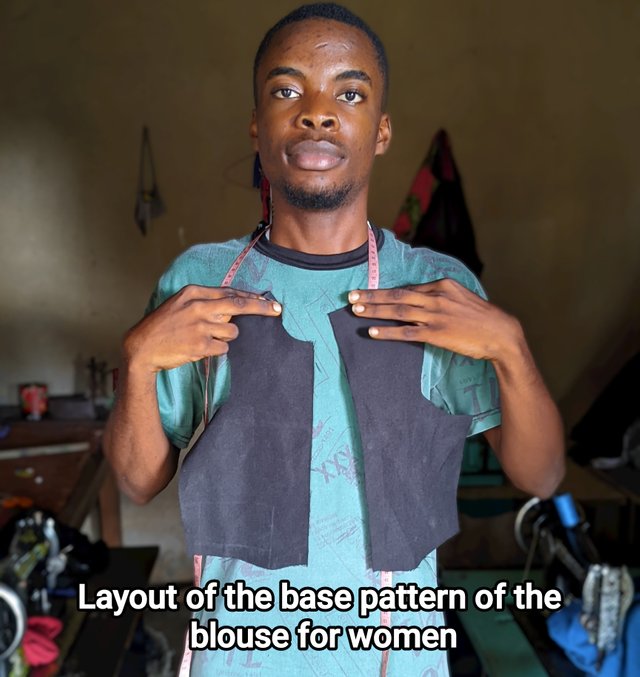
SEC 20w2: Layout of the base pattern of the blouse for women
It's another week to challenge ourselves in learning how to draft a basic bodice or blouse. To some, it may be time-consuming, but accomplishing it is worth the joy. You needed to see how happy I was that I was about to draft a blouse pattern that looks more like a half jacket for the first time. The joy was inexpressible. I felt as though I accomplished something huge that day, which I did.
There's one thing to learn and another thing to understand what you're learning. You may not be perfect immediately, but practice makes perfect. For this week, I enjoyed the tutorials, though it wasn't easy for me. I made mistakes and still pushed through, knowing I had an aim. Let's see what we do here.
To draft a basic bodice pattern or blouse, you need to get your measurements right. Without the right measurement and calculations, as it is highly involved in sewing, you'll end up shaping something different, which may not be fitting to the wearer.
Anyways, we are going industrial, so personal measurements won't be taken into consideration, which may not also affect the size as random measurements are taken in industrial sewing, and it can be small, medium, and extra large. So whatever size fits a person well, this she will take. For the industrial measurements using size 10, these are considered and taken into account. The following calculations are also made.
Put the value of the following measurements to draw the basic pattern of the blouse for ladies size 10 (this size is an industrial size), so it has only 5 measurements.
It's quite obvious you'll need to use measurements to be able to draw or draft this basic bodice pattern. With these measurements, you'll be able to get the shape and size of a particular dress sense, irrespective of the fact that it's industrially made or designed. For this draft pattern, we would be making use of the measurements below and their calculations, which I'll clearly state with their calculations. For industrial sewing, we usually make use of just 5 or a few measurements, which include the following:.
| Description | cm/in | Value |
|---|---|---|
| Back width | cm | 38cm or 15 inches |
| Bust circumference | cm | 92 or 36.2 inches |
| Front Size | cm | 63 cm or 24.8 inches |
| Rear waistline | cm | 40cm or 15.7 inches |
| Waist circumference | cm | 78cm or 30.7 inches |
These are the basic measurements and breakdown for sewing a size 10 industrial wear blouse. Now, let's move straight to the basic calculations involved to get a measured line.
| Description | 1/2 | 1/4 | 1/6 | 1/10 |
|---|---|---|---|---|
| Back width | ✓ | - | ✓ | - |
| Bust circumference | - | ✓ | - | - |
| Waist circumference | - | ✓ | - | - |
From the measurements shown above, we can use the formula just penned down to make these calculations. Let's say;
I take the back width in cm (size 10), which is: 38 cm.
Then:
2.54 cm equals 1 inch.
92 cm would be. ?
Let's multiply and divide.
1 " x 38 cm ÷ 2.54 cm = 15 inches
- Bust circumference = 1×92cm÷2.54cm = 36.2 inches
- Front size= 1×63cm÷2.54cm= 24.8 inches
- Waist circumference = 1×78cm÷2.54cm=30.7 inches
- Rear waistline = 1×40cm÷2.54cm=15.7 inches
With these in place, I think we can now draft out a basic bodice pattern for industrial size 10. Before doing this draft, I'll love to apologise for my own method of draughting because I feel more comfortable using this material than paper or carbon. In my region, we have different ways of draughting this basic bodice pattern, blouse essentials, but since the instructions are to follow the tutorials, I'll do just so.
Show the step-by-step of your tracing supported by your own images |
|---|
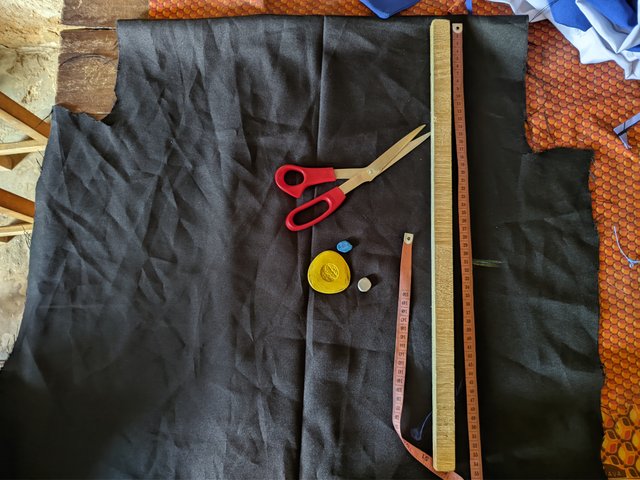
To draft or trace a blouse pattern for ladies size 10, you need materials and tools to help you do so and with these my materials, I was better efficient and equipped to do whatever task I was to face. Even though challenges and mistakes were part of the journey as learning, working with these tools and the measurements helped me provide something close to perfect. These materials include;
- Scissor
- tape
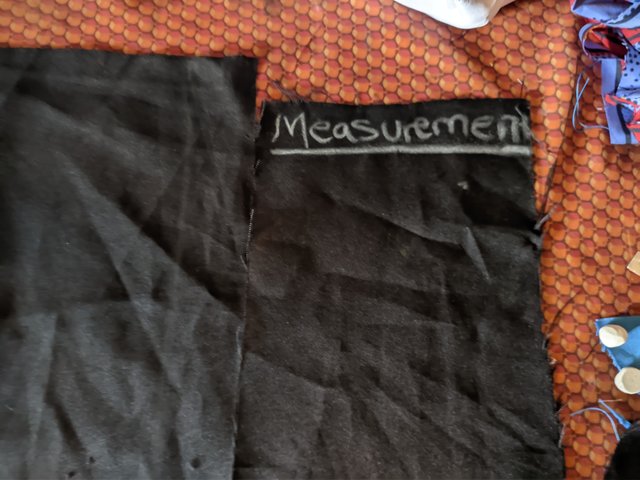
- Black material
- Chalk
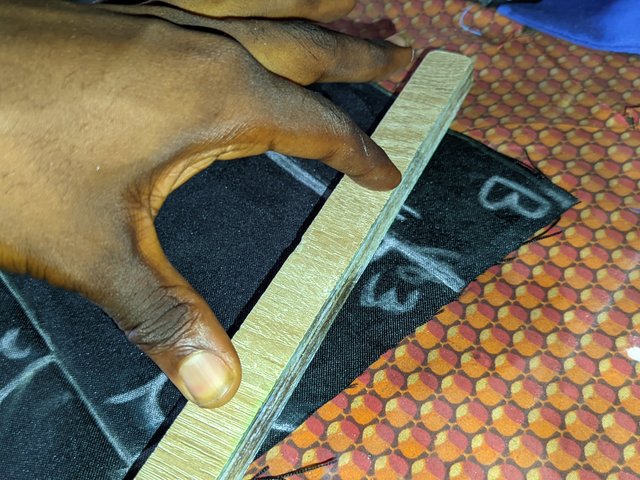
- Wooden Ruler
- Rough material for cleaning sketches
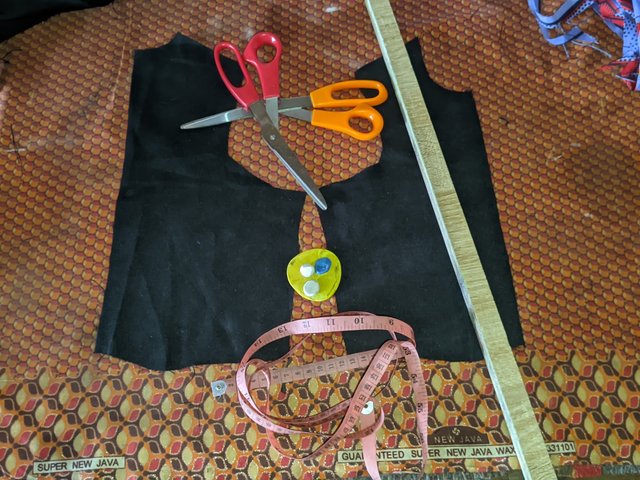
You see the reason I used these materials, especially the chalk and black clothes? I was trying to avoid a situation where I'll make a mistake and can't take it back with a pen. So the steps are as follows:
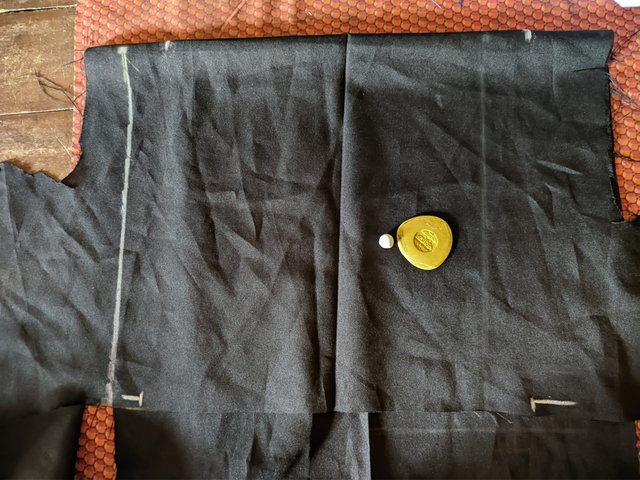
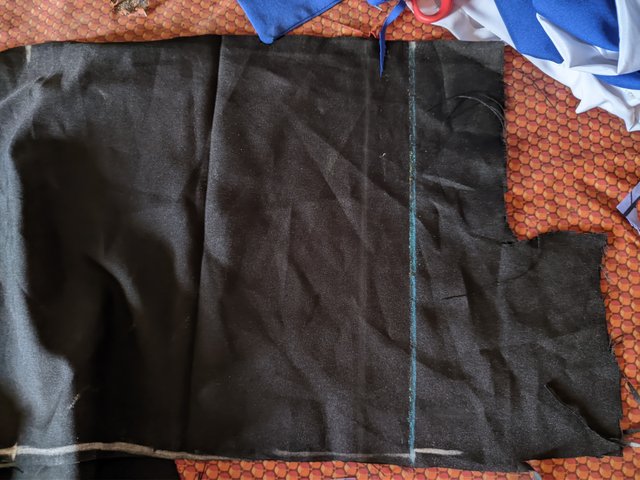
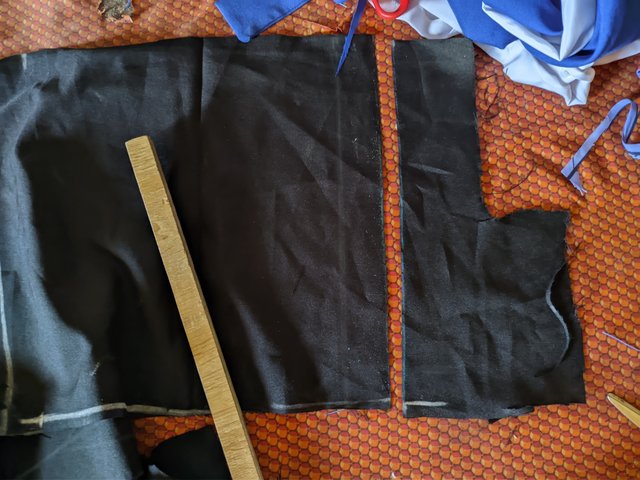
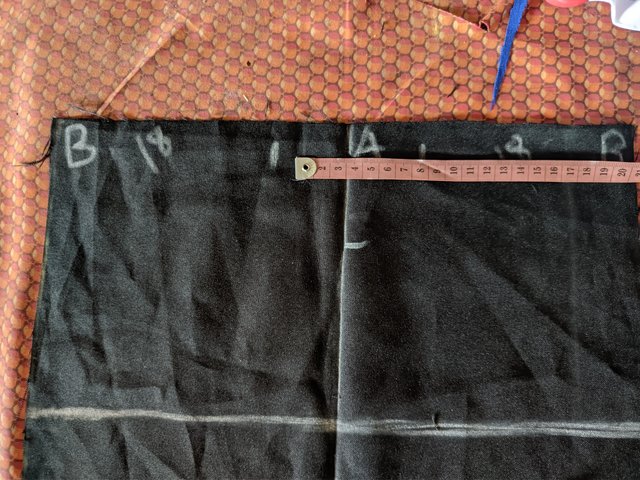
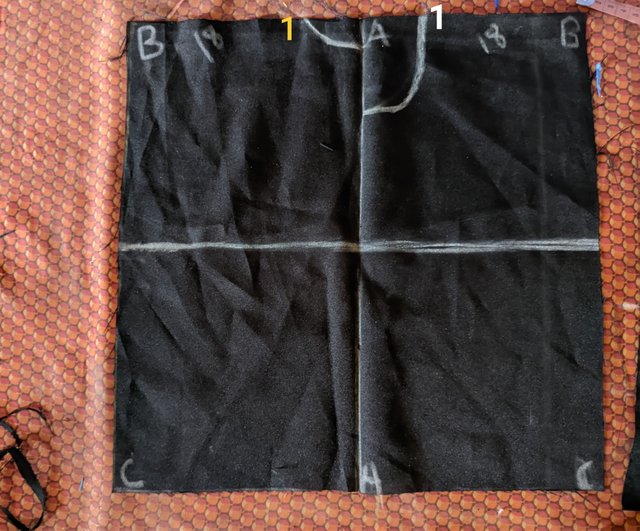
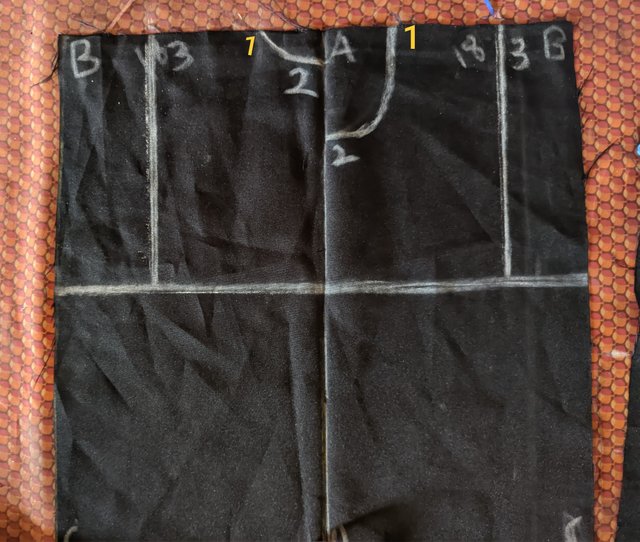
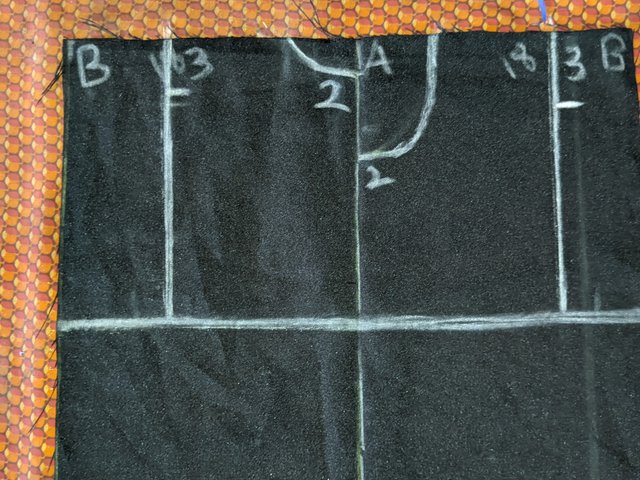
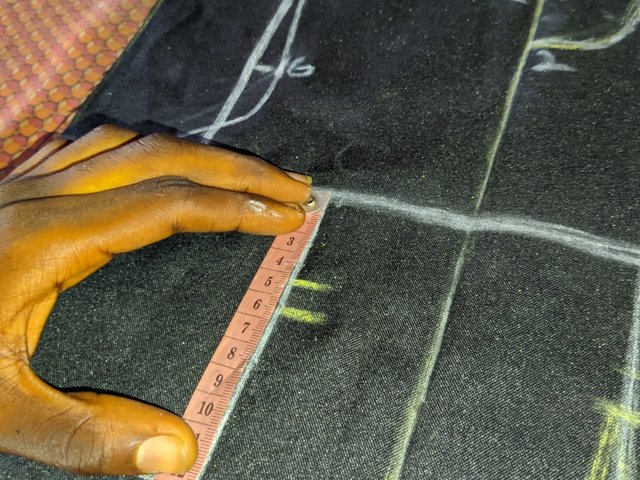
Step 1: The first thing we are going to do is to make a rectangle using measurements outlined above for the front and , that is, the back part and the front part. For the bust circumference and back waist, I did use the original measurements and the formula 1/4 to get the actual measured value. I then added 2 cm to the actual measured value I got and used it for drafting. This is what I did. I marked those places I wanted a cutout and then moved and used my ruler to trace and cut it out. After measuring and cutting out a rectangle or square-like material, I marked the edges and line after dividing it. My markings were A, B, C, and D for the edges.
 |  |  |
|---|---|---|
 |  |  |
 |  |  |
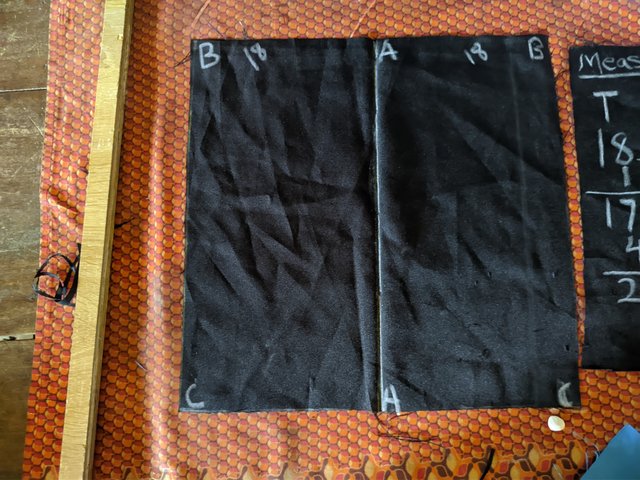 | 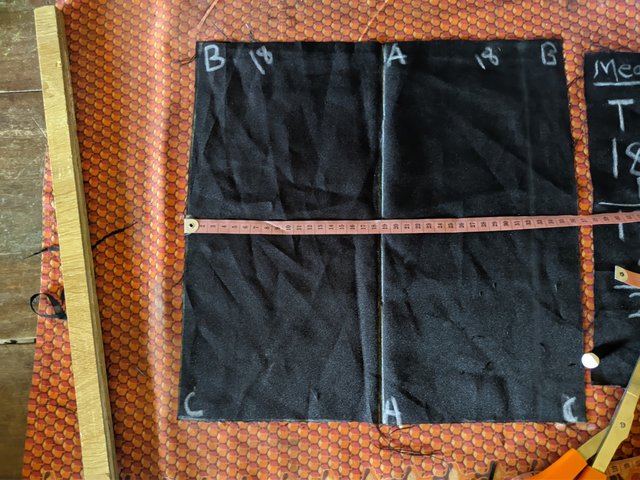 | 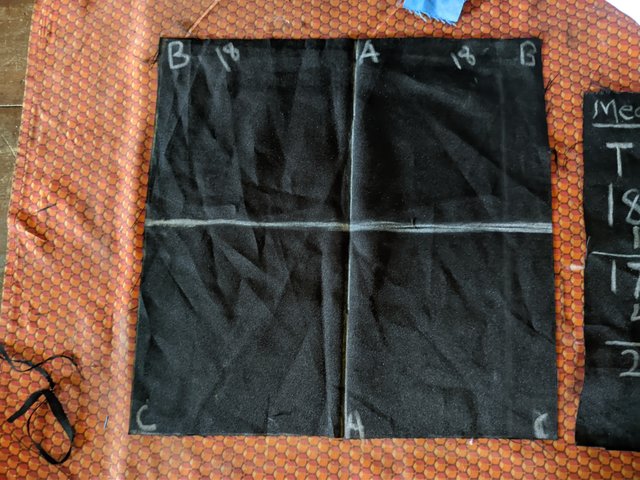 |
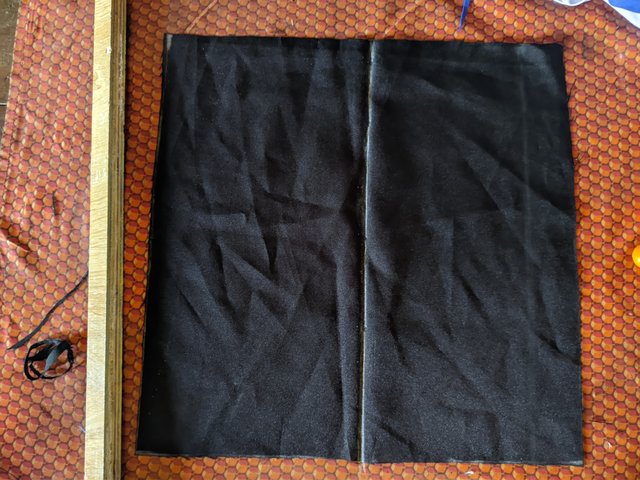
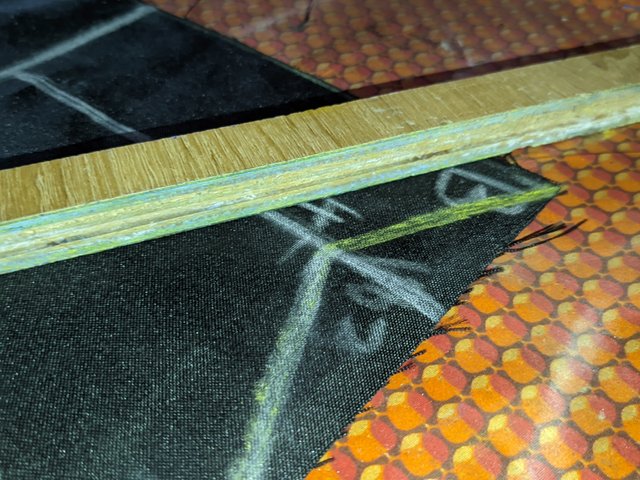
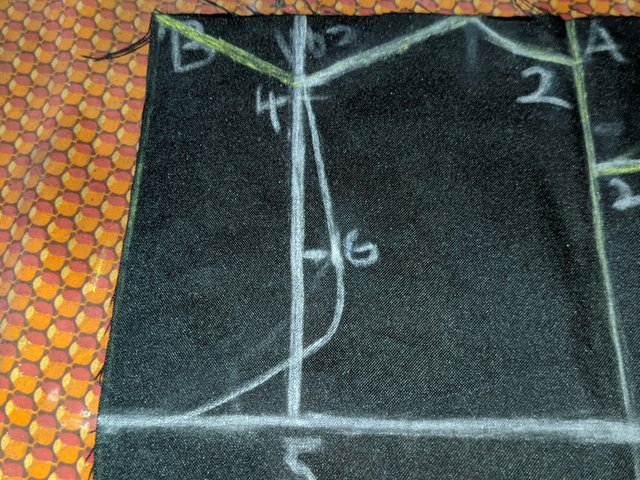
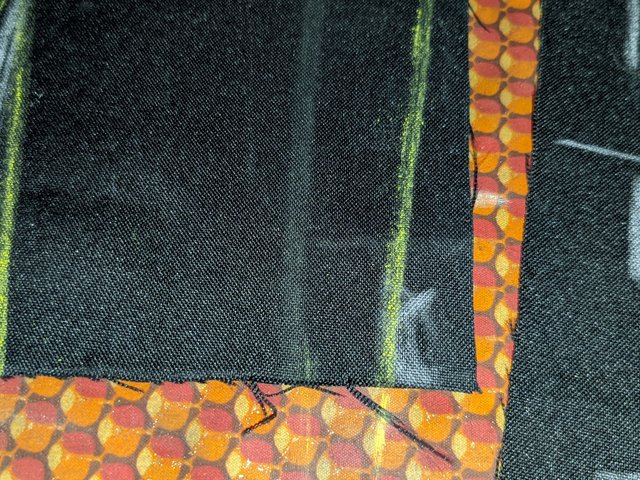
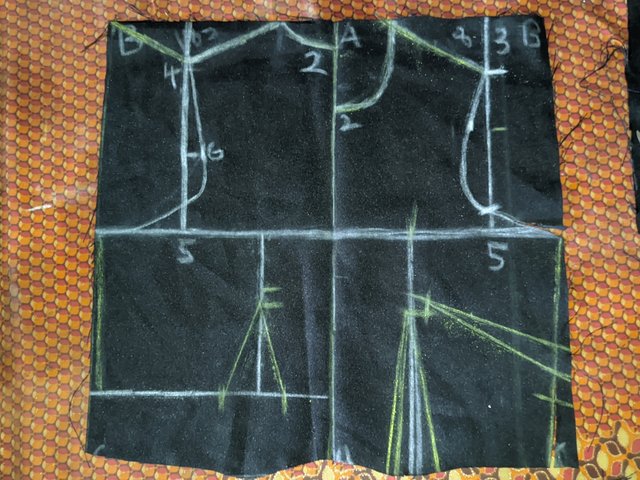
Step 2: Once I was able to divide the box to give me front and back using the measurements, I indicated my lines, which include the neck line, i.e., the line at the top, the bust line at the midsection, i.e., the line that divides the box into two equal halves, and the waist line at the bottom, which forms part of the edges covered.
| | |
|---|
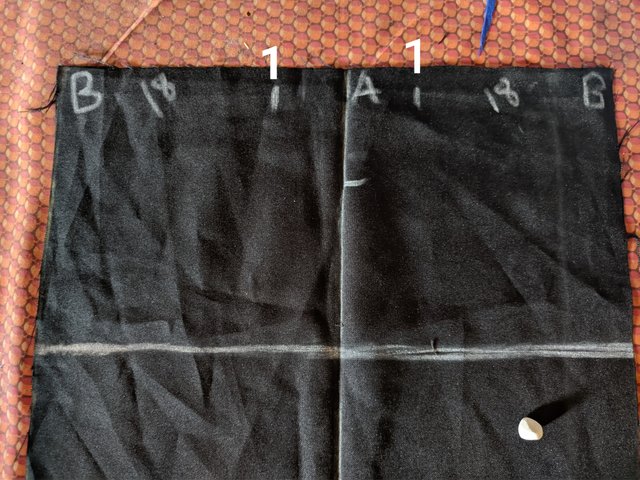
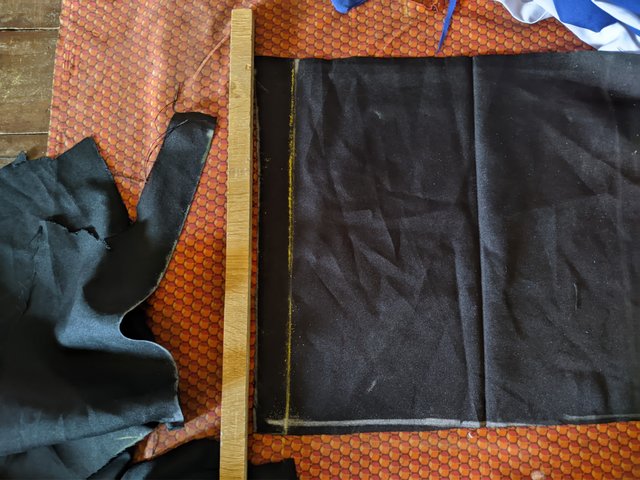
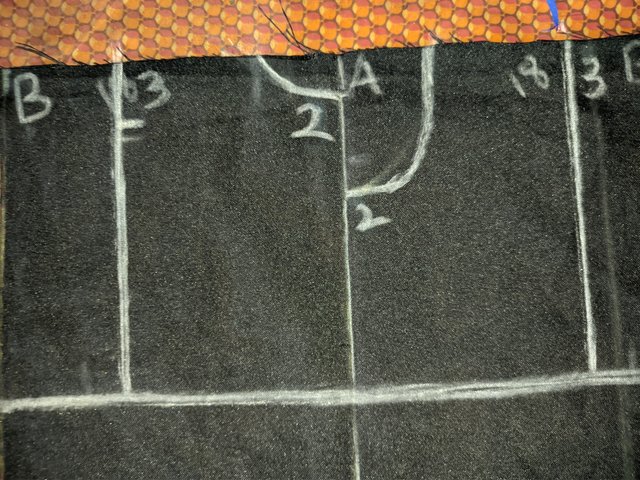
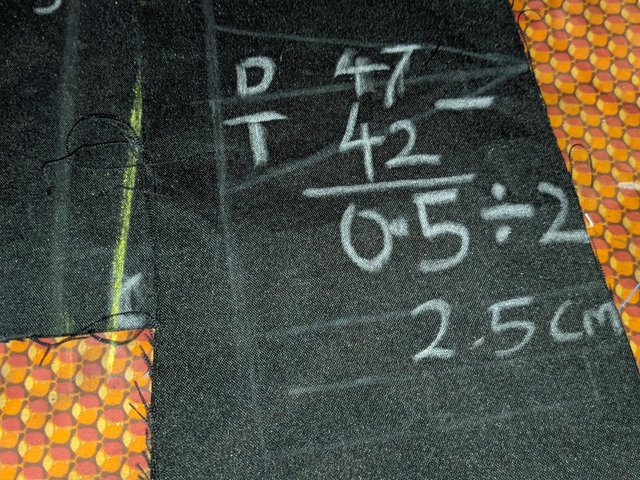
We were able to mark the first and third lines. To mark the second, which is the diameter, we would divide the back width by 2, which is 18, and we'll then subtract this back width by 1 and then add 4 cm. For the front side, we subtract 2 cm and then add 5 cm instead of 4 cm, and these are reflected in the markings of 1 and 2 labelled above.
|  |
|---|
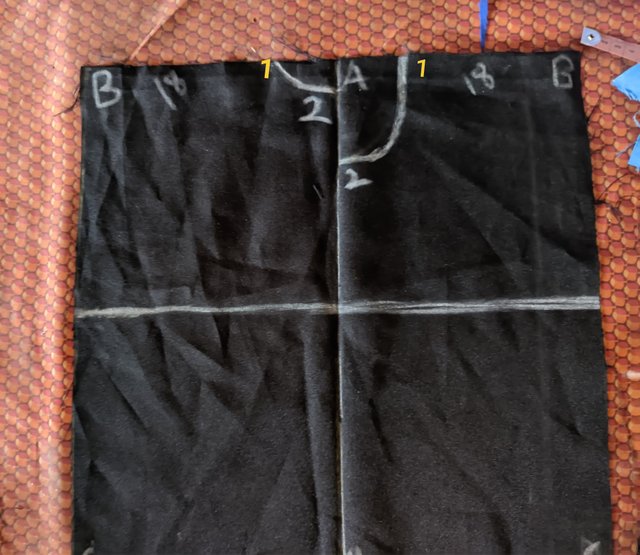
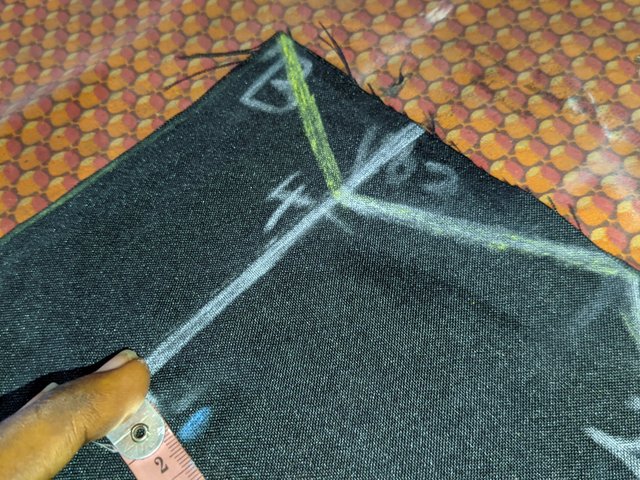
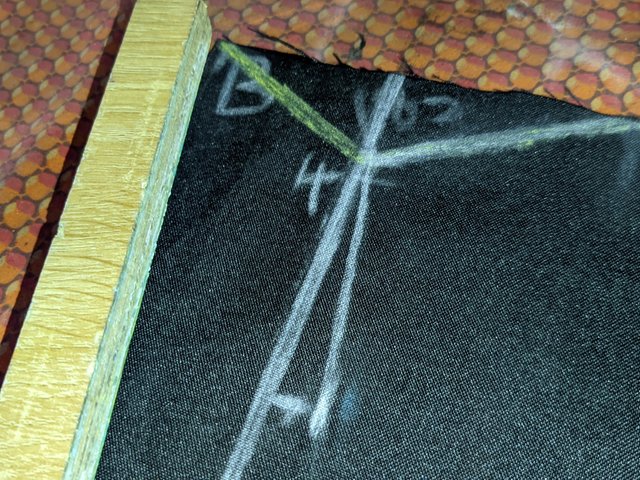
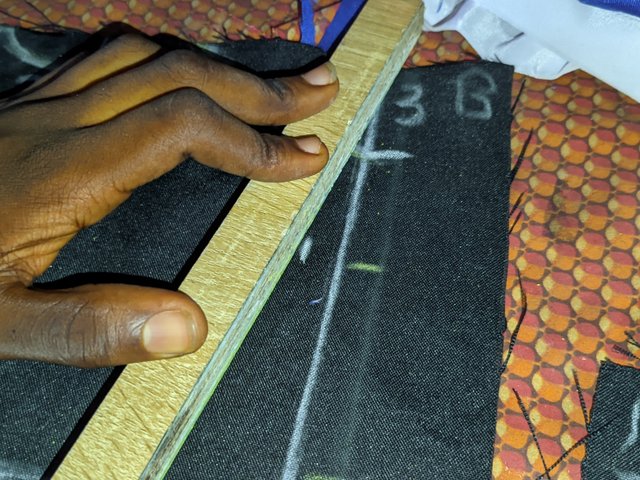
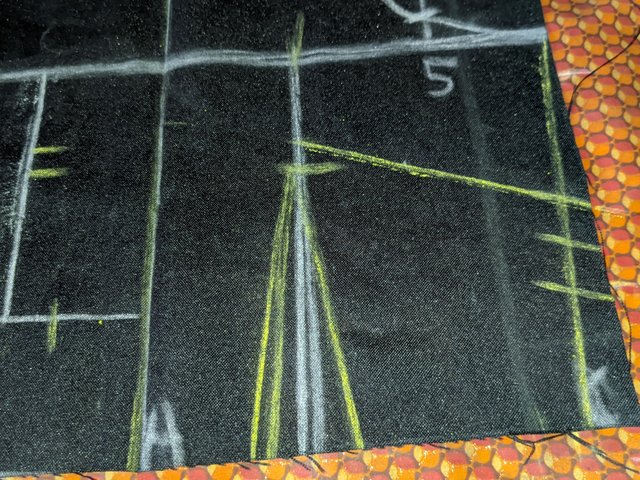
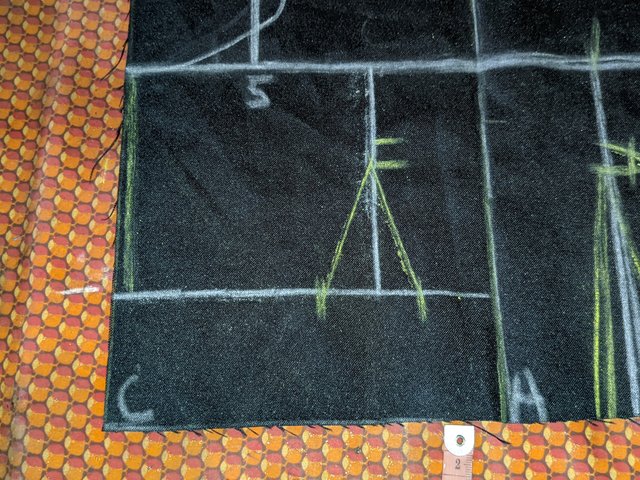
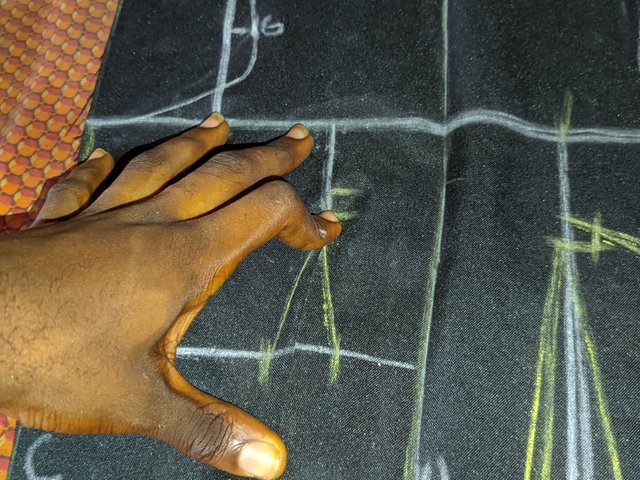
Step 3: From points So from B-C, on both sides I took measurements and drew line E, which would be reflected on both sides for the purpose of armhole length. From point A to each side, I measured 1/6 of the back width, and from A to point D. I then took it down to 2 cm at the back side, and at the front side, I did 1/6 of the back width + 2 cm, and then joined a curve from bottom to top, which serves as the neck of the blouse that would later be cut out.
 |  |  |
|---|---|---|
 |  |  |
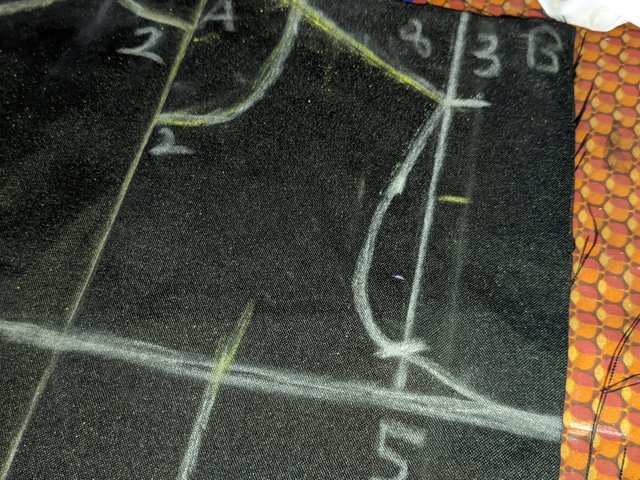
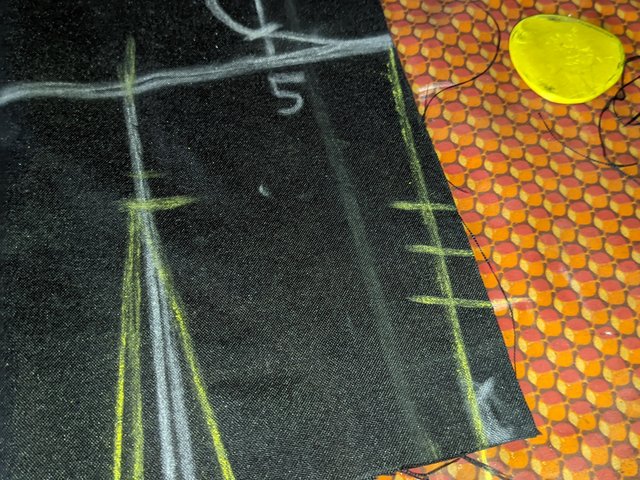
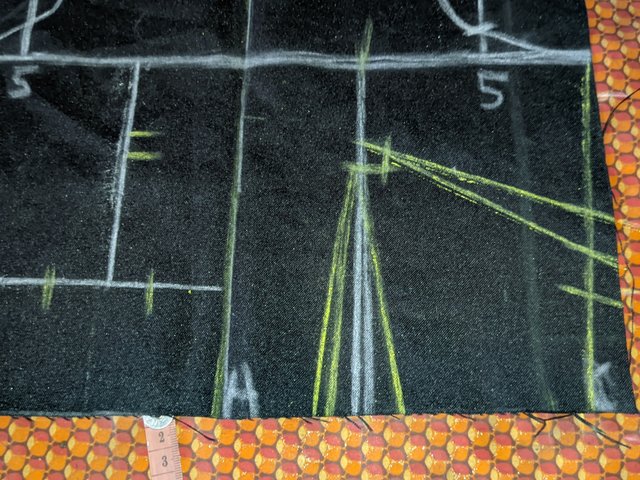
Step 4: To create the line for the armhole stitch, I did 1/2 of the back width, making the intermediate line on both sides. Now, I did make a straight line that joined the neckline, which is where the prologue line of 3 in line E is located. On the back pattern of the material, I made middle stitches 5-4 to mark point F and then introduced 1.5 cm to mark another point for the purpose of curving an armhole from the line E. After marking 1.5 cm, I drew a straight line to meet G. I did join line 4 with G and then join the last point, G with E, in a curve from top to bottom to make the armhole.
 |  |
|---|
Step 5: In the front pattern of this blouse, from point 5 to point 4 after joining, I went up 1.5 cm as shown below. From there, I made another markup of 6 cm and called it another point. I then marked 2 cm still on that line. I drew a straight line to meet the point I marked 2 cm and then drew a curve that passed and laid on line E. I found the middle of the line between the centre and then transferred it to the waist line.
 |  |  |
|---|---|---|
 |  | 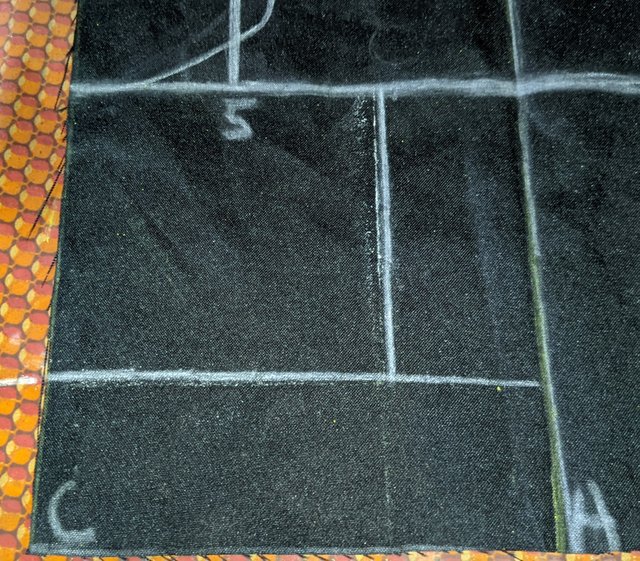 |
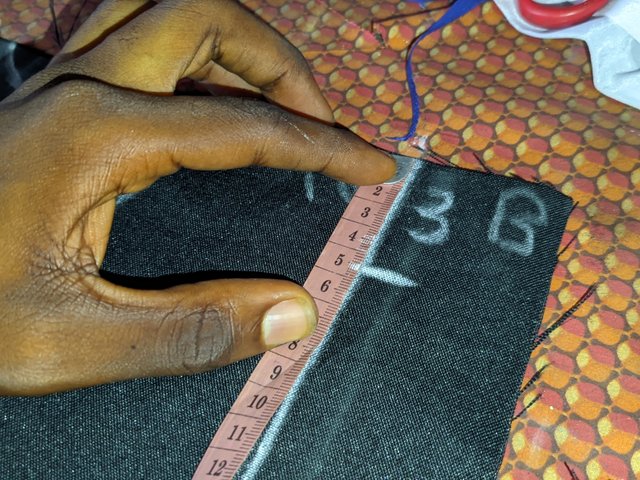
Step 6: From one point which I didn't label on the back side, I marked 5 cm. From points D to point C below, on both sides, I measured 1/4 of the waist circumference and added 3 cm for allowance sake. I then joined it with line E. I then marked 1.5 cm on each side of this point, still on the waist line, and then joined two straight lines below to have our waistband.
|  |
|---|
Step 7: Remember that the length of the front waist is reduced by the length of the back waist with different measurements and calculations. I then created a 1.5 cm mark on point E from the front side.
 |  |
|---|
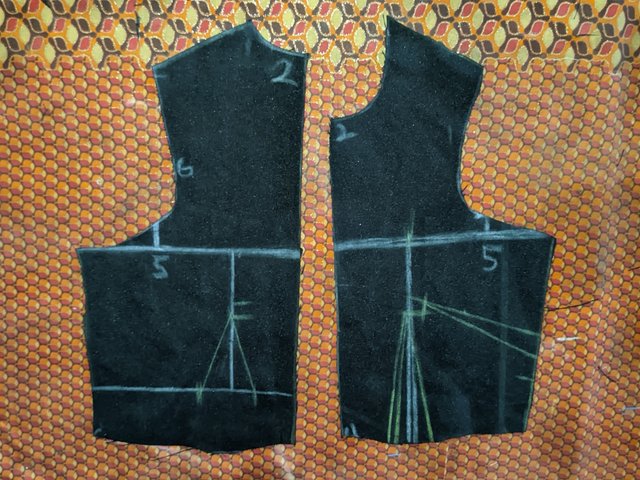
Step 8: I then measured the lines to meet the middle line as shown in the pictures below. On both sides, I made darts with 1.5 cm measurements below with different lengths. After making these darts, I took note of the curves as I couldn't close them. I would have sewn it directly to cover the darts but chose to make it appear like that for a reason. The reason for closing these darts is to strengthen the front and back sides of the blouse.
 |  |  |
|---|---|---|
 |  |  |
 | |
|---|
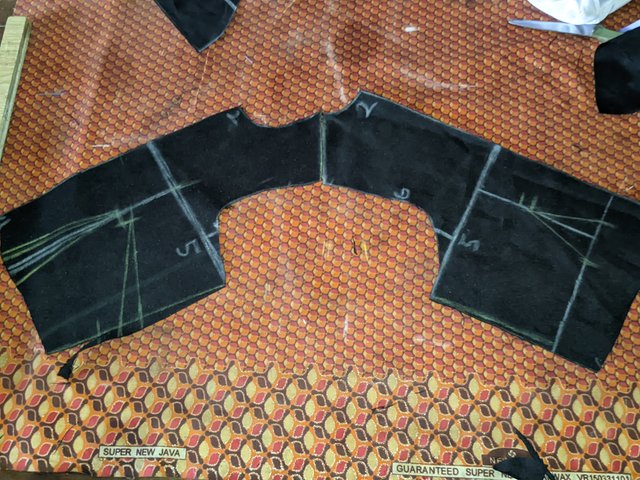
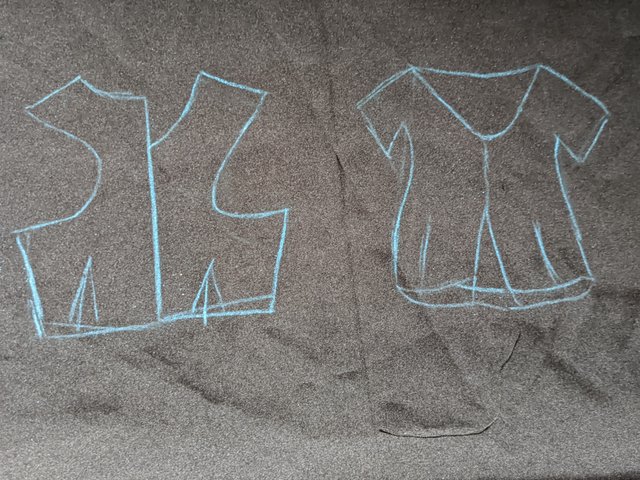
Step 9: After closing the darts, I cut out the armhole and shoulder line and diameter. I then checked if both shoulders matched, and yes, it was a match. Did I do a perfect job here?
 |  |
|---|---|
 | 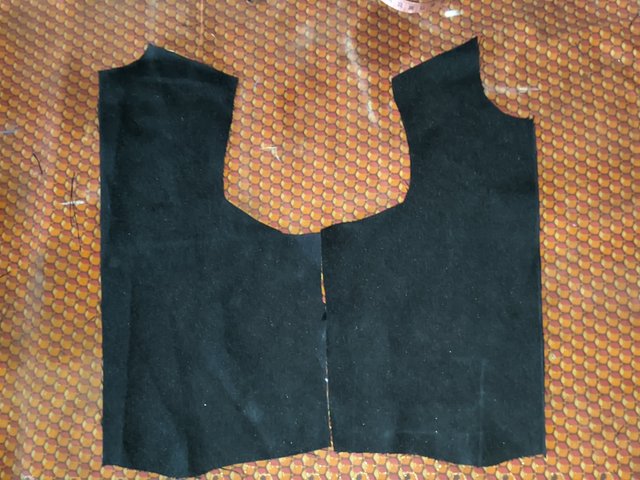 |
I need to be given a standing ovasion. I felt like I was too good, whereas I was just learning. The joy that comes from accomplishing a particular task was just indescribable. This is a picture of me with my final result.
 |  |
|---|---|
 |  |
Draw the pattern of the blouse you would like to design and tell me how you did with the tracing. Do you have any questions? |
|---|
Like I said, I love using clothing materials to do my sketch. This is the sketch I would like to design, and I would use these sketching methods, though I can't show them in pictures right now. This would be for personal size with lots of measurements to fit.
Step 1: I'll have measurements of the following in place. I'll then take a rectangle sketch and input marks on my shoulder, bust circumference, chest line, waist line, hip line, and underbust line.
| Shoulder | Neckline |
|---|---|
| Round | Sleeve Bust |
| Length | UnderBust |
| Chest line | Waist |
Once these are confirmed, I'll plot out my shoulder to waist and measure. I'll draw a straight line to indicate these points from shoulder to burst and waist. I'll then determine the length of my blouse from my shoulder line.
Step 2: I'll then try to create a slope on the shoulder of the blouse and then divide my burst circumference by 6 + 1.5 cm and then join it to meet the chest line. After creating the slope, I'll divide the burst measurement by 4 on the chest line to make a curve for the armhole.
To make a dart, I'll divide my burst line into two from the measured value, and this divide with regards to the bust line, under the burst line, chest, and hem line. I'll then connect those marks in a straight line. Making the dart on the waistline after points have been marked, I'll connect it again.
These are just the surfaces of the sketch for the front side. I refuse to make this post lengthy so as not to confuse others. Now to my questions... I'll love to ask the lecturer these...
- How do you know or adjust a blouse cup size? Is it from the bust measurements orrr?
- To the cutting, I was kind of lost and took particular caution to avoid spoiling the clothes with scissors. So please, what mistakes do we avoid when cutting a blouse?
These are the only questions I have. Your class to be sincere is very entertaining and challenging. For the first time, I could draft and cut this on my own. There's always this feeling that comes with achieving something. You gave me that feeling and educated mindset that I can go beyond even while I'm still learning.
Thanks a lot for your class. It took me 3 days to accomplish this, and I am happy it's done the way it's presented in the tutorial. I hope you can integrate videos in English for your practical. I'm a slow learner though and don't really absorb things that fast. Anyways, I can't wait to see what you have as a challenge for me next week.
I invite @whizzbro4eva, @vudeme123 and @usoro01
Cc,
@lunasilver
https://x.com/bossj23Mod/status/1836738497383735722?t=Xr_KrPbiizJlELiEgzNpAg&s=19
Upvoted. Thank You for sending some of your rewards to @null. It will make Steem stronger.
Hola muy buena publicación suerte
Thanks Boss lady
The prince of sewing and us princesses, I'm glad to see you in this second task and learn from you, from your ability, infect me with that enthusiasm. A hug friend, success along the way.
This is great work...good job!
This post has been upvoted/supported by Team 7 via @httr4life. Our team supports content that adds to the community.