Automatic Window Blinds - Part 1
I wanted to build an automatic blind opener. Potentially, I might like to have a photo-resistor to automate the unit and/or have a programmable open-close time. I think I will also need to incorporate end-stop switches to know when the blinds have reached fully-open or fully-closed. At the end of the day I think this will be a semi-challenging project involving 3d printing, Arduino programming as well as some light design work.
SECTION A - THE BRAINS OF THE OPERATION [Arduino]
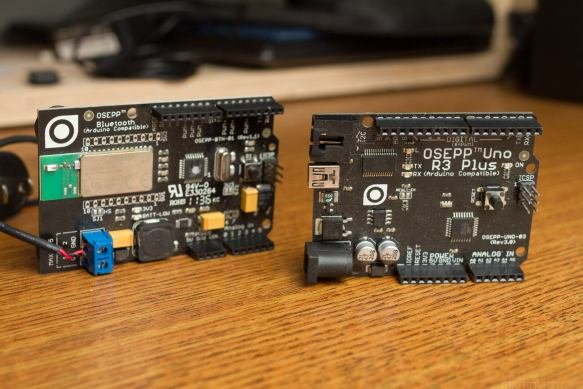
Two Arduino Clone boards a Bluetooth[Left] and Uno[Right]
The first thing that I encountered, it's been so long since I used Arduino, I couldn't get either one of my Arduino boards connected to my computer. They are not 'official' Arduinos from Italy but some Canadian knockoffs made on the West coast by a company called OSEPP. I thought maybe the board was burned out because a while back, I accidentally set it down and shorted out some pins underneath and some dreaded blue smoke escaped. However for the life of me, I haven't been able to find what exactly went wrong with my board - as far as I can tell, everything works, including each output pin! However I know I saw that smoke so I'm still expecting something to be up with this. But maybe I got lucky and all the vital functions that I will require of this Arduino board will be intact. Further testing will confirm.
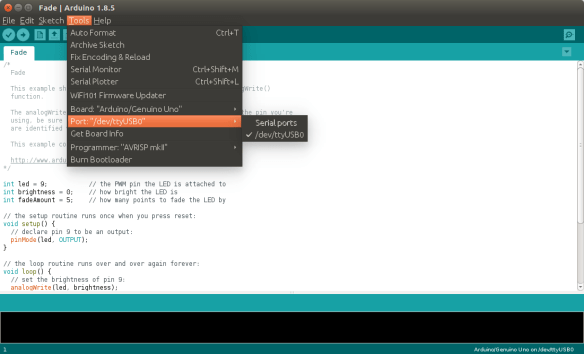
I could see the USB port for my Arduino showing up when the board was plugged in - I knew something was working with the Arduino.
It turns out that there wasn't something configured properly with Linux... I had already given up on my mac, but the fact that the USB port was showing up in the Arduino IDE on Linux gave me the inkling to continue my efforts on my Linux machine. Lo and behold, this is what my problem was - setting some permissions for my account. Ah, the mysteries and joys of Linux!
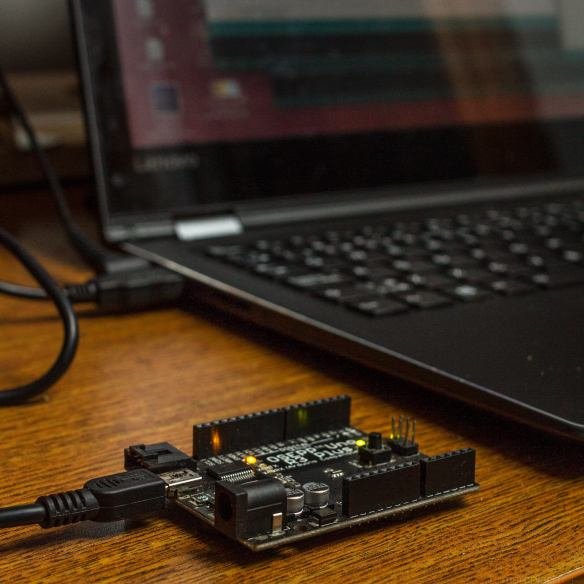
Blinking LED on Pin 13.equals("success");
When I finally got the computer properly talking to the Arduino the Blinking pin 13 after loading the Blink sketch I knew that I was on my way. Now the fun would begin! Starting to work on the mechanical components...
SECTION B - THE BRAWN OF THE OPERATION [Servo]

I've only had limited success running this servo from previous Arduino tinkering... controlling this thing seemed hit-and-miss...
A long time ago I bought this continuous-rotation metal-gear digital servo. I am hoping that I can make this thing spin forwards as well as backwards. Without this basic functionality this project won't even get off the ground...
I hosted a copy of the datasheet for this particular servo, but the original manufacturers page can be found here. This servo can take anywhere from 5-7.2V and has a stall torque of 13kg-cm... I'm thinking that this should be PLENTY of torque. I plan on using a dowel which has a much, much smaller diameter than 1cm, meaning that it should be able to lift far greater than the stated 13kg. I don't expect the whole contraption to be above that.
After fiddling around with the example sketch I figured out that I could indeed get the servo to spin both ways by sending it different values from the Arduino. Getting it to stop was entirely another matter, I think I will have to simply cut power to the servo using a relay or maybe a transistor.
Here is the example sketch to run the servo:
#include <Servo.h>

Servo leftmotor;
Servo rightmotor;

void setup()
{
leftmotor.attach(9);
rightmotor.attach(10);
}

void loop()
{
leftmotor.write(90);//for use with continuous motor
rightmotor.write(00);
}
SECTION C - PUSH MY BUTTON
Admittedly, I have not actually ever learned how to use buttons with Arduino. I know there's something to do with resistors. Now is the time...
The Arduino button tutorial says that I need to connect the pin to ground using a 'pulldown resistor' and make a momentary connection to 5v, otherwise without the use of this resistor, the pin will read random, arbitrary values. So the pin must always be connected to ground via a resistor so it eliminates this whole "floating pin" issue.
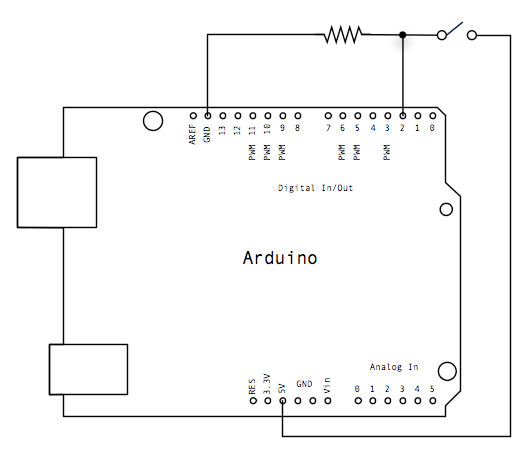
Here is the wiring schematic for the button example
After wiring the button as per the schematic, the LED behaves as expected. There is no apparent delay when pushing the button and having the LED turn on. Now that I can interact with the Arduino, I can start telling it what to do... However first I will add a second button.
After some tinkering, I found that in order to have a 'single click' type behaviour, we have to keep a variable for whether or not the button press has already accomplished our desired behaviour, otherwise a simple press will repeat the action many times as the Arduino runs through the main loop, executing each code block for as many cycles as it sees the button pressed down. Here is the code that I came up with:
/*
  Original code avaliable here:

  http://www.arduino.cc/en/Tutorial/Button

  Button code modified by Maciej Lach
*/

//constants won't change. They're used here to set pin numbers:
const int button1Pin = 2;     // the number of the pushbutton pin
const int button2Pin = 4;     // the number of the pushbutton pin
const int ledPin =  13;      // the number of the LED pin

const int increment = 10;  //increase by this much

// variables will change:
int button1State = 0;         // variable for reading the pushbutton status
int button2State = 0;         // variable for reading the pushbutton status
int servoSpeed = 180; //servo start at 180
int servoMin = 0; //max and min variables for the servo rotation
int servoMax = 360;
bool button1Pushed =  false; //track whether or not button push activated increment already
bool button2Pushed =  false; //found I needed to separately track the button pushes otherwise interference occured

void setup() {
  // initialize the LED pin as an output
  pinMode(ledPin, OUTPUT);
  // initialize the pushbutton pin as an input
  pinMode(button1Pin, INPUT);
  pinMode(button2Pin, INPUT);
  Serial.begin(9600);
}

void loop() {
  // read the state of the pushbutton values:
  button1State = digitalRead(button1Pin);
  button2State = digitalRead(button2Pin);

  // check if the pushbutton is pushed
  if (button1State == HIGH)
  {
    // turn LED on:
    digitalWrite(ledPin, HIGH);
    if (servoSpeed < servoMax && !button1Pushed) //make sure servoSpeed is under
    {
      servoSpeed = servoSpeed + increment;
      button1Pushed = true;
      Serial.print("Button 1 ");
      Serial.print(servoSpeed);
      Serial.println();

    }

  }
  else
  {
    // turn LED off:
    digitalWrite(ledPin, LOW);
    button1Pushed = false; //reset the variable so can increment again
  }


  if (button2State == HIGH) { //if the button is pushed
    // turn LED on:
    digitalWrite(ledPin, HIGH);
    if (servoSpeed > servoMin && !button2Pushed) //make sure that servoSpeed insn't less than min and button has not already pushed
    {
      servoSpeed = servoSpeed - increment;
      button2Pushed = true;
      Serial.print("Button 2 ");
      Serial.print(servoSpeed);
      Serial.println();
    }

  } else {
    // turn LED off:
    digitalWrite(ledPin, LOW);
    button2Pushed = false;
  }

}
Now I have two buttons that can control a variable called servoSpeed and the functionality is working correctly, one press only increments the variable once.
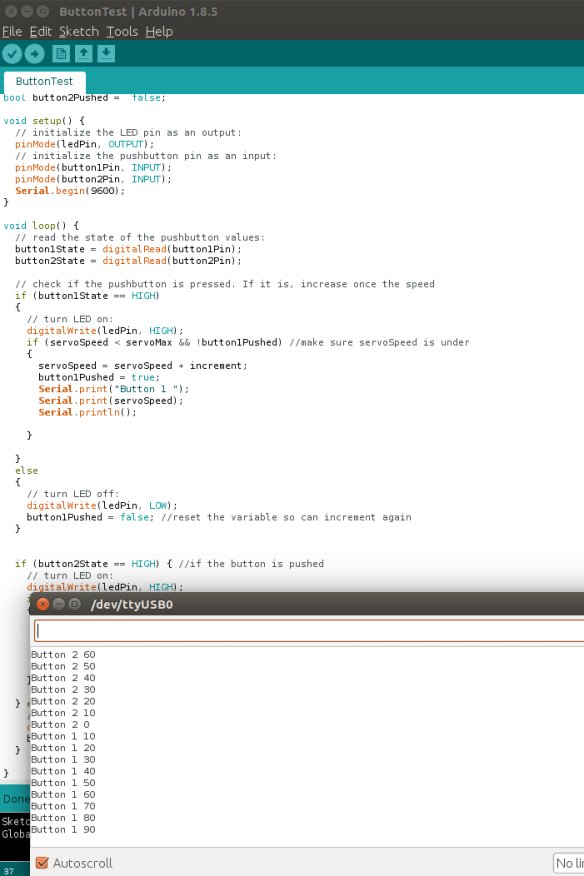
Arduino serial monitor showing correct output and expected behaviour
SECTION D - BRINGING IT ALL TOGETHER NOW
Okay so I got my buttons working and I know I can get the servo to spin in both directions. Now let's see if I can control the servo in 'real-time' via these buttons...
/*
  Original code avaliable here:
  http://www.arduino.cc/en/Tutorial/Button
  Button code modified by Maciej Lach
*/


 #include <Servo.h>


//constants won't change. They're used here to set pin numbers:
const int button1Pin = 2;     // the number of the pushbutton pin
const int button2Pin = 4;     // the number of the pushbutton pin
const int ledPin =  13;      // the number of the LED pin
const int servoPin = 5;

const int increment = 1;  //increase by this much

// variables will change:
int button1State = 0;         // variable for reading the pushbutton status
int button2State = 0;         // variable for reading the pushbutton status
int servoSpeed = 60; //servo start at 180
int servoMin = 0; //max and min variables for the servo rotation
int servoMax = 200;
bool button1Pushed =  false; //track whether or not button push activated increment already
bool button2Pushed =  false; //found I needed to separately track the button pushes otherwise interference occured

Servo controlServo;

void setup() {
  // initialize the LED pin as an output
  pinMode(ledPin, OUTPUT);
  // initialize the pushbutton pin as an input
  pinMode(button1Pin, INPUT);
  pinMode(button2Pin, INPUT);
  controlServo.attach(servoPin); //attach the pin output to our servo
  controlServo.write(servoSpeed);
  Serial.begin(9600);
}

void loop() {
  // read the state of the pushbutton values:
  button1State = digitalRead(button1Pin);
  button2State = digitalRead(button2Pin);

  // check if the pushbutton is pushed
  if (button1State == HIGH)
  {
    // turn LED on:
    digitalWrite(ledPin, HIGH);
    if (servoSpeed < servoMax && !button1Pushed) //make sure servoSpeed is under
    {
      servoSpeed = servoSpeed + increment;
      button1Pushed = true;
      Serial.print("Button 1 ");
      Serial.print(servoSpeed);
      Serial.println();
      controlServo.write(servoSpeed);

    }

  }
  else
  {
    // turn LED off:
    digitalWrite(ledPin, LOW);
    button1Pushed = false; //reset the variable so can increment again
  }


  if (button2State == HIGH) { //if the button is pushed
    // turn LED on:
    digitalWrite(ledPin, HIGH);
    if (servoSpeed > servoMin && !button2Pushed) //make sure that servoSpeed insn't less than min and button has not already pushed
    {
      servoSpeed = servoSpeed - increment;
      button2Pushed = true;
      Serial.print("Button 2 ");
      Serial.print(servoSpeed);
      Serial.println();
      controlServo.write(servoSpeed);
    }

  } else {
    // turn LED off:
    digitalWrite(ledPin, LOW);
    button2Pushed = false;
  }

}
With the code above, I was Able to control the direction as well as the speed of the servo. Also the amount of torque that this servo generates is quite impressive - it's just running off USB power from my computer via the Arduino board... I was worried I'll be needing a separate 7v power supply to run the servo but I think I should be okay with just the usb or small wall-wart providing 5v.
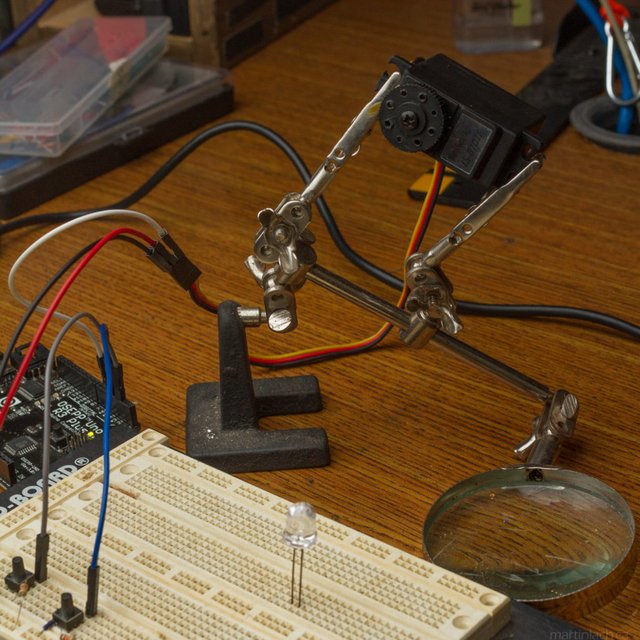
Having a set of helping hands is always nice! Here I used them to hold the servo while I was playing around. --- Now that I am sure that I can control the servo as intended, I will now work on the mechanical aspects of these items... continued in part 2!

Seems so complex. You must post the video you sent me of it working!
Posted using Partiko Android
Such a great effort and writing should have been rewarded more! This is the problem of steemit. Hard efforts from great bloggers go in vain. However, tremendous effort and I have become a fan and follower of you. Sorry that I could not upvote as the post is old. Waiting for the next part. Have a great time.
I know, it's pretty absurd sometimes, I've seen some posts that are so beautiful and amazing and payout = 0.00... after a while, those people are no longer posting, which is a shame! But of course, in life, persistence and perserverance is king! I should be posting more regularly. Part 2 is coming very soon, thanks for stopping by! :)
This is really informative! You should post here more often bro!
Thanks a lot, I totally should and AM! Thanks for stopping by and the encouraging comment. Have a great day Andy :)
youre welcome! :)
To listen to the audio version of this article click on the play image.

Brought to you by @tts. If you find it useful please consider upvoting this reply.
Hi @synrg!
Your post was upvoted by @steem-ua, new Steem dApp, using UserAuthority for algorithmic post curation!
Your UA account score is currently 3.436 which ranks you at #7299 across all Steem accounts.
Your rank has not changed in the last three days.
In our last Algorithmic Curation Round, consisting of 149 contributions, your post is ranked at #140.
Evaluation of your UA score:
Feel free to join our @steem-ua Discord server