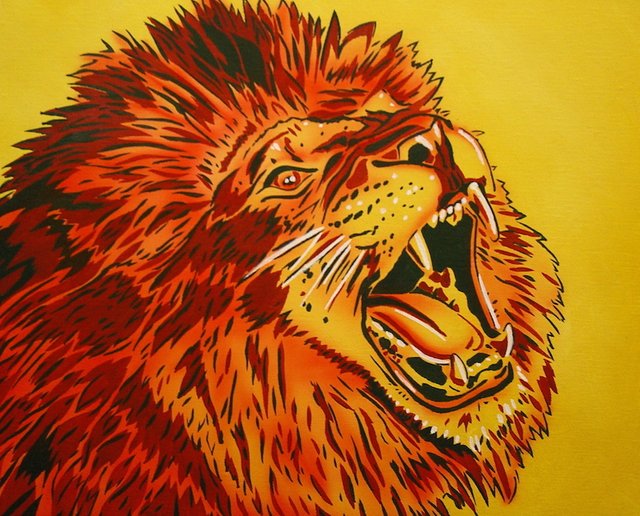
HOW TO make 3 color STENCIL painting.
In this tutorial I will explain how you can make a stencil painting in 3 colors.
Painting with stencils is fun and if you are using the right materials you can use the stencils more then once, so you can create more paintings!
This tutorial is for people who have already little experience in cutting sheets and painting on canvas (and if you don’t have any experience: it’s okay, you will still learn from this)
If you have experience in making a painting with stencil in 1 color you might know that you have to make plan about making the right cuts. When you are going to make multi-color-stencils there are a few things you need to think of and I will explain them to you.
- First of all you need to think about the materials used. If you are using weak cardboard for the stencil you can probably use the stencil only once or a few times before it will fall apart. I prefer using thick film, made of plastic. It needs to be easy to cut, so think about that when choosing the thickness. The benefits of plastic sheets are that you can use it more then once; it’s easier to clean it for re-use and there’s a less damage when it’s gets wet of the paint. Cutting fine details in plastic sheets might be a bit more difficult than cutting cardboard, but if you practice with the cutting you will get the right touch to make the perfect cuts in the plastic. I buy my plastic sheets at a professional art store. Ans I use small sharp knifes to cut.
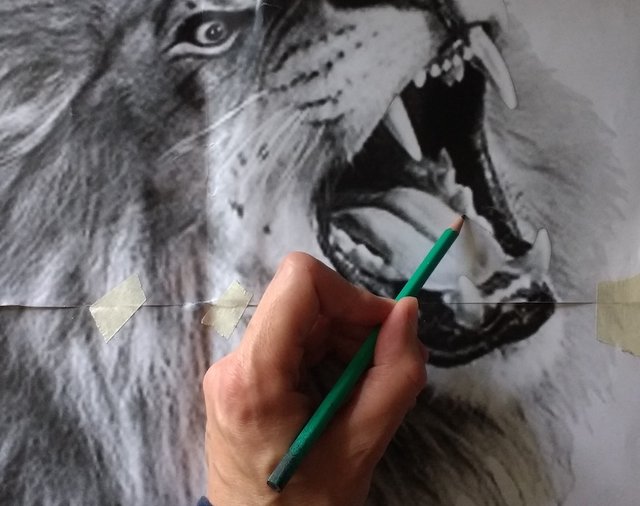
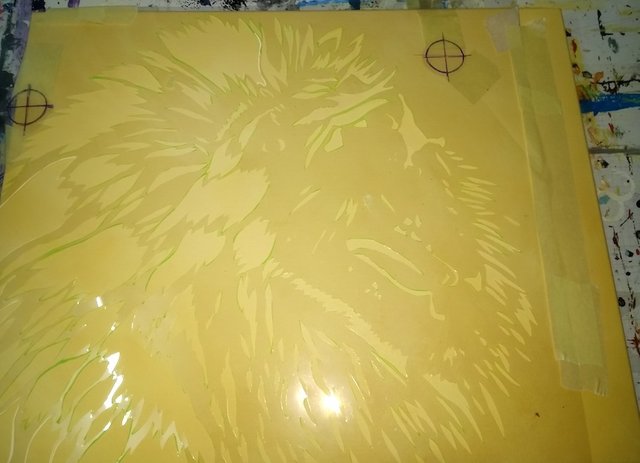
- Prepare the basic drawing. If you have a drawing or a photo which will be used as an example for your artwork, you need to put it down to 3 tones. In this case I used a picture of a lion and printed it in black and white; this way the picture gets various grey tones, from dark to light. This I split up in three tones: mid grey, dark grey and white for the lighter parts. With a pencil I sharpen some lines and make marks on the basic drawings of the parts I want to cut. You need to think ahead of your cutting process; if you cut out too much than your stencil will not work the way you want it.
- Place registration marks on the basic drawing.
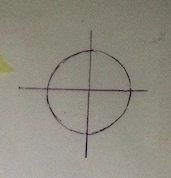 Because I work with more than one sheet I put these marks on every sheet in the same place, it will make it easier to place them in the right position when working on the canvas. So first put registration marks on the basic drawing.
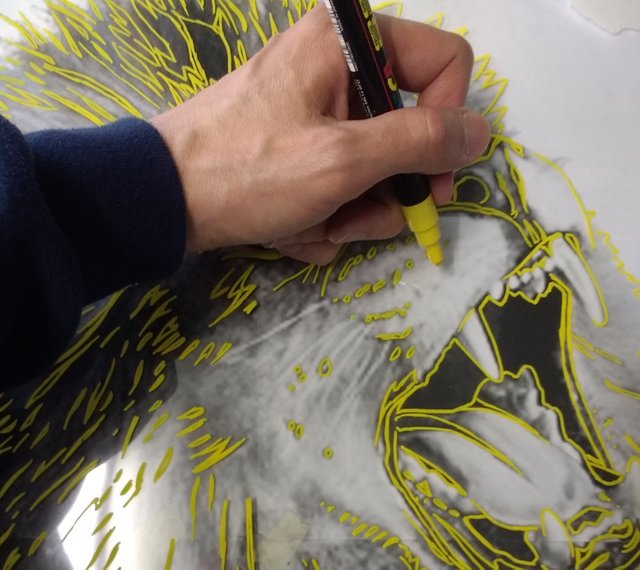
- Place the first transparant sheet over the drawing and stick it with tape. I use paper tape for this because it’s easier to remove. Now trace the registration marks on the sheet. And than start tracing color number one of the drawing (in my case, light grey). For drawing on the plastic sheets I use paintmarkers in various colors so it's easier to see what I am doing when I place them on top of each other.
- Take the first sheet off the basic drawing and place the second sheet for next color (dark grey). Stick it with tape and trace the darker colors and put the registration marks also on sheet number two.
- Repeat step 5 again for your third sheet, the white parts.
- Now you have finished tracing the drawing on 3 sheets, you must not forget to place registration marks on all sheets. Plus you need to make 2 small sheets with just the registration marks, which will be used as a guide on the canvas.
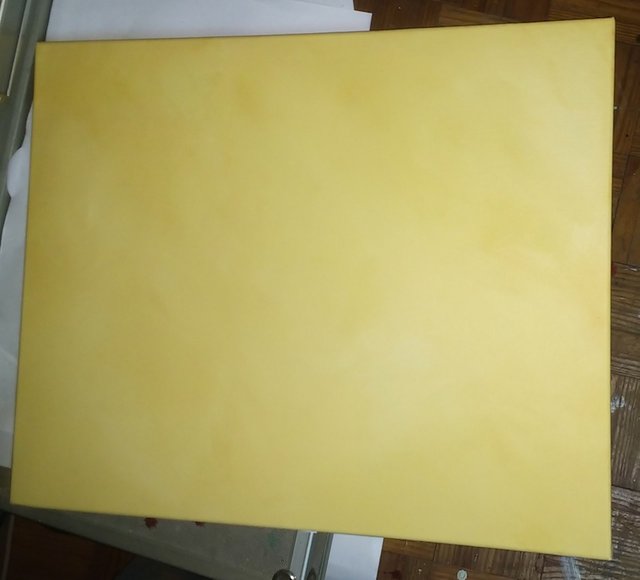
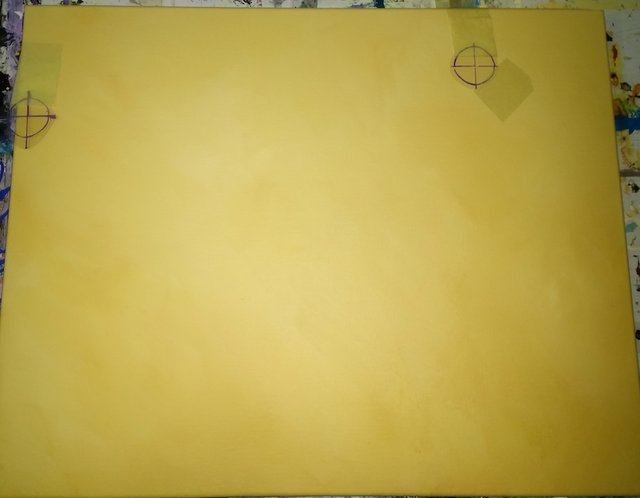
- Prepare the canvas; you can choose to keep the background white or you can put a base color on the canvas. When the paint is dry, you can stick the 2 registration marks on the right place. I use this trick to put them in the right place: in step 3 I have placed the registration marks on the basic drawing. Now I turn the papersheet and go with a soft pencil over the place of the registration marks (on the back of the paper). Now turn the papersheet again with the drawing facing you and place it on the canvas and stick it with tape. Now you can trace the registration marks onto the canvas, by using a pen and go over the registration marks; because of the pencil on the back of the paper, it will trace onto the canvas. Take the papersheet off and now you can place the 2 small films with registration marks on the traced lines on the canvas (stick it with paper tape).
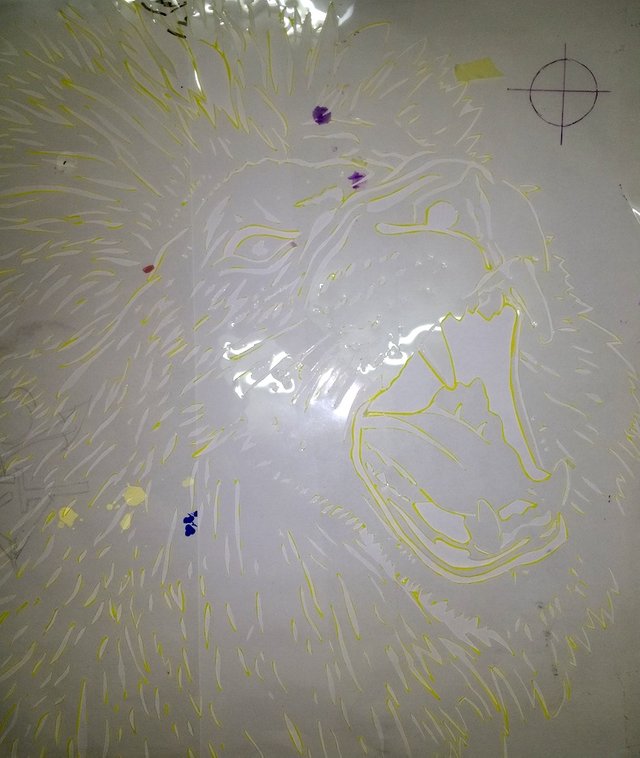
- Now start cutting the sheets. Cut out all the parts you want to paint. This might be a long process depending on the drawing, so take your time and be patience when cutting.
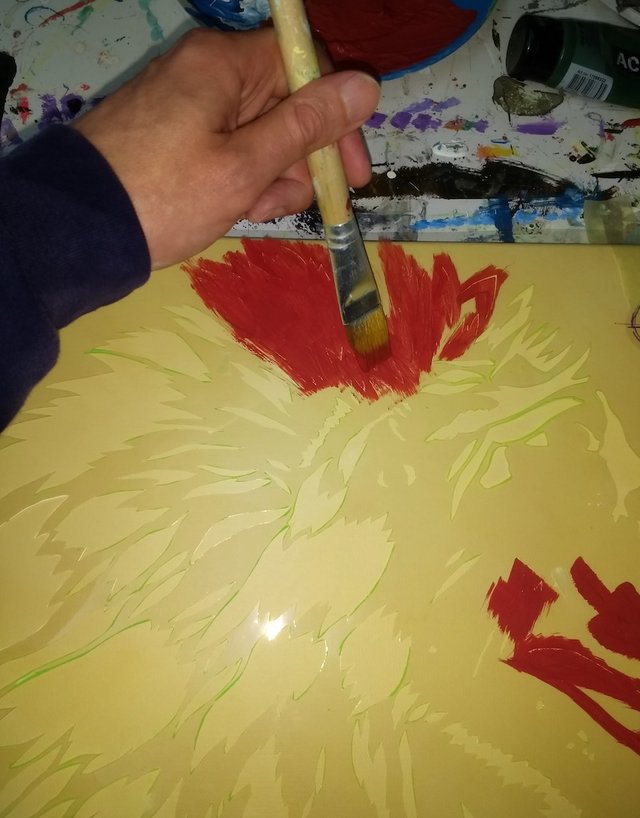
- Start with painting the first color. Place the sheet of the mid grey on the canvas and position the sheet with the registration marks, stick it with tape and start painting. I prefer using a brush to apply acrylic paints. You can also use a spraycan or airbrush. In my artwork I turn the mid grey into red.
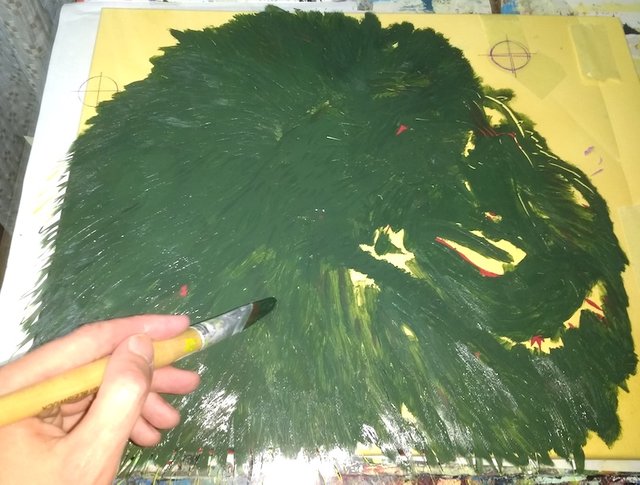
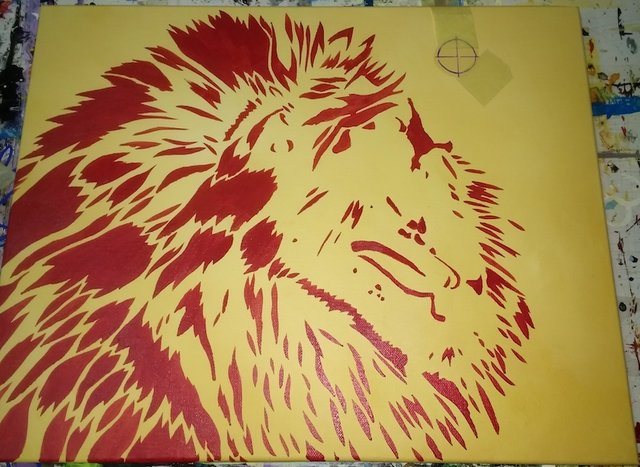
- When the firs layer is painted, take off the sheet and place the second one with the darker colors into the right place (using the registration marks again) and paint it.
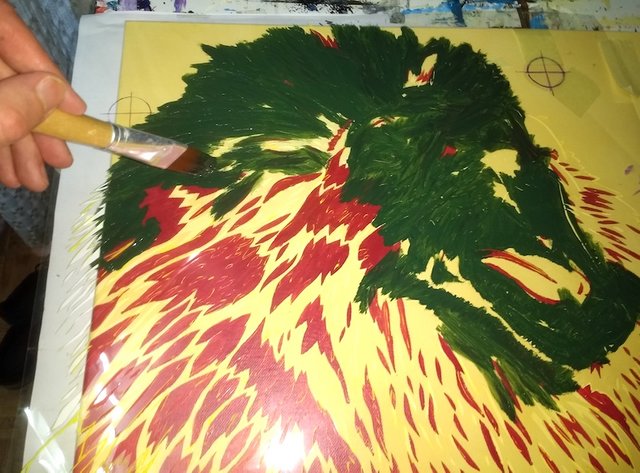
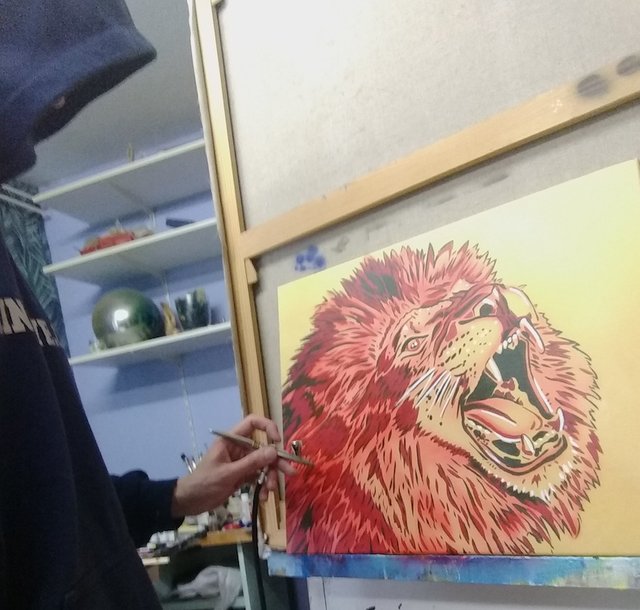
- After drying layer number two, take off the sheet and place number three for the white parts in your artwork.
Take off sheet number three and the sheets of the registration marks and look at the result. Now you are done! You will notice how easy it works when you are using registration marks; it will put your sheets in the right place. I explained it for three colors, but you can use this technique for more than 3 colors. You just need good preparation and think ahead when it comes to cutting stencils. The process of cutting is the hardest part, after that comes the fun of painting.
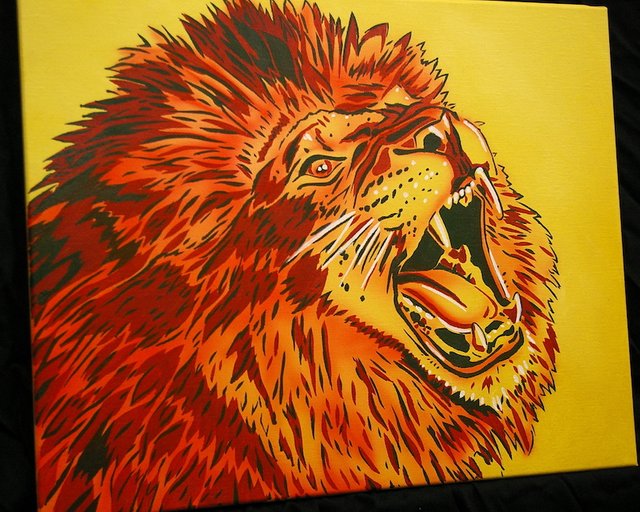
 I finished this painting with a layer of airbrush, just to give an extra shade. I can use the sheets more than once and I will make variations of this painting in various colors.
I hope you enjoyed my tutorial and that it is useful for you.
Enjoy painting!
Thanks for supporting my work.
Dimitrov, the Paintcave
Good art!
I believe that your post is undervalued and deserves a reward.
I added it to the list of underappreciated posts.
Thank you very much!
Congratulations @paintcave! You have completed the following achievement on the Steem blockchain and have been rewarded with new badge(s) :
You can view your badges on your Steem Board and compare to others on the Steem Ranking
If you no longer want to receive notifications, reply to this comment with the word
STOPVote for @Steemitboard as a witness to get one more award and increased upvotes!
an exceptional job, but how much patience !! have you studied art or are you self-taught? congratulations on your curie vote
Thank you very much! yes, the cutting process needs patience. I have studied art but my techniques are self taught, self developed from experimenting for many years
A great way to explain, the image is powerful, perfect for a shirt hahaha AMAZING!!!!😎😎😎😎
Thank you, oh yes on shirt will be great: you can use the stencil also for painting a shirt, best apply the paint with an airbrush
Very beautiful your painting. I love lions because I see them as kings of the jungle,. Your painting is beautiful, well done, its silhouette and colors are very bright. I congratulate you for the technique you used in the realization of this spectacular image. My greetings.
Thank you for your nice comment. Have a nice day
Hi paintcave,
Visit curiesteem.com or join the Curie Discord community to learn more.
Congratulations @paintcave, your post has been featured in the latest Curie Author Showcase.
On behalf of @curie I thank you for your time and for creating amazing content. Keep up the good work!
Sincerely,
Ivan (@curie curator)
Wonderful! This tutorial, in itself, is a work of art. Your step-by-step explanation is very didactic because you take into account all the details. What a great pleasure it has been to read you and see your work. A big hello @paintcave
Hello @marcybetancourt Thank you very much for this comment. I have over 20 years experience in painting and now I want to share my knowledge of techniques. So there's more to come!