Understanding Office 365 and the Need for Email Backups
You might think cloud-based services are foolproof, but they too have weaknesses. Which means, backing up your Office 365 emailsstill matters. People often assume their data is totally safe just because it's stored online. But that's not always true.
Yes, Microsoft provides some level of data security and redundancy. But it's not the same as having a complete backup. If you accidentally delete emails, or some kind of attack compromises your account, recovering that data without a dedicatedOffice 365 backup can be really tough.
Microsoft's built-in recovery tools, like the recycle bin and retention policies, are helpful. But they have limits on how much and how long they can recover data. A dedicated Office 365 backup solution offers more extensive recovery options. It lets you restore emails in different situations where your data is corrupted, deleted by mistake, or needed for long-term legal retention.
Why Use Dedicated Backup Tools?
There are plenty of reasons to use dedicated backup tools for Office 365 emails. These tools usually offer more detailed backup and recovery options.
• They let you back up not just emails but also attachments, calendar entries, and contact lists.
• These tools often give you more flexible storage choices. While Microsoft offers data recovery within its infrastructure, third-party solutions let you store backups in different places. Like on-premises servers, other cloud services, or even external hard drives. This flexibility can be important for meeting specific regulatory or internal data management needs.
• These tools also come with added security features. Many third-party options provide encryption for data both at rest and in transit, which keeps your backups safe from unauthorized access.
• They also allow you to set up regular, automatic backups, reducing the risk of human error. Dedicated backup tools can often work with other data management and disaster recovery solutions. This gives you a more complete approach to protecting your data. Especially useful for larger organizations handling lots of data across different platforms and services.
The Bigger Picture: Data Safety and Email Clients
When thinking about Office 365 backups, it's important to consider the broader issue of data safety and the role of web-based email clients. Email is crucial, especially in business. Web-based email clients like Office 365 and Gmail offer convenience and flexibility. But relying only on these platforms without a backup plan can be risky. Data breaches, service outages, and other unexpected events can cause significant data loss.
A complete backup plan reduces these risks and helps keep your business running smoothly. While Office 365 offers great tools for productivity and data management, adding dedicated backup solutions strengthens your data protection and keeps your critical email communications safe from various threats.
Using Mail Backup X for Office 365 Backups
Mail Backup X is a tool designed to secure your email communications by backing up, archiving, and restoring emails with efficiency. It supports various email clients and servers, offering encrypted backups, flexible storage options, and automated scheduling.
Steps to Back Up Office 365 Emails Using Mail Backup X
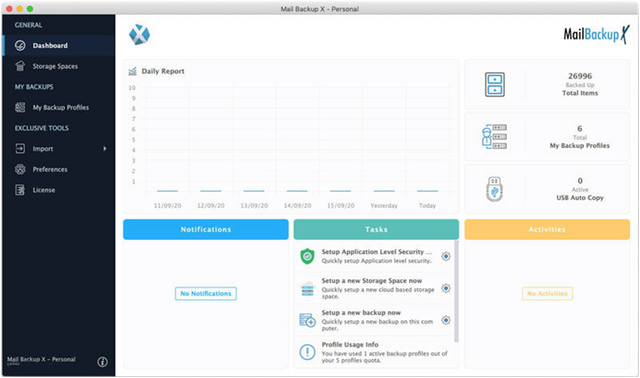
Step 1: Launch and Navigate Open Mail Backup X after installation. The main dashboard is where you'll manage all your backup tasks. The dashboard is divided into various components: side navigation panel on the left, daily report graph at the top-center, and 'Notifications,' 'Tasks,' and 'Activities' box below.
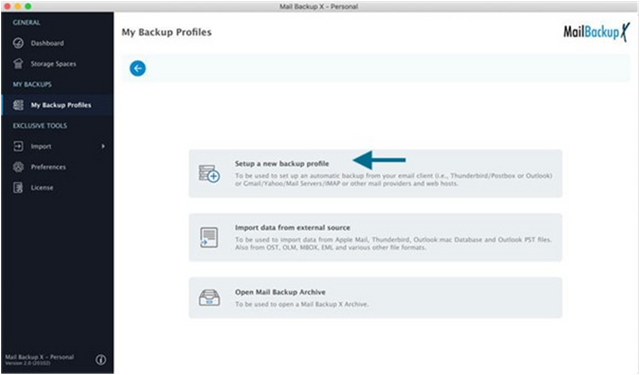
Step 2: Start a New Backup. Find the "Tasks" panel and click "Setup a New Backup Now." Or go to "My Backup Profiles" and click "Setup a New Backup Profile." This starts the process of securing your Office 365 emails.
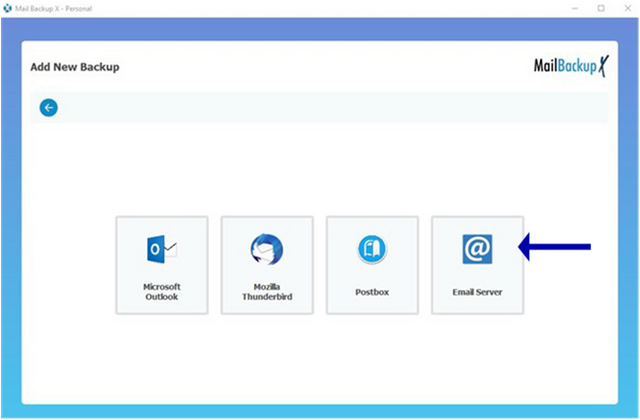
Step 3: Connect to Office 365. Choose Office 365 as the email client to back up. To do so, first click on "Email Server," and then "Office 365" in the subsequent screen.
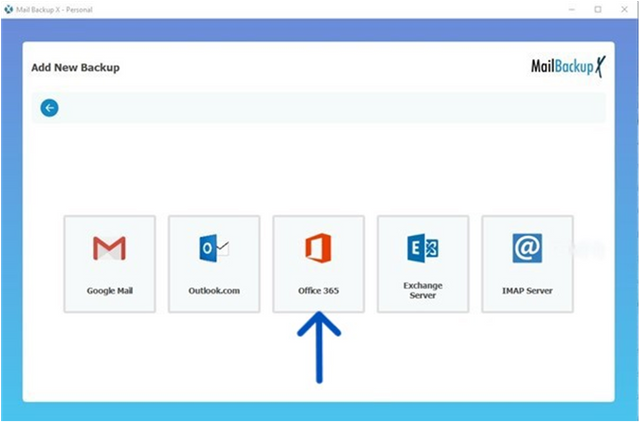
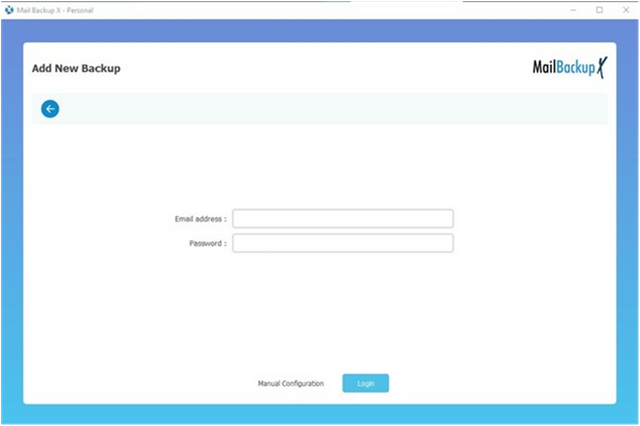
Next, you'll be prompted to log into your Office 365 account, allowing the software to access your email data.
Step 4: Choose Your Mailbox. Once logged in, Mail Backup X will detect your Office 365 mailbox. If you have multiple mailboxes, select the one you want to back up. This ensures the right data is being secured.
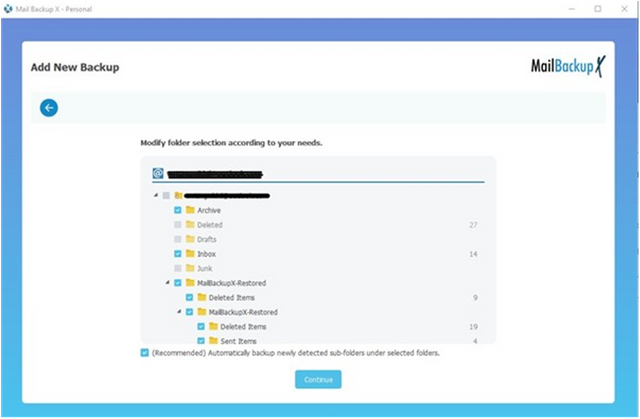
Step 5: Select Backup Folders. The software will show the folders in your chosen mailbox. You can choose which folders to include in the backup, excluding those you don't need. Turning on the auto-detection of new folders (highly recommended) means any new email structures will be included in future backups. You can find this option just below the list of folders.
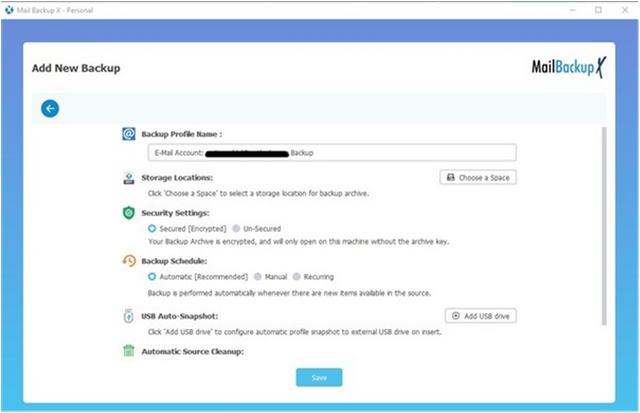
Step 6: Configure Backup Settings. When you reach the configuration screen for yourOffice 365 backup profile, you'll need to adjust a few settings to tailor the backup process to your needs. Here's how to do it:
- Profile Name: Think of a title that reflects its purpose or contents. This unique identifier will help you differentiate between various backup profiles. Make sure the name is clear and descriptive to avoid confusion later. A well-chosen name streamlines the management of multiple backups.
- Storage Destination: Choose where your backups will be stored, considering both security and accessibility. Whether you select local storage on your device or prefer the flexibility of cloud services, ensure the location suits your needs. Select a destination that guarantees the safety and availability of your backups.
- Enable Encryption: Encryption secures your backup files by converting them into a coded format, accessible only with the correct decryption key. This protects your data from unauthorized access. Turn on the encryption feature by simply selecting the "Secured (Encrypted)" checkbox, to ensure your backups are safe. If this is the first time, the application will automatically launch the security setup wizard. Go through the wizard to set it up. You will be asked to set the password and save the master recovery key in a safe place. You only need to do it once.
- Set Up a Regular Backup: Determine the intervals at which your data will be backed up. Select a timing that aligns with how frequently your data changes. This automated process keeps your backups up-to-date effortlessly.
- USB Drive Configuration: For keeping your latest backups always with you, you can configure a USB drive for your Office 365 backups. After enabling USB auto-snapshot, whenever you connect this drive to your computer, the software will automatically copy the latest backup. This provides a portable and convenient backup solution.
Step 7: Save and Monitor. Click 'Save' to complete your backup profile. This action activates the backup process. Your active backup tasks will be displayed in the "Activities" section of the dashboard. You can monitor their progress here. Notifications and alerts about your backups, including any errors, will appear in the "Notifications" panel.
By following these steps, you can integrate Mail Backup X into your data protection plan. We hope you find this guide to back up your Office 365 emails accessible and easy to go through. This approach to email management helps protect your communications from potential data loss.