🎨 [Step by Step] - Tutorial: ✨ 🍭 🍬 "L.O.L Surprise" Mint Piñata + Original technique for Embossing Effect! 🍬 🍭 ✨ - By: @Tesmoforia.
"Creativity is Contagious. Pass it on. "

• Photo by @Tesmoforia, with a Lumix/Panasonic DMC-FH2. Gif by @Vanuzza •

Yes, it isn’t the most elegant, complex or laborious hobby; but the expression of people when seeing a piñata is priceless 😂 💯

• ...especially adults WHO JUST GO ENTIRELY LOL •
Before finishing 2019 I received around half a dozen of orders, and I recorded each commission for more tutorials (TUTORIALS WILL NEVER STOP BABY) ~ ✨ 👌
• S T E P • B Y • S T E P •
« "L.O.L Surprise" Piñata »

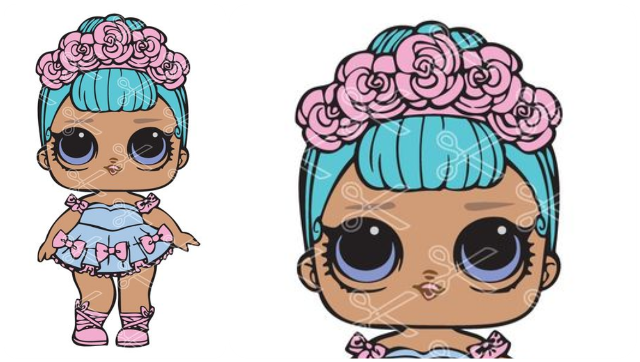
• Source •

This was the model requested by my customer, a "L.O.L Surprise" Doll (but just her head), with the detail of changing her color palette.
« T O O L S
&
M A T E R I A L S »

| • Ruler. | • Grey Cardboard 22 or 18. |
|---|---|
| • Pencil. | • School Glue. |
| • Geometry Compass. | • Skin Crepe Paper. |
| • Eraser. | • White Pasteboard. |
| • Pen. | • Red Crepe Paper. |
| • Measuring tape. | • Pink Crepe Paper. |
| • Large Scissors. | • Light Blue Tissue Paper. |
| • Jewelry Wire. | • Mint Crepe Paper. |
| • Adhesive tape. | • Fuchsia Crepe Paper. |
| • Small Scissors. | • Hot Silicone Gun. |
| • Tweezers and pickaxe. | • Turquoise Crepe Paper. |
| • 5 Plastic Pearls. | • Aquamarine Crepe Paper. |
| • Silicon Bars. | • Glittery Black Pasteboard. |
| • Large Stapler. | • Pattern Paper or Bond Paper. |
« STEP N° 1 »
• Body Construction •

The first step is to choose the height of the piñata, which is determined by the number of children invited to the party: For a celebration with 10/15 children, the height should be 45 to 50 cm.

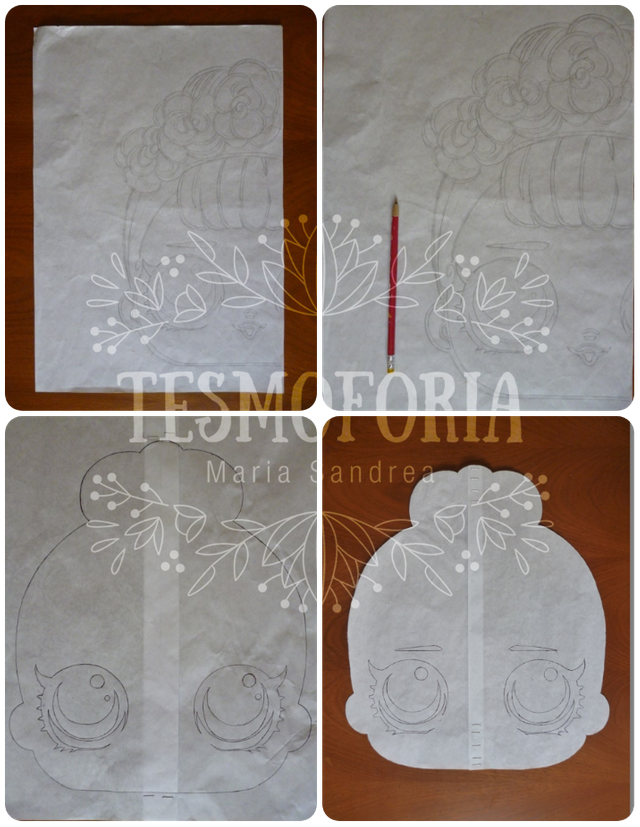
• "Simply draw a perfect half, and then replicate it." - Photos by @Tesmoforia, with a Lumix/Panasonic DMC-FH2.
The entire outline of the head is drawn, including all its details on the left side, then we’ll replicate it to get a symmetrical pattern.

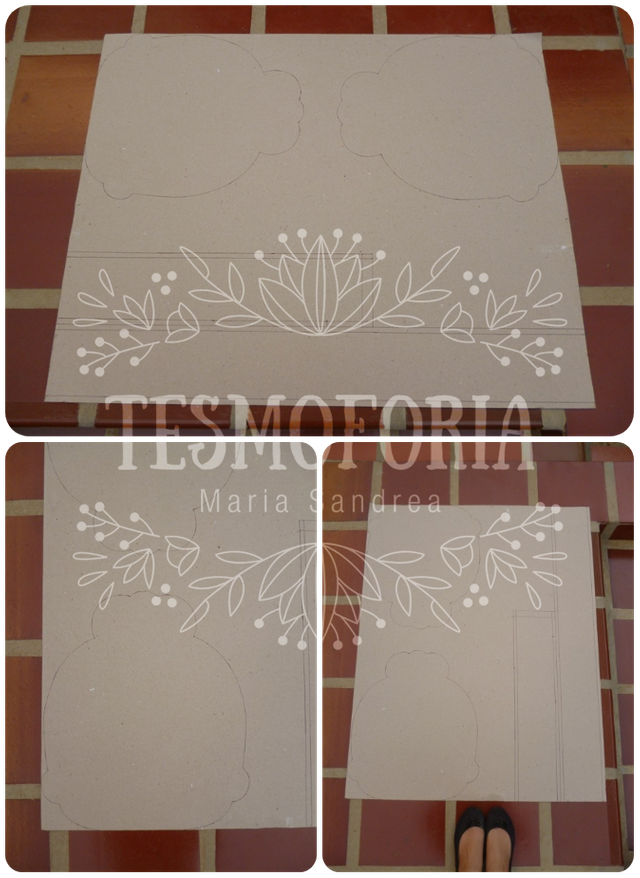
• "This design consumes a sheet and half of Gray Cardboard. 1 Sheet to make the body and half sheet for all the details (see later)." - Photos by @Tesmoforia, with a Lumix/Panasonic DMC-FH2.
We’ll trace the outline of this pattern on the gray cardboard twice to get the piñata's face and back, plus 2 strips along the rest of the material, 14 cm wide.

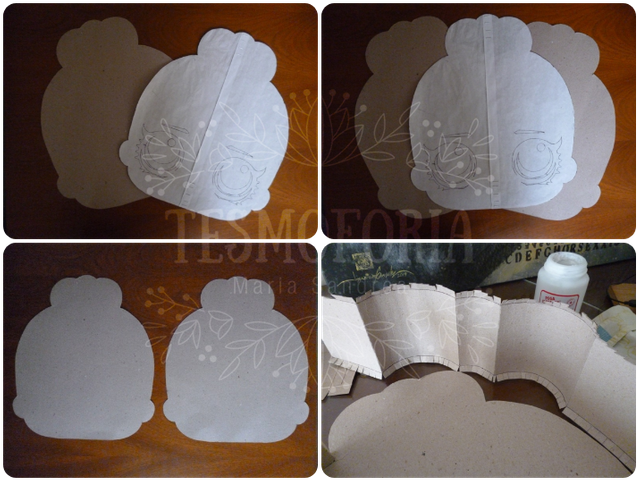
• "Fold each angle of the silhouette in the main strip beforehand, it will facilitate its installation." - Photos by @Tesmoforia, with a Lumix/Panasonic DMC-FH2.
The first side to be installed is the front. The walls of the piñata will measure 12 cm after using 1 cm on each side to make the tabs used to fix the covers.

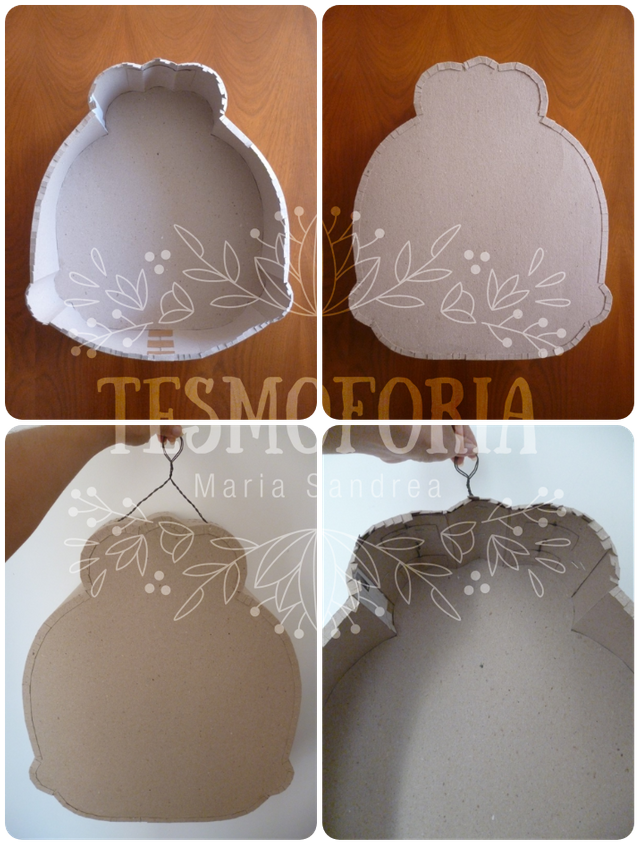
• "This "hook" must measure within 15 cm to 20 cm height." - Photos by @Tesmoforia, with a Lumix/Panasonic DMC-FH2.
With the jewelry wire being curled many times, you will create an outside-down “V” shaped hook: Due to its shape, this piñata needs to distribute the weight it will contain in 2 different points so it won’t tear/give in.


• "It is important to reinforce the inner sides with extra cardboard tabs." - Photos by @Tesmoforia, with a Lumix/Panasonic DMC-FH2.
Once the hook is secured with enough hot silicon and an extra cardboard seal with staples, it is advisable not to re-manipulate it so as not to weaken it until the piñata is ready.

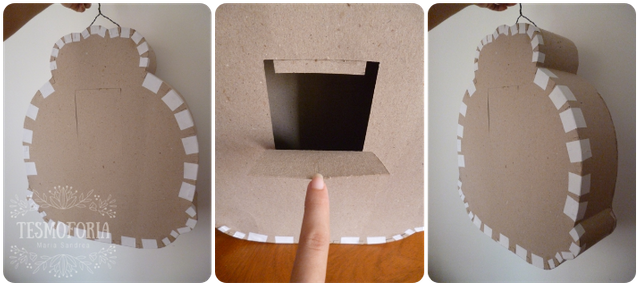
• "The window to be filled with toys measures approximately 10 x 14 cm. I recommend creating a small inner tab that will prevent the "lid" from sinking by accident." - Photos by @Tesmoforia, with a Lumix/Panasonic DMC-FH2.
We install the back side with the same technique, and add an extra touch in the sealing using plain paper tabs and school glue for strength.
« STEP N° 2 »
• Delicate "Embossing Effect" + Paper Layers •

Right now the trend elaborating piñatas is about creating a simple figure (a circle or square), buy wrapping paper with the characters currently famous, cut them, and paste them at the front side of the piñatas (super economic option that saves hours of work).
Another option which I don’t like neither, is cut foamy pieces and overlay them, but visually the transition between materials, paper/foamy, does not seem harmonious in my opinion.

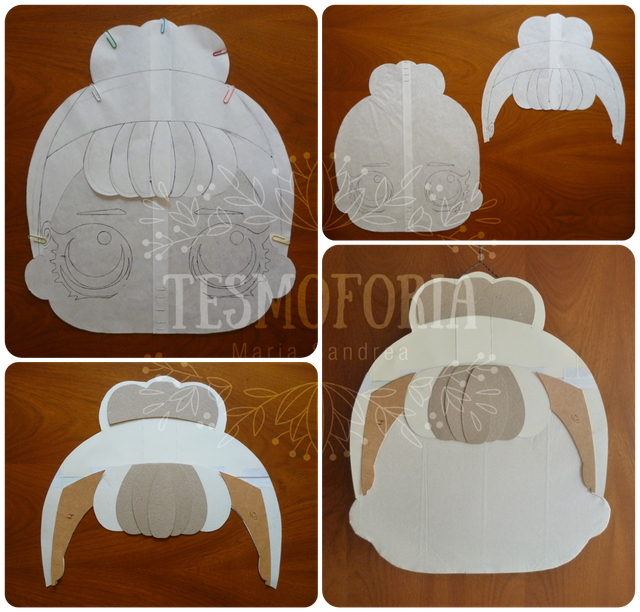
• "There are going to be 23 pieces: Bum, hairband, sideburns, sideburns background, layers of the bang, layers of the eyes, nose, shadow of the nose, mouth and embossing of the mouth and eyebrows." - Photos by @Tesmoforia, with a Lumix/Panasonic DMC-FH2.
The next technique is about replicating (from the main pattern) all the elements (separately) on the character's face, and transfer those small patterns to the cardboard.

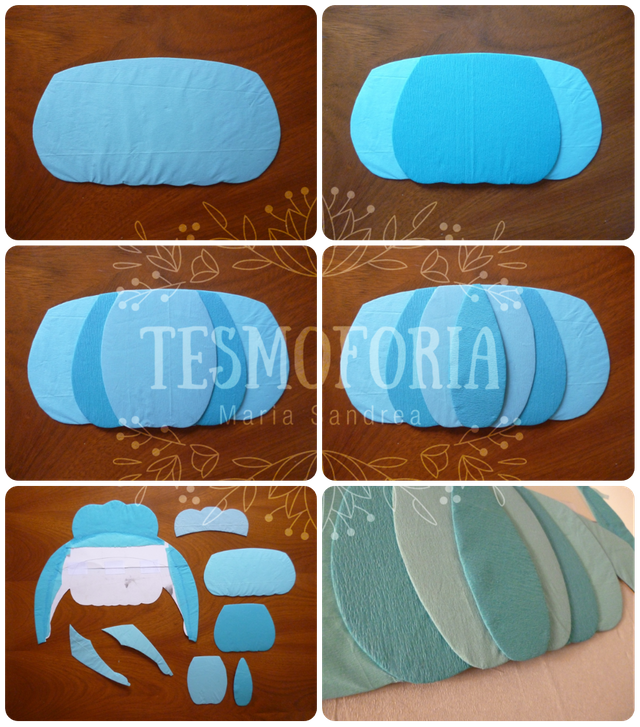
• "Alternating the tones and colors between the pieces is essential." - Photos by @Tesmoforia, with a Lumix/Panasonic DMC-FH2.
Each piece is separately lined with the same ´Crepe Paper´ which the sides of the piñata will be lined with.
This will give a pleasant homogeneity effect to the design when fully assembled.

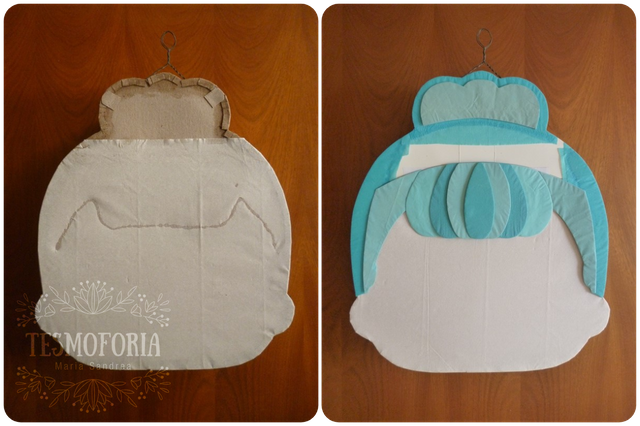
• "All the zone representing the skin of the character is lined with the Crepe Paper selected for the skin color. The secret to avoid glue spots is lining the front side using the 'drum technique': Placing glue on the walls of the opposite side and tensioning the paper at its ends." - Photos by @Tesmoforia, with a Lumix/Panasonic DMC-FH2.
Before fixing the parts, they should be placed in their position only as a test, to ensure they fit together.
✋ THE FACE SHALL NOT BE INSTALLED YET ✋
The pieces will be installed only when the piñata is lined with paper.

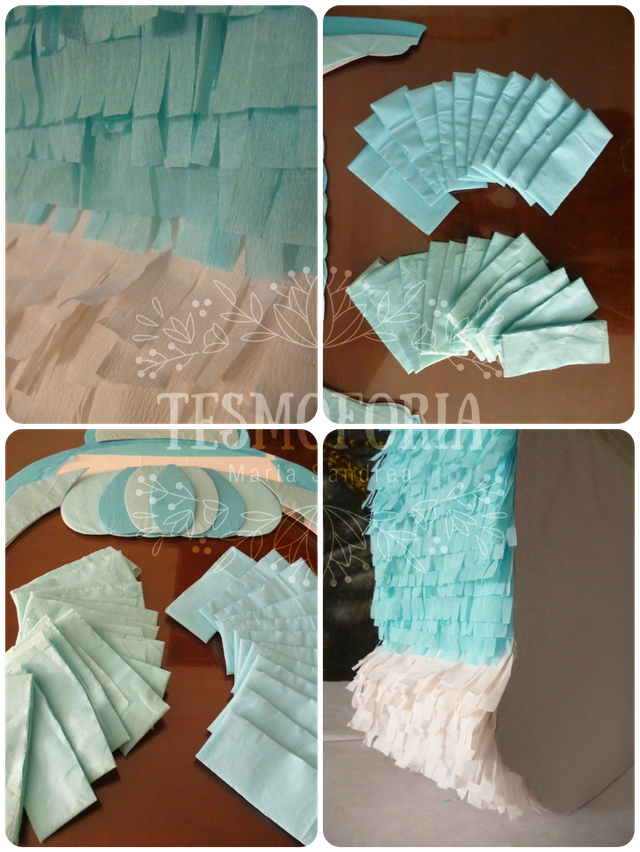
• "The recommended width for the paper layers is 4 cm." - Photos by @Tesmoforia, with a Lumix/Panasonic DMC-FH2.
If the material is enough, inserting the turquoise/aquamarine tones one after the other in each row of paper will create a very beautiful effect.

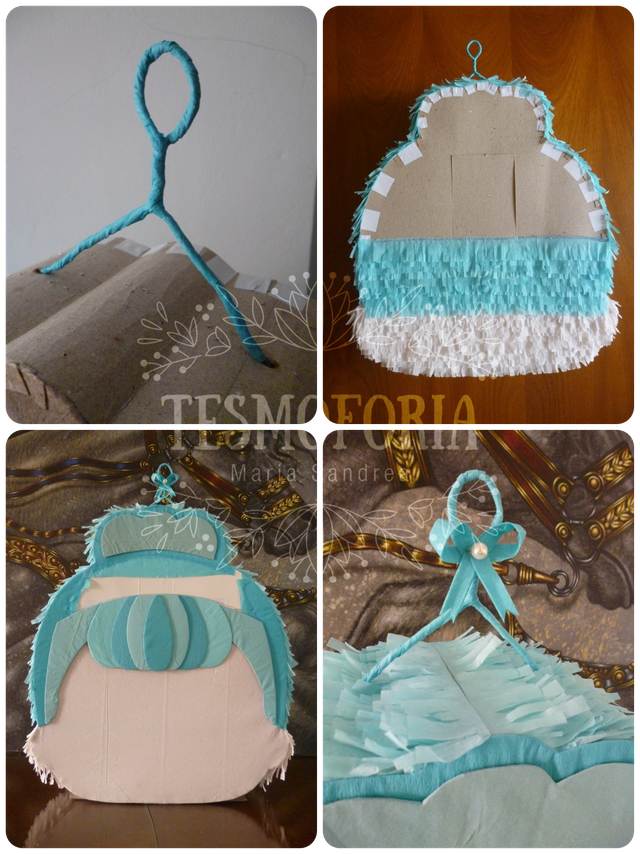
• "The hook is lined with the darker ´Crepe Paper´, same as the hair tone." - Photos by @Tesmoforia, with a Lumix/Panasonic DMC-FH2.
Because by manipulating the figure in the lining process, these pieces can be stained with glue/ get damaged.
« STEP N° 3 »
• Hairband of Roses •

For the hairband of roses, I chose using big paper flowers instead of flat ones.
👇 HOWEVER 👇
The only roses I know how to make are with the technique of "Blossom by Blossom", it takes a lot of work hours to make only 1 rose this way; so, I asked a neighbor (who is a teacher with more than 20 years of experience making scenery and stuff for children theater), and she kindly agreed to help me.

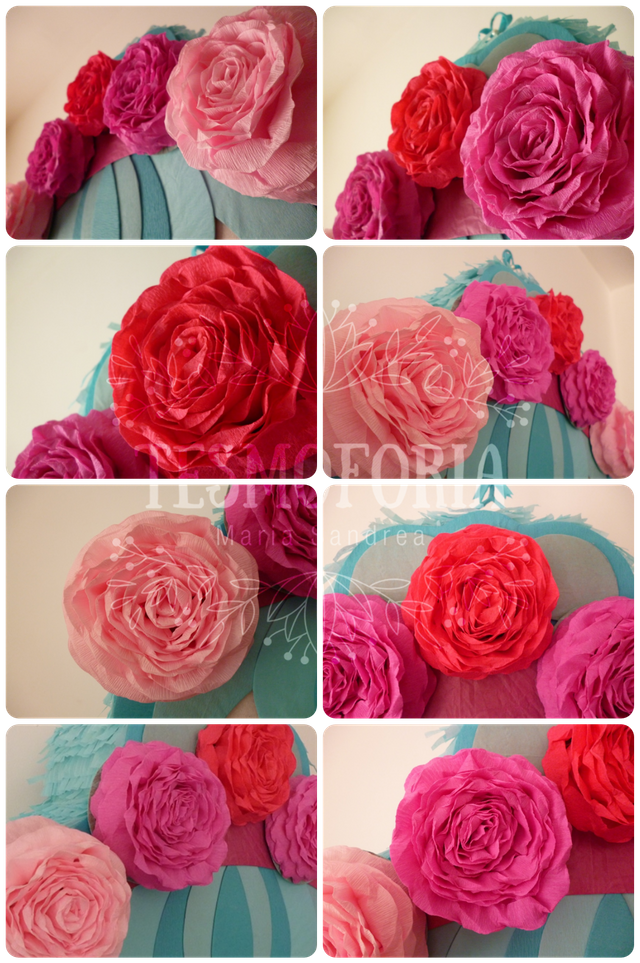
• "All the credit of these fabulous roses is hers." - Photos by @Tesmoforia, with a Lumix/Panasonic DMC-FH2.
The technique to make these roses is to twist the edge of a long strip of 'Crepe Paper', previously cut with the width we want the rose to be (its width determines the height of the flower), and then roll it.

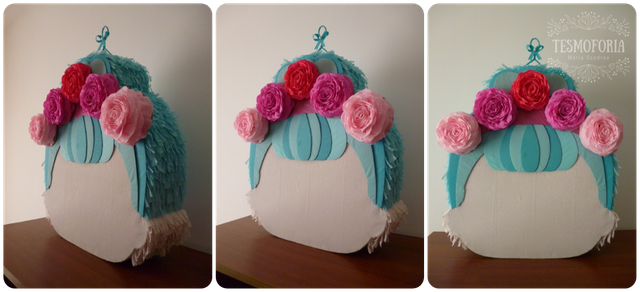
• "The colors were chosen in a way that the tone at the center would highlight the symmetry of the design." - Photos by @Tesmoforia, with a Lumix/Panasonic DMC-FH2.
At this stage the value of using the same material for the whole body of the piñata can be appreciated.

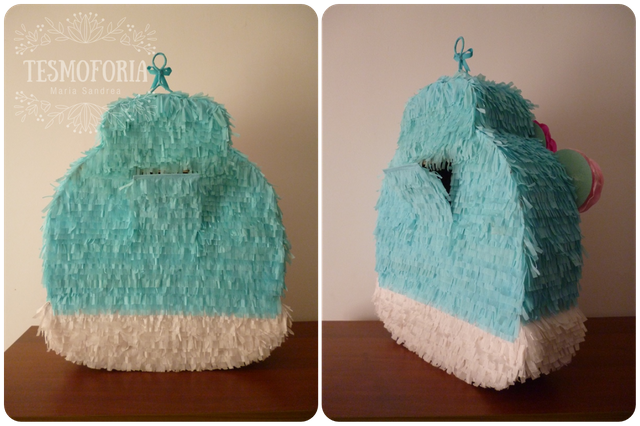
• "Respecting the hairline will make her look more like a head." - Photos by @Tesmoforia, with a Lumix/Panasonic DMC-FH2.
To cover the sides and the back, the equivalent of 1/2 sheet of 'Crepe Paper' was invested.
« STEP N° 4 »
• Details in Pasteboard •

Exclusively for the eyes, varying the material to one more striking than the "Cardboard/Crepe Paper" is an excellent idea.

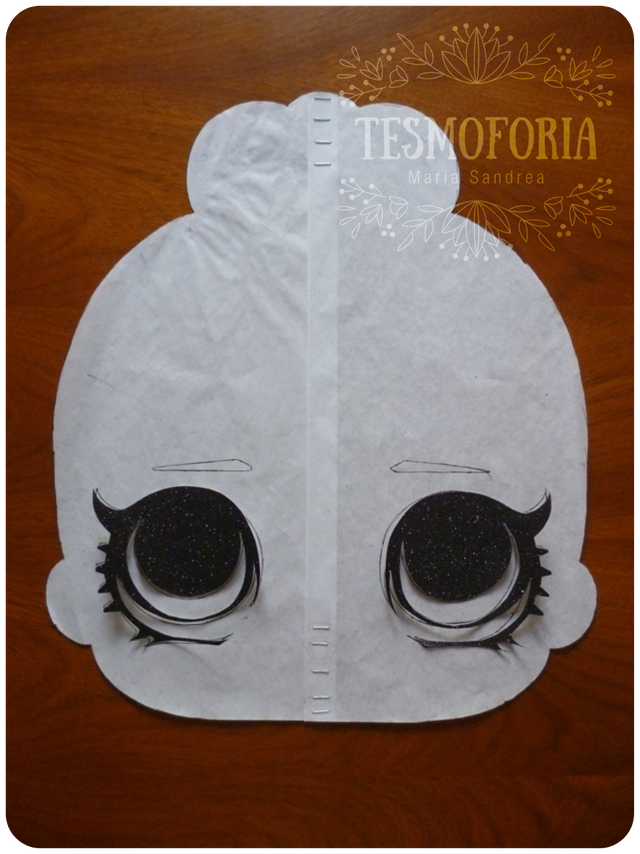
• "Back to the main pattern, we transfer the silhouette of the black part of the eyes to the black glittery pasteboard." - Photos by @Tesmoforia, with a Lumix/Panasonic DMC-FH2.
The same process of the silhouette of the hair is repeated with each part of both eyes, and each replica is measured in the main pattern to assure they are accurate.

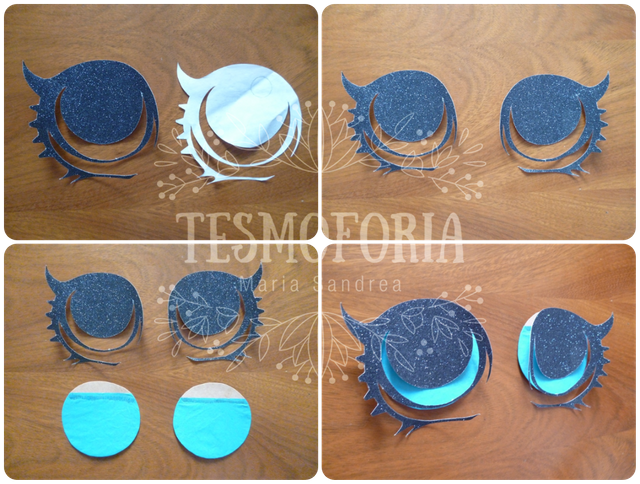
• "The circle that will be the iris, is lined with tissue paper and not crepe for a softer effect (ignore the super exposed photos)" - Photos by @Tesmoforia, with a Lumix/Panasonic DMC-FH2.

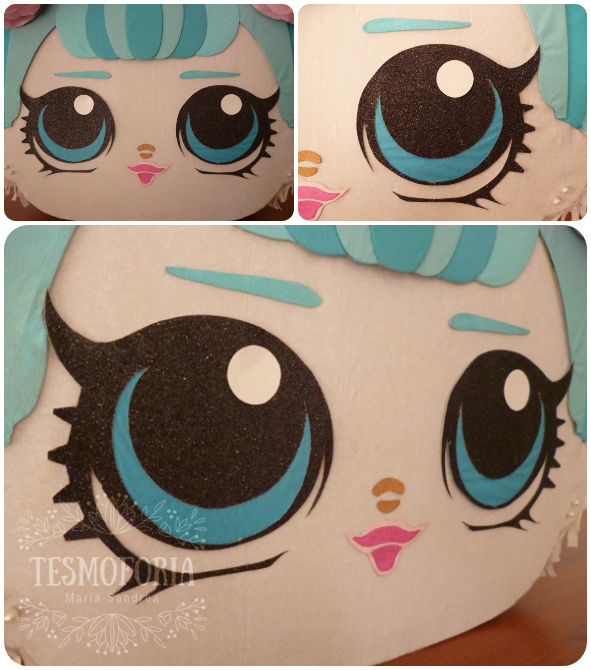
• "P I Ñ A T A I N T E N S I F I E S" - Photos by @Tesmoforia, with a Lumix/Panasonic DMC-FH2.
For a cleaner result, the smaller elements of the face shall be placed with cold or hot silicone, because the humidity of school glue may cause that the dye of the 'Crepe Paper' would stain the work.
« R E S U L T »

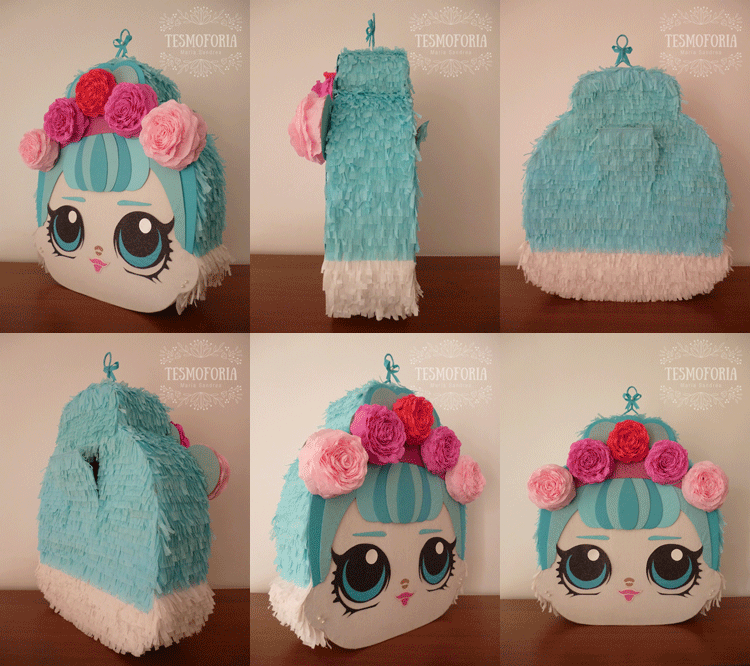
• Photos by @Tesmoforia, with a Lumix/Panasonic DMC-FH2. Gif by @Vanuzza •


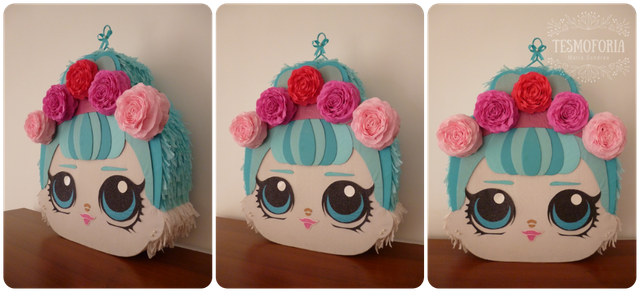
• Photos by @Tesmoforia, with a Lumix/Panasonic DMC-FH2 •
🎊 Happy New Year 2020! 🎊

I have had a lot of work, which has made me very happy, although receiving so many commissions consumed the time I used to spent on hobbies and other activities that I love (including writing content for my beautiful blog here at Steemit).
Also, after much physical and emotional discomfort (doing full introspection), I was aware that I was going through "The Dark Night of the Soul ", and that I had fallen in that state approximately in February 2019.
I'm currently taking care of that, even though sometimes I feel like I’m made of glass, and resorting to the cloister becomes inevitable.
December was a really complicated month; I try to reconcile many things at once. I have the perennial feeling that I need to sleep like a whole year, but I can’t stop thinking that we aren’t immortal and that it’s irresponsible to always leave things for later, as if we were to live forever.
This 2020 my only resolution is too use each hour of the day; leaving things for later can dissolve motivation, until killing the dream.
« Piñata Series (tutorials!) »
Shopkin Piñata, "Melonie Pips" ~ ESP / ENG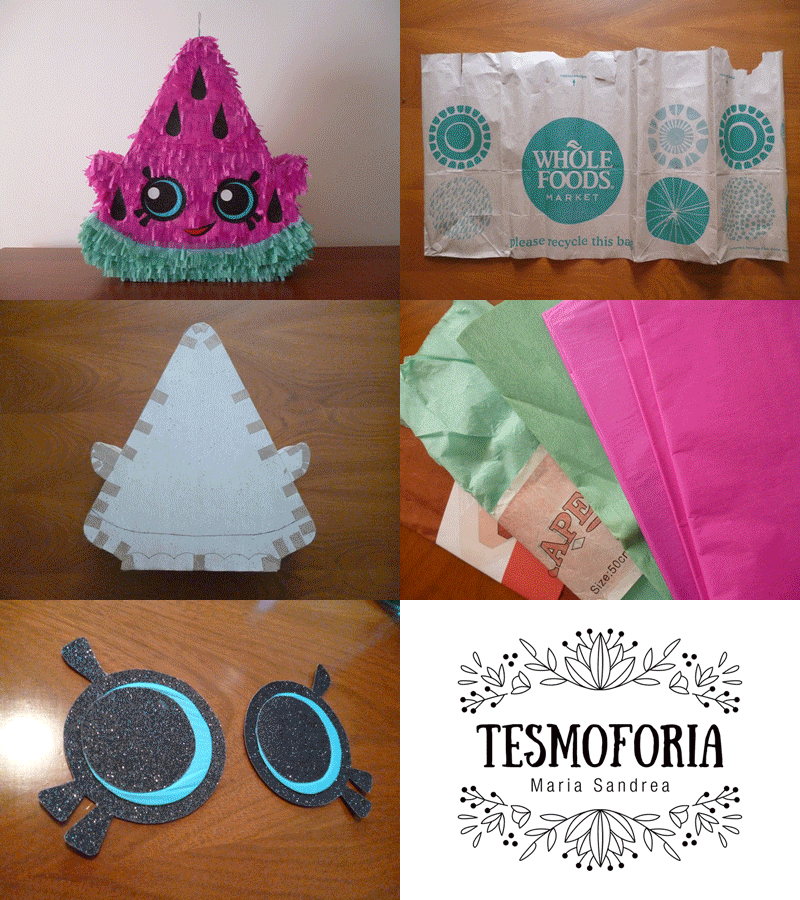 ”Rainbow Donkey” Mini Piñata~ ESP / ENG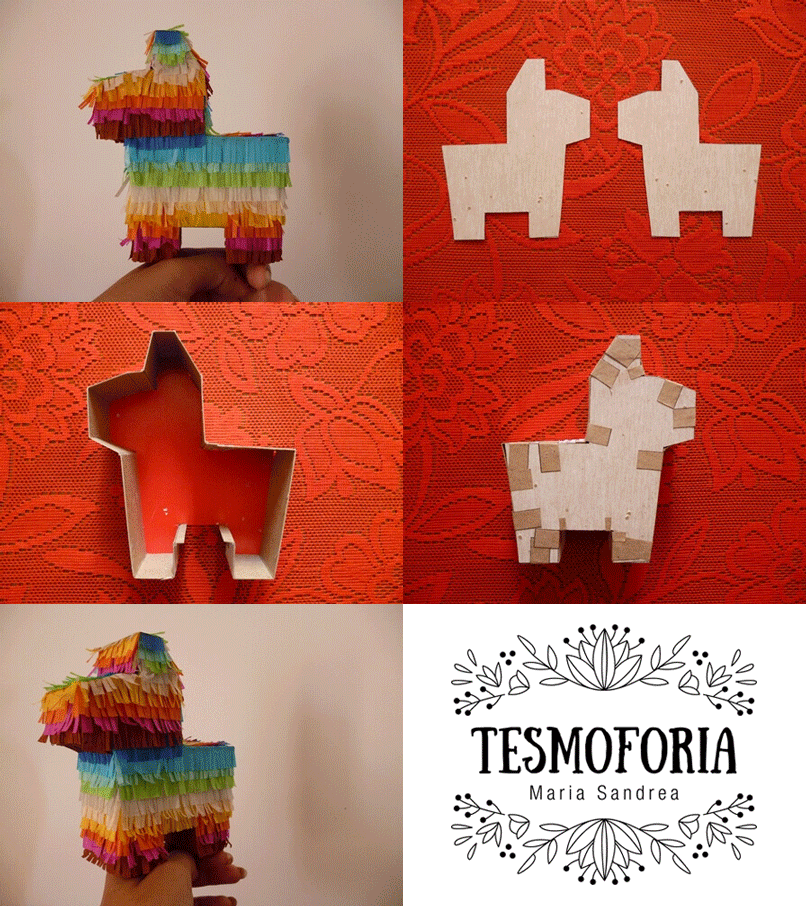
|
|---|
  .png) .png)
|
.png) Discord
Discord .png)
 Would you like to Ask me Something?
  Do you play Drugwars?

.png) Would you like to Support me? You can help me get more and better supplies to continue Crafting! !
Would you like to Support me? You can help me get more and better supplies to continue Crafting! ! 
 I like Tacos
.png) ¡ And Coffee too!
¡ And Coffee too! 