Refinishing My First Canoe
If you don't own or borrow a canoe from somebody, the most expensive part of going on a backcountry canoe trip is renting one. Hands down, it is more than 50% of the total cost per person. Ideally and if you can afford it, you'd want to go with a ultra-lightweight kevlar (featherweight), which can cost a whopping $45CAD a day. If your trip involves many portages that are more than one kilometer, you'll thank yourself as you're carrying the canoe on your shoulders across sometimes unforgiving terrain. Aside from the slightly lighter kevlars that are a little heavier and are only a couple of bucks cheaper, you could go with a fiberglass canoe, which can weigh 55-60lbs, and cost only maybe $30CAD a day. If your trip has few and short portages, you can get away with using a fiberglass canoe. Or if you're in great shape (unlike myself [currently]), you could manage portaging the heavier choice over longer distances.
Anyways... the whole point of this blurb was to explain how if you have your own canoe, backcountry camping is not nearly expensive than if you have to rent. When I started going with my friends in highschool, I could only dream of owning my own canoe, and none of my friends had canoes. Fast-forward some years down the road to early this past Spring, and I find myself periodically looking on Kijiji for used canoes. At this time, I didn't have a whole lot of money that I could spend on a canoe, so I was really looking at the cheapest ones on the site. If you're wondering how cheap? Below you can see how cheap I'm referring too!
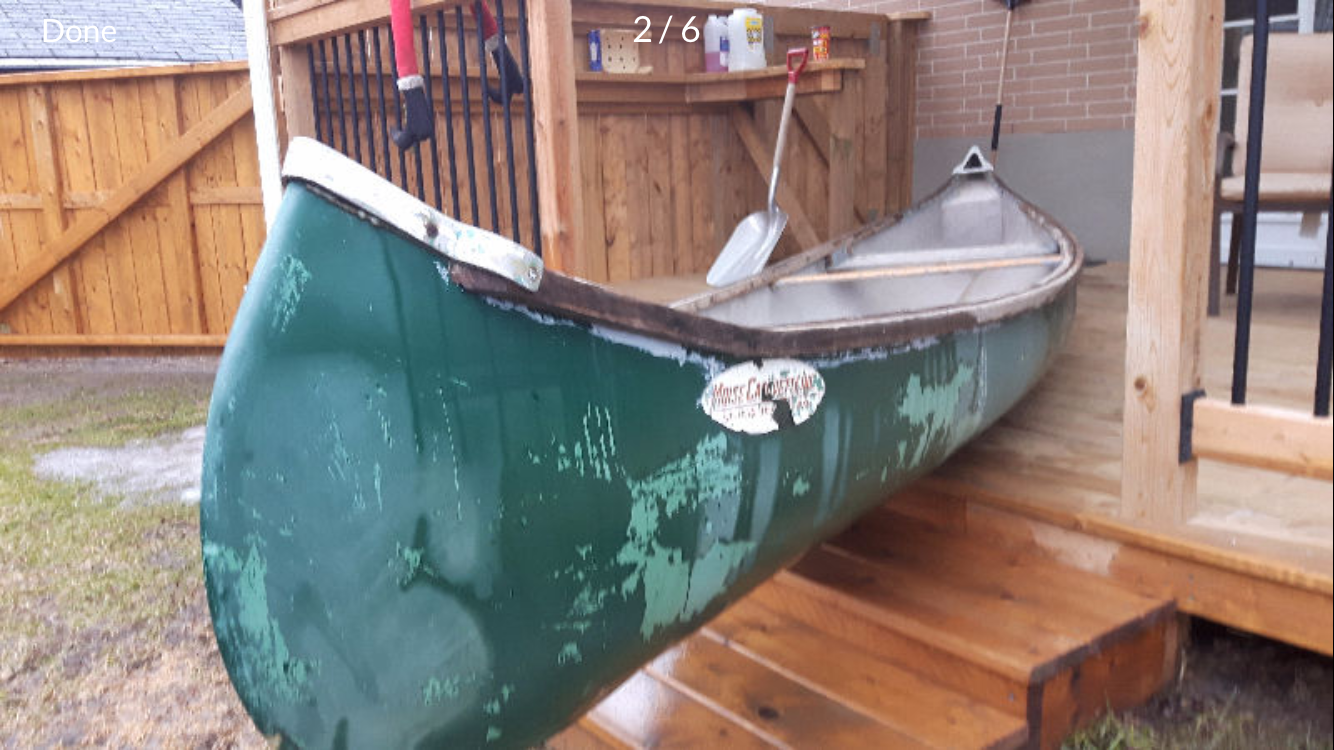
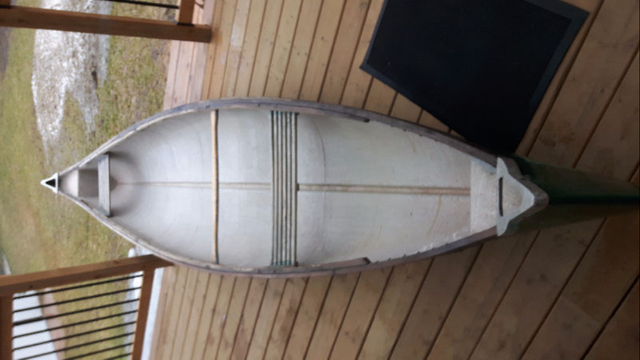
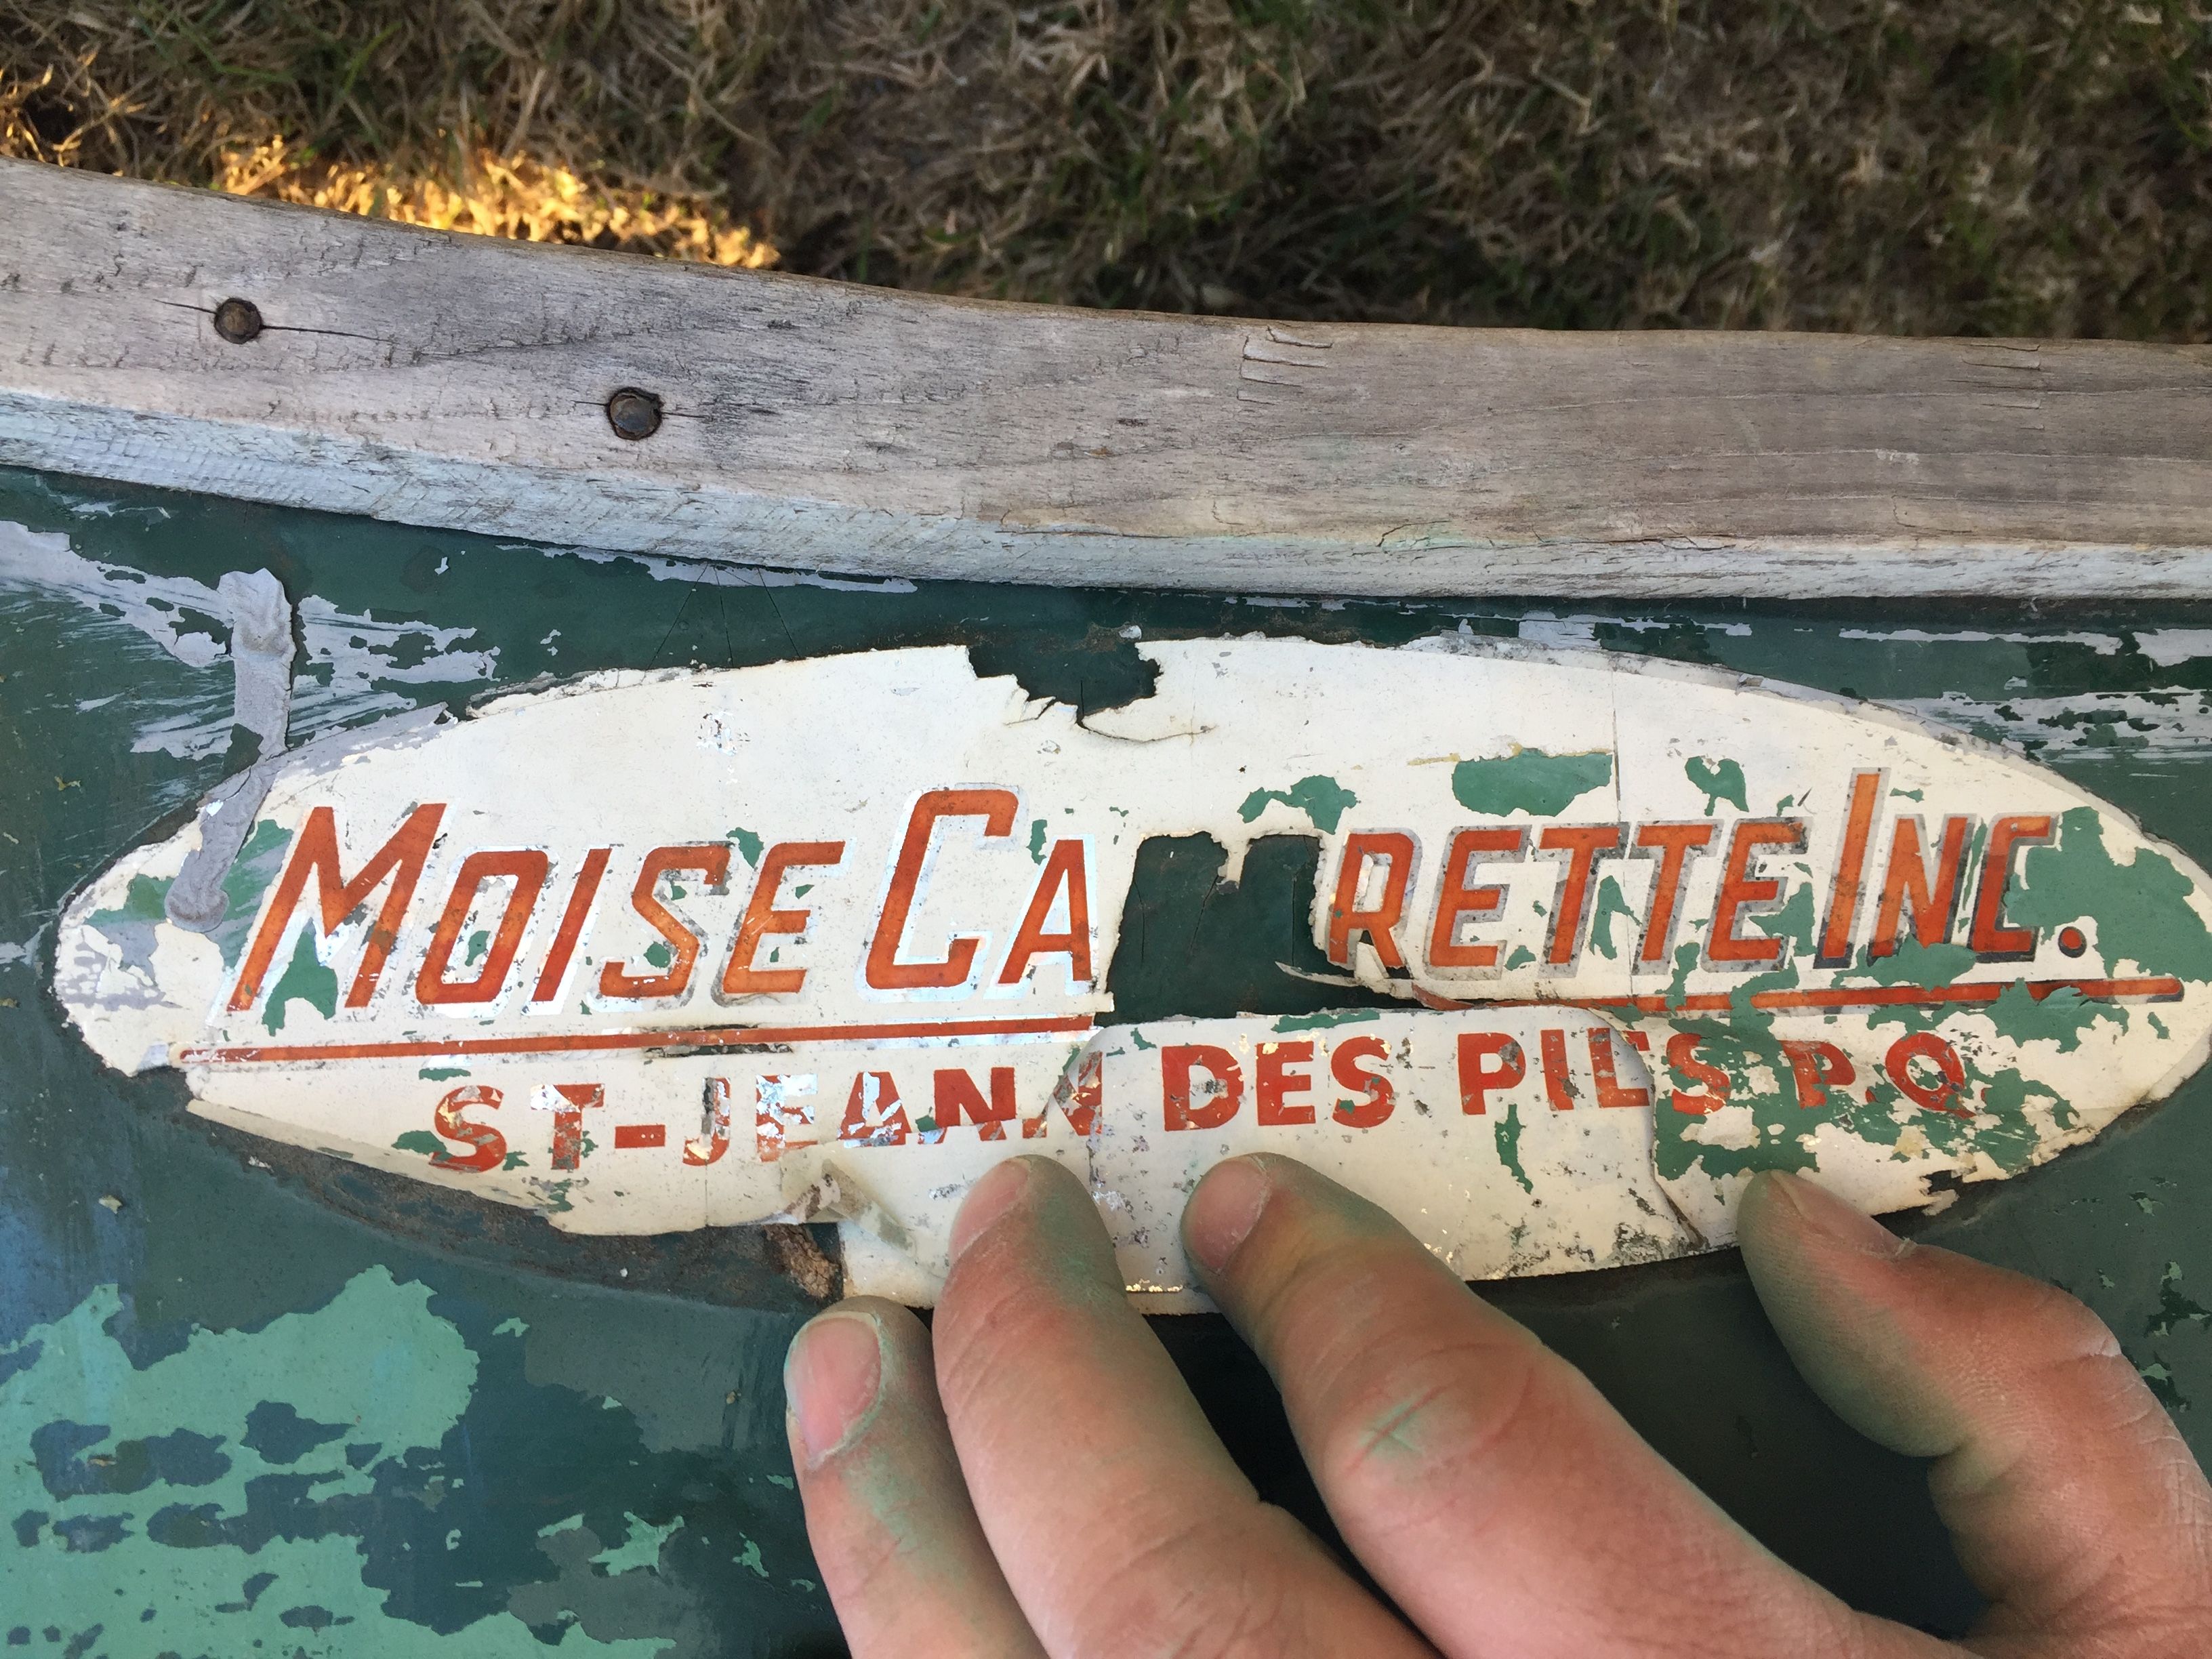
I bought this hunk of crap from someone for $220CAD i believe it was. It's a 16ft fiberglass canoe, weighing somewhere around 55-60lbs. Considering that all of the similar looking canoes for sale were $100-$200 more expensive than what I paid, I had to jump on the opportunity. I also want to note that before bought it, I checked it out in person to make sure the canoe was structurally sound and seaworthy. Really, it was a good canoe, but the aesthetics weren't maintained whatsoever. I knew that refinishing this canoe was going to take time, and love. The company label was been torn off over the years, and it took me some guessing and googling, but I was able to determine it was a company from Quebec, Canada, that had gone out of business some time ago. I tried googling what I can read off of the label as I type this up, but I can no longer seem to find the link that gave me the name of the company. See if you can try to decipher it!!
Paint Job
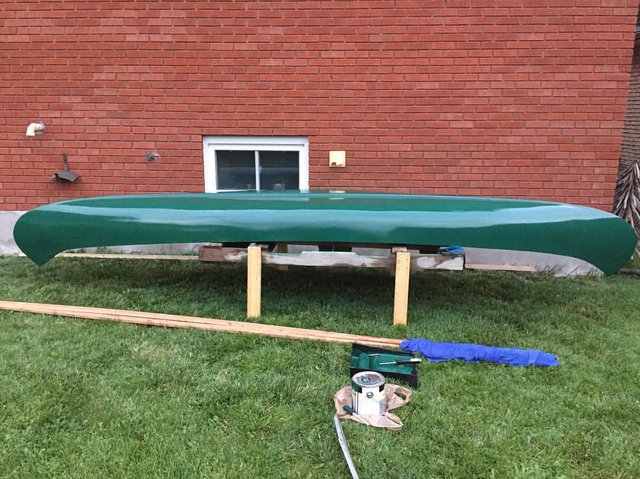
The first thing I had to do was strip the canoe of everything. The seats, gunwales, and thwart had to go. The next step was to remove the current paint job right down to the gelcoat. It took me a few hours split up into a few days to fully remove the paint. Once that was finished, I filled in any hairline cracks in the gelcoat with a marine sealant, let it cure, and sanded those spots down again. I had done an extensive amount of research about what type of paint I should use. Many sources stated that I should use a 2 part polyurethane paint, but it was expensive, and I was having trouble locating some. However, I also read a few people saying that if you were on a budget, you could use rust paint. I was skeptical about this concept at first, but since I was on a budget, I chose the rust paint. I was considering a different colour to paint the canoe, but somebody online brought up a great point. As soon as I go on my first canoe trip, there will be scratches on the bottom of the canoe. If I painted it red, overtime, the green gelcoat would be visible through the scratches, which would look kind of silly. So I stuck with a bucket of dark green rust paint to avoid this. I painted the canoe and let it dry for a couple of days, and repeated again. Below is a picture of the final paint job.
Note: I also painted the inside of the canoe a nice beige colour, although you cannot see in this photo.
Gunwales
I spent a lot of time online learning about gunwales, and how to make your own. I wanted to do my absolute best with these, but keep in mind that I didn't care as much if they were perfect. Really, I just needed them in place to provide a frame for the canoe, which I could attach seats, the yolk, and thwart too, which would altogether give the canoe structural stability. My gunwales are probably the cheapest option there is haha! As you can see in the photos at the bottom of this post, The outside of the gunwales are a nice roundness, which looks great in my opinion. What I did was I went to the local lumber yard, and purchased one single deck board that was 18ft in length, for about $10CAD. With a table saw, I cut strips 3/4 of an inch wide, and cut them to length after taking measurements from the canoe. The rounded parts of the gunwale are just the two outside strips cut from the deck board! I attempted to soak the ends by wrapping them in old towels and repouring water on them every couple of hours. I would need the wood to be more flexible to be able to bend it upwards at the bow and stern parts of the canoe. My method was terrible to be honest haha. One end was soaked somewhat well, but not so much on the other end.
When installing the gunwales, I started with the inside pieces, and I drilled deck screws (has a ceramic coating to avoid rust) into the middle of the gunwale(s), and through the top edge of the canoe. I should have stated that I drilled guide holes with a drill bit first! Once the middle was secured, I drilled screws in every 6-8 inches until I got to the ends. The ends were the hardest, and two of them I had to enlist the help of a friend to drill the screw in while I pulled and bent the wood up into shape. You'll see in the photos that they even look like I "broke" them upwards, however, although i bent the wood up, there were no cracks or damage that I could see. The metal caps on the ends of the canoe were actually nice because the clipped over top of the ends of the gunwales, so it looks as if the gunwales flow right to the very point of each end. I spray painted the metal caps a dark black or brown, which gave it that "new" look. This was the hardest part of the canoe. I easily broke 4 or so strips for gunwales. One of the ones I broke was the rounded outside part, and so I had to go and buy another deck board haha.
Seats
This part was the most fun for me! I simply took spare wood from the deck boards, and a couple strips of pine I had laying around. With 3 inch screws, I constructed the frame of the seat, using my best guess for the size of the seats. Once that was done, I went to a local shop to buy nylon strips. I wanted strips that were 2 inches wide, but they only had 1 inch width. Although I was worried, I was in a rush to finish, and figured it would be alright! I cut and stapled the nylon strips underneath the seat frame, wove the strips through, and stapled them on the other side. I then carefully placed the seats on top of the gunwales where I wanted them to sit, marked a line to trim, and them drilled them into the inner gunwales.
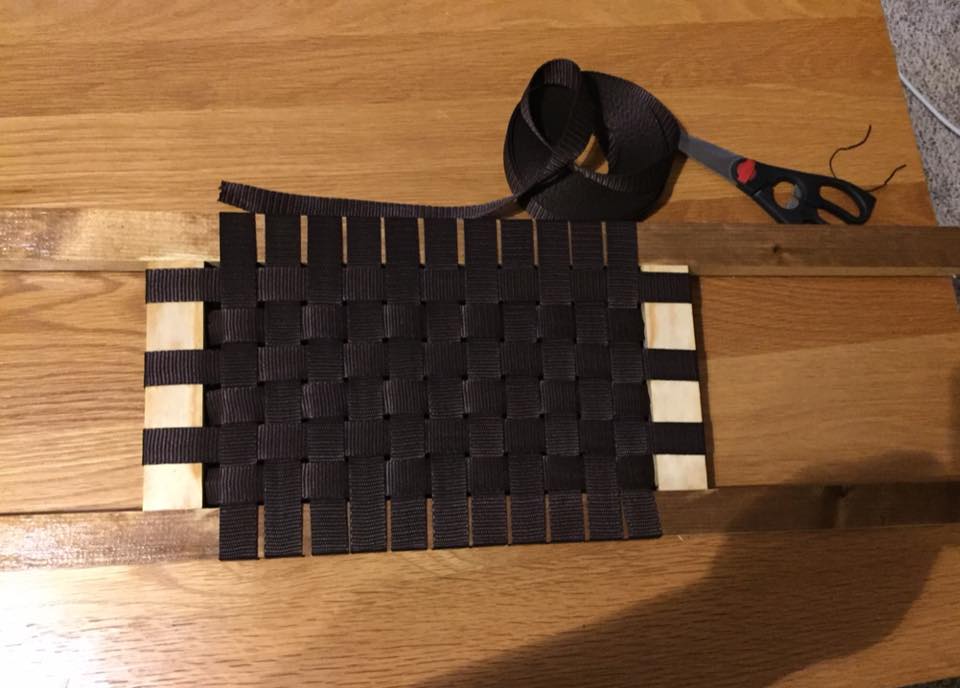
Yolk & Thwart
I don't have the tools or skills to make these, so I bought them pre-made from a camping/outdoors store called Sail. With time perhaps I could make my own! The pieces I bought were made from oak, and once I played around with the placement, I trimmed and drilled them into the gunwales.
Finished Product!
After a few weeks of painstaking labour, and a lot of mistakes and lessons learned, my baby was complete. My post "Travelling by Night in Algonquin" was about my most recent trip this past August, which was the first canoe trip that I was finally able to bring my own canoe (and save the rental fees!!). Thank you for taking the time to read, and I'll be more than happy to answer any questions!
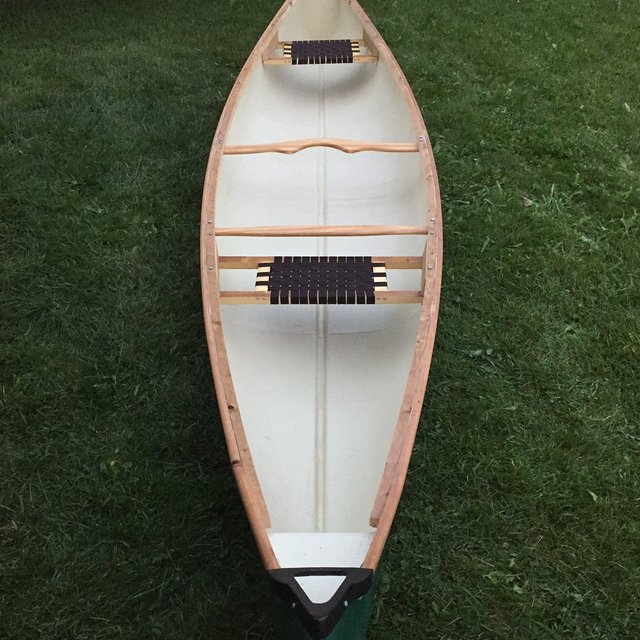
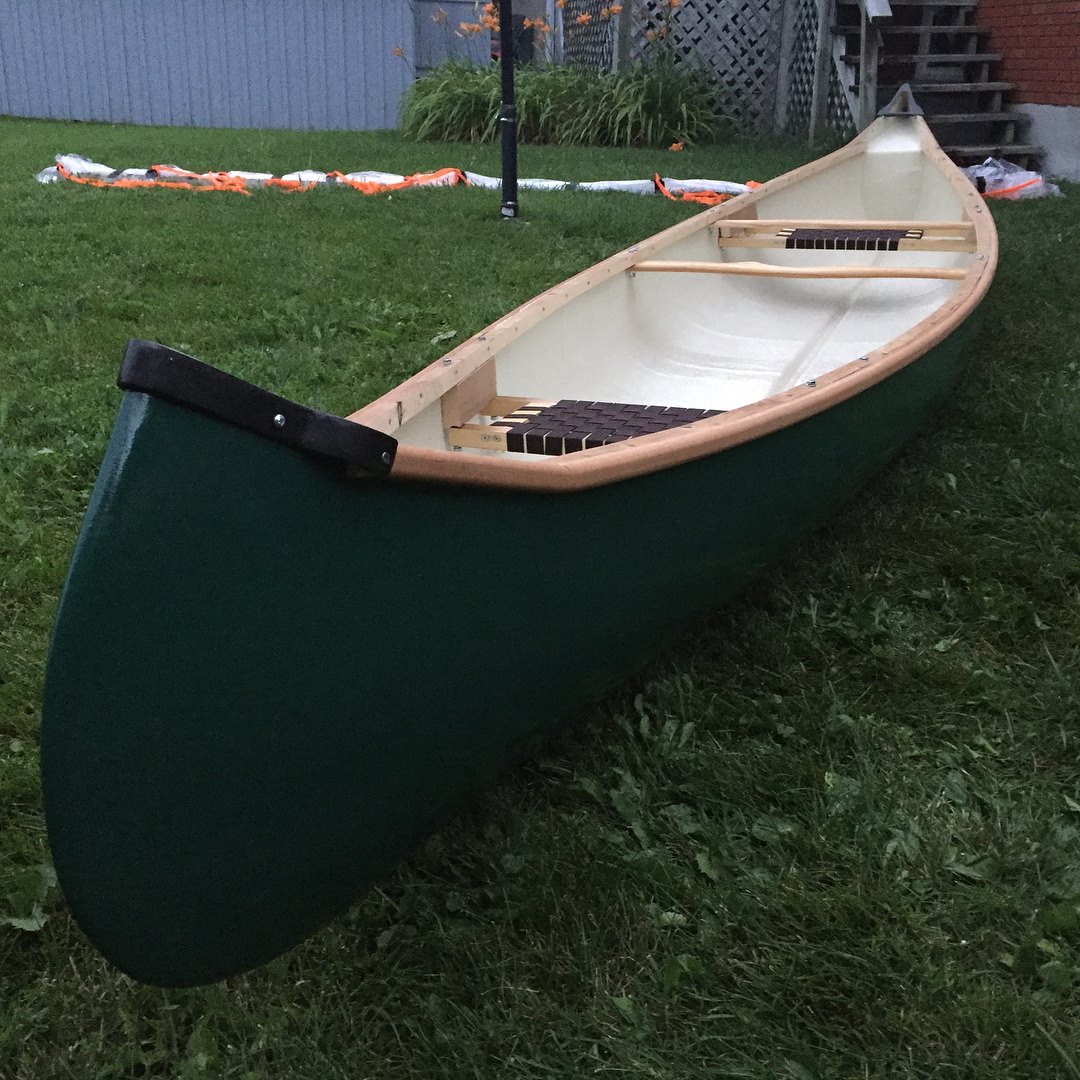
cool post! this is especially helpful to all those who want to get into the canoeing scene! great advice and tips my friend! thanks for taking us on a tour on the ways to refurbish a canoe. great work!
Thanks for taking the time to read :) I know I write a lot haha. Cheers!
it was a good read bro! my pleasure! :)
By the way, you have been scouted by @promo-mentors. We are always on the lookout for promising authors.
I would like to invite you to our discord group https://discord.gg/vDPAFqb.
When you are there send me a message if you get lost! (My Discord name is the same as the one here)
Sweet! Thanks man :) I appreciate the recognition. It’s nearly 2am for me and I have school tomorrow (I’m always on here later than I plan to be haha). So I’ll check it out tomorrow! Thanks again
My pleasure bro! 😀
What is your 4 digit tag, so I can add you as a friend :)
i already dropped you a DM bro! :)
What a difference!!! Amazing job! You brought that thing back from the dead! 🤣
haha thanks! Took a lot of work!!
Wow beautiful work! Whats the first trip you hope to take this beauty on? I live in Minnesota and have done a few back country canoe trips in Voyagers National Park and paddled the Amazon river for a month a couple years ago. Hoping to get my feet wet again this spring or summer :)
Awesome! I think you’re the first person I’ve met on here that also camps in the backcountry! Minnesota is one of the places in the states that I’d love to explore and camp one day! Oregon and Cali look cool too :) A lot of my posts are about my previous trips! If you scroll down my page to my 5th post called “Travelling by Night in Algonquin”, that is the first time I brought out my canoe :) it was this past summer!
This post has received a 0.80 % upvote from @booster thanks to: @thehappycamper.
Very nice job well done.
upvoted
Thank you :)
Crap...that is Amazing! Great work. I personally have never been canoeing, but I have goals to one day haha
It's very easy and rewarding :) I highly recommend it
Nice job . Next week ill be getting a canoe too . Someone decided years ago my canoe was better off in their hands so they took it without my consent. Yep they stole it . Ive been trying to replace it ever since but just never worked out. This time ill be trading some stuff for one . Great job btw , hope to see you on the water this summer .
Thank you! That sucks what happened to you.. It's my worst fear aha. Any idea what kind of canoe you are looking to get?
Im huge into bartering , so i am not super picky about what someone else has . As long as its around 15 feet . I just want to get back into a canoe that i own lol . having to rent then sucks . Ive found someone who wants to trade . Ive got an airbrush setup for a canoe. He is not close to me and I've just not been able to meet up with him yet . Fingers crossed i get it done soon
I must show your canoe post to my husband. He loves boats and this process of how you recreated this canoe, will catch his interest too.
Well done..a real labour of love.
Thank you very much :) I appreciate your genuine interest! I sent you a follow
What a beautiful canoe! We are currently thinking about buying one ourselves and seeing your post has given me a bit more spirit to look for a used one rather than buying a new one.
Also that label you couldn't read says, "Moise Cadorette Inc., Saint-Jean-Des-Piles, Quebec".
Thank you for sharing your experience!
Thanks for figuring out the label hahah! And it's not super hard, but also not super easy. You'll make mistakes, but you will learn from them. I'm sure you could do it :) Sent you a follow!
This look beautiful, if I may ask, what kind of materials you used to make the boat?
Most of them are detailed in the post itself :) But deckboard for the gunwales