Yamaha Virago Front Brakes Rebuild
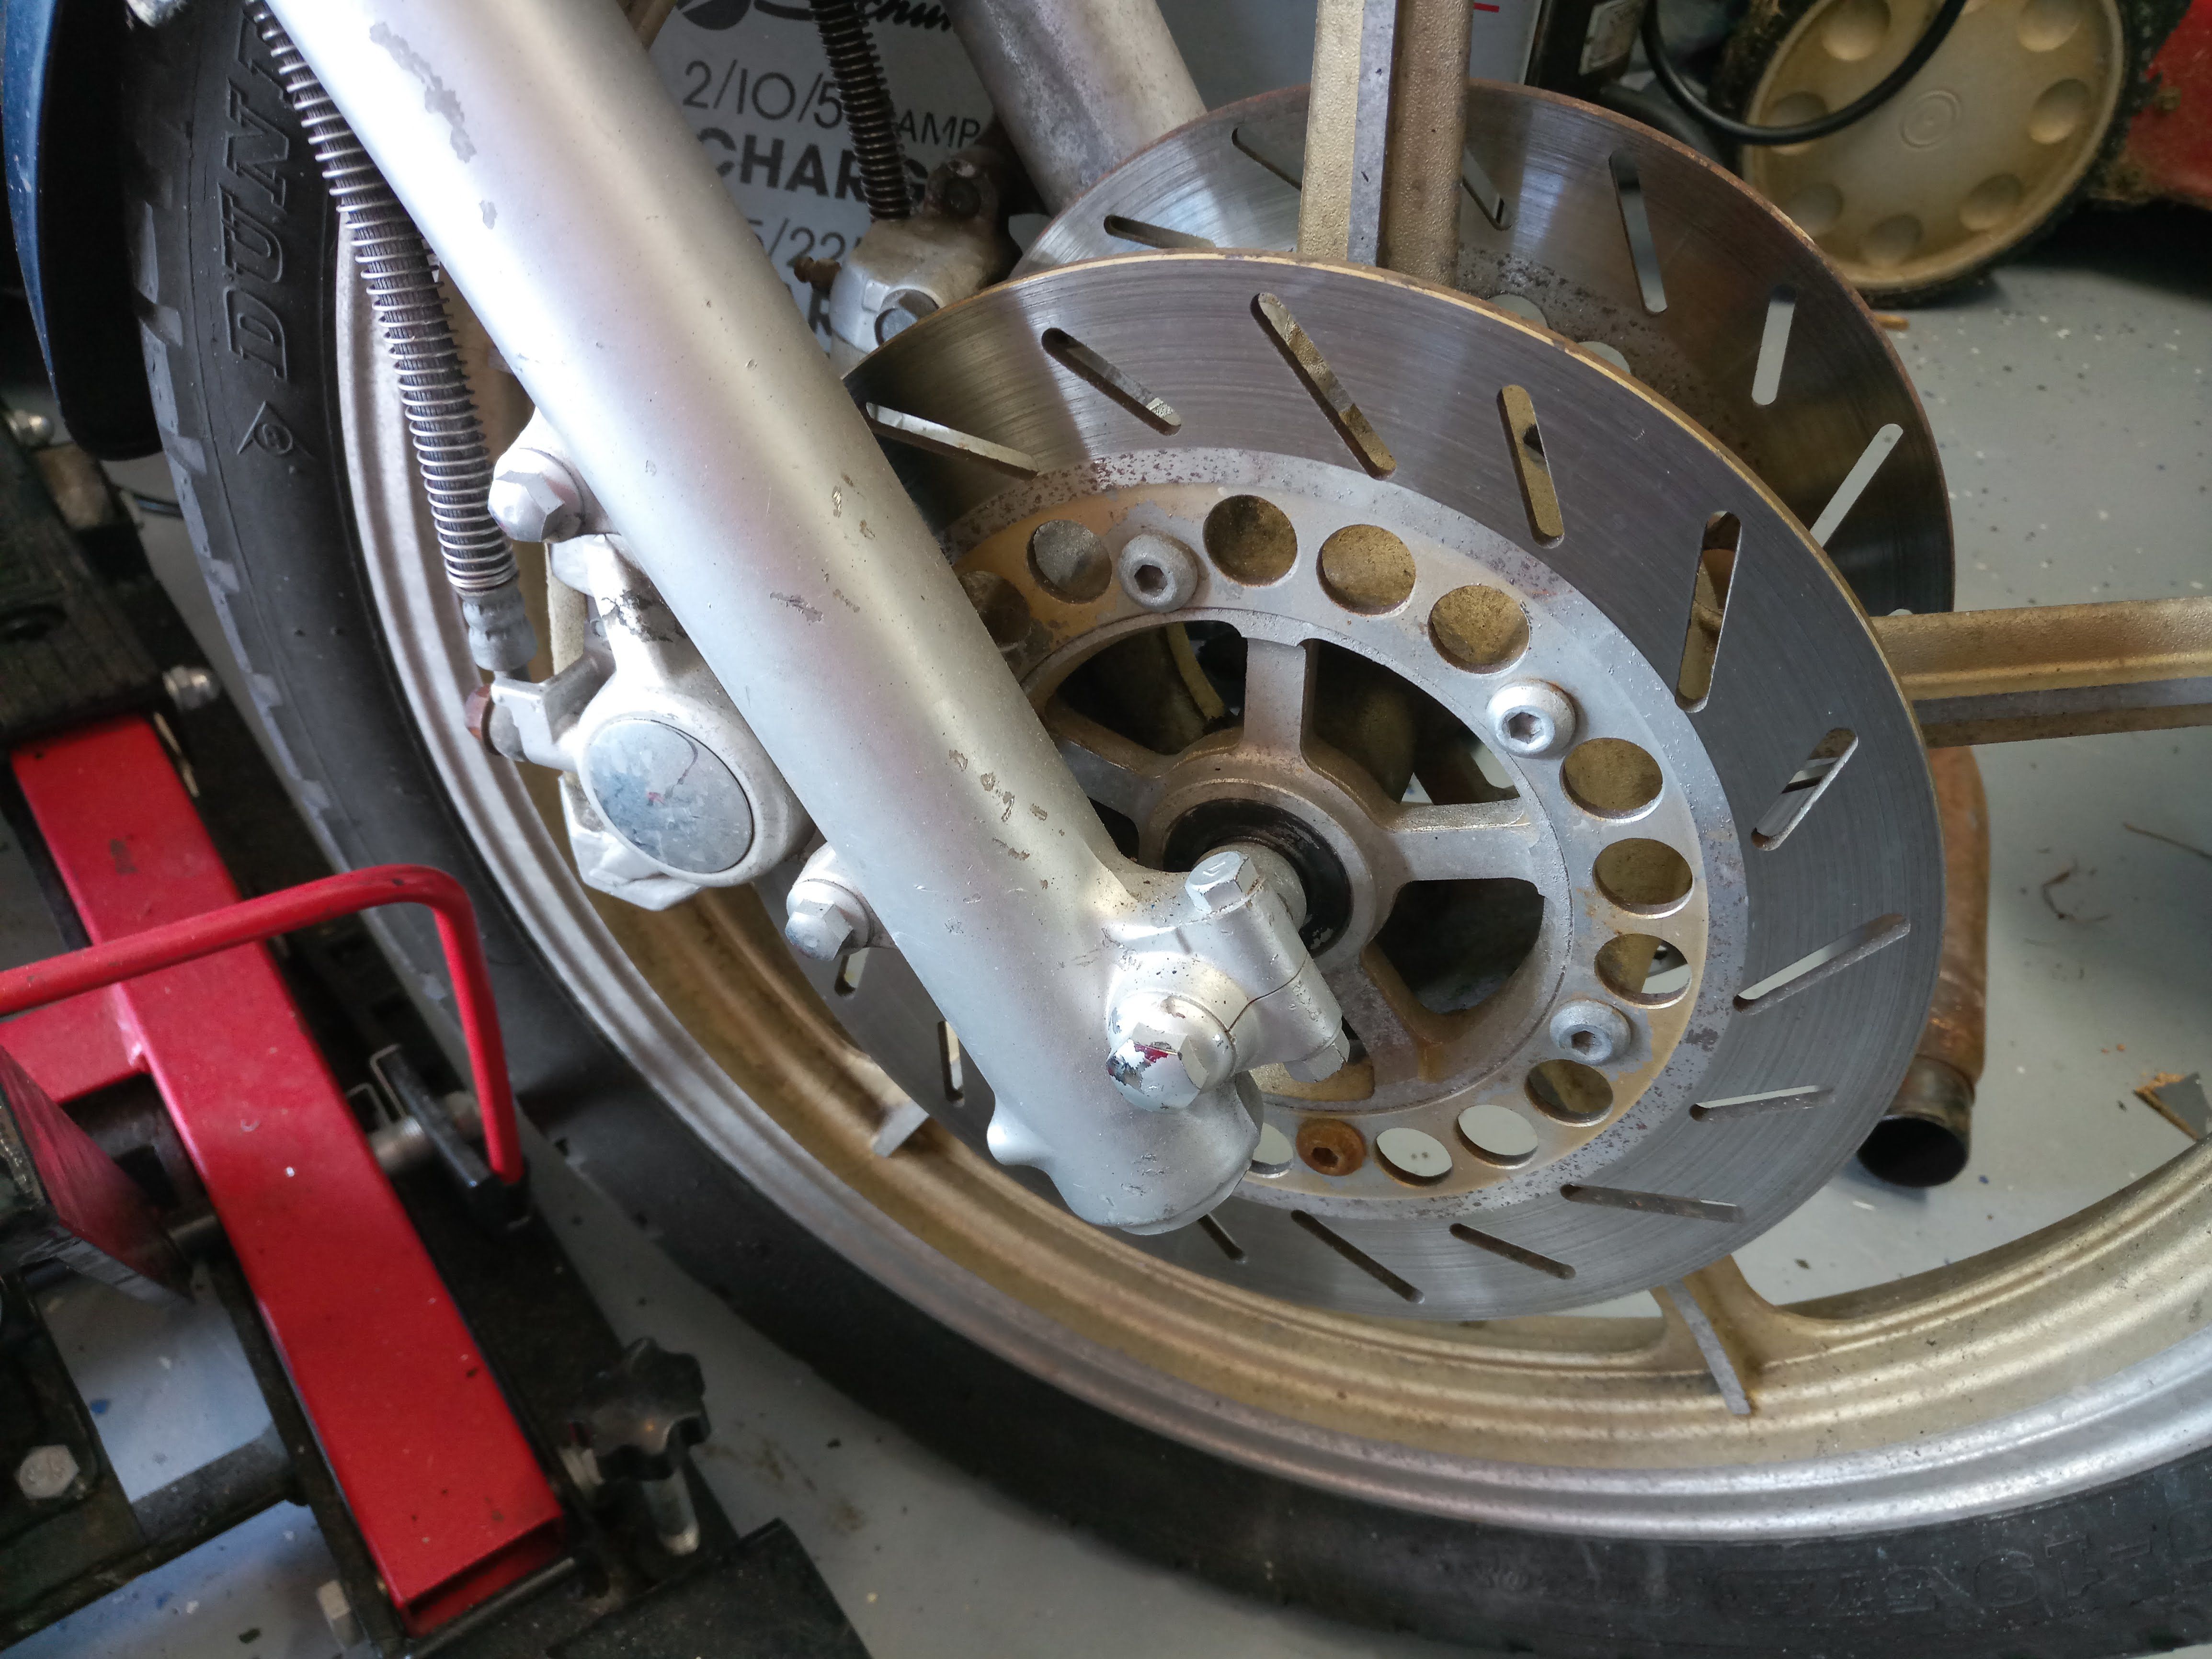
Where to start when starting on a rebuild? Ground up or front to back? We might as well start at the front with the front brakes and forks. The condition of the front brakes was pretty poor. It looks like they have not be operational in a long, long time. Maybe the previous owner was using the back brake only? Very scary! So, first thing is to document the configuration of the parts before taking them apart so it makes it easier on re-assembly. Sometimes when you take something apart you find out that you need to order another part for it. If it takes a while to get that part you can forget how it was before you took it apart. Anyway, pictures are great for this purpose. Here are the calipers and rotors before disassembly:
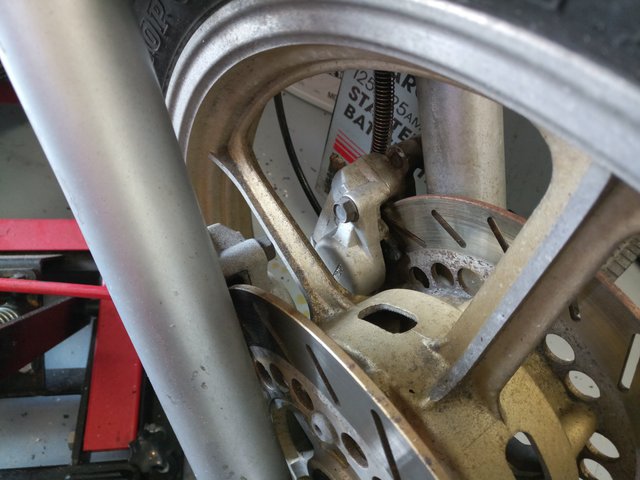
Another shot of the assembly:
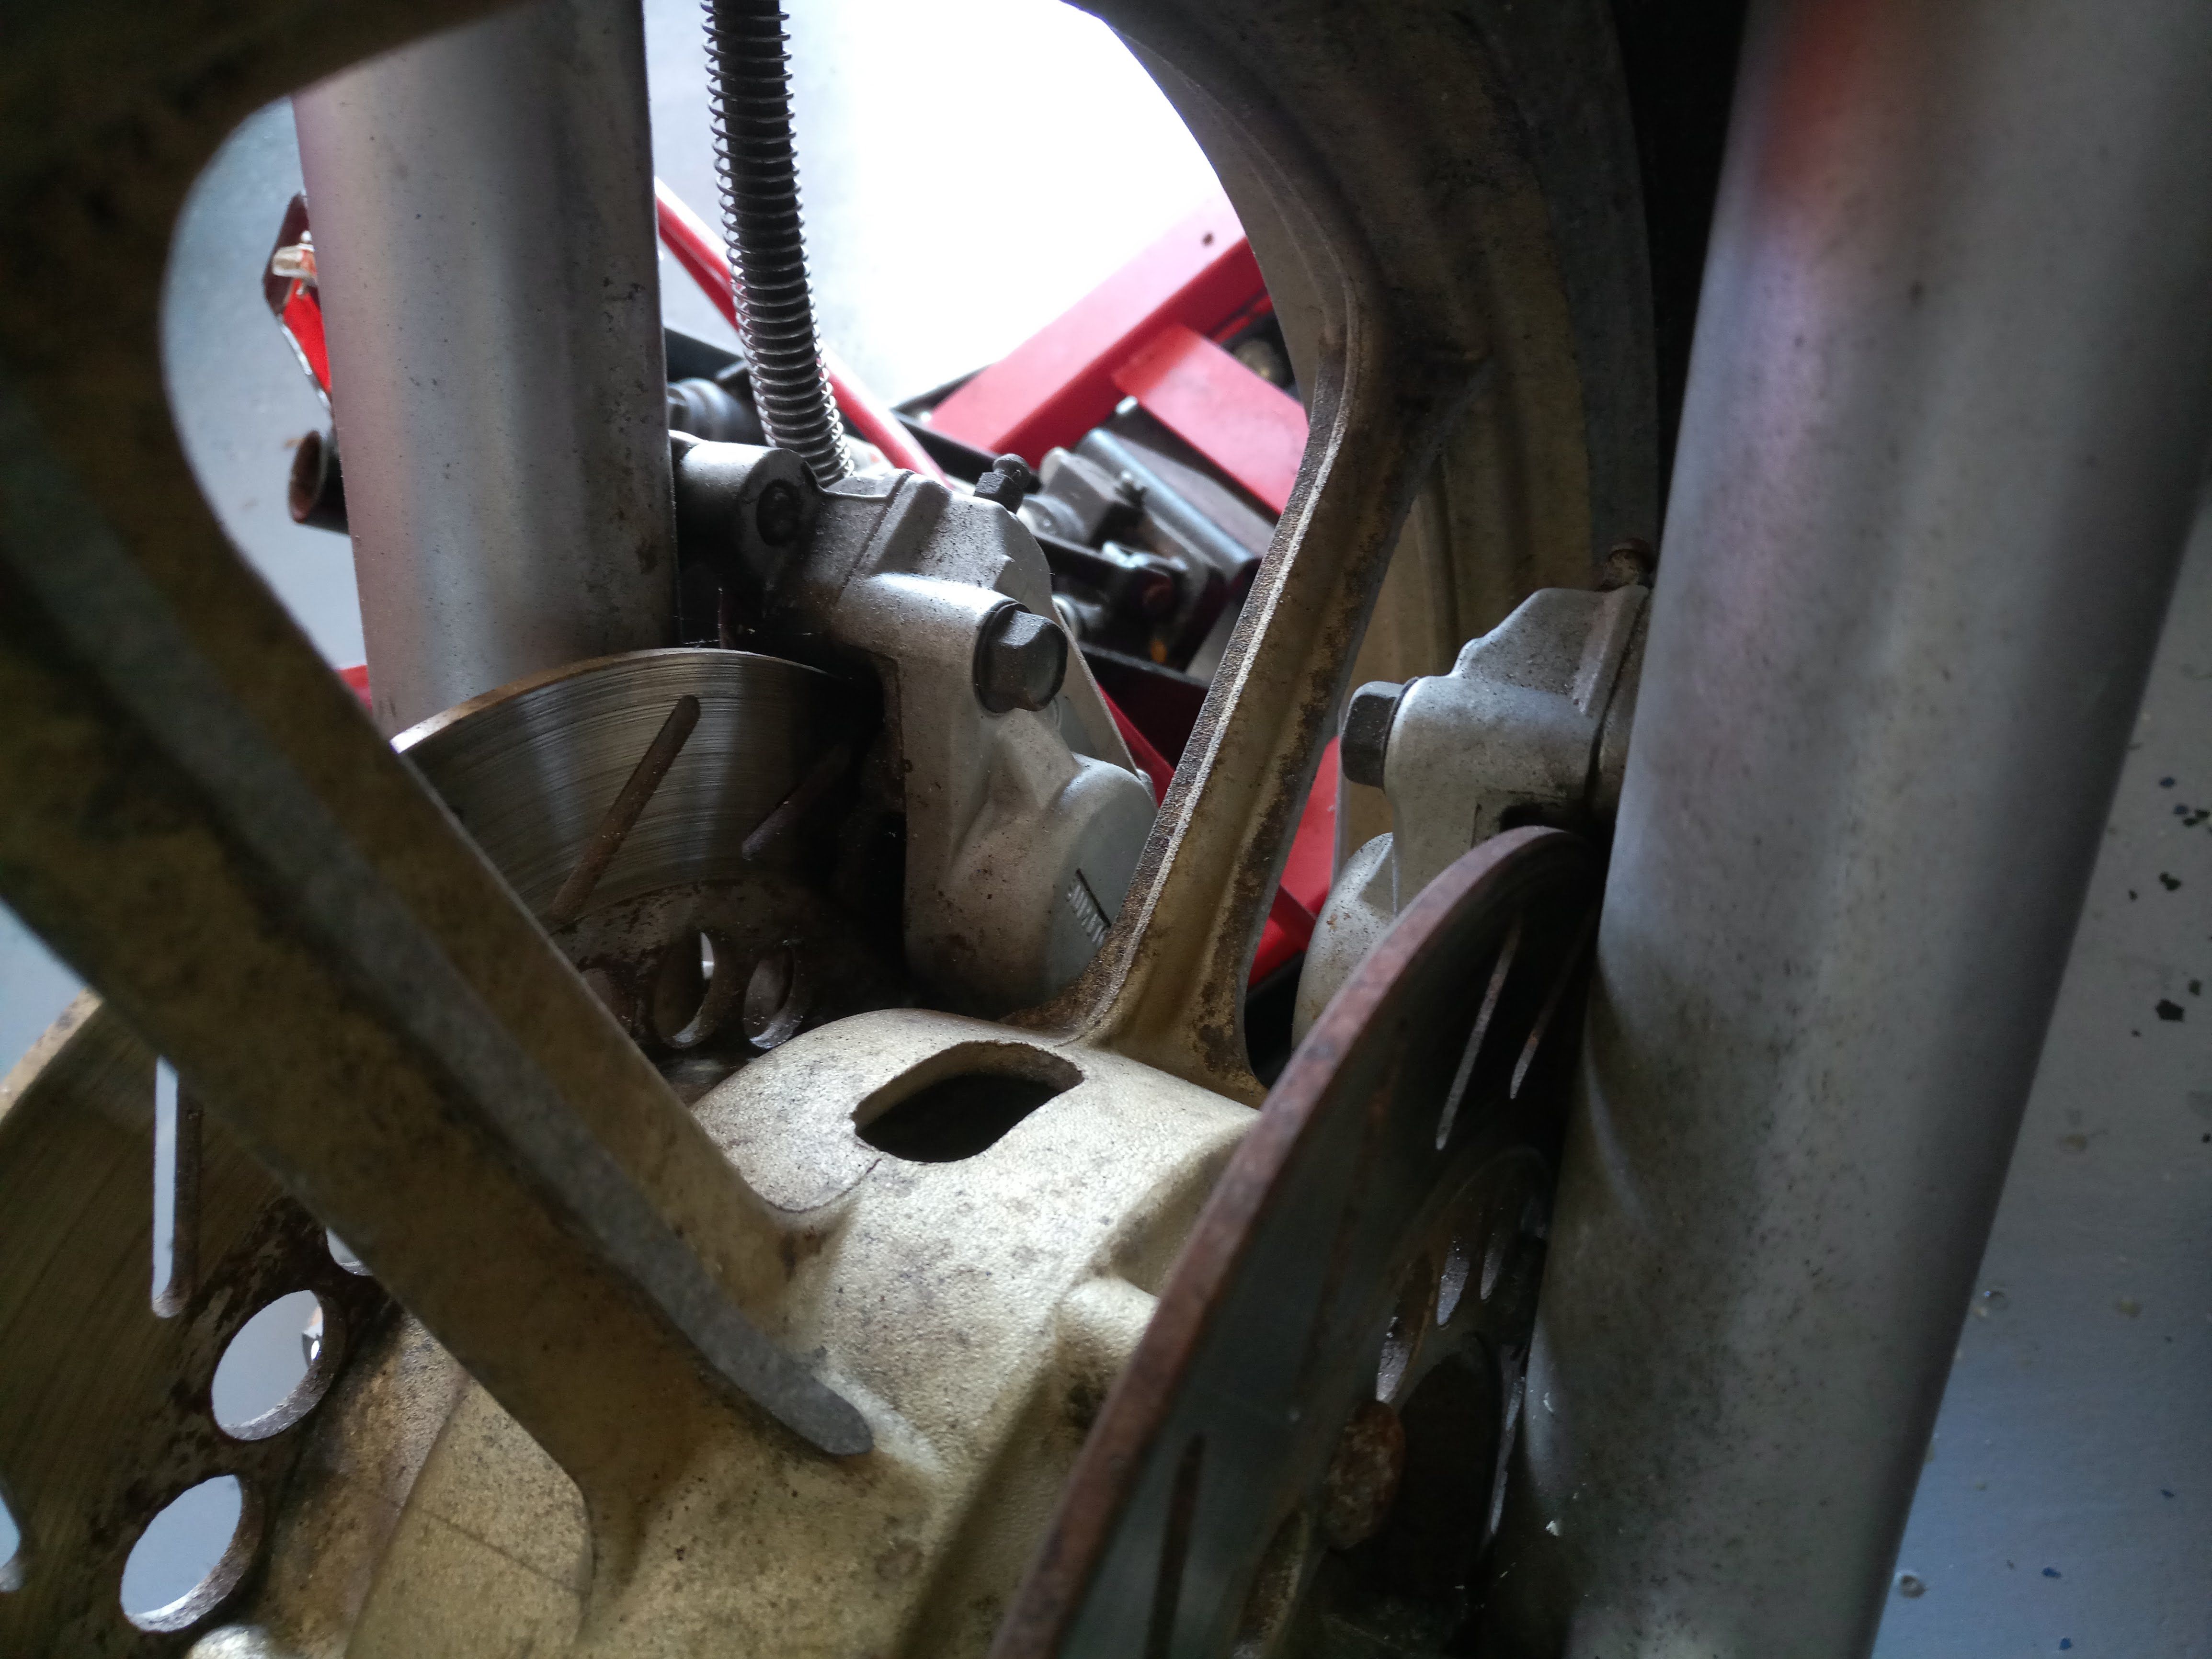
One more from the back side:
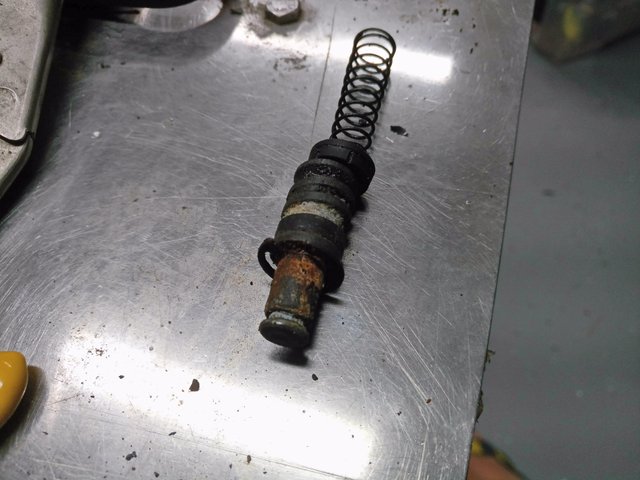
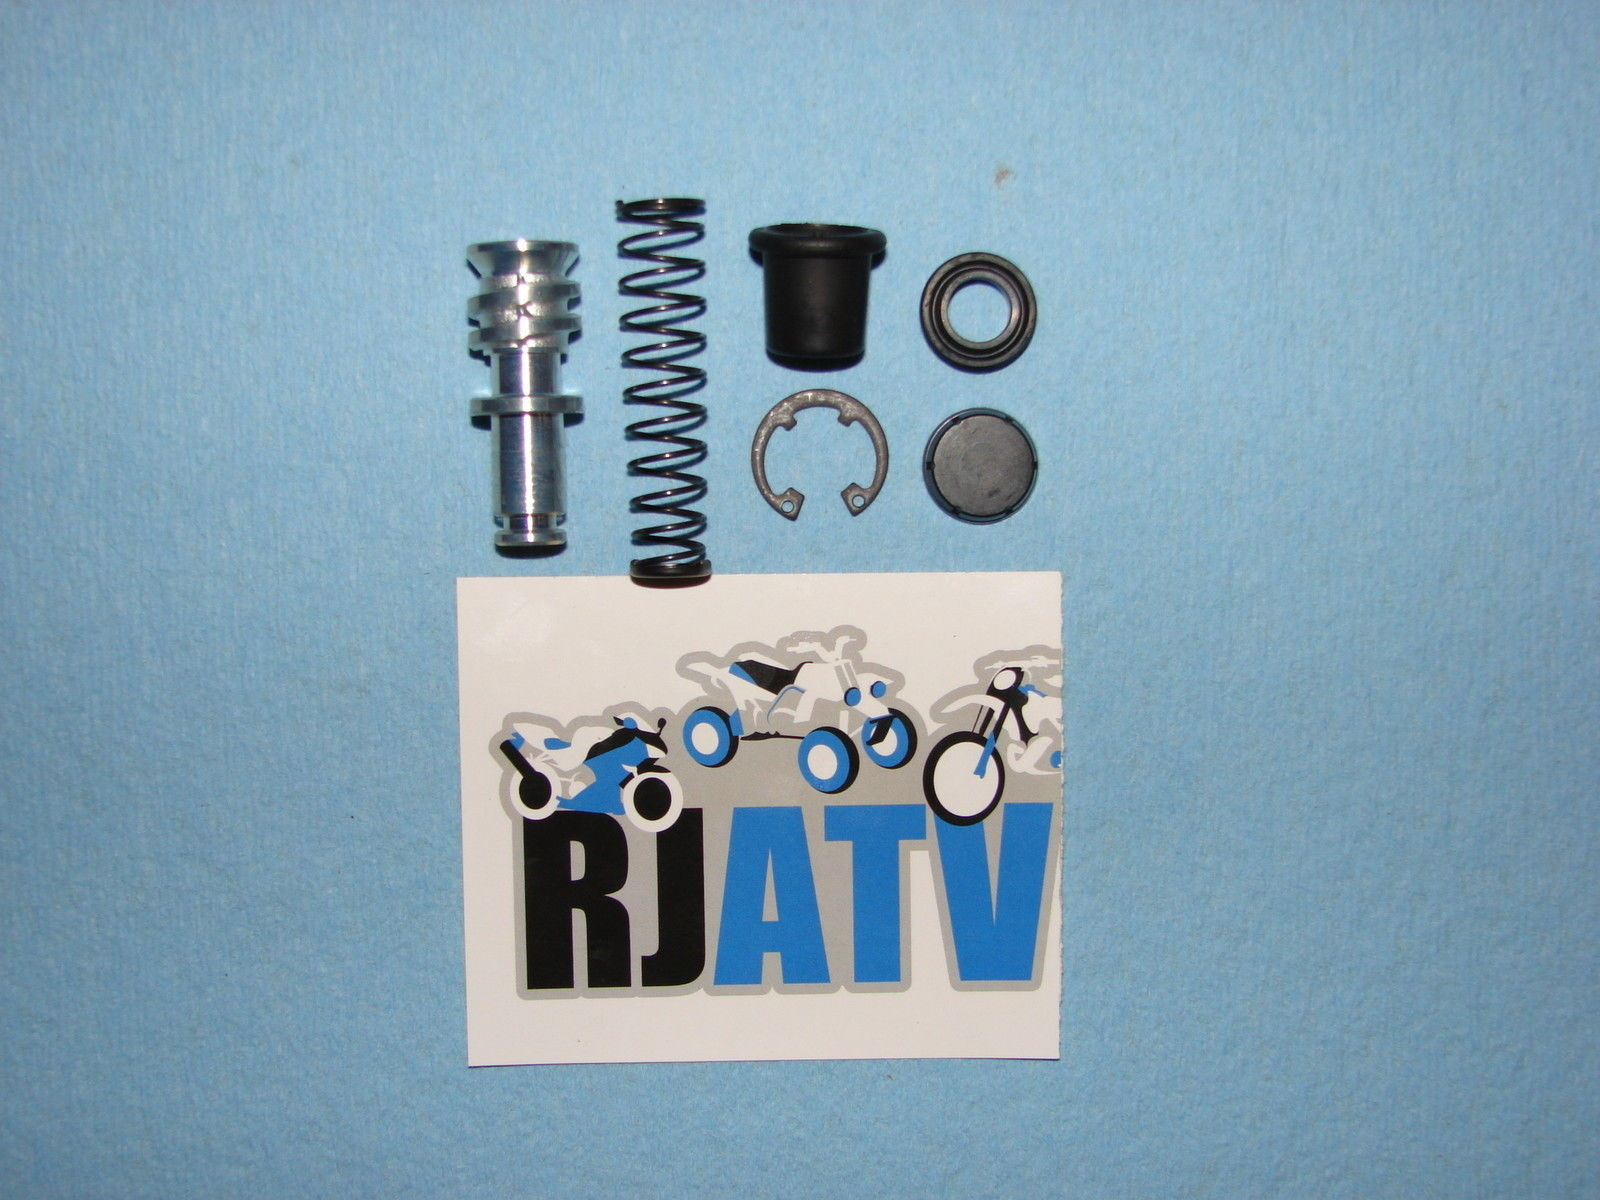
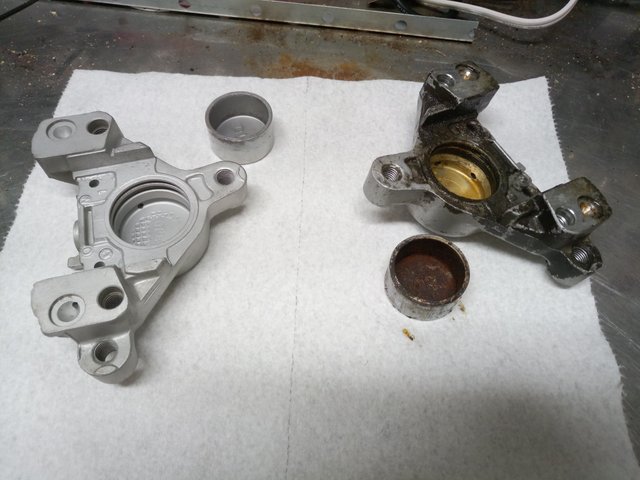
So I took the calipers apart and the cylinders were very difficult to remove. They had been stuck in there for a very long time. I tried using air pressure to force them out but they were full of gunk and I don't think the air was able to get the surface area it needed to drive them out. So I had to rebuild the master cylinder first in order to provide the pressure to drive the cylinders out. This is what I mean about taking pictures first, I did not plan on rebuilding the master cylinder just yet so I had to order parts for it and wait for them to arrive. Here are the internals of the master cylinder I took apart:
Pretty crusty right? So I ordered a new rebuild kit:
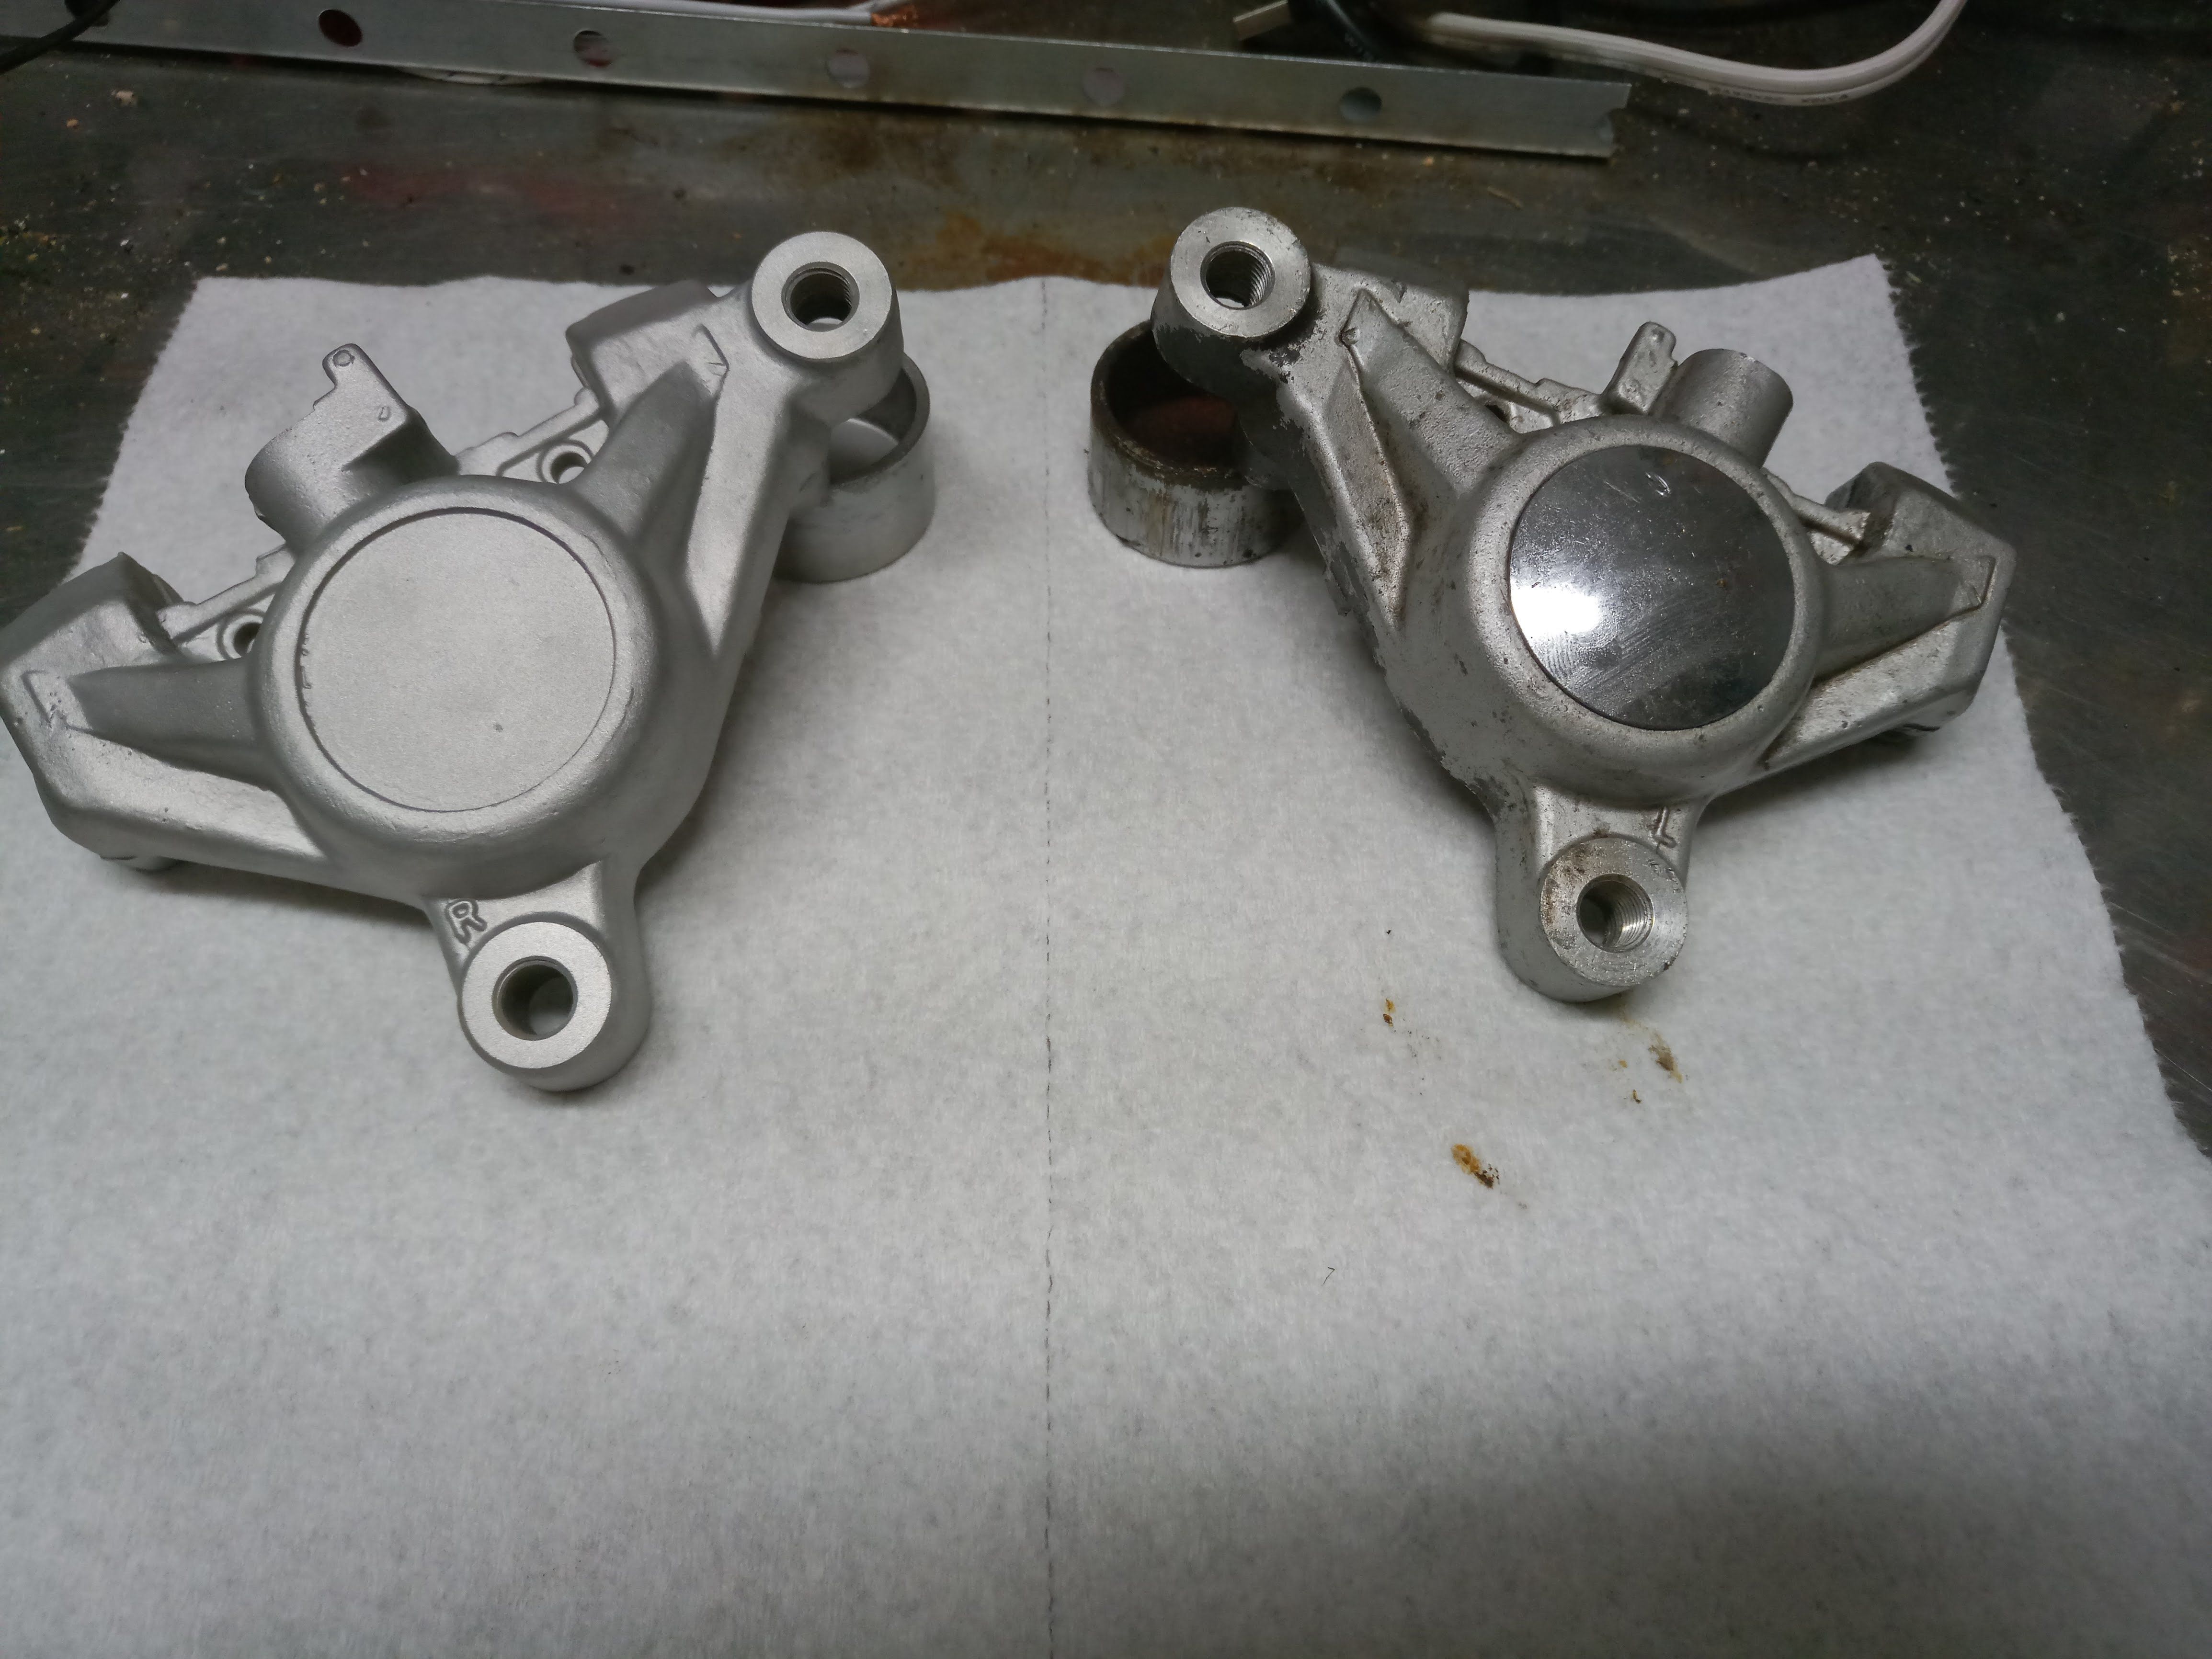
Built the master cylinder and drove the cylinders out of the calipers. Then I took the caliper halves into the blasting cabinet to completely clean them up. Check out the before and afters:
And:
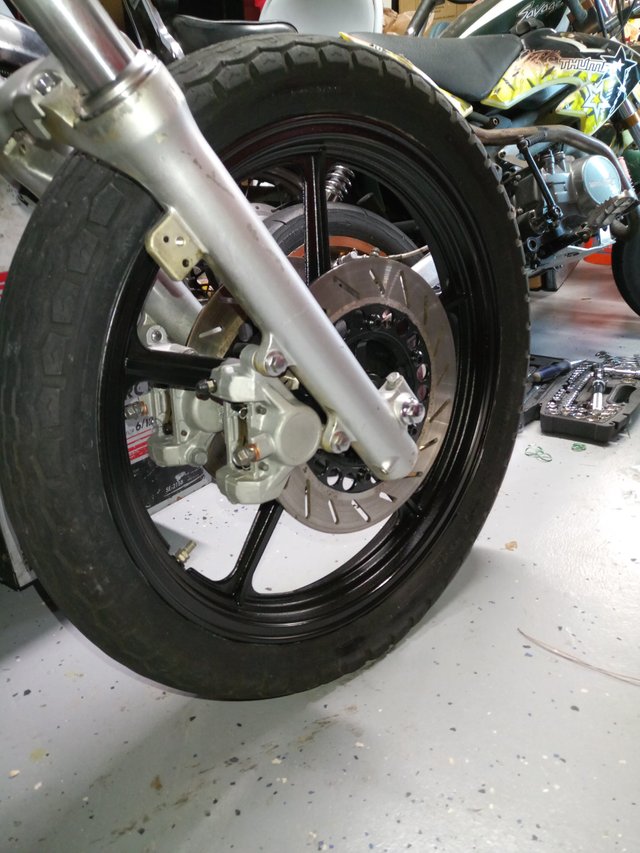
I installed all new seals and rebuilt both calipers then I painted them with a clear satin finish polyurethane spray to keep them from corroding. I cleaned up the wheel and painted it and cleaned up the forks and brackets. I also installed new brake lines. Here is what it looks like now:
So moving on from the front, I will work on the triple clamp and upper forks. Then I will remove the engine to begin that process. Wish me luck!
looks great cleaned up! I like to put bolts back where they came from, especially if I have to wait on ordered parts to rebuild. Another great way to help yourself out, so you know which bolt goes where and none grow legs..
Yes, that is a good strategy also. Another good one is these little 6 quart plastic bins with a lid they sell at Home Depot for $1 each:
I bought a bunch and then use one for each "system" I take apart.
Hey @consolidated, great post! I enjoyed your content. Keep up the good work! It's always nice to see good content here on Steemit! Cheers :)
Thanks for the comment! I'm glad you liked it. I'm not sure if you saw my other blog posts, I'm documenting the whole process of converting a 1986 Yamaha Virago into a Cafe Racer. Every couple of days, I add a new post showing the progress I've made.
front wheel looks so much better painted black. very good taste
There will be soooo much matte black paint used on this project!