The rigs of a small-time apartment miner: All good, none bad, but some ugly
I started mining in early 2017 and like many, quickly got hooked. I'm the type of person looking to DIY to save myself a few bucks here and there, so all my rigs are wildly different. I thought it'd be fun to share and perhaps give readers an idea on how to do it simply and how to work around some limitations in smaller homes!
I've got a mix of AMD and nVidia cards, all different types of motherboards, and went with Rosewill Quark PSUs due to the raw price/wattage ratio and platinum efficiency and so I could mix and match cords across my different PSUs to suit each rig.
RIG 1 - Good and ugly
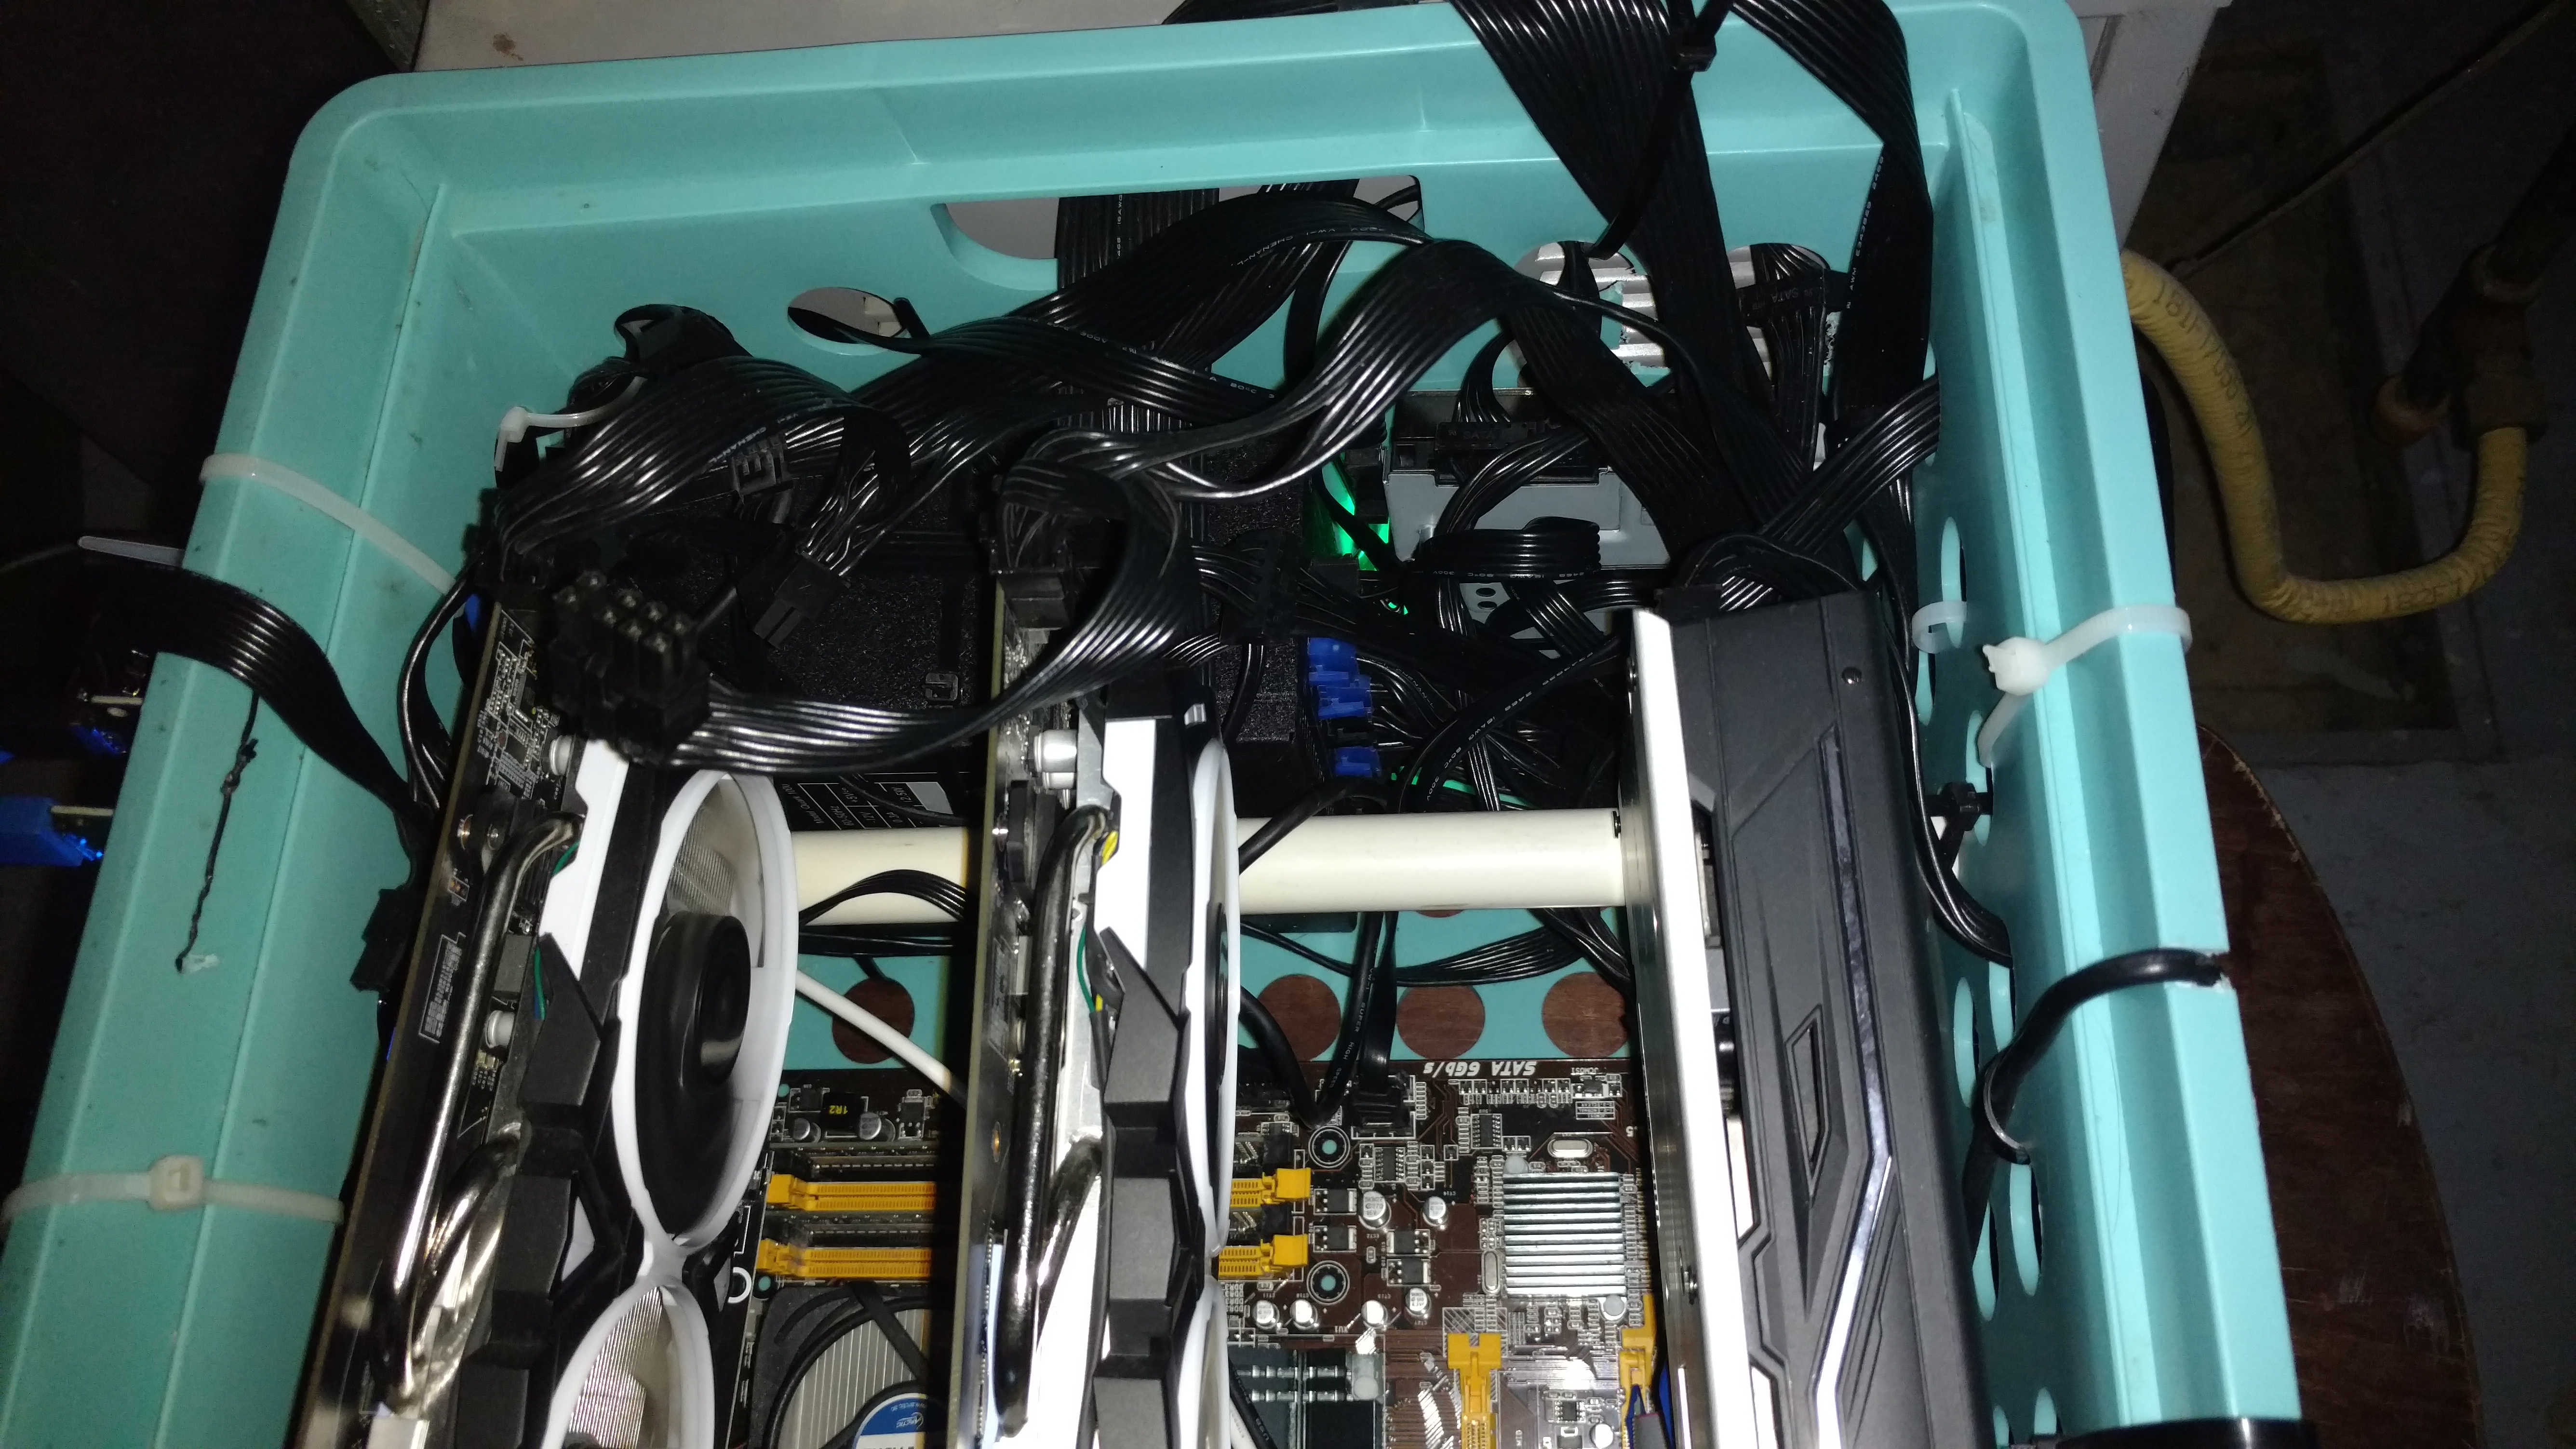
My first rig was a 'standard' milk crate build made with a crate from Target, a section of PVC, an absurd number of zip ties, and a cheapo $5 hacksaw. Contained within are three RX480s and a 1000W PSU (overkill, I know, but I was new). The motherboard was on super special from Newegg for $25 and could support 4 cards, and I threw in an $8 eBay-sourced Athlon II X2. I'm a pretty big fan of using older equipment because the savings are substantial.

Later on when I had a bit more experience I attempted to add a fourth card, but I did a dumb thing and somehow bent a pin inside a PCI-e slot. So, to work around that I got one of those PCI-e 1x expansion cards I picked up on eBay from Hong Kong and strapped a 570 to the side. This required a whole runaround with drivers, because RX 4xxs need older drivers to be recognized with modified BIOS's and RX 5xx need newer ones, but I'm not going to get into that for now. At one point I tried a fifth card, but it was a huge pain trying to get it to boot with 5 cards reliably so I just accepted my 4-card fate.
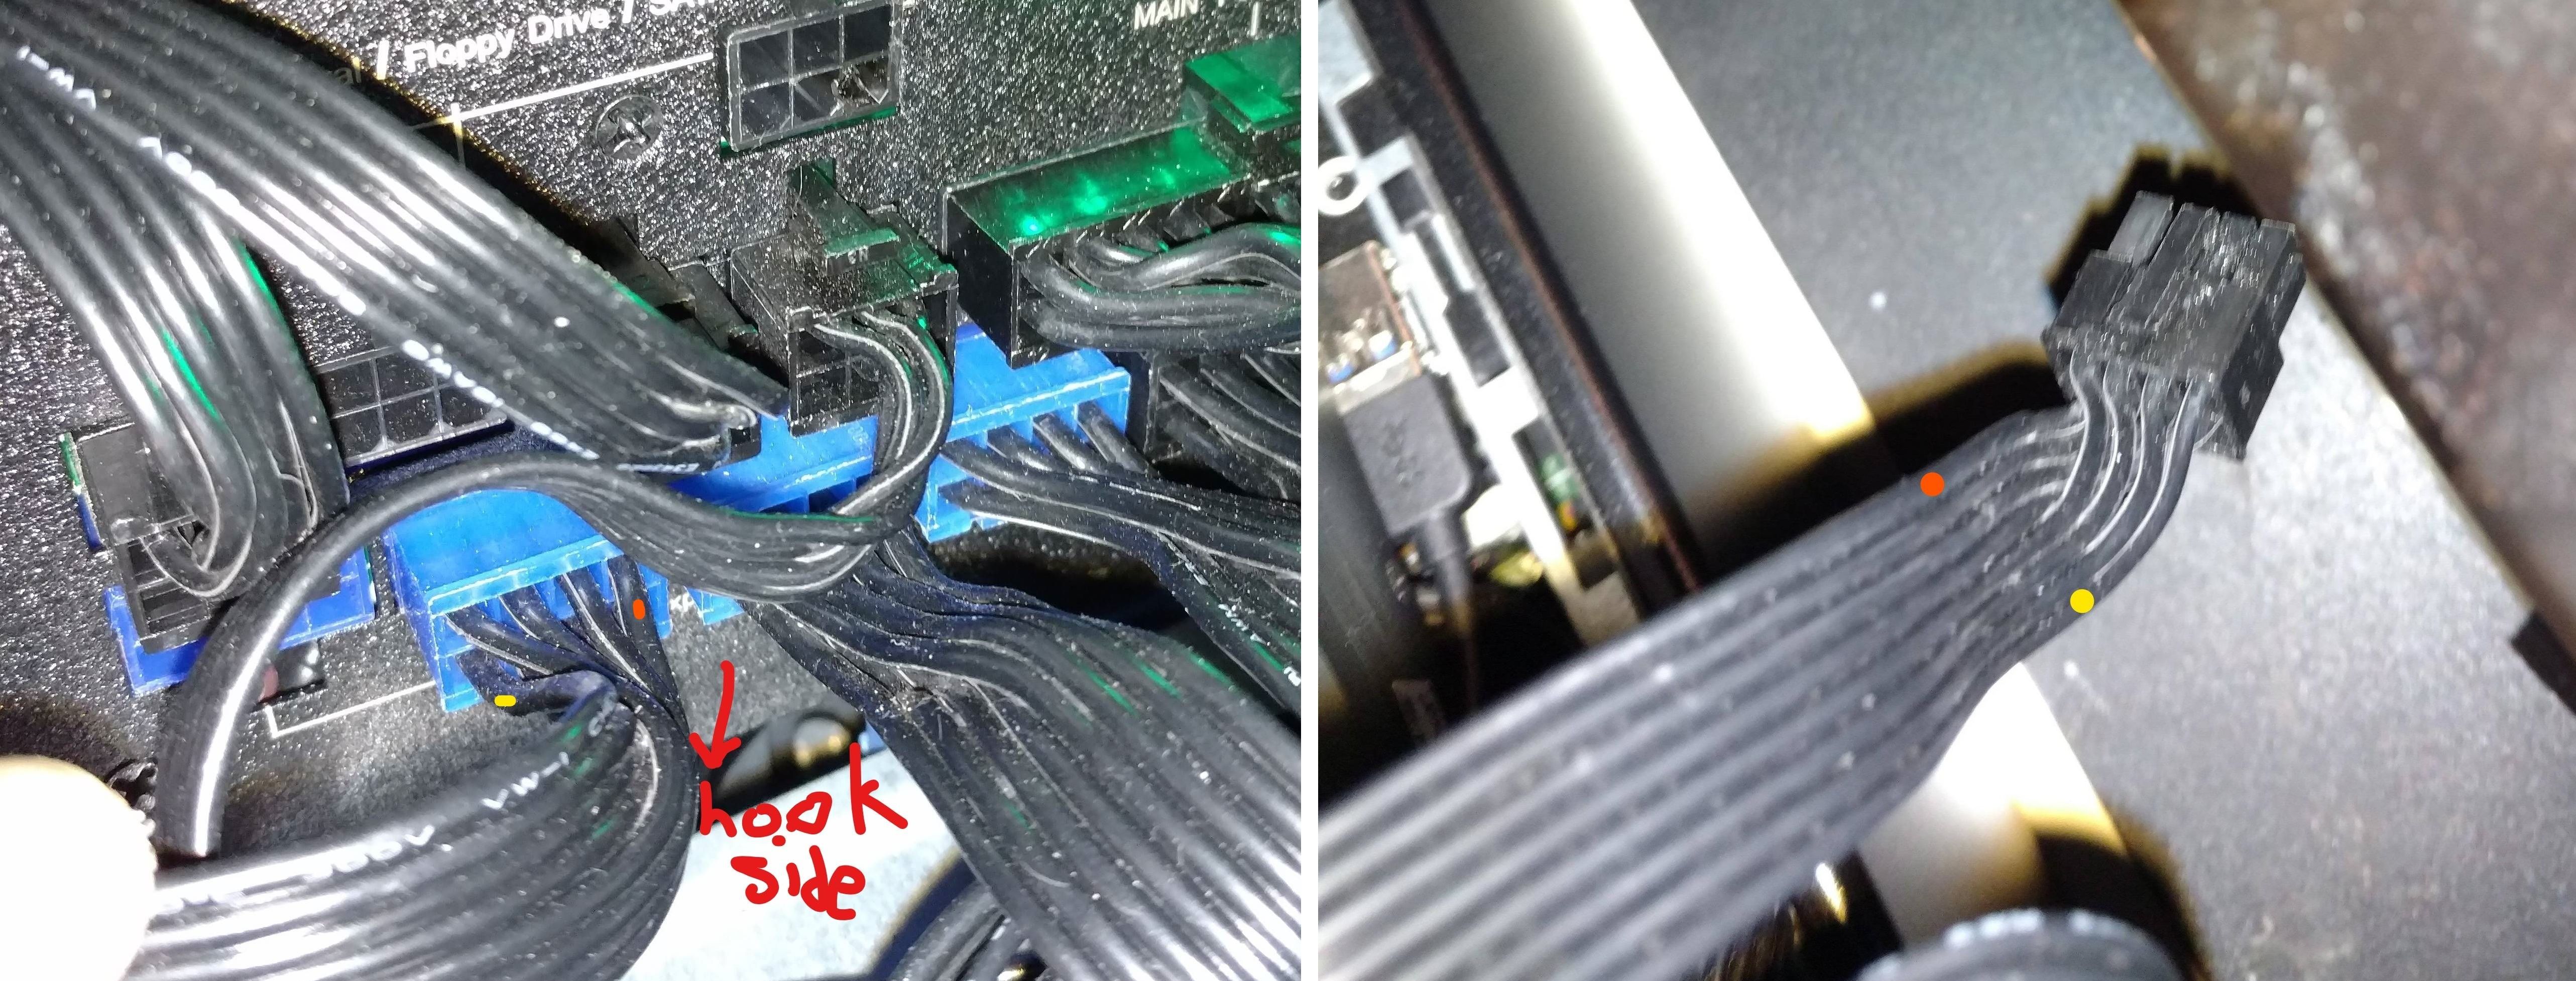
Probably the weirdest thing I did in this rig was use an 8 pin CPU connector to power one of the GPUs since I was short a cable. I do NOT recommend this unless you know what you're doing - basically, I had to quintuple check the pinouts on the PCI-e power cord and the 8 pin CPU cable to ensure that they're in the same positions (they are), and then I used a power drill to 'de-square' the plastic squares that prevented plugging the cables into the 'wrong' ports. After re-checking the pinouts with a multimeter, I plugged it into the PSU and the GPU, and it works great! I'd like to avoid doing that again, but it's an option for the brave. Here's an image I was using to help me map the pins:
So that's Rig 1, perhaps the most Frankenstein of all? This one is tucked away in the corner of the basement and shares a breaker with Rig 2, which is another small-ish rig.
RIG 2 - Good and uglier
This one was sort of a spur of the moment build. I was browsing Craigslist and saw a well-priced Dell workstation with 3 PCI-e slots that included an extra SSD, and I was in the market for one, so I figured I'd kill two birds with one stone. Plus, this thing had an i5 in it so I could speculatively CPU mine some smaller coins. So, I acquired three more RX 480s and a 650W PSU and sorta... smushed... them onto the case as a ghetto-rig.
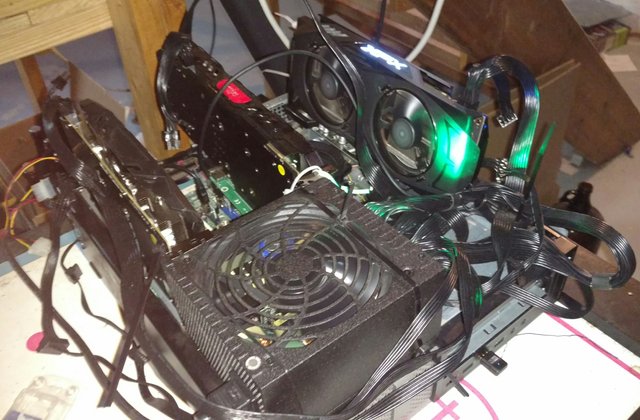
Basically, I took the HDD and moved it into the DVD drive slot to get it out of the way, strapped the PSU down with some zip ties, and found place where the cards/risers were secure. Two of the cards use the PSU case for support, and the other one is in a rock solid position using the closing latch for support. The setup of this rig was a bit annoying because it took me quite a while to realize that I had to set the primary display to one of the cards and then ONLY use that card for display going forward, but after that it's been cake.
Rig 2 isn't quite as slapped together as Rig 1, but I'm not sure which one wins the Frankenstein contest. Thoughts?
Rig 3 - Good and beautiful!
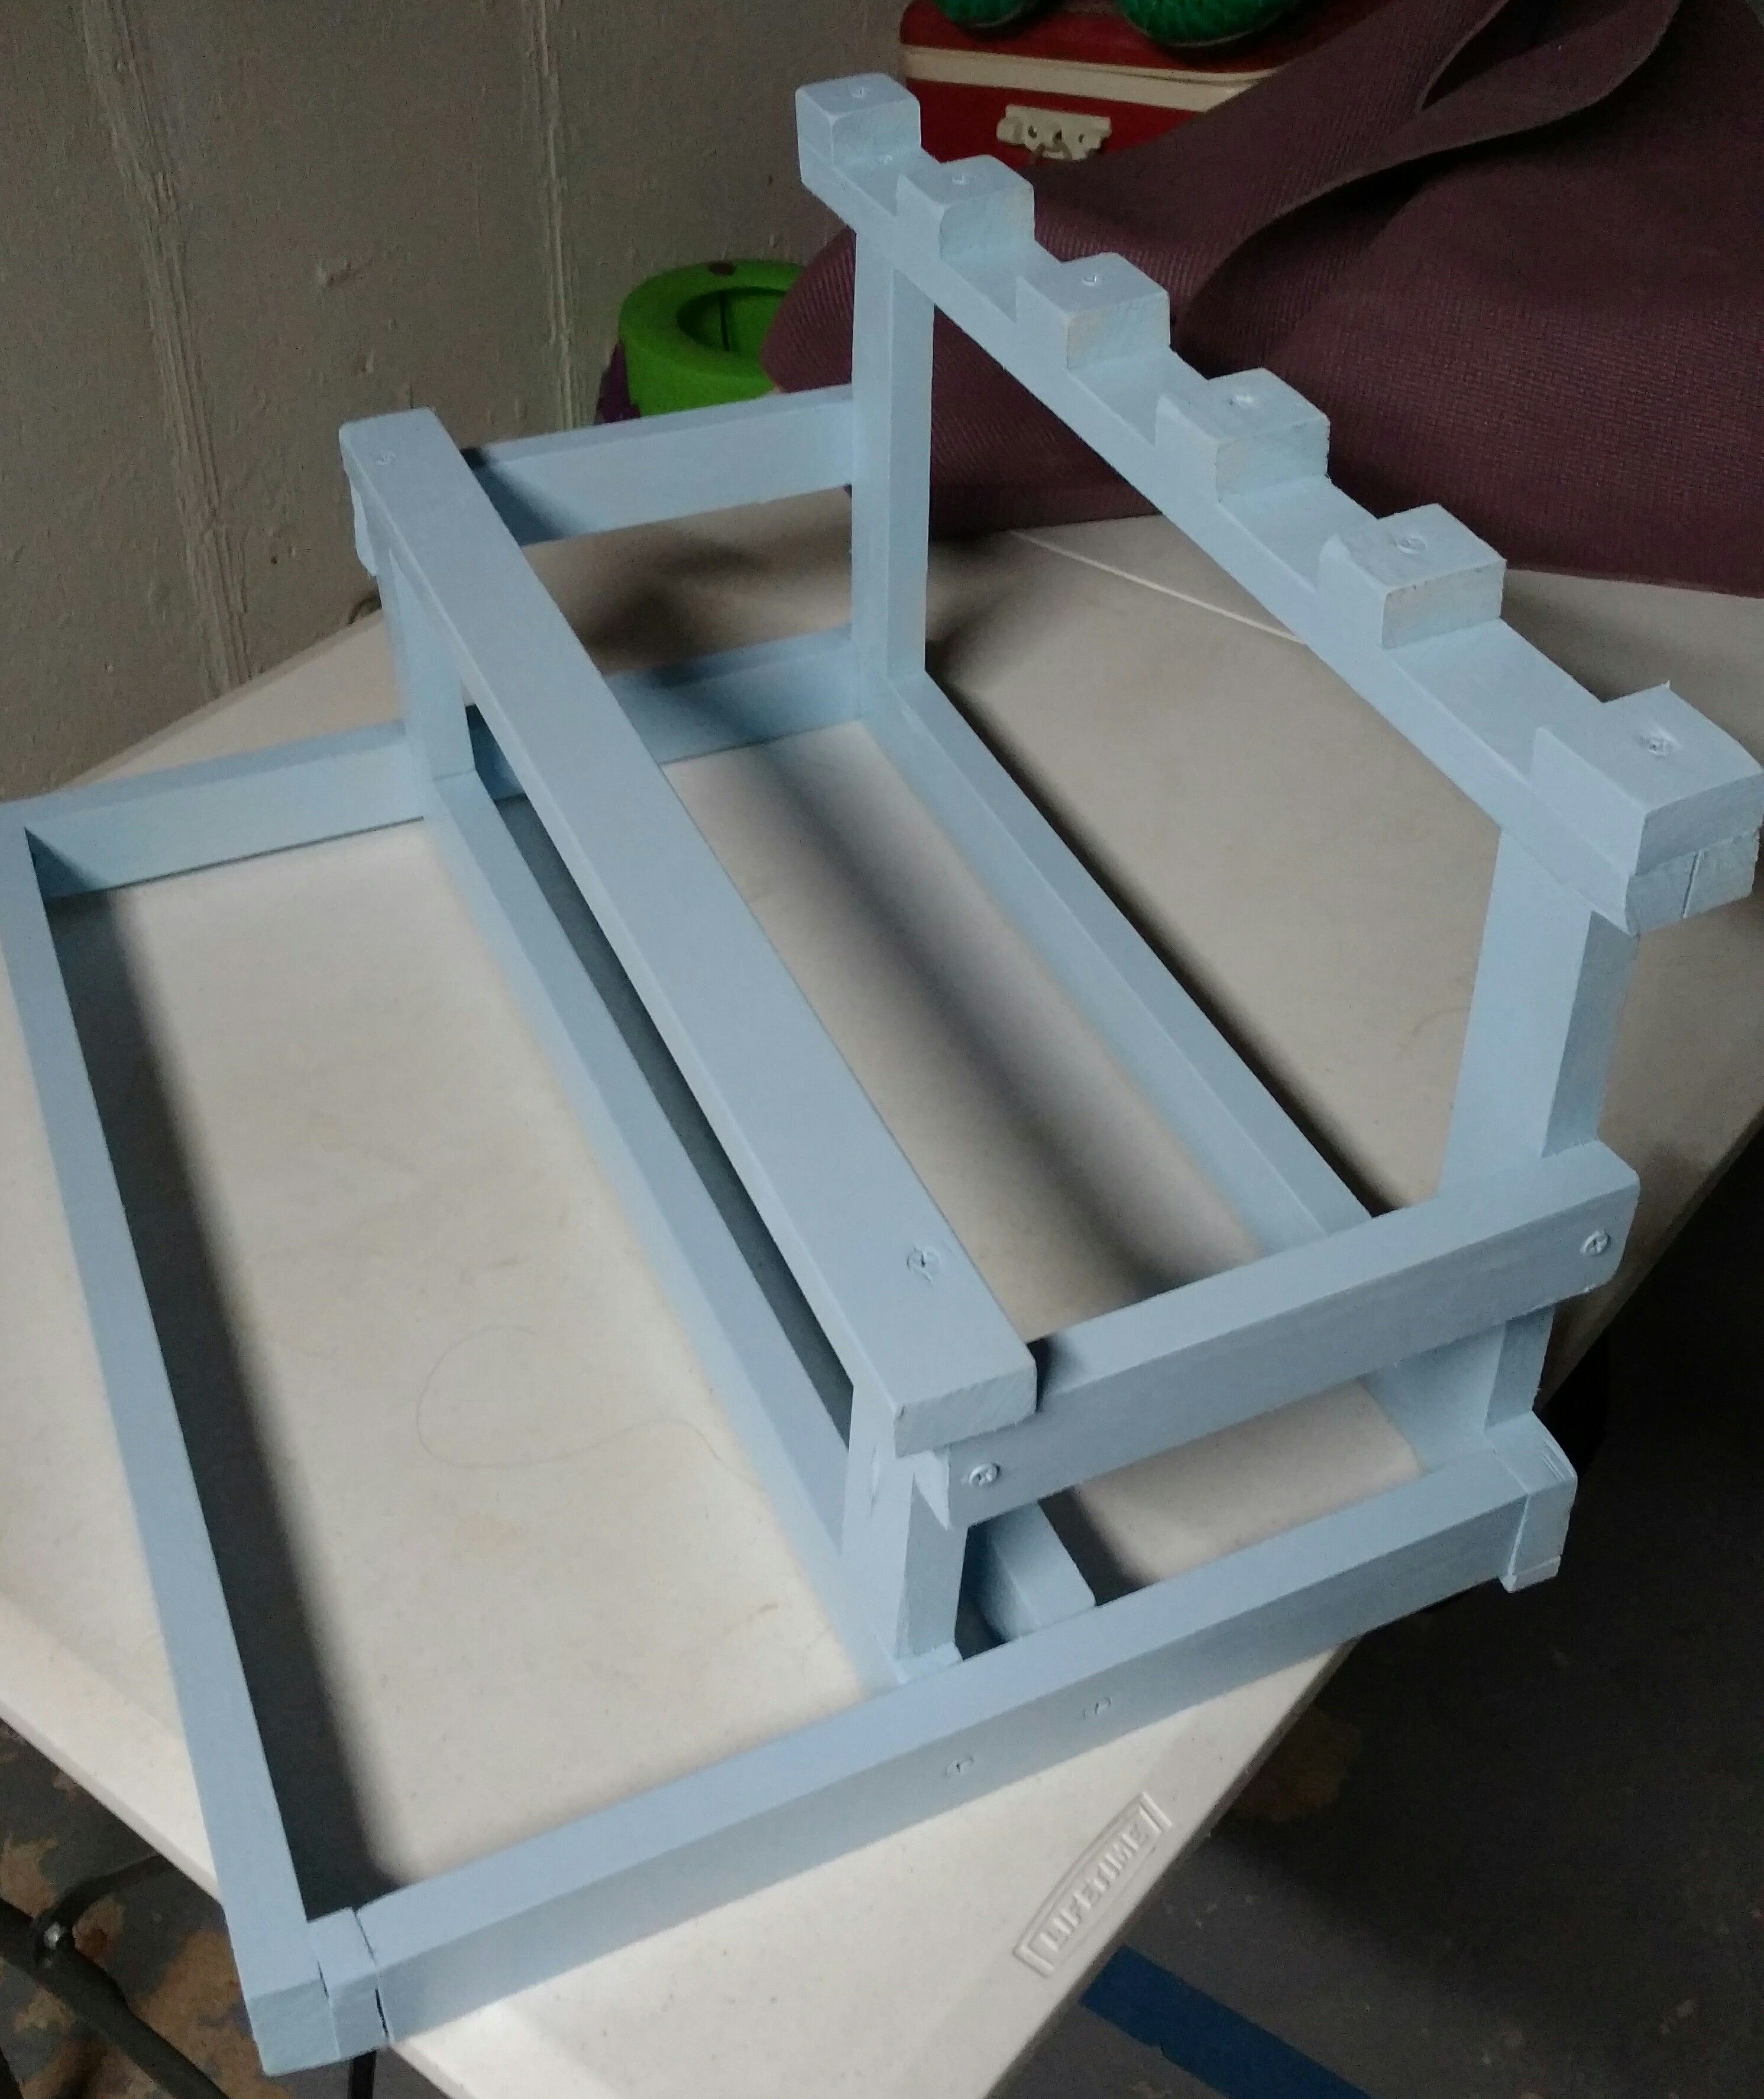
After those hideous previous builds, I needed to make something that looks decent. I went with the 'recommended' build approach for once. $10 of wood and screws (and some leftover paint from a custom keyboard build) got me this:
Then I picked up some 1070s, an H81 Pro BTC R2.0, and a pair of PSUs (850W and 650W), and slapped it into this:
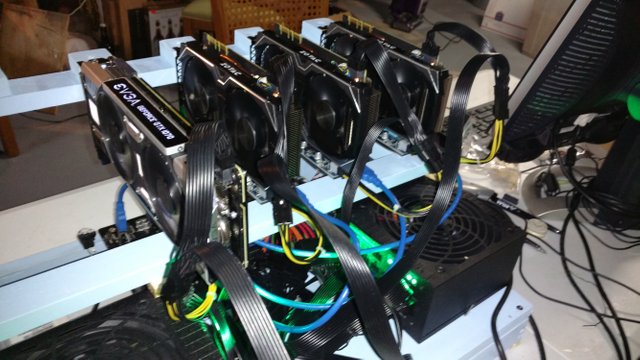
Two PSUs is actually pretty easy, I grabbed a 24 pin splitter thingy and just ensured that every component is only powered by ONE of the PSUs so current can't flow between the two. This motherboard was pretty easy to work with which was fantastic, there's a reason they're so sought after. I got an i3 off of r/hardwareswap for a pretty good price, so this one is CPU mining as well. A 30GB SSD was enough to run things, though it's a bit slow.
Oh yeah, I made a fun power switch for this one with a random Kailh keyboard switch and a Meowcap:
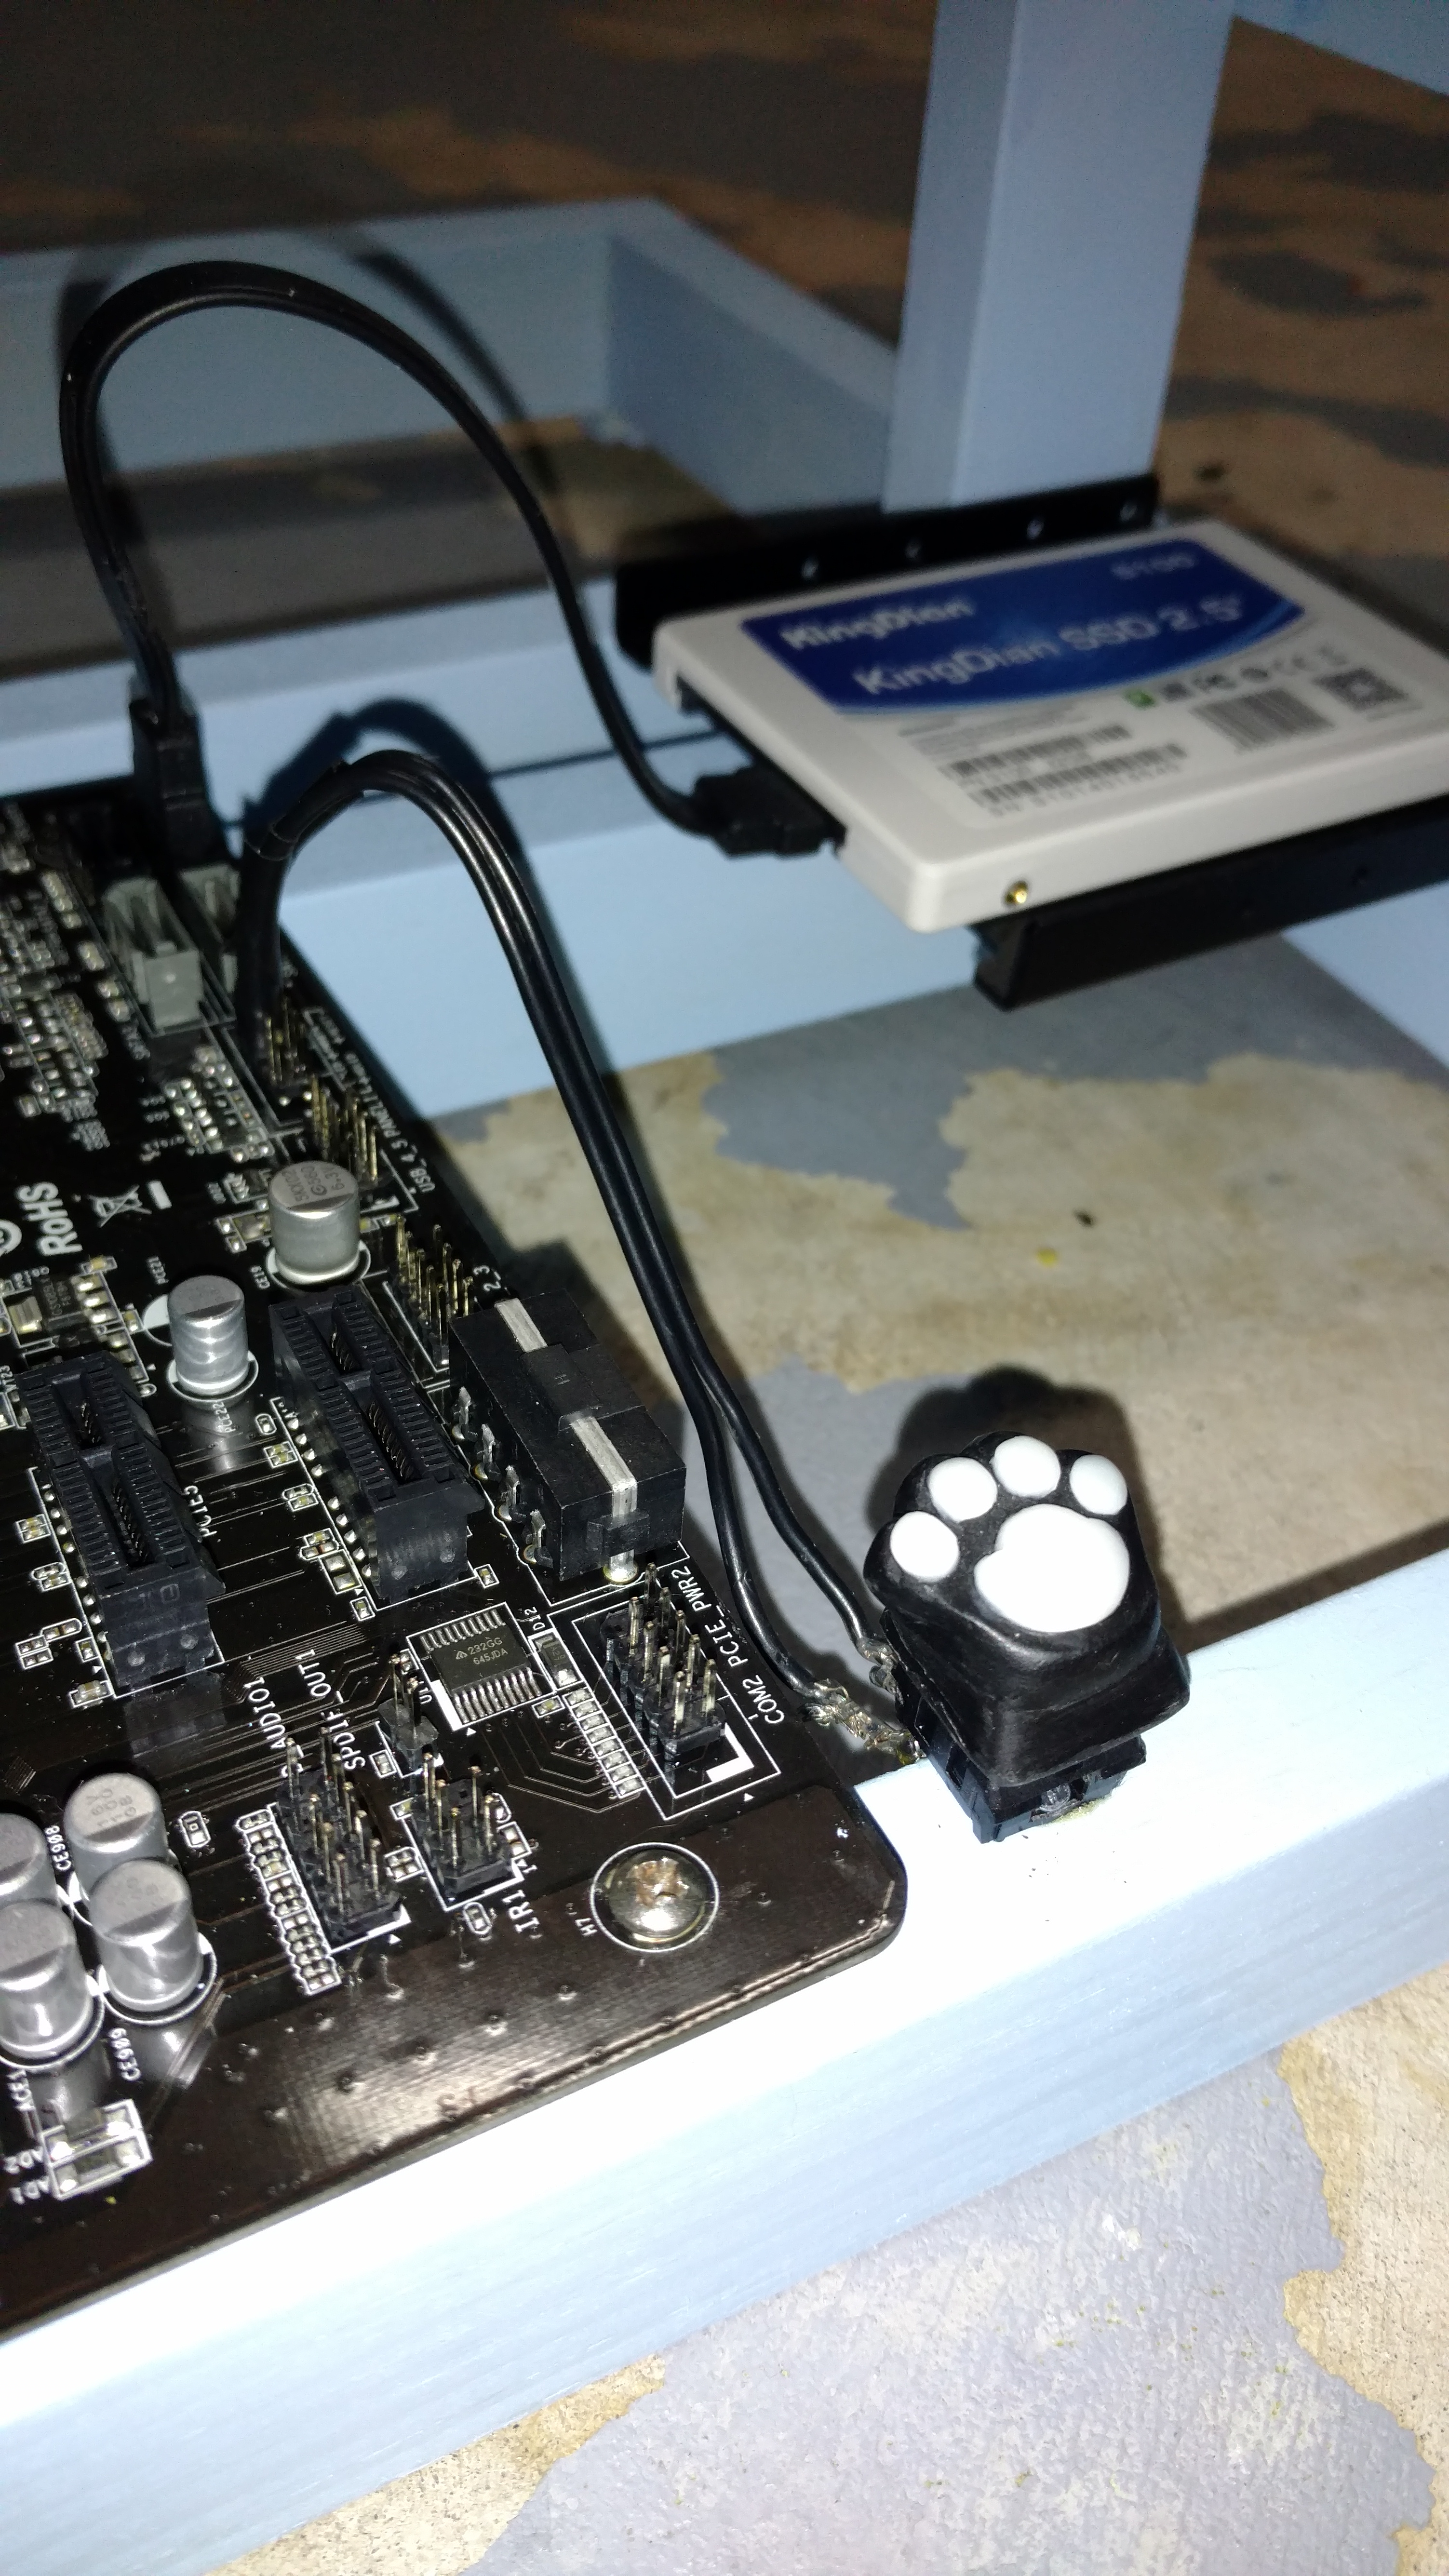
A couple more 1070s later, and this thing is kicking ass mining a ton of Zcash daily. The Zotac 1070 minis run a little hot, so I used a box fan in an unusual position (which oddly provided the most cooling as compared to all other orientations):

Glamour shot:
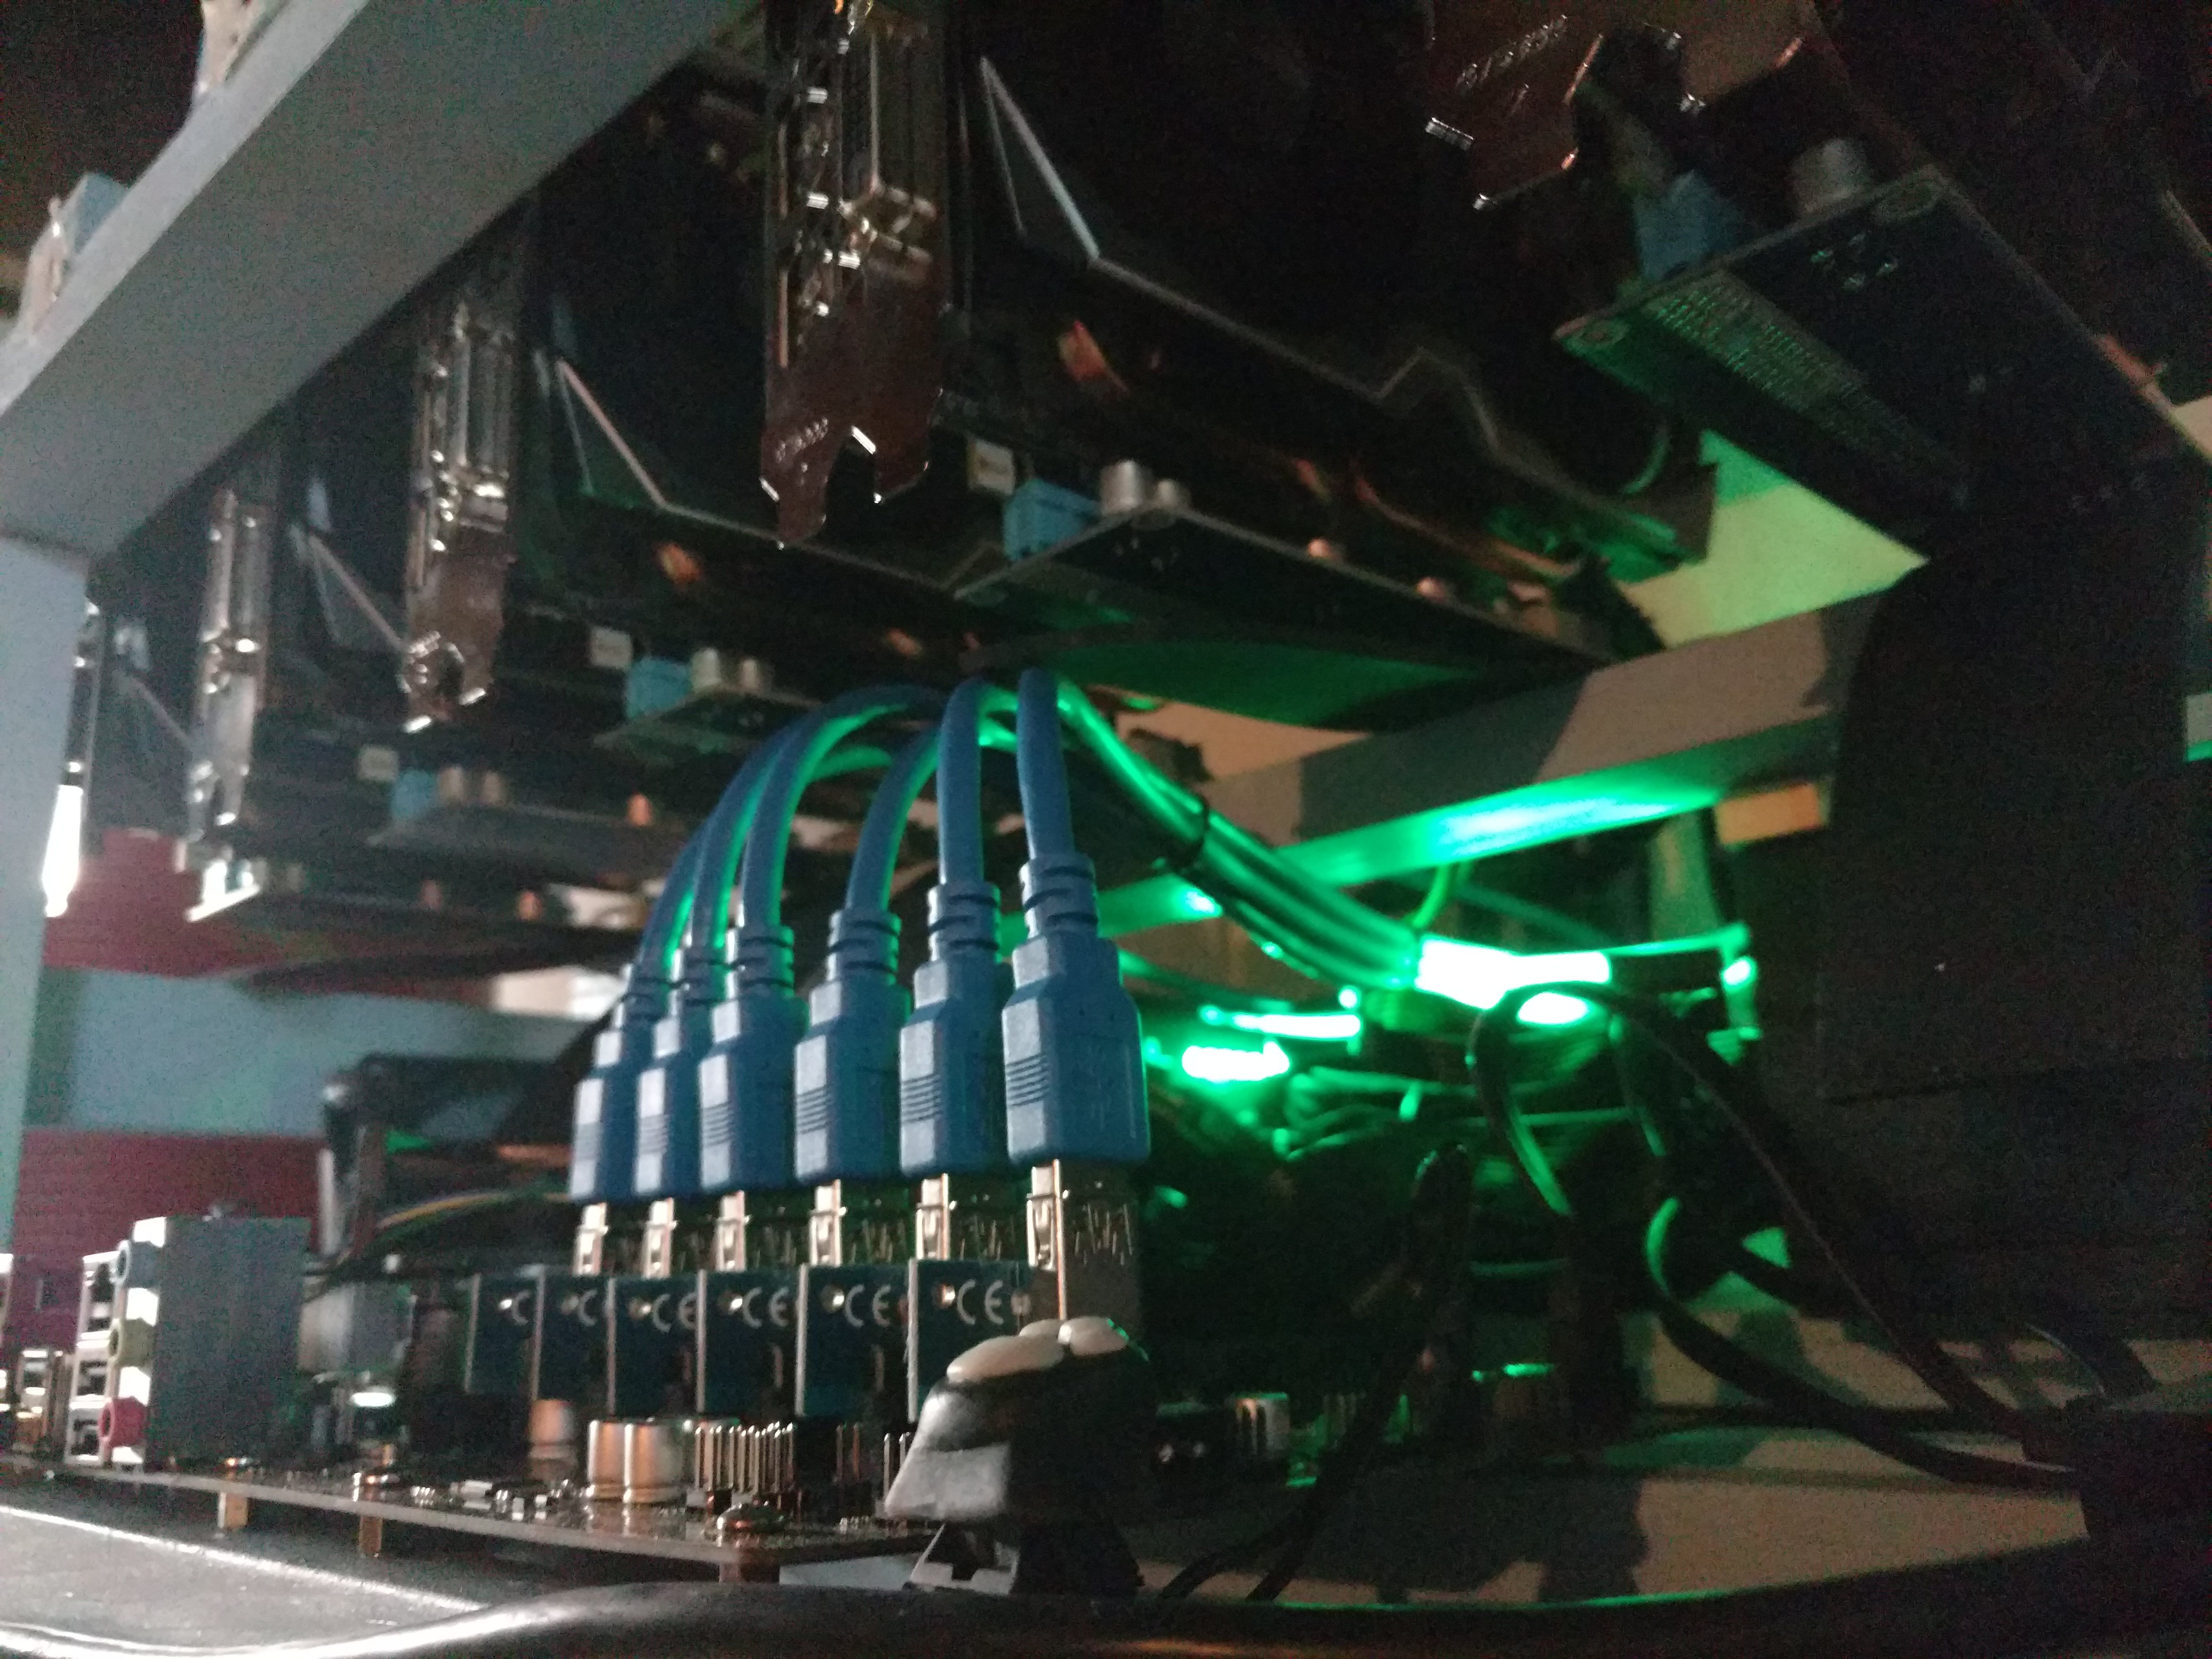
So this is my pretty rig, it was nice knowing exactly where everything was going to go for once. This one is on its own breaker up on a shelf in the basement, chugging away.
Rig 4 - Good ugly duckling on its way to becoming beautiful?
I wasn't really planning on expanding, but this... hobby... is too addictive. This is a recent addition, post-price gouging, so I decided to go with 1060s mining Ethereum. A couple concerns I had with this rig is that my basement only has so many circuit breakers available, and it's HOT down there now. So, I put this one in a spare bedroom that's mostly owned by my cat.
It's built with a super old LGA775 motherboard that can support 4 (maybe 5?) cards, and I bought the mobo, CPU, and RAM from a guy for a crazy good price. I got a different model of PSU for this one to cut costs even more, and it's not even modular. However, in the end I'll use every single cord, so no biggie!
I thought I was so clever with this idea - use a $6 shelf from the big box hardware store:
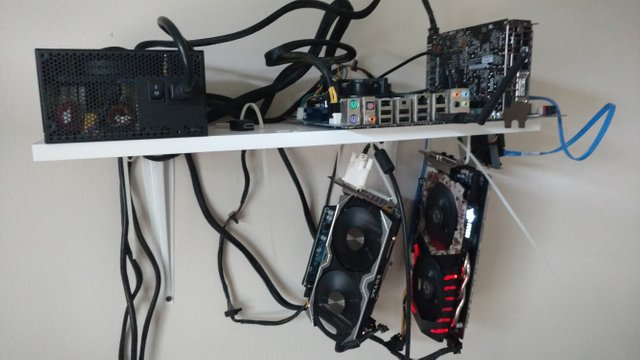
Ugly, but effective! The most important thing here was using anchors to ensure it doesn't come crashing down from the wall.
All I did was drill holes in the shelf and run zipties through the holes to hang GPUs. Eventually that DVI cable will be disconnected and replaced with a headless HDMI plug, and a fourth card will be added. Then I'll manage the cables to make it look like modern art! It would be a bit prettier with matching cards, but I take what I can get.
I think this rig is my favorite - cheap, simple, and way out of the way. If I keep expanding, it'll be along this vein.
So there you have it! 4 rigs with wildly different builds. I had a lot of fun making these, and wanted to show people that you don't have to go with a standard 6 card rig on some sort of stand. It can be just as cost-effective to build smaller rigs with what you've got laying around, and as a bonus if a 3-4 card rig goes down you're losing less hash power which is especially great when you're not that experienced. I'm pulling in some decent coin now, and if I keep building I'll have to worry about tripping the breakers in my apartment, but it hasn't happened yet so knowing me I'll probably add another shelf or two.
Thanks for reading and looking, I hope you enjoyed the post!
Kitteh loves the 1060s keeping her warm!
Nice work! Some write ups on the various work arounds, and components that helped you along, would be great if you manage to have time for it. I'll be looking forward to your future posts.
Thanks! It's been an adventure figuring out the details for each rig. Writing up some of the workarounds is a great idea for future posts, I'll think about the best way to do that in the next couple days.
That's awesome! Very creative as well. Now I'm getting the bug.
Careful, it's hard to stop. Watching $2k+ flow in monthly is intoxicating.
I can imagine it would be!