Step by Step: How to run your node in Meson.Network
Meson Network is committed to creating an efficient bandwidth marketplace on Web3, using a blockchain protocol model to replace the traditional labor-based sales models, consolidating and monetizing idle bandwidth from long-tail users at a low cost. Meson Network is the foundation of data transmission for decentralized storage, computation, and the emerging Web3 Dapp ecosystem.
Meson is trying to create the world’s largest bandwidth marketplace in the future. Here, users can exchange their unused bandwidth resources with Meson for tokens, and those who need bandwidth will come to Meson’s market to borrow bandwidth anywhere in the world. To achieve this goal, we cannot simply use the direct sales model.
Meson Network has raised a total of $9.4M in funding over 3 rounds.
Prerequisite and Rules
-A Static(Public) IP or A DHCP Reservation
-Opening the port of the firewall (default: 443, support for custom server ports)
-Providing enough Storage (default minimum requirements: 20G)
Mining Rules:
-Mining Score = Bandwidth Score * Storage Score * Credit Score
--Basically, Bandwidth is the most important related fact for BandwidthScore.
-And, Storage Space is necessary to cache the files for StorageScore.
-In addition, standing and stable servers will have a higher CreditScore.
-Also, there will be some reward adjustments for servers in different regions.
For more information about the mining rules and rewards calculations, please visit the official documents:
https://docs.meson.network/nodes/.
Get a VPS
-Go to DigitalOcean and sign up. https://cloud.digitalocean.com/login
-You need to add a payment method. https://docs.digitalocean.com/products/billing/manage-payment-methods/
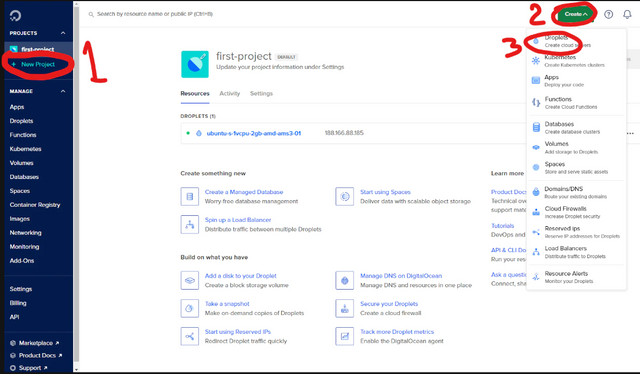
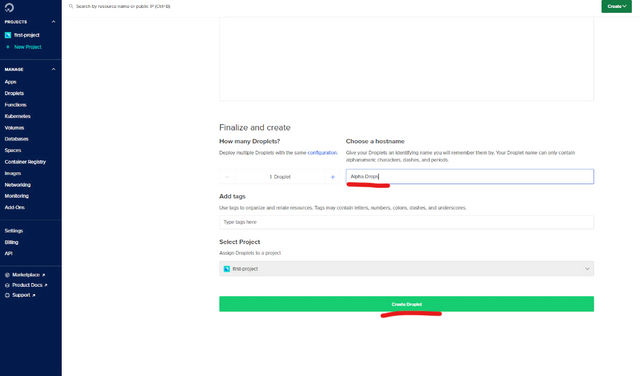
-Follow the steps on the screenshot below to create a new droplet:
.png)
Creating a droplet on DigitalOcean
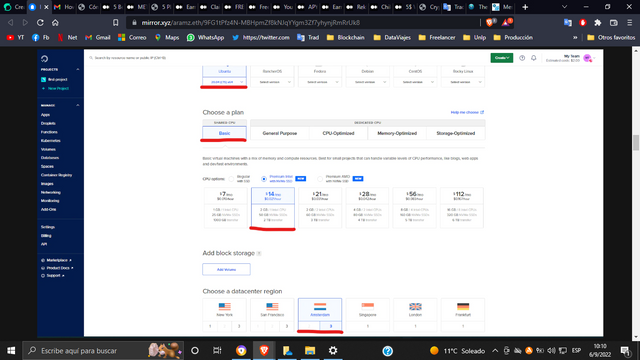
-Choose your preferred system requirements. I’m getting the following system for this tutorial:
.png)
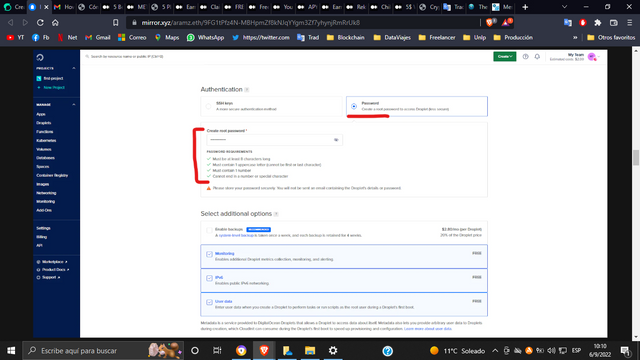
-Set a password:
.png)
-Choose a name and click on Create Droplet
.png)
Run Your Node
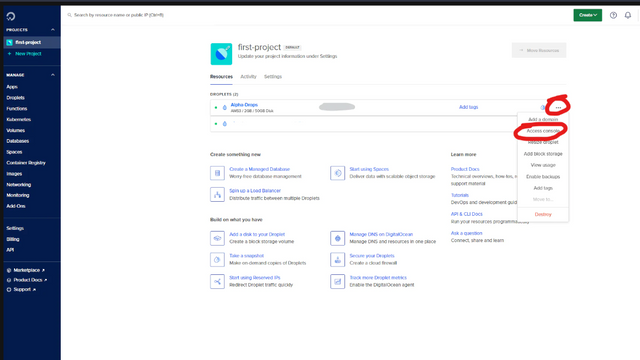
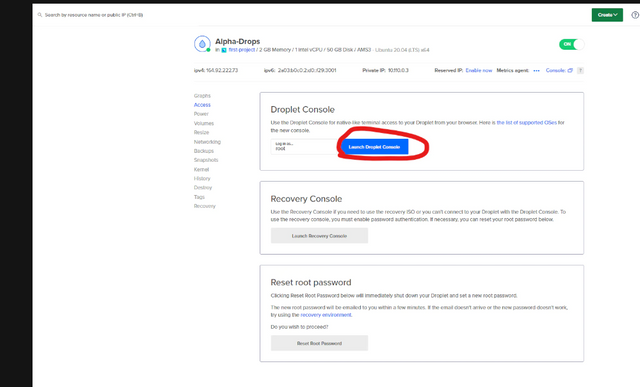
-Launch your VPS by following the steps on the screenshots below:
.png)
.png)
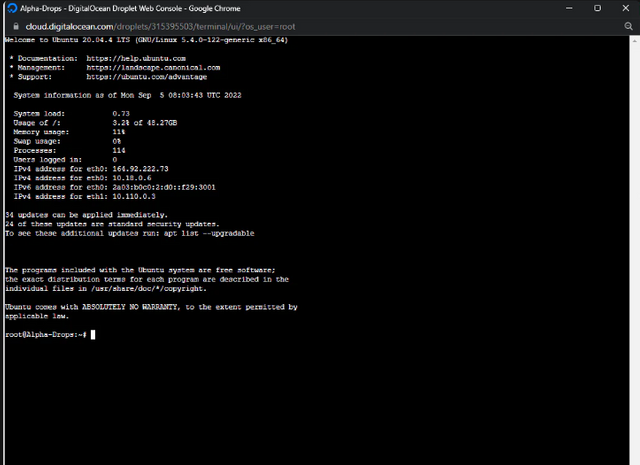
-You will get a box like the one below.
By doing this, you will not need to access your VPS on CMD or Terminal. We got rid of a couple of steps.
.png)
Now, copy and paste the commands into the terminal one by one and press enter
Update packages:
sudo apt-get update -y && sudo apt-get install wget -y
--Install dependencies:
sudo apt-get install jq unzip -y
-Check ports
ufw status verbose
-Open ports
apt install ufw -y
ufw allow ssh
ufw allow https
ufw allow http
sudo ufw allow 443
ufw enable
-Press Enter
-Press y and Enter
-Check ports again
ufw status verbos
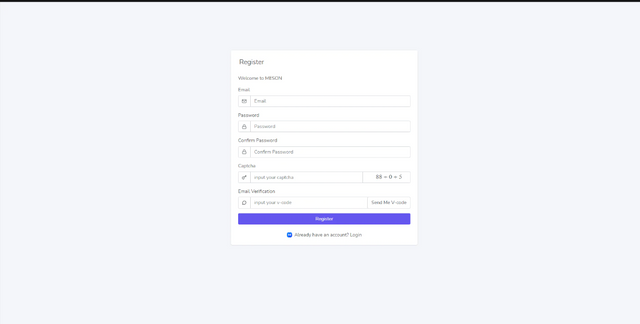
Register
Visit this link to register your account.
.png)
-Copy and Paste the following commands into the terminal one by one
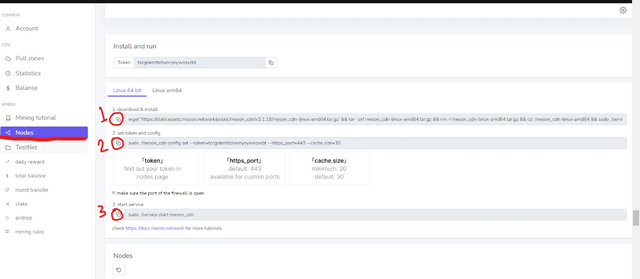.png)
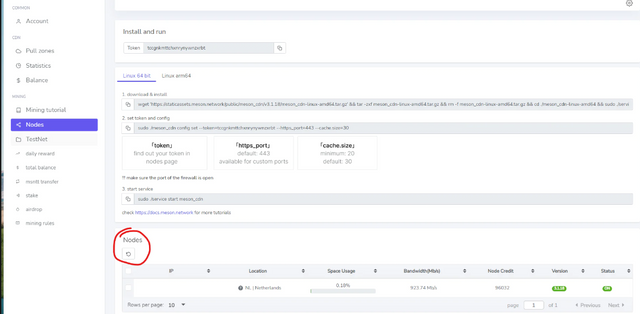
Check Status and Earnings
-Refresh to check the status of your node
.png)
-Go to “daily rewards” to check your daily and next-round earnings.
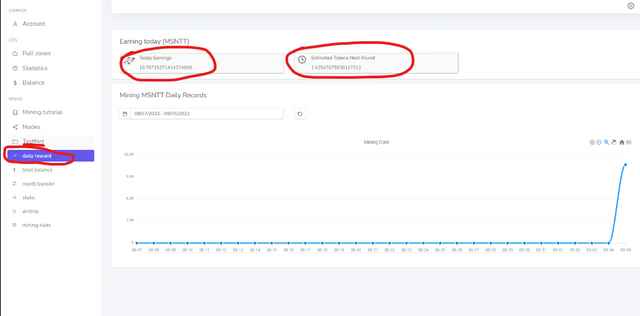.png)
That’s all, for now.
We've found Crypto in your hashtags, reshared to @crypto.defrag