UV Texturing - Think I'm finally starting to get it
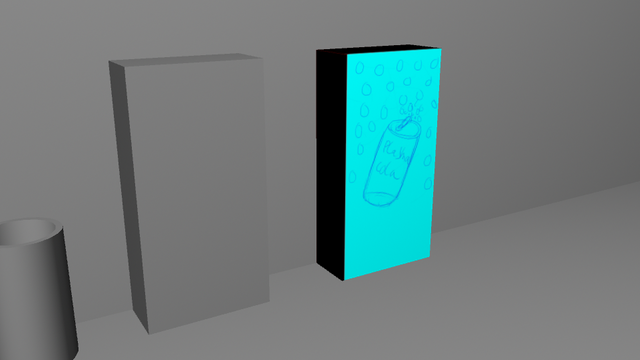
I did that classic thing of finally stumbling on a video tucked away made by a small time youtuber and he does a really good job explaining most of the features I didn't get. I'm still struggling a bit in deciding where to sew edges and so on to make the faces match up but it is like real life sewing almost. You just want the textures to 'wrap' around your object like wrapping paper almost and like people in tutorials say the preparing is almost like folding out the actual object like a cardboard box and the sewing is just you putting everything together in the way you need. As the guy says in the video I've provided if you want a texture that has multiple colours and so on but going all around your gameobject and not all patchy and blocky like my badly textured alien soldier you need to set this all up correctly.
Here's the video I found for those interested, he does a good job of explaining the basics, I think I'm going to find more documentation on UV sewing though just so I have a clearer understanding of how it all works. As you can see I've gotten a really basic sketch up but I already have an idea of what I'm going to do as a finished texture, I've made a new brand of cola called plasma cola! I'll get to work colouring it all properly so you can finally see one of my models in full colour and detail hopefully without major issues.
When it comes to learning anything really if you find yourself frustrated by a complicated thing you're learning and are struggling with something new, I found thanks to finally having good teachers you should just go back to basics and remind yourself of what you need to do or get better explanations and knowledge of what you're doing.
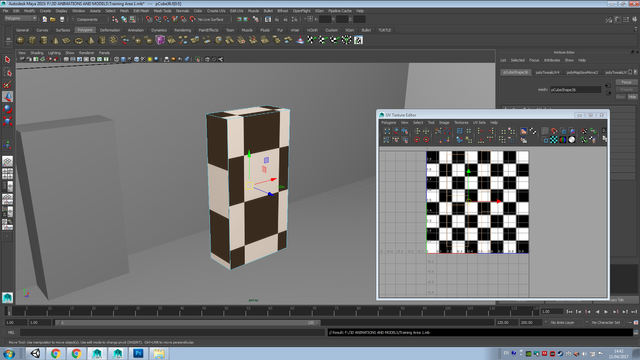
So here I am starting off with that chequered pattern again, it is actually really useful for getting your textures fairly accurate on the UV but in the end you still need to match what you draw to what's called the 'shell' which is those shapes within the UV editor otherwise your texture will just look borked.
So I got pretty confused with the sewing as I said, one of the reasons I fucked up my texturing so much was because I was accidentally sewing together four edges on my model. So what this was doing was scrunching my textures up altogether and confusing Maya. It turns out that the program matches each edge for you with the opposite side. This is the key to getting a good UV setup if that makes sense. When you sew like I said it's like stretching the texture over the object like a wrapping paper of some sort. So if I select the edge of one face, it must therefore link together on the bottom face, that's at least the basics I've grasped, it's all about symmetry. The more complicated the object the more difficult it is to get the symmetry correct which is why sometimes you have entire teams working on the complex parts of texturing.
This I think is the correct shape, it turned out pretty good when I decided to add an image to the object considering, it was just a bit off but I think that's either because of the way I positioned the UV's or because I simply didn't double check my vending machine was coloured in right to the edge of my UV's when I put them in.
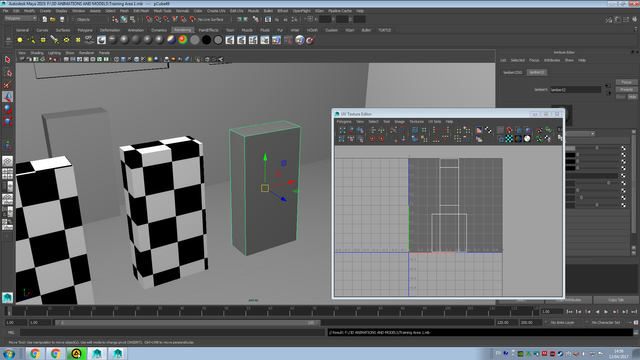
Now this is where the really clever part of UV texturing comes in and I suddenly understood where I had been fucking up, the UV snapshot. The UV snapshot is where you can do the most accurate texturing, if you can get the UV's right on the first go then you can go as nuts with the artwork as you like and the snapshot acts almost like a guide or set of construction lines for you to follow when you start painting and drawing. Now one thing I was wondering is how the fuck do the artists know which place to draw on? If you're putting a texture on an arm for example you don't want to end up accidentally drawing all over the head and then fucking everything up.
Well I don't know what they do because when you look at those really complicated UV shells they don't really explain how they do it, but my theory is they must simply label them and give them a code, so that's what I did and holy crap it actually worked! I was very pleased even though it was just a really basic texture but this will mean that I can start moving onto more advanced stuff eventually.
How do I confirm this though? I'm I just completely misunderstanding it all? Well no, as explained in the guy's tutorial that I posted up, whenever you click on a face within the viewport it shows up on the UV texture editor as well as a full face so you can easily identify what is what.
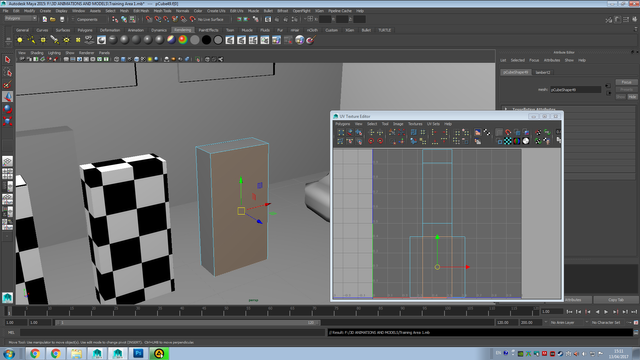
So now the moment of truth, here's what I did to confirm all of this for certain, I took UV snapshot and the nice thing about this little program is you can save it any size and format type you like, on top of that you can choose what colour to make the shell, I picked red to make it easier to see in the end.
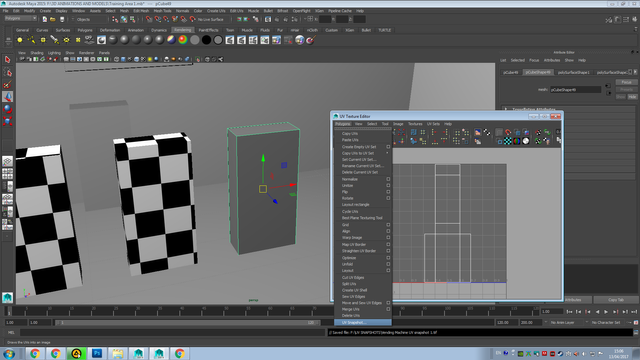
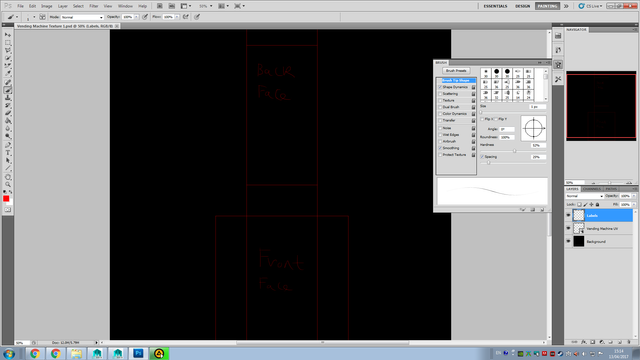
So the computer does all the work for you in regards to putting the image to the screen, you just drag it into photoshop and then you're done, after that it's down to you as the artist to set everything up and get texturing. Here's what I did to identify what part of the UV shell was what. I clicked on the model in Maya, then I wrote down as a label what side I was working on.
Here's the simple sketch I did up, something bright and colourful to make a change from all the grey that is in my models.
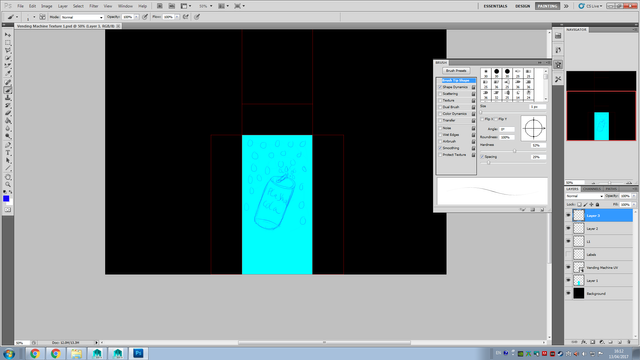
I think brought it into Maya and once you apply this texture to the model holy crap! It actually shows up in the UV editor. After that, it's a matter of dragging the shell within the UV editor to match what you've done in photoshop and lining it up properly.
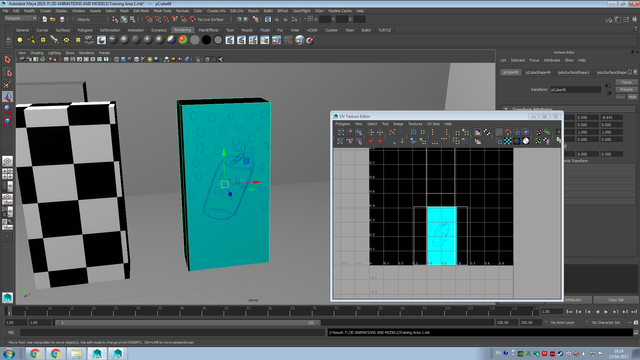
I still need to get used to messing around with this, but I think I actually understand things now and I hope my explanation made at least a bit of sense, this was a really long post. I just realised looking back at my screenshots I somehow managed to make the texture a bit too big for the UV shell but the really good news is now I actually know what I did wrong so I'll be able to fix that up and make everything look a lot nicer.
I'm going to go even more radical now and now I'm getting more confident with this I'm going to go and put a stupid weapon skin on my gun to make it look more colourful. You know the sort? The kind that you can unlock like in Call of Duty and CS:GO. I think I really want to put at least a bit of customisation unlocking for fun just to show up all these publishers that try to shove micro-transactions in our faces, who will win? The lone indie developer who just puts silly weapon skins on for free along with the game for fun? Or the publishers who stick ridiculous prices on a texture they probably spent only a couple of hours on.
I keep finding good tutorials on the subject now that I know what to look for.
Hope this helps out people who are struggling with UV editing because it is a pain to get right.
yeah I don't know what its like with Maya but youtube is your good friend when it comes to learning this kinda stuff. It helped me out a whole bunch learning the inner workings of blender
The big thing for me has always been learning the vocabulary and just how to get through the documentation. In fact I was chatting to some other programmers awhile back about this and they were saying half the skill in programming is just learning how to read the documentation generally.
Once I knew about UV shells and sewing UV's etc. the tutorials started flooding in, it keeps happening with every subject I come across.
Oh yeah very true, opens the door for so much more!
Good on ya! Its interesting to see how its done in maya since I use blender. I hope you keep improving and cant wait to see what you do next :)
Great jobs dear. Following you now :)