Learning Maya - Week 2 - Bouncing Ball Tutorial
Learning Maya - Week 2 - Bouncing Ball Tutorial
- Check out the last tutorial ( https://steemit.com/maya/@altcoinnerd/learning-and-installing-maya-2017 ) to get caught up
- We will start a new file called bouncing ball
a. Make sure that last week you used your one drive is set up and you have created a fall2017 folder and a week 1 folder
b. Now you can create anew week 2 folder for the bouncing ball project. Then go to Maya and under file -> set project and choose your week 2 folder.
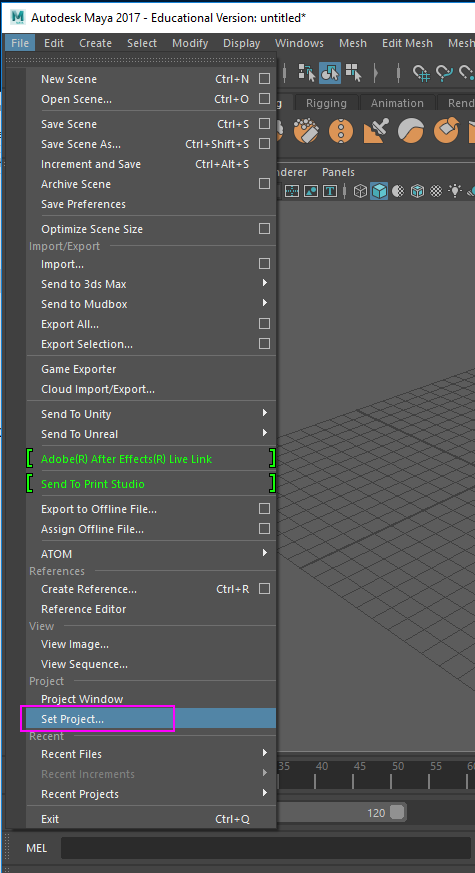
c. Now choose your folder week 2 bouncing ball
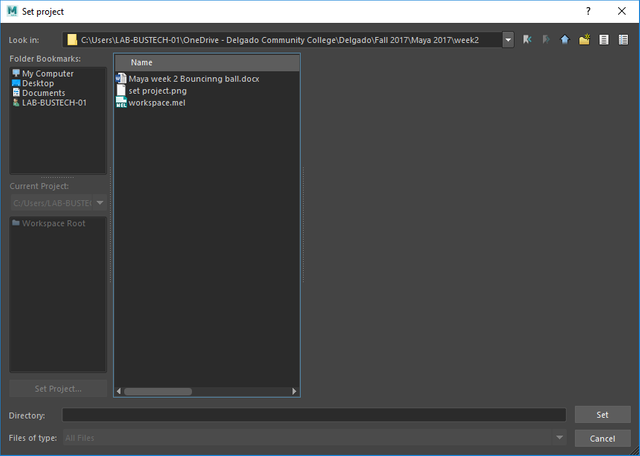
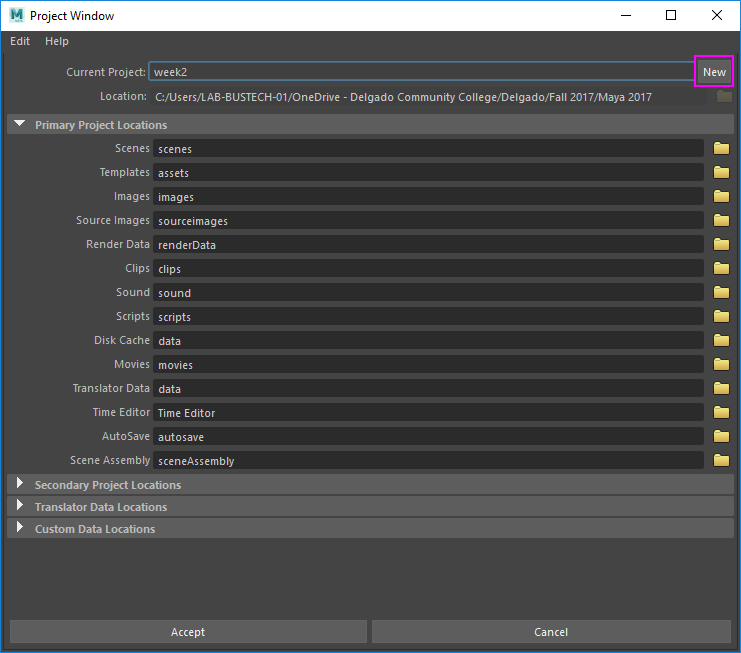
d. The window will close when you click ‘set’ - new set up the working directory by going to file->project window –
e. Currently the folder is named week 2 but by clicking the ‘new’ button you will create a new folder and type in ‘Bouncing Ball week 2’ is a better and more descriptive name.
Create a ball:
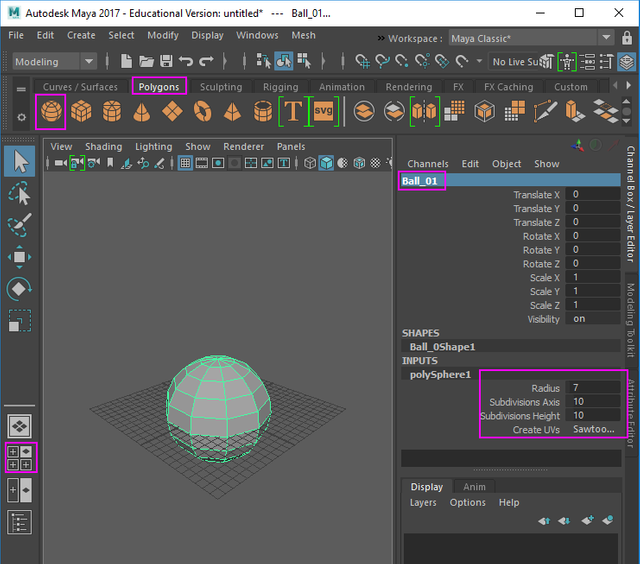
- click the polygon tab of the tools shelf and choose ‘sphere’
- on the right side of the screen in a long thin dialog box called the channel editor rename the sphere ‘ball 01’
- change its radius to 7
- change the subdivisions to 10 in both the axis and height
- on the right side of the screen choose the ‘4 view’
Now put the ball on its own layer and hide it:
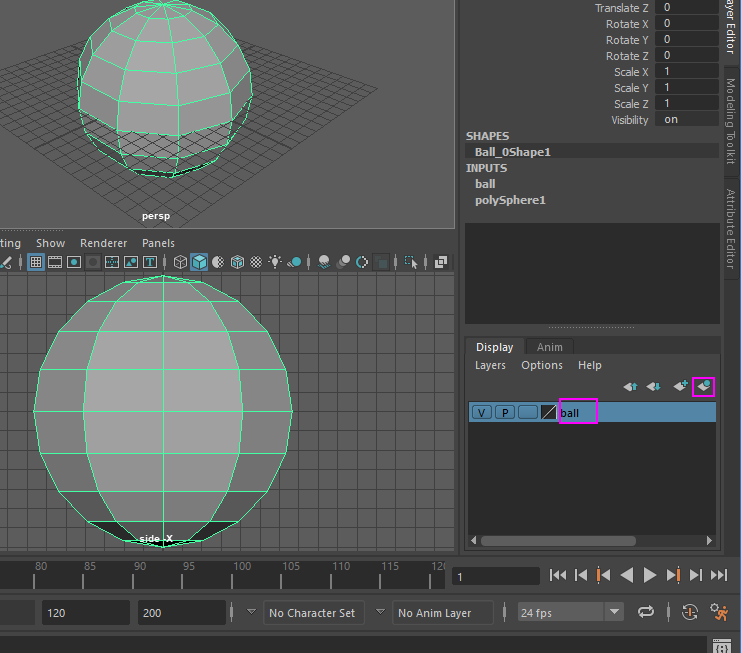
- Make sure the ball is still selected.
- On the right hand side of the screen below the channel box in the corner is the layer manager. Select ‘create a new layer and assign selected objects button’ the name of the button is readable in the help bar at the bottom left of the screen when you mouse over it. In fact all buttons have names when you mouse over them and their names and other helpful hints are listed out on this tool bar

- Hide the ball by clicking on the ‘V’ for visibility button next to the ball name in the layers menu.
Create our first stair step:
On the poly tab of the tools shelf click the create poly cube button

A cube should appear on the screen. Change its name to ‘Step 001’ in the channel editor on the left side of the screen. Watch it in the top view as we change its size.
Change the dimensions of the box to:
a. Width 36
b. Height 7
c. Depth 11
d. The box might be too big to see so zoom out with your wheel on your mouse.
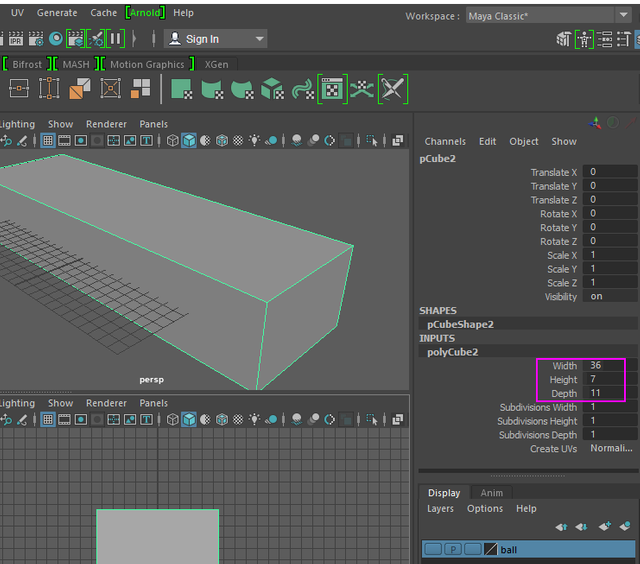
Copy the step 10 times to create a staircase.
- Go to the top of the screen for the main Maya menu and choose edit- > Duplicate special choosing the square box icon that opens the options menu for duplicate special.
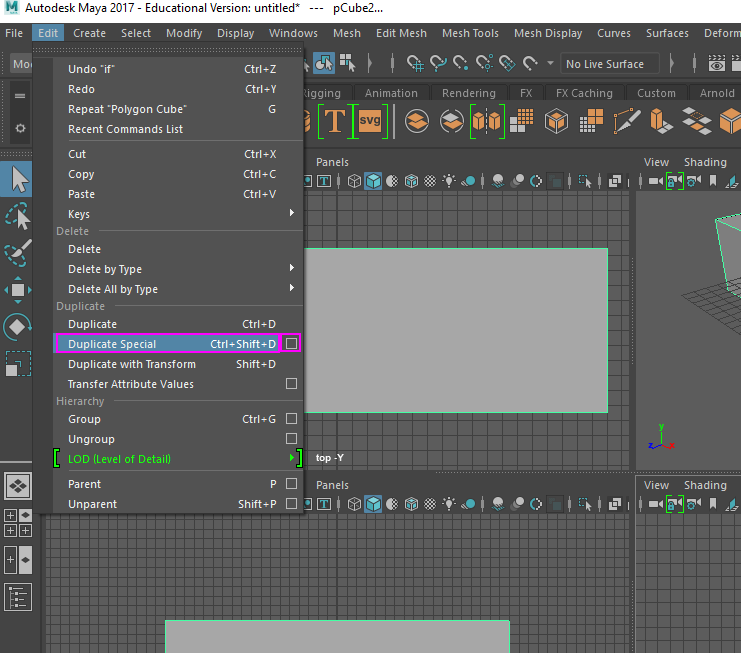
- In the Duplicate special dialog box go to the translate section and middle box representing the ‘Y’ direction to 7 and change last input box for ‘Z’ to 11 and the number of copies to 10
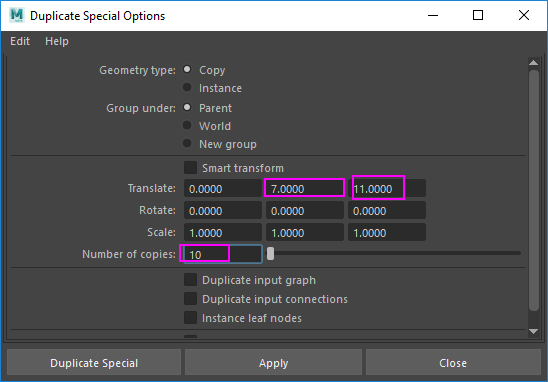
- When you click on ‘duplicate special’ you should see stairs. You may need to zoom out bit wth your mouse wheel to see them.
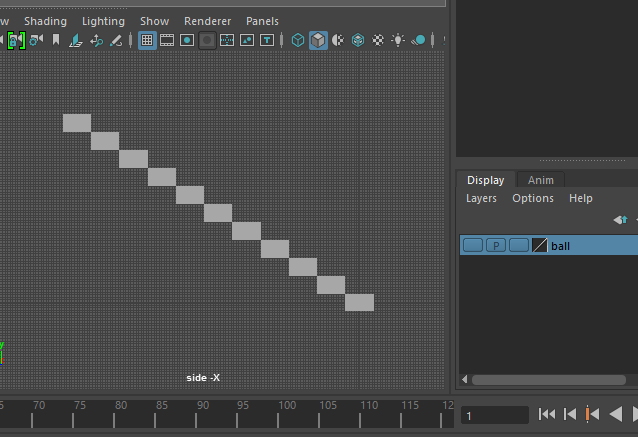
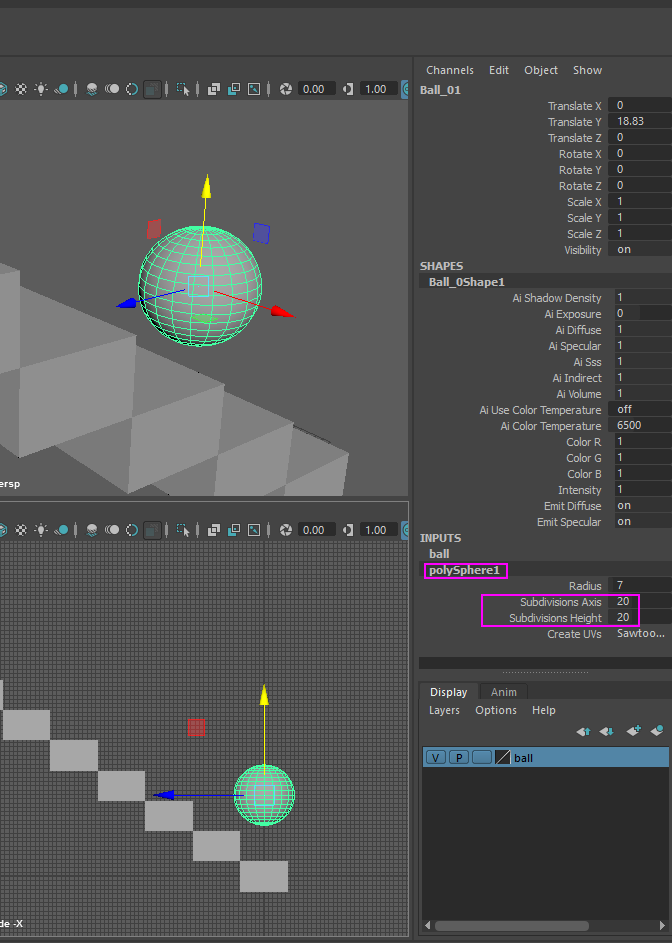
- Unhide the ball, it should be in the wrong place in the middle of the stairs. So move it up on to the first step with the move tool on the left hand side of the screen
 you will also notice that the ball is not smooth like a rubber ball but faceted and chunky like cut crystal. Select the ball and in the channel box scroll down to ‘inputs’ and click on polysphere to see the Subdivisions in the Height and Axis – change the number from 10 to 20.
Make a ground plane by going to the poly tab on the shelf and clicking on poly plane.

You will not be able the see the plane because it is below the ball, hide the ball, but it is still so small compared the stair case you can still barely see it.
You may have lost your selection of the plane clicking around to find it. A fast way to find things is to use the outliner. Go to the top menu to window-> outliner
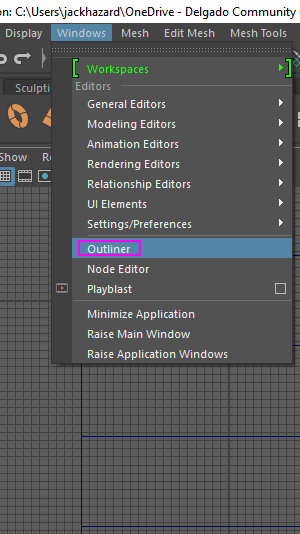
When it is open select all the stairs on the list by selecting the first stair and then holding shift and then clicking the last stair. It should select all the stairs in-between.
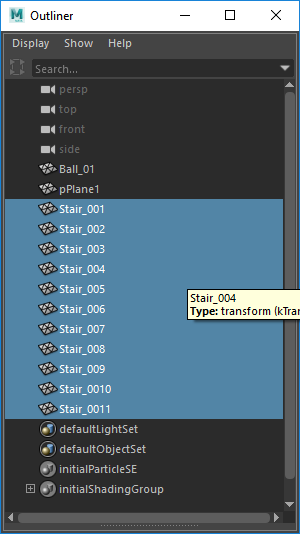
Go to the layer’s menu in the corner of the screen and click ‘create new layer and add selected objects button.to t new layer’ on the bottom right of the screen. Double click on the new layer and label it ‘stairs’
Now hide the stairs by clicking the ‘V’ key on the ’stairs’ layer.
You should now be able to see the very small square ground plane on the screen. If you still can’t see it use the outliner to click on the name ‘pPlane’ double, click the name to rename it ‘ground plane’.
In the channel box editor on the right side of the screen click on the ‘polyPlane01’ input to resize the plane and change the dimensions from 1x1 to 50x50
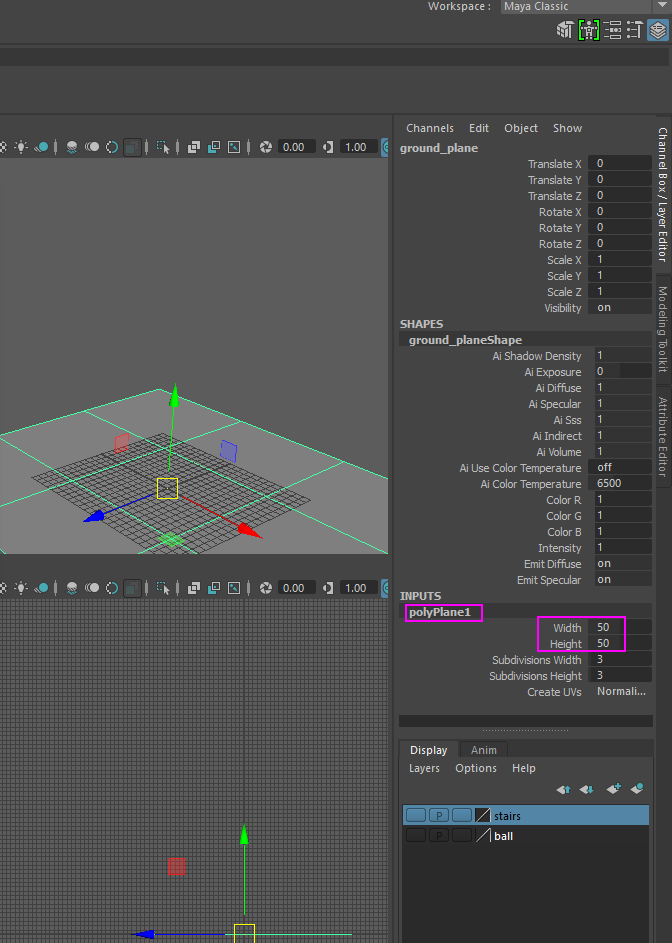
Unhide the stairs and the ball and you will see the ground plane is too high up on the first step making it look too short, also the ground plane is way too small so scale it up so it is 500x500 instead of 50x50
Move all the stairs up so they match the floor. The stairs are 7 high so half of that is 3.5 but if we move one stair we must move them all. Group the stairs together and move them all at once.
Make a shape to link them like a ‘handle’ to move the stairs.
a. Template the stairs so you don’t move them yet. Go to the layer manager and click the box next to the letters ‘V’ and ‘P’ next to the name ‘Stairs’
b. Make a box and adjust it to the angle of the stairs.
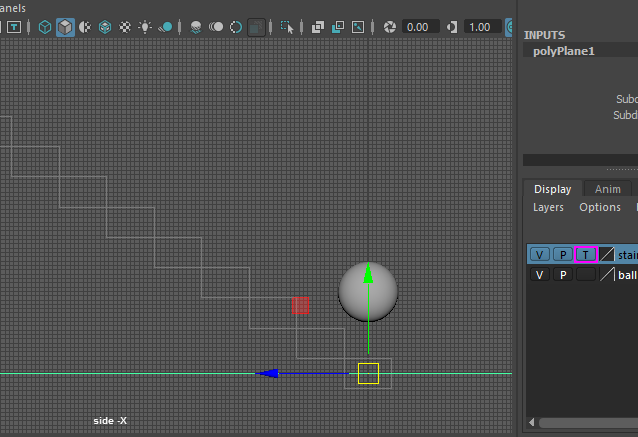
When there are multiple objects on the screen it can be hard to see. Go up to the menu on the top of each of the four views and click on shading and halfway down the menu you will see ‘X-Ray’ choose X-ray. Do this for all 4 views (perp, top, front, side)
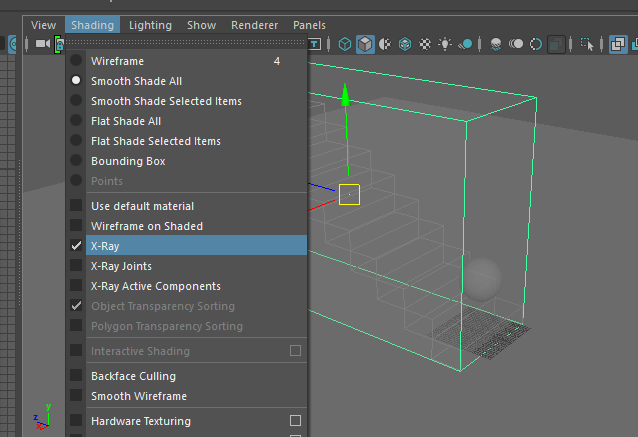
Change the inputs on the box in the channel box editor.
a. Translate X = 0
b. Translate Y = 35
c. Translate Z = 55
d. Width = 37
e. Height = 77
f. Depth = 121
g. Change the name from box to ‘Stair Base’
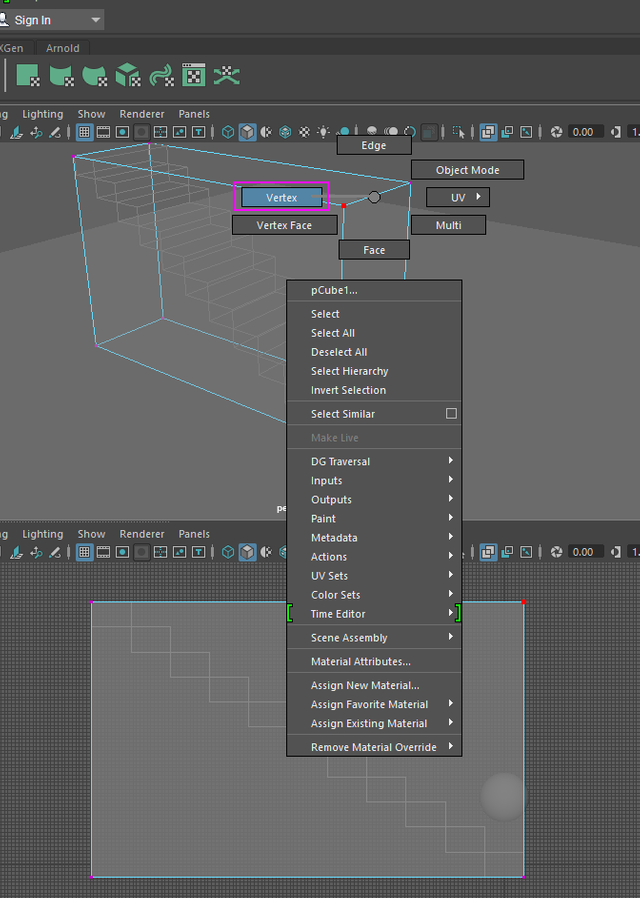
Right click on the box while it is still selected and choose ‘Vertex’ on the pop up menu to edit the vertex of the box.
In the side view drag select a box around the top corner of the box to select the 2 vertexes on the top corner of the box.
Using the Move tool (on the left edge of the screen) move the corner vertex to the middle of the stair case so it lines up.
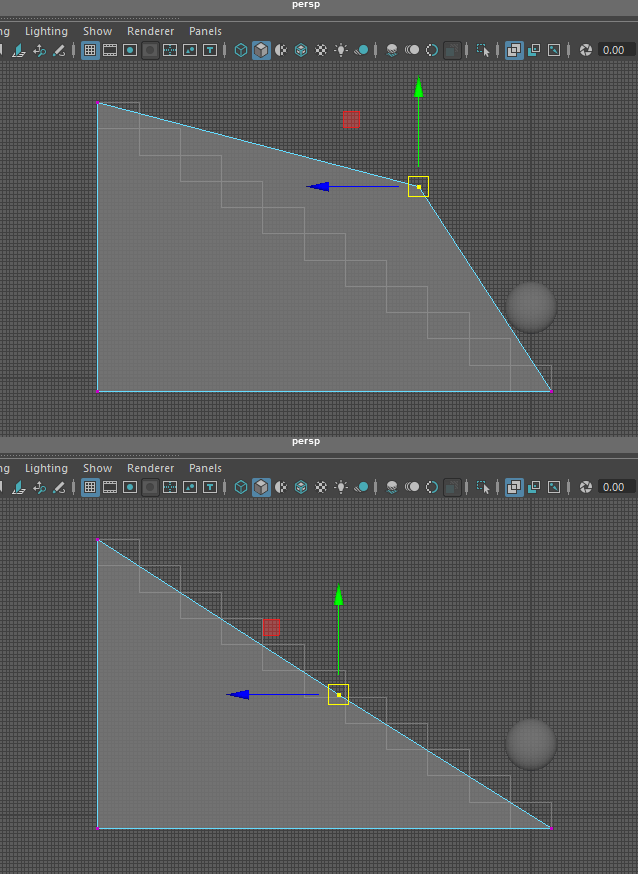
Switch back to object mode by left clicking on the object and choose ‘object mode’
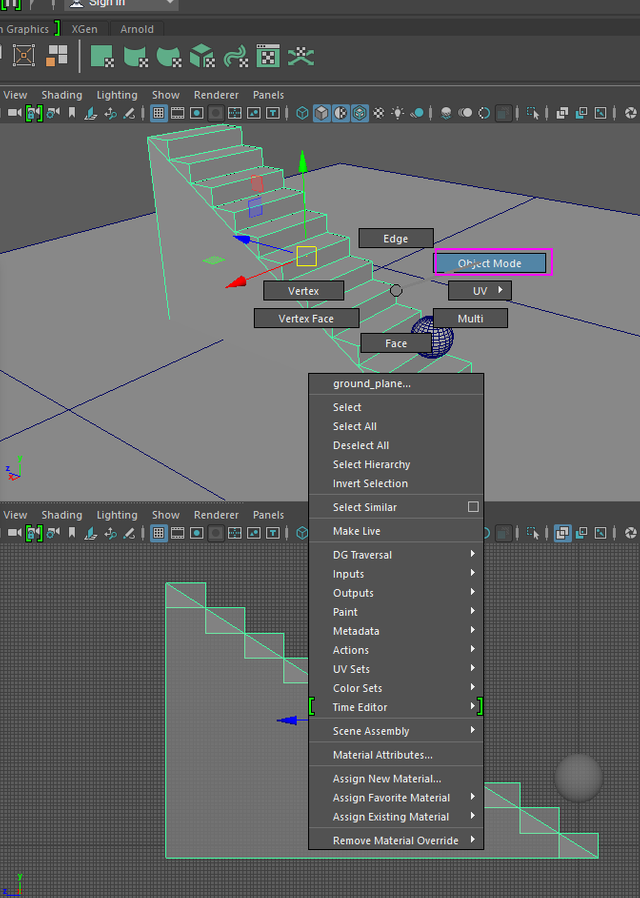
Parent the stairs under the stair base object
a. Go to the outliner
b. Select all the stairs
c. Middle mouse drag the stairs onto the ‘Stair base’ object they should go underneath it in the list, click the ‘+’ sign to open the list to see them again.

e. Now you can move the stairs up as one object so they all rest evenly on the ground plane
f. With stair base still selected go to the channel box editor and the ‘Translate Y’ and change the number in the Translate ‘Y’ from 34 to 37.5
- Make 2nd floor for the stairs
a. Select the ground plane object and press ‘CTRL’ + ‘D’ you have just duplicated the object. If you look at the ground plane name in the channel box editor you will see it is now called ‘ground_plane1’
b. Move the ground plane object into position by changing the translate X and Z positions
i. Translate X =0
ii. Translate Y = 77
iii. Translate Z = 365.5 - Animate the ball bouncing down the stairs.
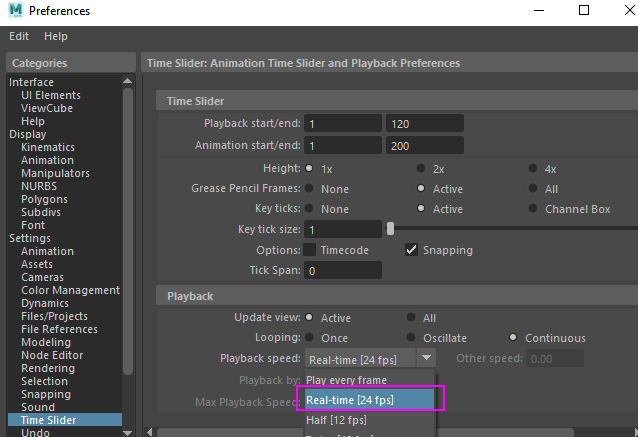
- First change the speed of the animation playback
a. In the bottom, right corner of the screen there is a small icon that looks like a man running form a wheel
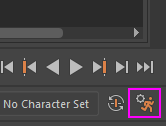
b. Change the playback from ‘play every frame’ to ’24 frames’
- Put in you first keyframe.
a. Move the ball up to the top of the stairs with the move tool and press the ‘s’ key on your key board to ‘set a key’ you will see all of your transformations in the channel box editor go red to show they are now animated.
b. You will see a red line on frame one of the time line along the bottom of the screen

d. Move the time slider on the bottom of the screen up to frame five or just type in 5 into the frame position input on the bottom right of the screen and move the ball up like it just jumped off the top step. Press the ‘s’ key again to set a keyframe.
e. 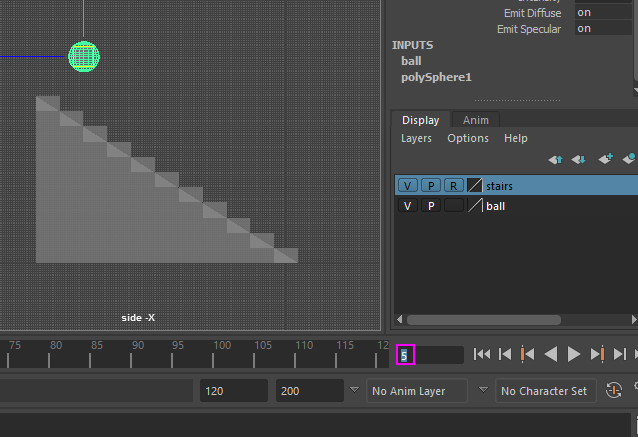
f. Type in 10 in the frame position and put the ball on a step 2 steps below from where it started and press the ‘s’ key to set the frame. Now continue doing this until the ball is bouncing on the floor. This should take about 70 frames or so.
- Make a render of your work, upload it to youtube, and submit the link from you tube for grading.
a. Click the ‘Display render preferences’ along the top of the screen near the right side.

b. Set the render settings to use:
i. ‘Maya Software’
ii. Name the file
iii. Use avi compression and choose a compression
iv. Set the start frame and end from to 1-70 or for as many frames as you animated
v. 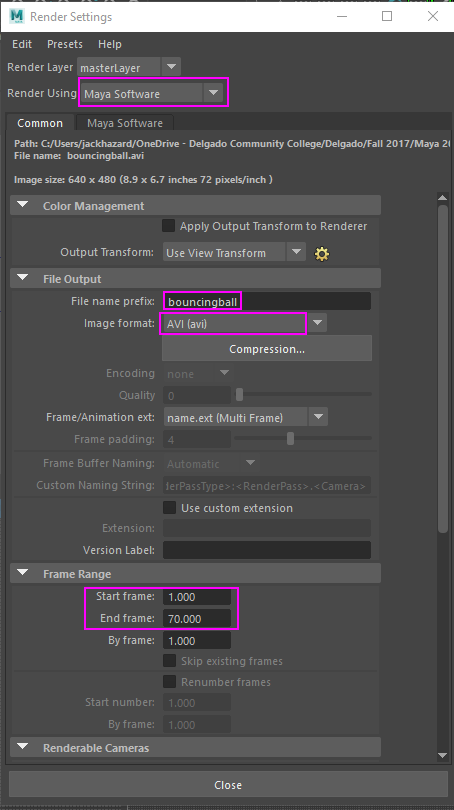
vi. Set the renderable camera to perspective
vii. Image size to 640 x 480
viii. 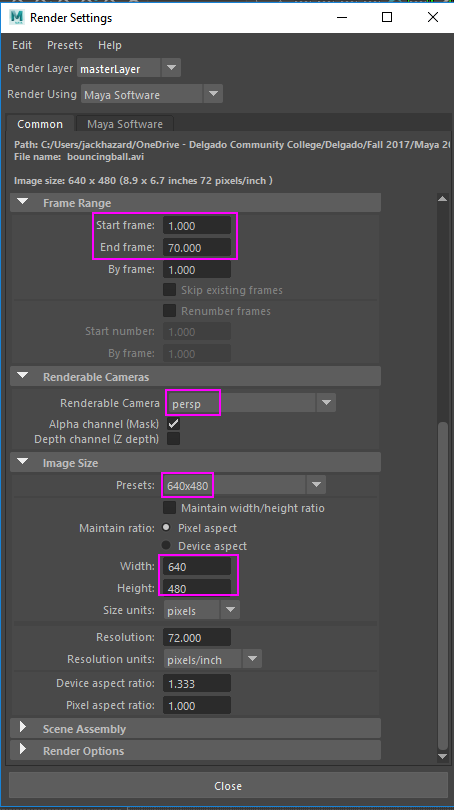
- Go to ‘the top left corner where the ‘Modeling tab is and click it and choose render from the drop down menu
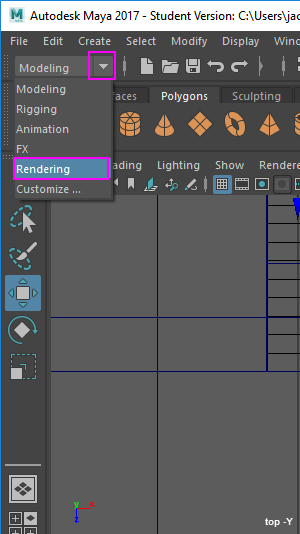
- Choose render from the file menu and click ‘Batch render from the drop-down menu
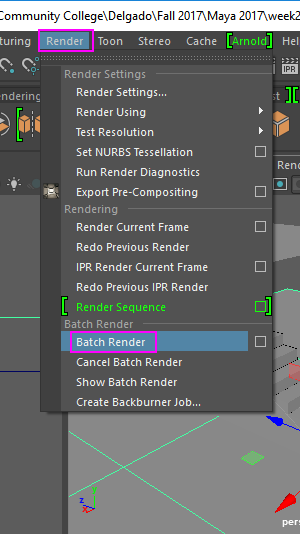
b. Click ‘continue’ if it says it’s an educational copy of the software.
c. The file should take a few minutes to render and when it is done you can find the file in the ‘images’ folder of your project folder.
d. Open it and view it
e. Upload it to youtube and send me the link on canvas.
Don’t forget to save your Maya file as well for your own records.
Nice one. If you are interested in some video tutorial on Maya 2017 please make sure you will visit: https://steemit.com/@kazzz