Learning and installing Maya 2017
In this class, we will open the Maya interface and create a simple table top scene, apply textures and render out a JPG to show to your friends.
Step 1: open Maya 2017 by clicking on the window icon (start menu) in the bottom left of your screen and typing in Maya and it should come up. It should already be installed on your computer at school. But if you are working on your own computer and want the software you can download it for free and use it for a 3-year license period.
I don’t have Maya on this computer (if you have Maya skip down to the scene creation part):
Downloading Maya 2017-
Go to https://www.autodesk.com/education/free-software/maya
If you are not already a member you must sign up its easy and free. Just use your email and a password.
Choose the 2017 version, 64 bit operating system and the English language.
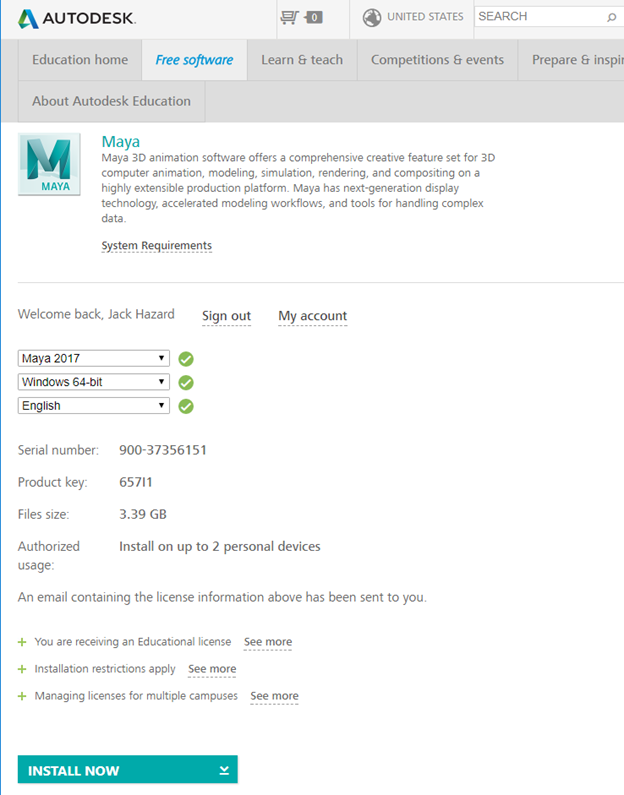
Download Maya and install it to make your first 3D scene in Maya. Just follow the instructions on the screen.
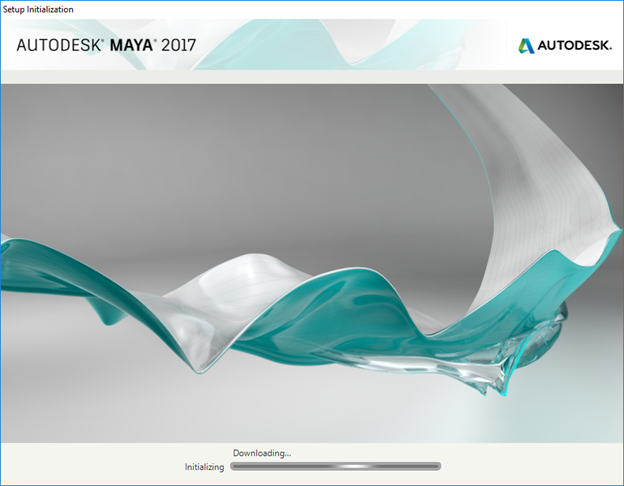
Click install when it comes up – it should be installed in the C drive.

It will take some time (from an hour to a day) to download and install depending on your speed.
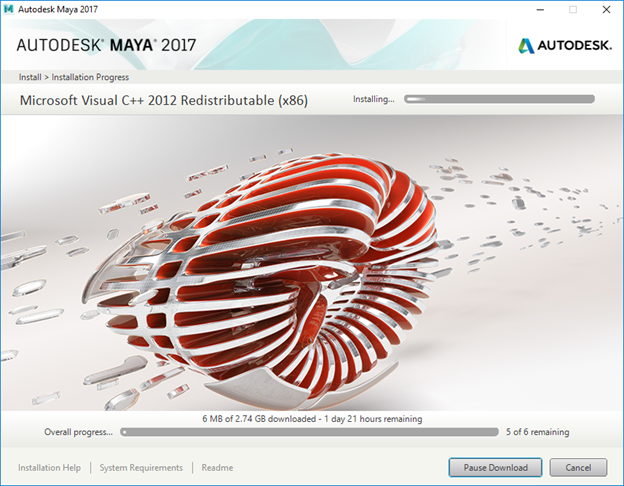
When it is done click finish and start up Maya.

Choose Default preferences.
NO SAVING TO THE DESK TOP!
You must choose your directory and stick with it. This we be very helpful if you work in groups as you will all have shared directories in ‘OneDrive’ creating a one drive folder and a Maya project folder is not an option it is a requirement. There will be an assignment when you have to create a one dive folder and a Maya project with your name and you will submit a jpg of ‘print screen’ of your file browser window showing your folder and your file structure.
If you haven’t already set up you Microsoft ‘Onedrive’ let’s do that now.
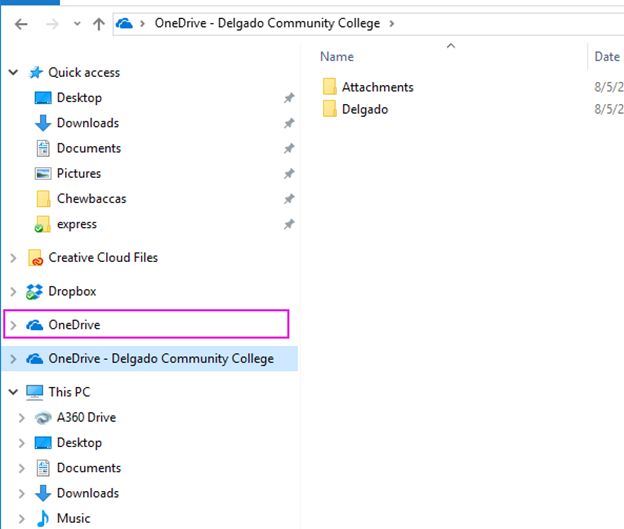
You will be prompted to sign in. Just use your email, I used my Delgado email, but you can use Gmail or whatever email you like.
SETTING UP MAYA FOLDER STRUCTRE
You are setting up One drive to create a ‘Maya’ folder to save your Maya projects to. A Maya file is more than just than a file it is a network. Just a JPG or HTML file is not a web page but a file in a network of files that make up a web page.
QUICK ASSIGMNET: SETUP YOUR MAYA FOLDER in your ‘OneDrive’ – submit JPG
Take make a working for you on the One drive and take a screen shot of your final folder set up to show me that you did it.
Go to file -> menu -> set project
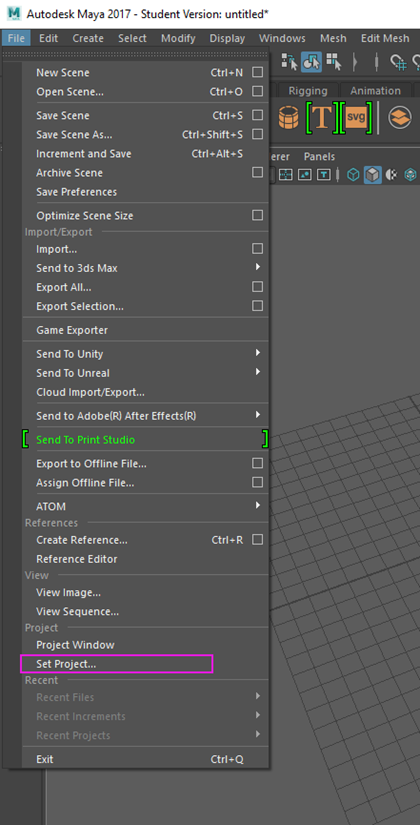
Maya defaults to the users/your user name /Documents/Maya/Default directory. We need to change this to ‘OneDrive’ so we can share it with our design team. You can’t see the ‘OneDrive’ icon so let’s navigate to it first. Choose the arrow at the end of the file path and a drop down will pop up, scroll down to your name.

Click the arrow and Scroll down to your name.
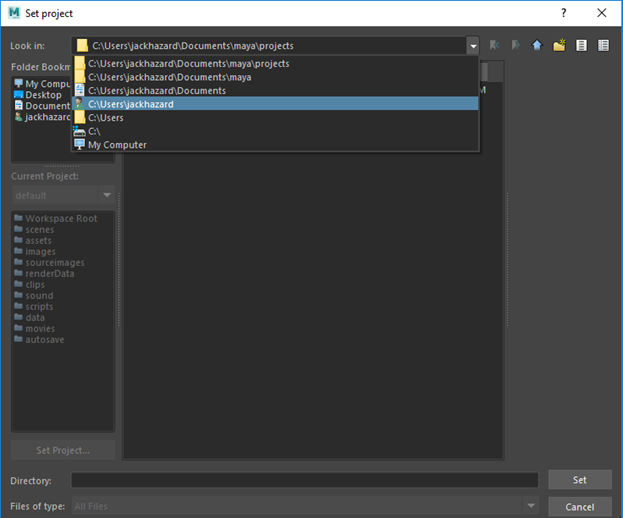
Once you click on your name you should see ‘OneDrive’ half way down the list.
My ‘OneDrive’ is called Delgado.
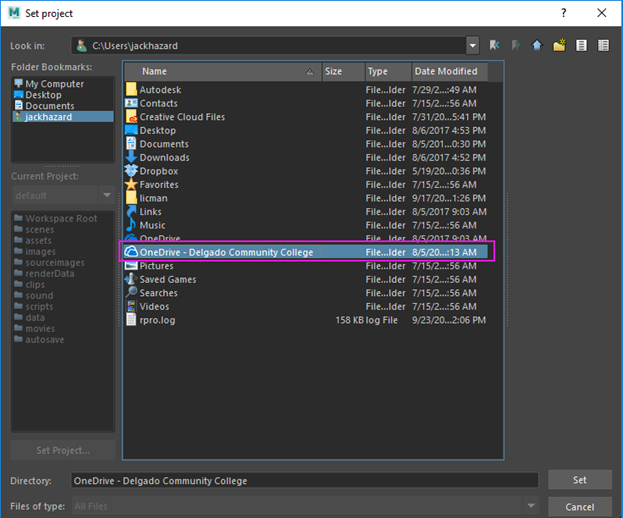
Click on one drive to choose it and create a folder called Maya Fall 2017 and then ‘set’ that folder using the set button.
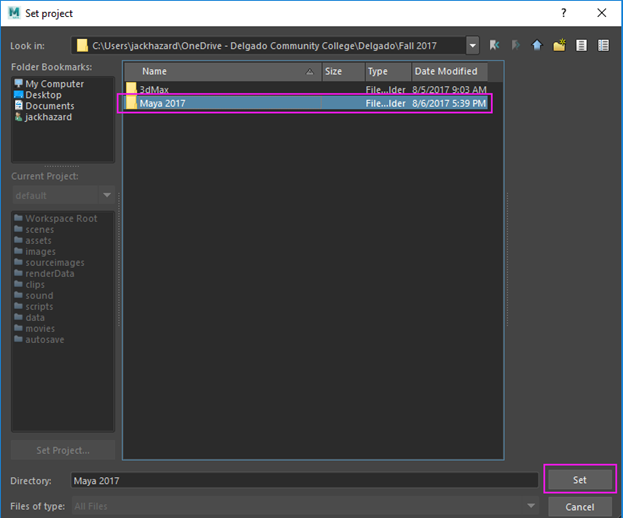
Maya should ask you if you want to ‘create default workspace’ set it . The default workspace is just that ‘default’ but you can edit your workspace to what you want. professional Maya users bring their ‘work space’ file to work with them. Some have special scripts and custom buttons for tools they have created as they are both artist and programmers.

Now we will create a bunch of folders for Maya to save special ‘assests’ it uses and you will create. So go to the top left hand corner of the screen and click on file-> project-> project window and the project window should pop up.

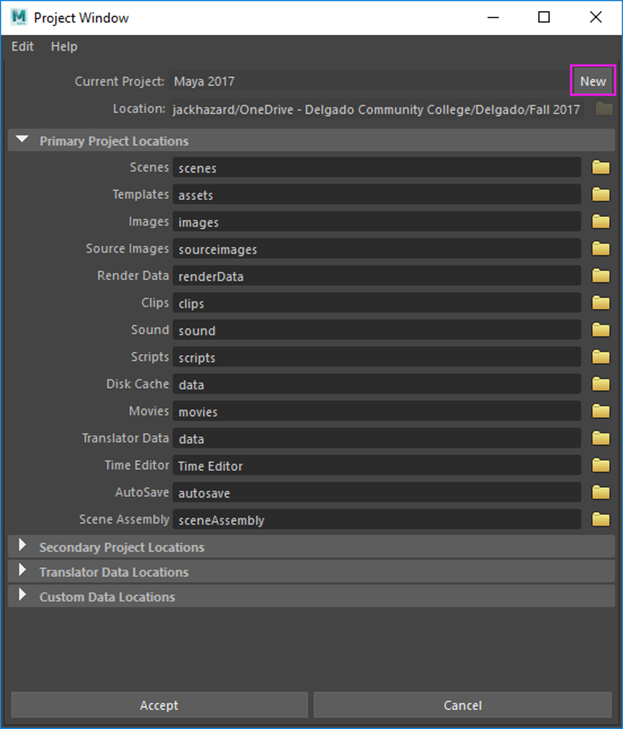
Notice the file string. It already knows the working directory in OneDrive. OneDrive->Delgado-> Maya 2017.
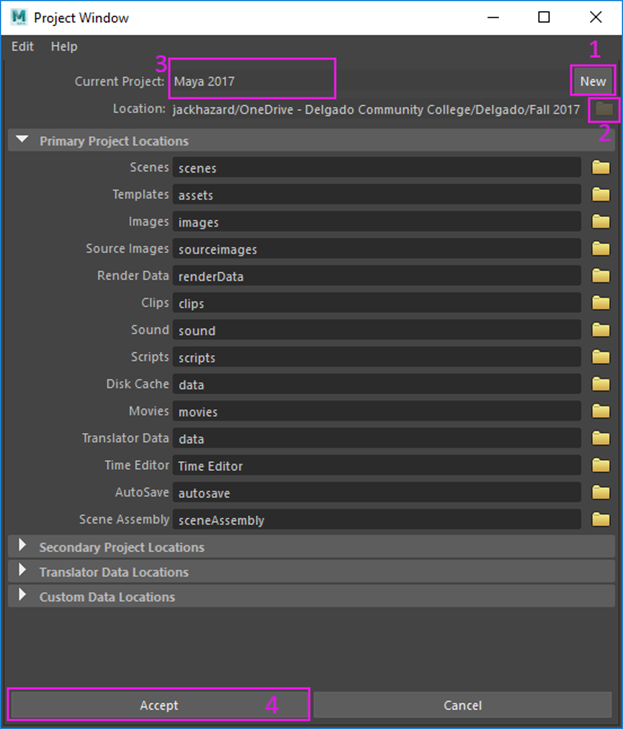
- Now click on ‘NEW’ to create a new folder
- Click the folder button below ‘new’ and make sure the fold is set to Maya Fall 2017.
- In the ‘Current location field at the top type in the name ‘Week 1 Bouncing Ball’ – it just created a folder called ‘Week 1 Bouncing Ball’ and a bunch of sub folders like: Scene, assets, images ect…
- The last step is you click the ‘accept’ button
Before we make something: LETS LOOK AT THE INTERFACE
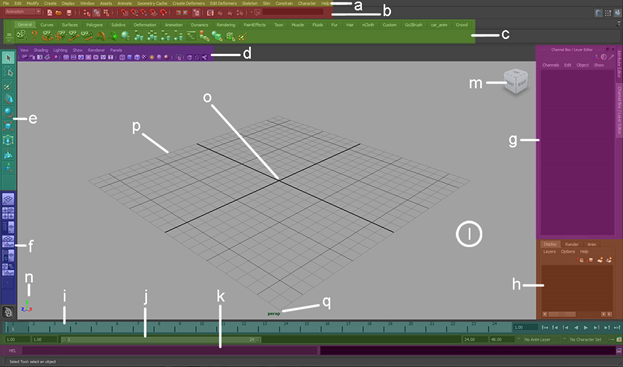
Here is a quick breakdown of the highlighted regions:
a) Menu bar
a. This allows you to create new files, create new objects, animate, debug ect…
b) Status bar
a. This controls the ‘snap’ to grid or angles if you like round numbers this is great, you can also launch a render or look at a render or control what type of point or plane you would like to select
c) Shelves
a. Shelves are full of little icons that are graphic representations of some of the stuff you found up in the menu, it show what it does as well as has a name for the function.
d) Viewport Panel bar
a. This controls what you see in the view port (see the letter ‘I’) it’s the big screen in the middle that shows a grid. It can show more than a grid it can show objects in wireframe or in color and there are ‘camera gate’ functions that tell you where the end of your render screen really is.
e) Toolbox
a. Tools to select a object like a chair, move it, rotate it and scale in in the XYZ coordinate space.
f) Window configuration (panel lay out)
a. This allows you to change the main windows in Maya. There are many windows and views in Maya.:
i. Perspective
- You could see objects in your scene in a natural perspective view the way you see things with your eye in the real world.
ii. Isometric - Top
- Front
- Side
iii. Utilities - Object list – a list of all the objects in your scene
- Hypershade – A hierarchical list of the shading networks assigned to those objects that give them color and texture.
- Hypergragh – A hierarchical list of the objects in the scene and how they are linked, like how a finger is linked to a hand which is linked to an arm.
g) Channel Box
a. An interactive list of controls over the objects you have selected. Its scale, position and rotation, this can be helpful in handing in large scenes, do you really want to click and drag to the moon? Or do you want to type in 238,900?
h) Layer Editor
a. This is just like the layers in photoshop, keeps your lights on one layers, your cars on another layers, your streets on another layer.
i) Timeline and Playback Controls
a. When animating you have to see at what point in time you are currently in and set a key from for an action to occur.
j) Time Range and Character Sets
a. Maybe your animation is an hour long but you just want to zoom in on the time like to see 5 seconds of animation. This is your tool. Character sets control character animation.
k) Command Line and Script Editor
a. If you don’t want to paint every star in the sky this is where you can write a script in Python to do it for you. You can also build your own lighting a modeling tools.
l) Workspace
a. This is where you are working the bulk of the time – see d) viewport panel above to edit what you are looking at when you work.
m) Viewcube
a. This allows you to navigate 3D space and show you where you are – this is the ‘compass’ on your dashboard.
n) View Axis
a. Before the view cube there was just a shows you where you are but you cannot navigate in 3D space with it.
o) World-space Origin
a. This is the (0,0,0) point the center of your universe in X, Y, and Z coordinates. Try to build your objects in relative proximity to this point so when you import individual objects in to other more complex scenes you have a reference.
p) Grid
a. The X, Y grid (or plane) just like in math class. It is helpful to keep track of where your objects are on this space. Not pictured is the X,Z grid (or plane) and the X,Y Grid (or plane), but the n are there.
q) Indicates the view you're currently in
a. So if you are in the ‘Top’ view this should say top, if you are in the perspective view this should say ‘Perspective’
• The interface is deeper than this but this is enough for today.
Make a ball and a ground plane
In the top left part of the screen you will see the “Sphere” icon on the polygon tab of the shelf bar. Click it to create a ball.
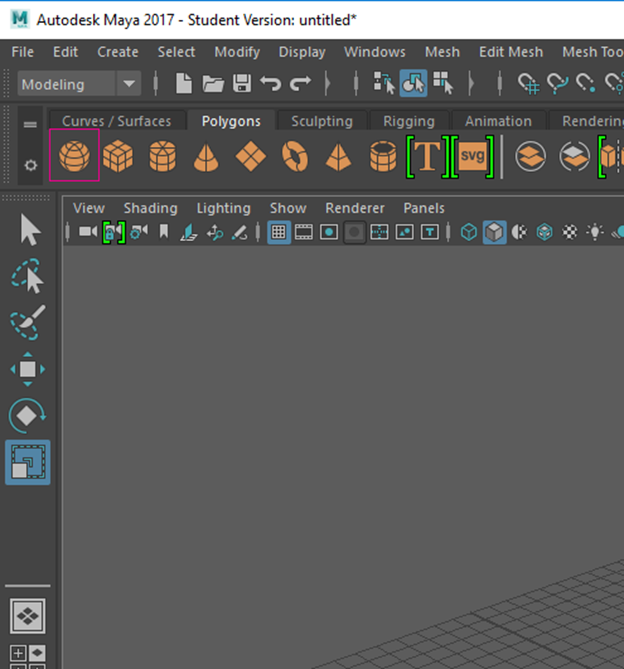
Now move the ball up a little but in the screen using the move tool. When you click on the move tool on the left edge of the screen the ball should still be highlighted from when you created it. If it is not, click on the ball after choosing the move tool. You will see 3 arrows in 3 colors each representing an X,Y, Z direct.
Y = Green = up and down
X = Red = left and right as a known as side to side. (ok … well that is relative depending on your vantage point.)
Z = Blue = forward and back (ok…. that is relative to your vantage point as well.)
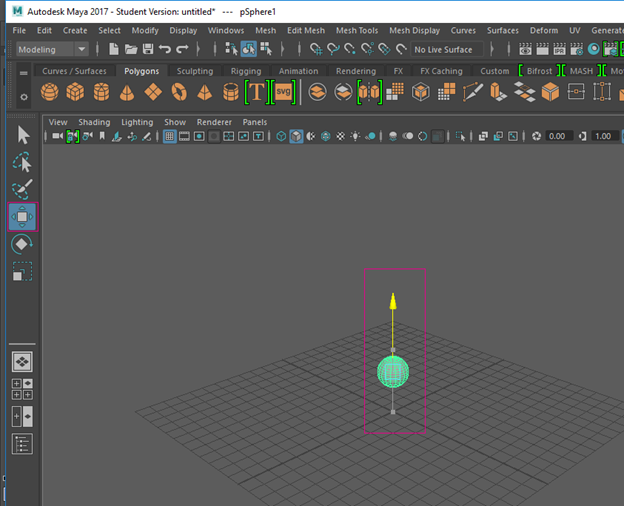
Now create a ‘floor’ or ‘ground plane’ – look over about 4 Icons to the right of the Sphere icon on the Polygon tab of the shelf. You will see it is small in the middle of the screen (about the size of one vinyl floor tile). Scale it up to be the size of the floor using the scale tool. The scale tool is located two icons lower than the move tool on the left edge of the screen.
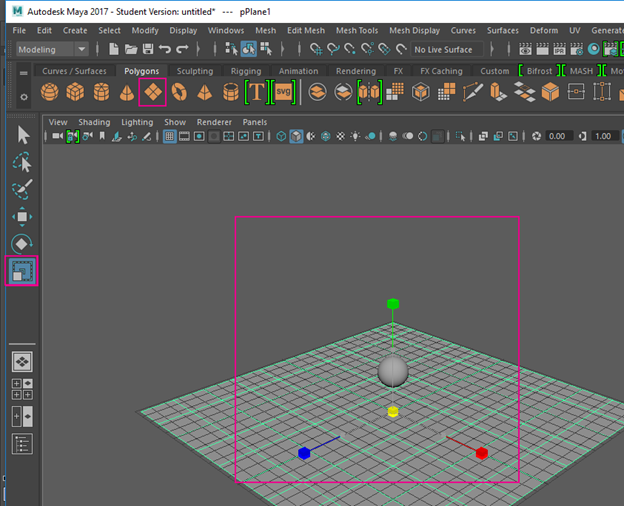
After creating the ground plane and selecting the ‘scale’ tool you will see the scale tool as a X,Y,Z, handle (they look like little colored boxes) in red, green and blur but it also has an light blue box in the middle. This light blue box handle is the ‘uniform scale tool. It allows you to scale an object in X,Y,Z at the same time. This is helpful if you want to keep the object length width and height equal while scaling up an object.
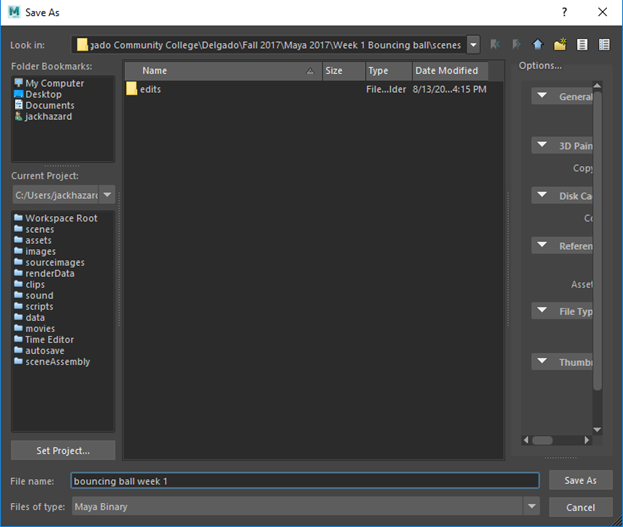
Now let us save the file and call it ‘bouncing ball week 1’ and send me a screen shot of your file saved in the correct folder so I know you set up your directories properly. Submit the JPG for approval.
If you are interested in more about Maya 2017 make sure that you visit my blog on https://steemit.com/@kazzz