How to set up Kreds masternode on VPS (Virtual Private Server)
This is my first masternode and I had a lot of mistakes, so I decided to sum up the whole process and hopefully it will simplify setting up a masternode for somebody else.
Firstly you will need a VPS. I ordered one from https://www.vultr.com. They do hosting for 5$ a month.
After you sign up you need to deposit 10$ from Paypal, Alipay, Debit card, BTC...
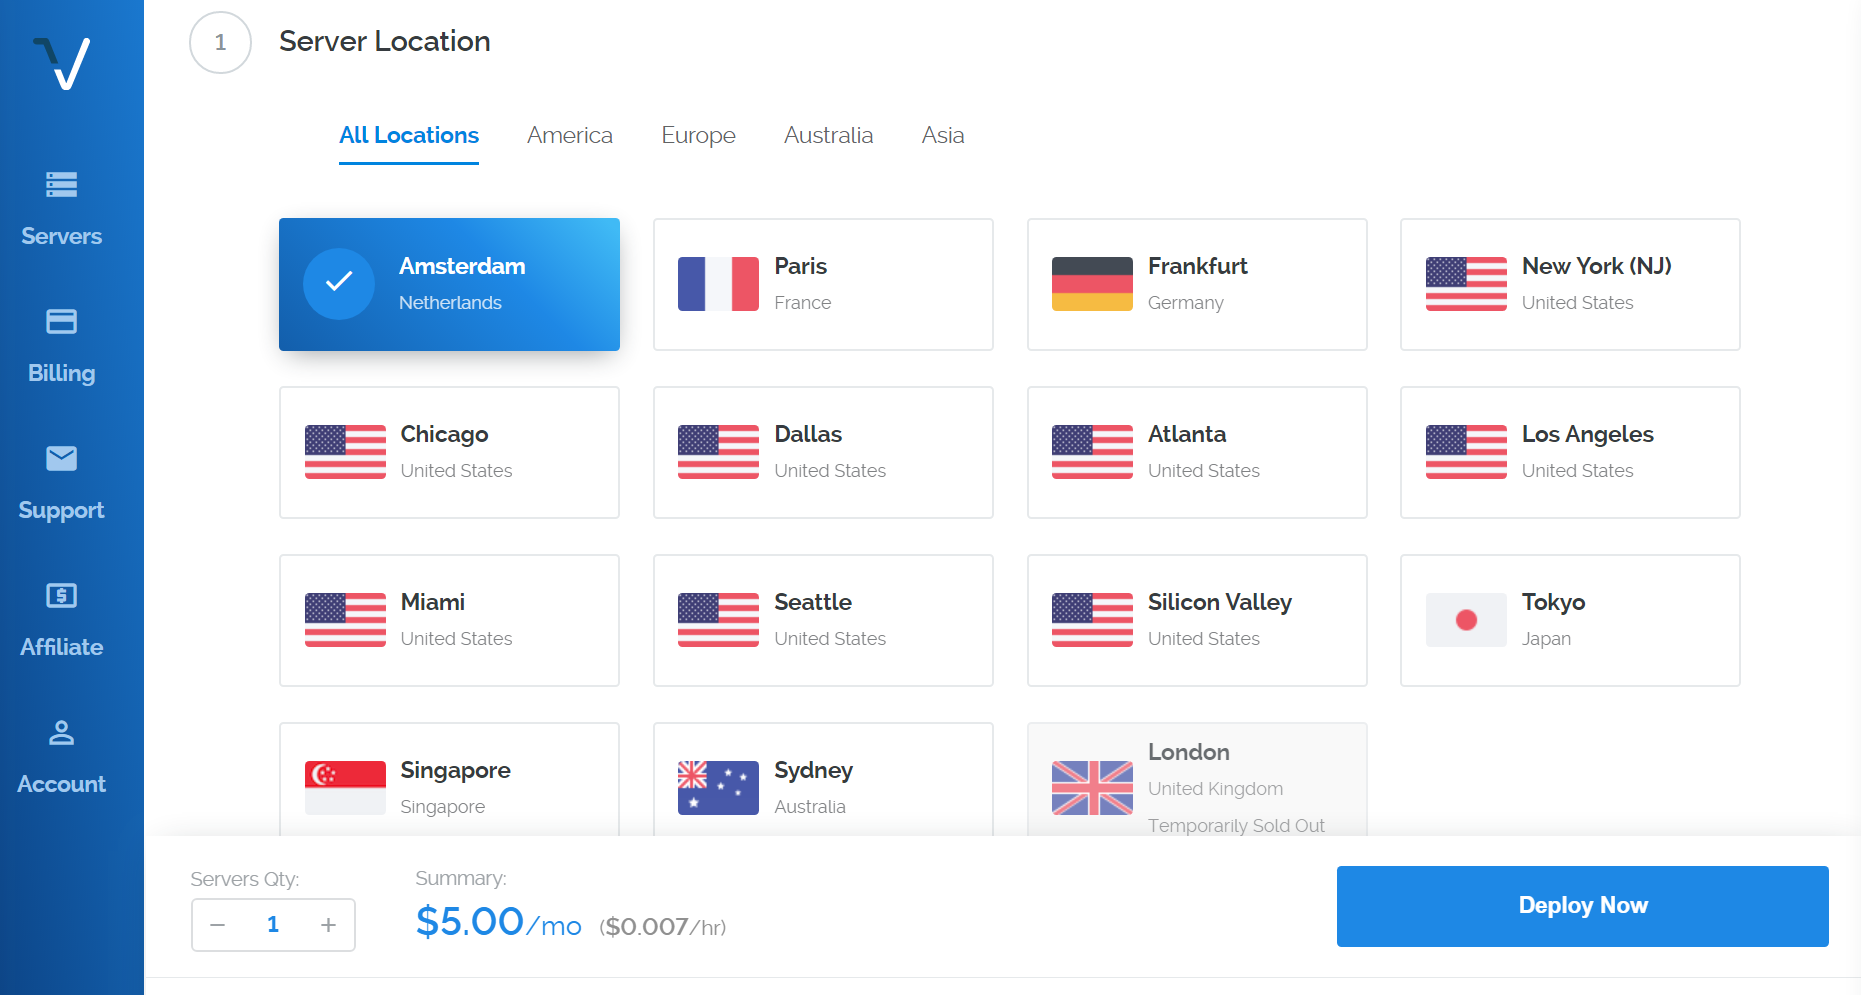
Than you select location of your server (EU, USA, ASIA...).
Now select the Ubuntu server version 16.04 x64bit.
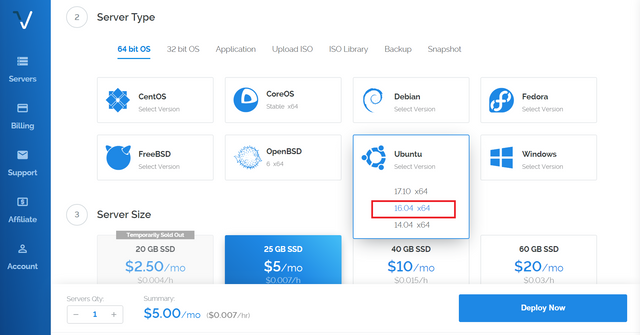
Here you can select the server size. They offer also a 2$, but it's sold out most of the time. If it's free you should order that one, to save money. Than you should give your server a name, for example Masternode1. This will be also your Alias.

Now we need access to VPS, the best way is to use Putty client: https://www.chiark.greenend.org.uk/~sgtatham/putty/latest.html
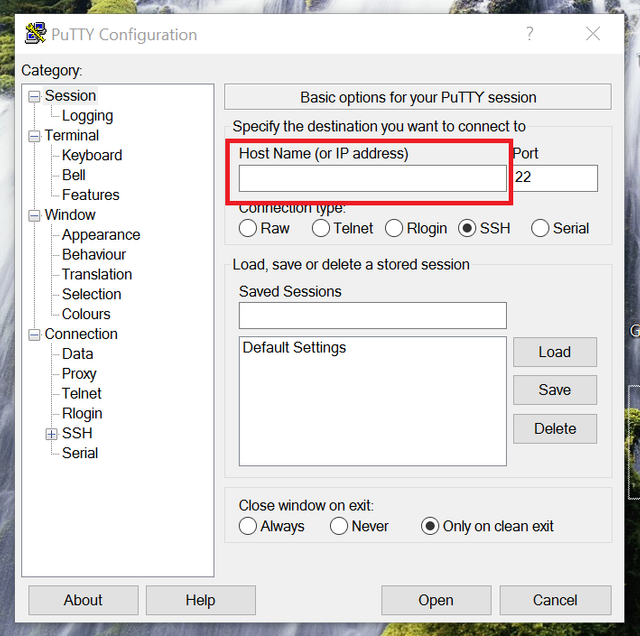
Install and run Putty. In Host name (or IP address) we type your IP address from Vultur webpage.
Than a pop up window opens and we click OK. 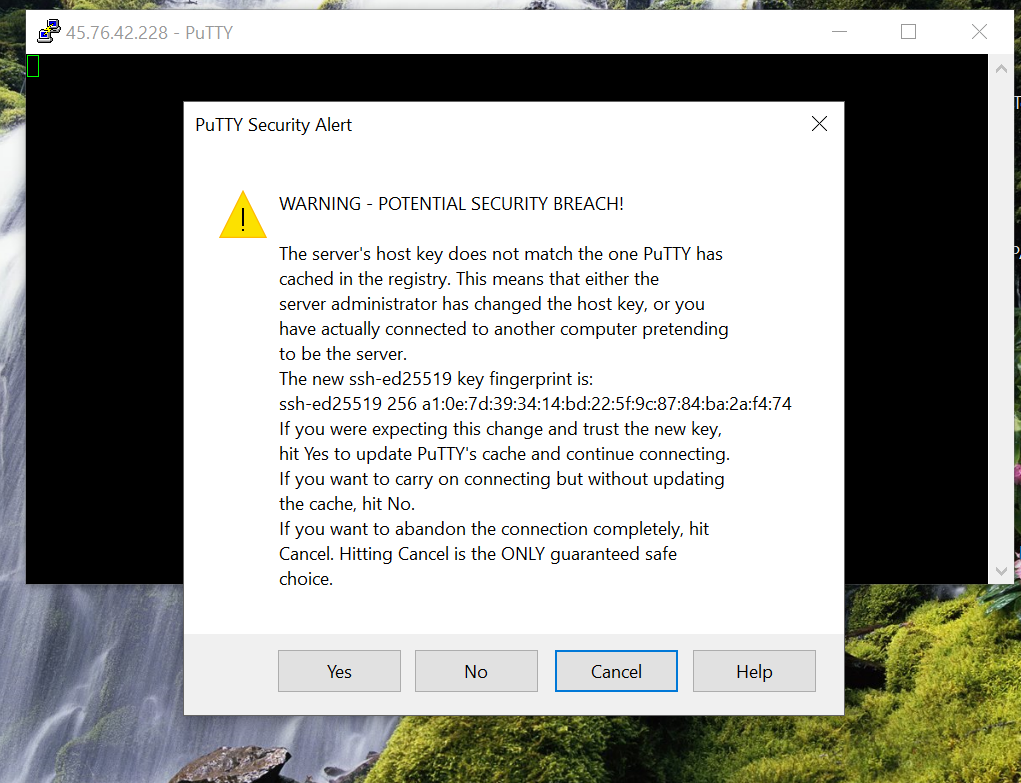
Now a black screen opens and we type username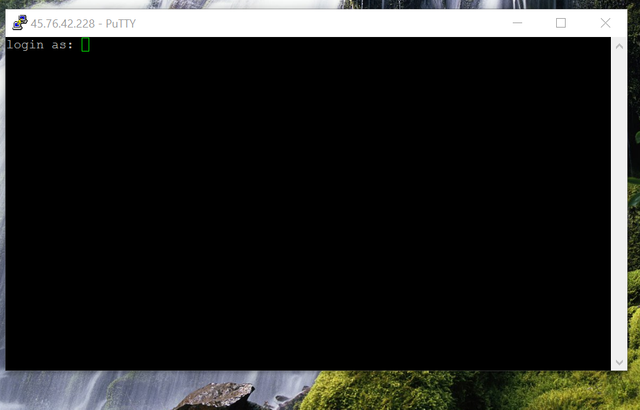
Username is always: root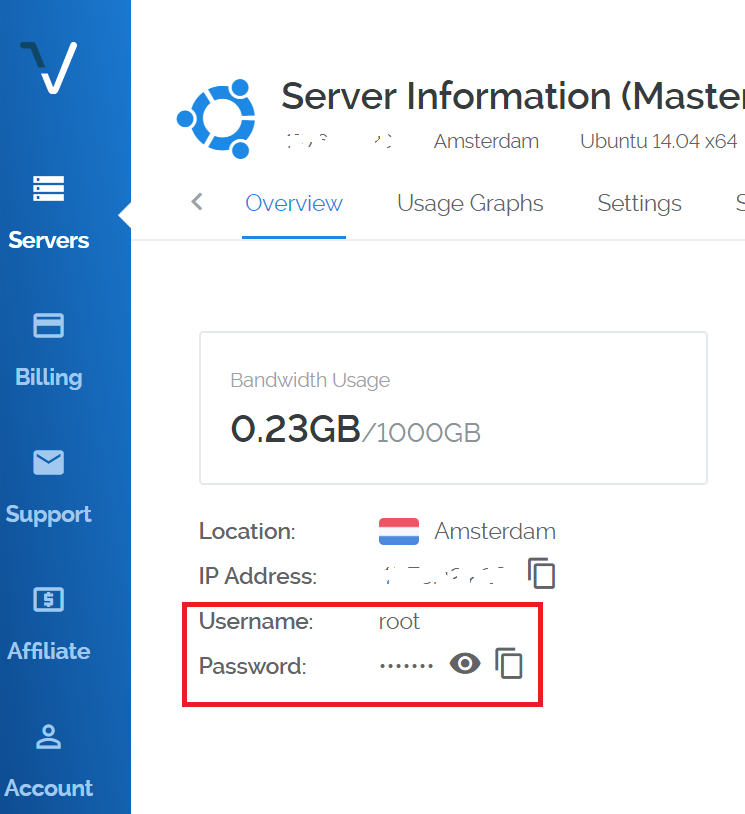
Then we copy password, which is located on VPS webpage. (Use CTRL+C) and click on Putty and there you just press the right mouse button and press enter (this is the same as CTRL+P) and we are in. After we logged in we will need to type a series of commands to get started:
Start to keep your repository up to date before you begin:
apt-get update
Install the dependencies needed before compiling the Masternode:
sudo apt-get install build-essential libtool autotools-dev autoconf pkg-config libssl-dev libcrypto++-dev libevent-dev git libboost-all-dev software-properties-common autoconf autogen
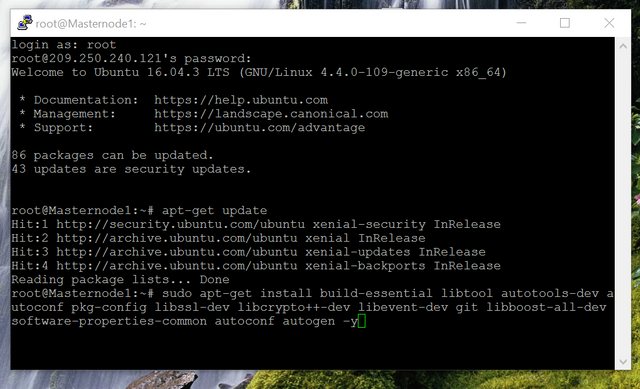
When asked press Y
Download DB4.8 directly from bitcoind repo in Ubuntu:
add-apt-repository ppa:bitcoin/bitcoin
When asked hit enter
sudo apt-get update
Install the libdb4.8:
apt-get install libdb4.8-dev libdb4.8++-dev
when asked press Y
Download the source from kreds and check for the latest release (at the date of writing this post the wallet had release 1.0.0.1, next one will be 1.0.0.2 and so on...):
wget https://github.com/KredsBlockchain/kreds-core/archive/v1.0.0.1.tar.gz
Wait for it to download and check if it's the latest release :
tar -xvzf v1.0.0.1.tar.gz (you will need to fix the correct ending for example next release will be: tar -xvzf v1.0.0.2.tar.gz
After it installs enter:
cd kreds-core-1.0.0.1 (check for the latest release and change the ending)
Once we are in kreds-core we enter:
apt-get install automake
Then we enter:
./autogen.sh
After that we enter:
./configure --without-gui && make && make install
or in case your VPS has low memory, we use only bottom command:
./configure CXXFLAGS="--param ggc-min-expand=1 --param ggc-min-heapsize=32768" --without-gui && make && make install
After your compile is finished you will find your source here:
cd /usr/local/bin/
Try to run the daemon and see if everything is running:
./kredsd --daemon
Verify if the daemon is running or not:
ps -aux | grep 'kred'
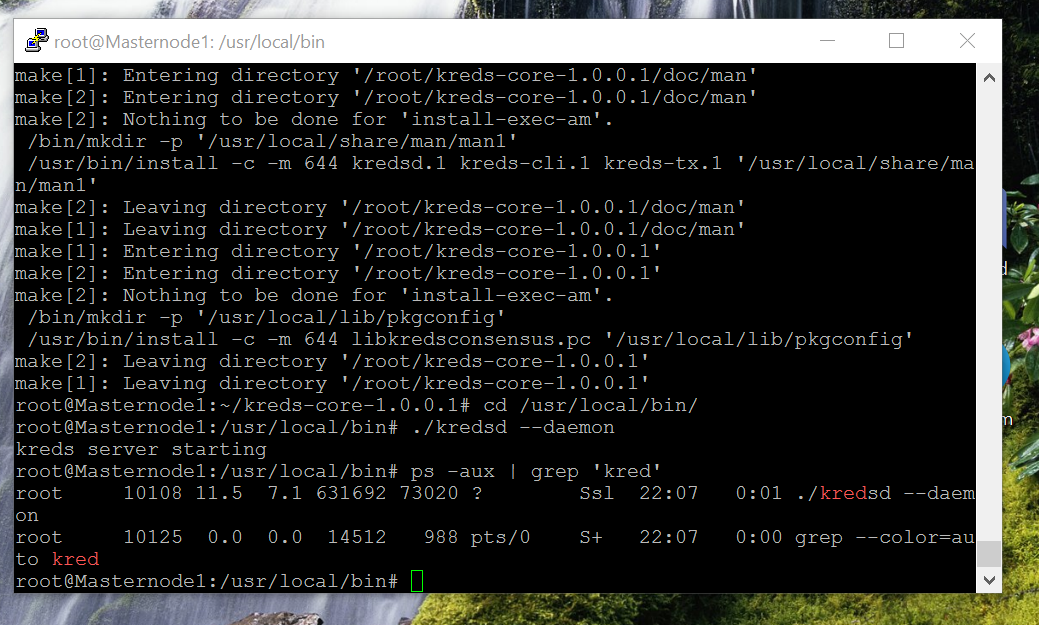
OK, now is it time to generate your VPS masternode key:
./kreds-cli masternode genkey
The output will be something similar to: 93HaYBVUCYjEMeeH1Y4sBGLALQZE1Yc1K64xiqgX37tGBDQL8Xg
Copy your masternode key somewhere safe, because we'll need it later for the kreds.config file and also for your HOT wallet setup).
To edit the configuration file for your Masternode we go to the configuration folder:
cd ~/.kreds/
Create a kreds.conf file in this folder:
touch kreds.conf
Edit the file kreds.conf:
nano kreds.conf
Add these lines to the file :
rpcuser=(you can use what you like here)
rpcpassword=(just use a strong password)
rpcallowip=127.0.0.1
listen=0
promode=1
maxconnections=100
masternode=1
externalip=(VPS IP Address) //example 185.22.152.12
masternodeaddr=(VPS IP Address):PORT //example 185.22.152.12:3950
masternodeprivkey=(Insert your VPS masternode key we generated above)
Than press CTRL+X to save and confirm with enter. The rpcuser and rpcpassword values are for the RPC interface, allowing you to interact with the Masternode from the command line. Use any values you like but keep a copy of them on file somewhere.
We are finished with the masternode configuration. Now we need to restart the wallet and let it use the new generated config file you just have created:
cd /usr/local/bin

./kreds-cli stop (this command will stop your daemon)

kill -9 10108 (alternative command if it doesn't work. The numbers - 10108 need to be copied from your root, they are different on your side my example: root     10108)
Check if your kreds wallet is running: (it should now be dead and no daemon output will be there!)
ps -aux | grep 'kred'
Now we have to start the daemon again with the new config file you just added.
./kredsd --daemon
You are now finished with your VPS part of masternode SETUP!!!
Now we go to your Windows wallet and open the RPC console by going to Debug window -> Console.
We run command:
masternode outputs
Write down the hexnumbers (this is your masternode tx) and the output index (it can be 0 or 1).
Now we can create masternode.conf file. Open notepad and save it as masternode.conf in the data directory of your install:
• For Windows: %appdata%/Kreds/
• Mac OS: ~/Library/Application Support/Kreds/
• Unix/Linux: ~/.kreds/
The new masternode.conf format consists of a space separate text file. Each line consisting of an Alias (VPS server hostname), VPS IP address followed by port, VPS masternode private key (not LOCAL or HOT masternode key), LOCAL collateral output transaction ID, LOCAL collateral output index.
(VPS ALIAS) (VPS IP) : (PORT) (VPS MASTERNODEPRIVKEY) (LOCAL MASTERNODE OUTPUTINDEX)
Example:
MN1 127.0.0.2:3950 93HaYBVUCYjEMeeH1Y4sBGLALQZE1Yc1K64xiqgX37tGBDQL8Xg 2bcd3c84c84f87eaa86e4e56834c92927a07f9e18718810b92e0d0324456a67c 0
Now we can save the masternode.conf file. You will need to re-start your wallet, it will then read the data from your newly edited Kreds.conf and masternode.conf. Once re-started, go to Settings --> Options --> Wallet --> Enable coin control features --> OK.
Once we did that we go to Send and click Inputs and click with right mouse button on the gray square and select Unlock unspent than click OK.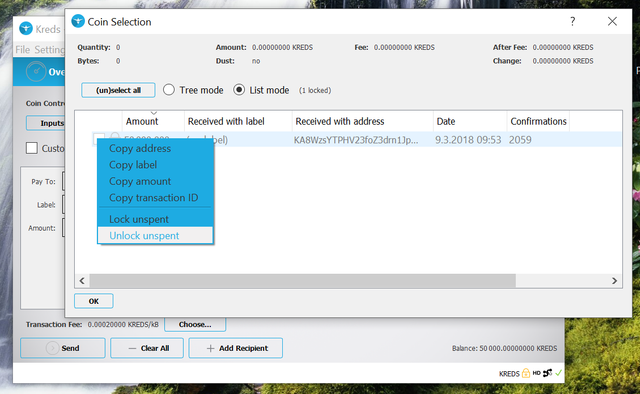
Now we can go to Masternode tab and click Start alias or Start all, this will broadcast and register your masternode details. After 3 min. we close wallet and re-open it to lock all 50k Kreds on the wallet. We wait for about 1h so it's fully activated.
Now your masternode should start tunning, but how to check if that is true?
Well, the most straightforward check is to get the list of running masternodes and enter through Windows Kreds-Qt Client console commands (or linux rpc command):
masternodelist full (your masternode VPS IP)
You will be presented with various information that will allow you to check if your masternode is running smoothly.
Example:
{
“ 2bcd3c84c84f87eaa86e4e56834c92927a07f9e18718810b92e0d0324456a67c 0": " ENABLED 61404 Ec52sButeWS2a6niZW3bBwBzsHR1QxLjcB 127.0.0.2:39501500345066 150 1500345096"
}
2bcd3c84c84f87eaa86e4e56834c92927a07f9e18718810b92e0d0324456a67c 0 is your masternode Output Index position.
Ec52sButeWS2a6niZW3bBwBzsHR1QxLjcB is your public key holding the coins.
127.0.0.2:3950 is your IP:PORT
ENABLED is a good sign, and 150 is your masternode rating. If it is 0 or 1, that is not a good sign, keep an eye on it for a few minutes and if it does not change then go through your data and restart. In this case the final number 1500345096 is a time stamp and will update every time you enter.
Done, your masternode is active and supporting the Kreds network :)
PS: I would like to give a special thanks to Kreds community on Discord channel, especially to ZynX and Cakkeman, who helped me go trough all the mistakes. I really appreciate it.
PSS: If my guide helped you don't forget to upvote! 😉
"kill -9 10108 (alternative command if it doesn't work. The numbers - 10108 need to be copied from your root, they are different on your side my example: root 10108" How do i learn my example?