WOOD AND BRASS LETTER HOLDER

Organization! Who doesn’t need a little more of this in their daily routine to help them feel like they’re killing it at this whole adulting thing?! If you’ve got plenty of notepads on hand, thank you cards to send out, and paper documents that are time sensitive, a chic little letter holder will work some magic. Keeping things upright and within arms’ reach will help clear up valuable desktop square footage and make sure you don’t forget anyone’s birthday this year!
You can alter the width and length of this project according to your spacial needs or what types of paper items are collecting dust or multiplying overnight. Paint your wooden base to fit your aesthetic or leave it natural and seal it with a wax or poly. An organized desk is a happy desk!


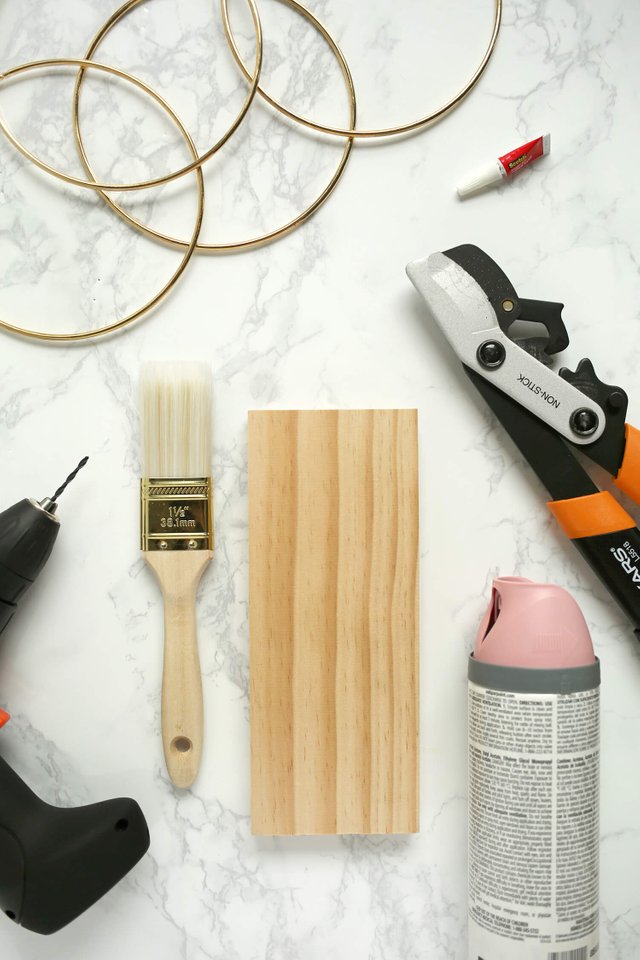
Supplies
-one 4″x10″ cut of pine
-three 8″ brass hoops (or four in case one doesn’t cut well)
-sturdy wire cutters
-super glue
-power drill
-5/64″ drill bit
-spray paint or acrylic paint and brush
-washi tape
-ruler
-pencil
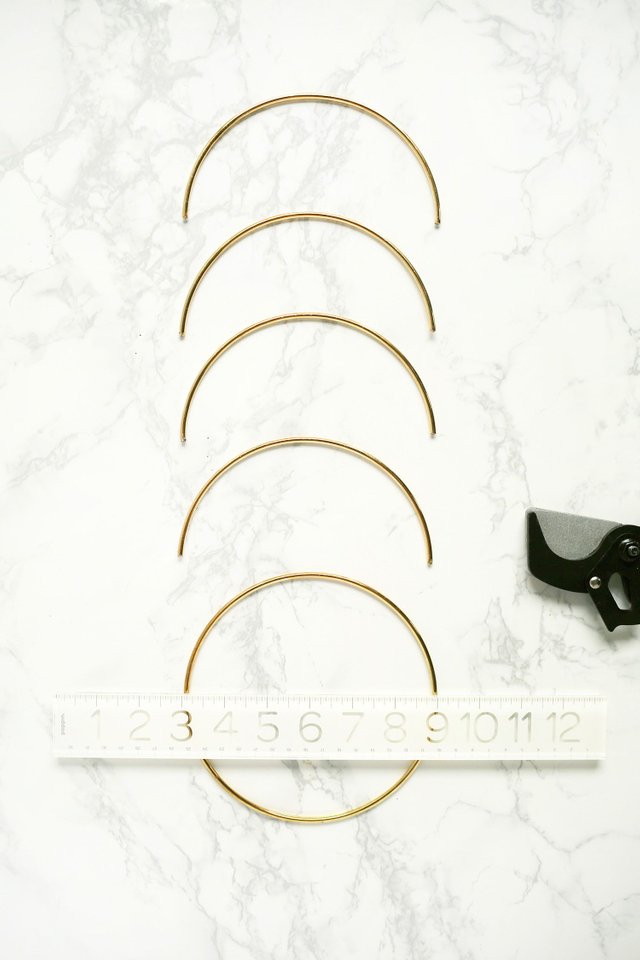
Find the center of your first circle and then use your ruler to mark the halfway point on each brass circle with a piece of washi tape. Cut as precisely on those marks as you can. Repeat until you have the amount of brass circles that you need.
If one of the cuts is off, it will affect the measurements of both halves. How do I know? Let’s just say there was some whispered swearing involved. After you’ve cut three hoops up, you’ll have one extra arch. Find the most consistent five arches out of the six. You can also snip the ends off of the longest ones to ensure they are all as even as possible.
Place one end of your first hoop so that it sets 1/4″ in from the same short end and long end of a corner. Make a mark there and then make another where the other end rests. Be sure it’s also 1/4″ from the edge..jpg)
Use the same hoop and place one end 1/4″ in from the short end and the long end of the same corner—the one that is diagonal from your first hole. Make a mark. Then make a mark where the other end rests.
Using your ruler, find the halfway point between the marks as shown above. I resorted to using my cm side to get a more accurate measurement. Then find the center between the middle mark and each end.
Repeat with the other side.
Place your washi tape on your drill bit so that when it hits the wood, you’ll know not to drill any further. You don’t want your hole to go all the way through the wood, just short of a 1/2″ deep. Drill each of your holes and sand off any rough edges. Give your wood two coats of acrylic or spray paint.
 Make sure all of your hoops fit and then remove them before adding a tiny amount of super glue to each hole and replacing them. Let dry according to manufacturer’s instructions.
  Fill her up with stationary or use her to hold mail that needs attention … like finally RSVPing to your co-worker’s upcoming wedding.
Switch out the hoop size and see what you come up with. Use a heavier block of wood and 14″ hoops to make a chic record stand or pare it way down and cut up seven or eight 4″ hoops, flip them so that they all face one of the short edges, and suddenly you have yourself a fun instant photo display.
by https://abeautifulmess.com/2018/03/wood-and-brass-letter-holder.html
Congratulations @urbihere! You received a personal award!
Click here to view your Board
Congratulations @urbihere! You received a personal award!
You can view your badges on your Steem Board and compare to others on the Steem Ranking
Vote for @Steemitboard as a witness to get one more award and increased upvotes!