TUTORIAL ON HOW TO DRAW FACE
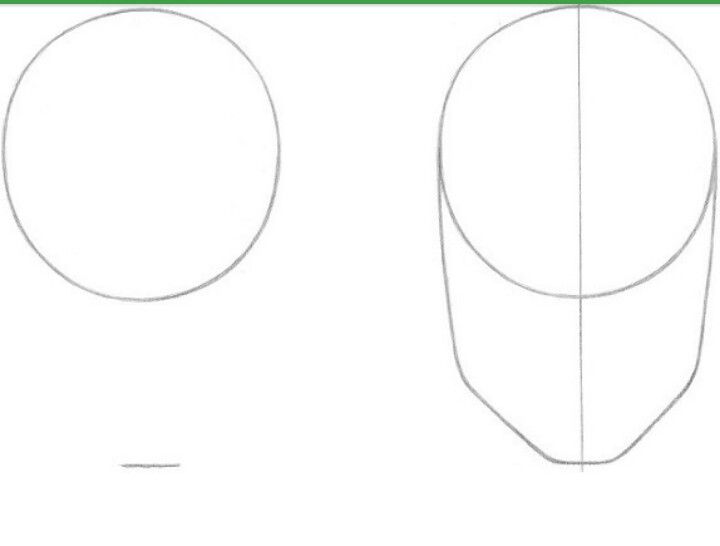
Step 1: Start with a circle Draw a large circle and make a horizontal line below it for the chin. Then sketch the jawline. Draw a vertical line down the center of the face and make sure both sides of the face are symmetrical.
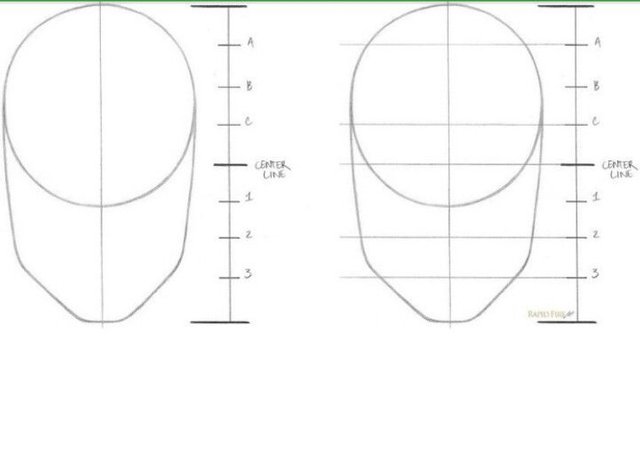
Step 2: Draw guidelines on the face There are 2 ways to do this step: Ruler or no ruler. I highly recommend using the ruler method for the first couple of faces you draw. Why? Because doing this step without it can throw your proportions off like crazy. Especially if you have trouble locating the ‘center’ of an object with your eyes. The no ruler method requires you to split multiple sections of the face in half and then in half again. Ruler Method: Make a ruler beside your drawing that is the same height. The ruler should be marked so there are 8 equal spaces. Always start with the center line. Draw faint lines through the face on the markings labelled CENTER LINE, 2, 3, A, and C. As you get used to this, you won’t need to draw the ruler on the side. No Ruler Method: Without the ruler, I draw lines in this order: CENTER LINE, 2, 3, B, A, C (B is included because it’s easier to break the forehead section in half first, especially when you’re drawing freehand). This is the method I use to draw heads all the time. Super SIMPLE Method: If it’s still a little confusing.
Step 3: Draw eyes in the right spot On the face, mark the center line with 4 ticks spread equally apart. The eyes will sit roughly on this line. Don’t be afraid to move slightly above or below the line, since eyes are usually slanted.  Step 4: Draw a proportionate nose Extend the 2 lines where the inner corners of each eye are located. These guidelines will determine the nose’s width. Now that we have a box, it’s time to draw the nose. Start with a circle, resting it anywhere be. You can give your male character a more chiseled appearance by drawing the nose using very angular lines.
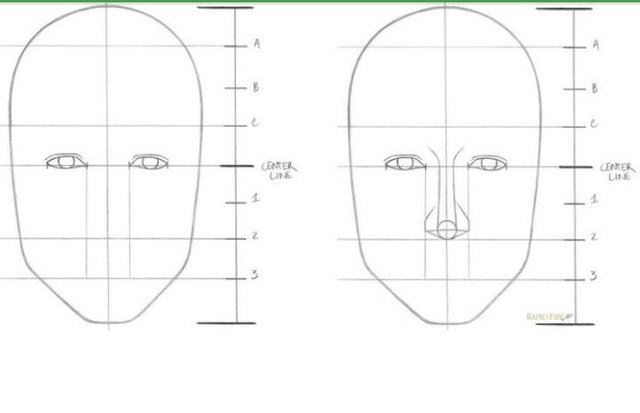
Step 5: Add the eyebrows Extend the nose’s bridge past the eyelids to define the brow bone (this step is optional). These lines should be very light! Using a 4B pencil, draw the eyebrows along the brow bone. Facial features that can accentuate masculinity are thick bushy eyebrows! 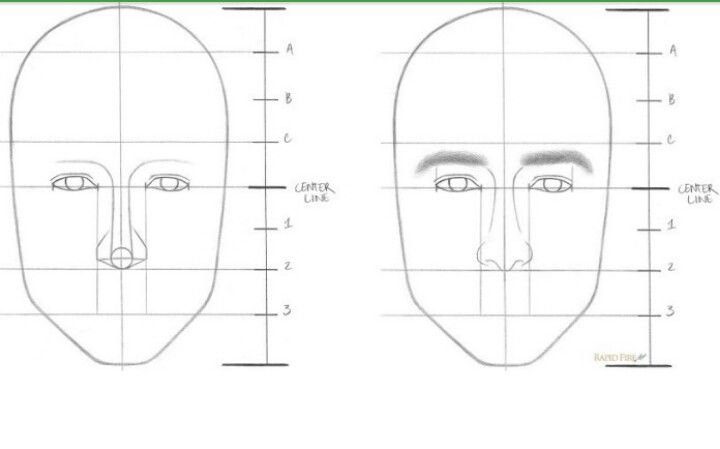
Step 6: Use a triangle shape to draw lips Draw a vertical line down the center of each eye. This will mark the lips’ outer boundary. Click here for my lips tutorial. If you’ve already read it, place your triangle in the small box under the nose to start. If you drew the nose well above line 2, extend the triangle so the tip touches the nose. 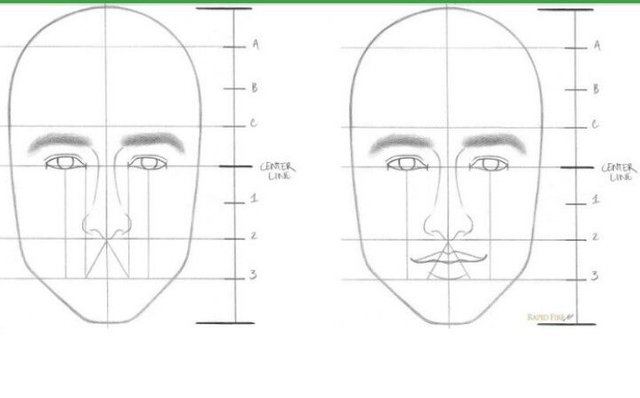
Step 7: Add the ears The Center Line and Line 2 mark the general boundaries for each ear. In-depth tutorial on how to draw an ear from the front .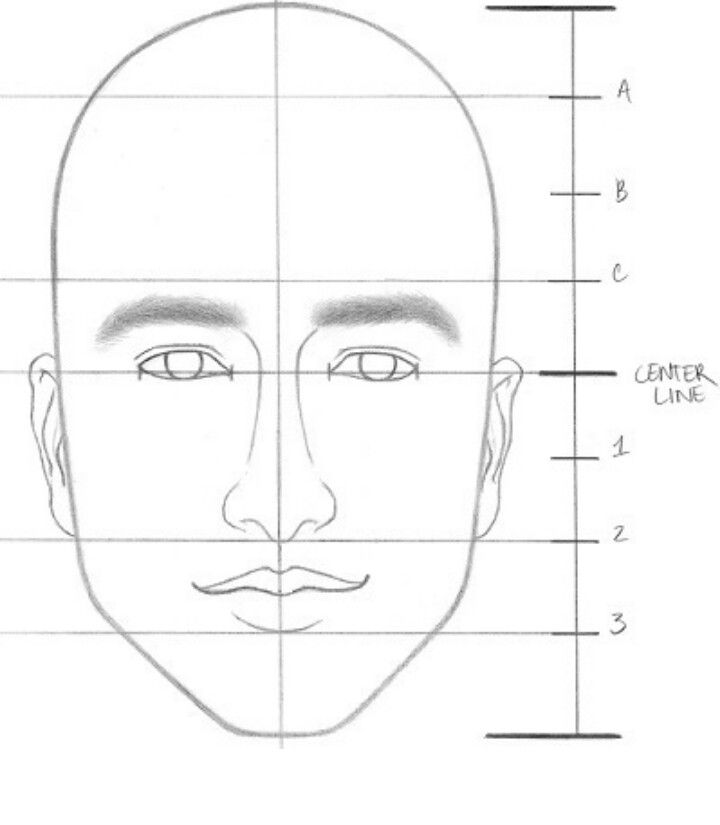
Step 8: Draw the hair Draw the upper hairline somewhere in between line A and B. It’s up to you how large you want the forehead to be. To draw a receding hairline, go above line A. When you’re drawing a man’s face, bring in hair from the sides of the head to create a solid and visible looking hairline. 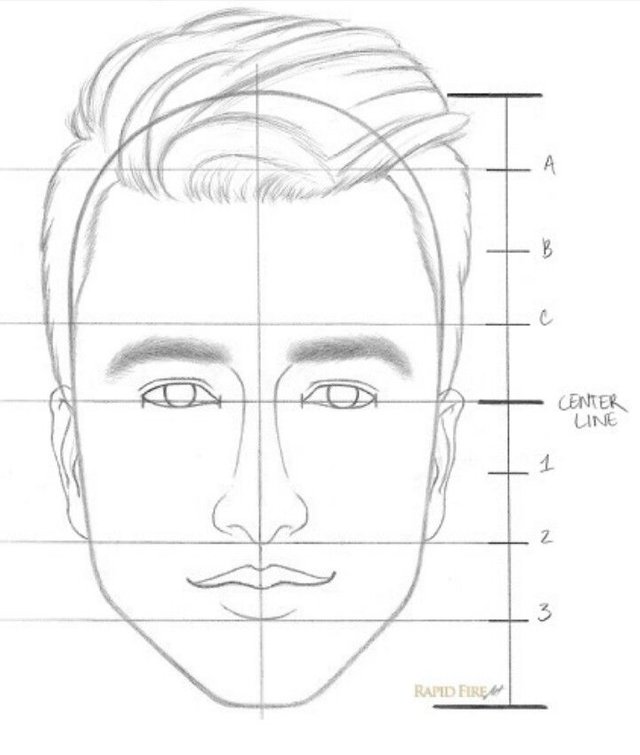
Next tutorial will enlighten us how to draw side face.