8 Tips for Better Lighthouse Photography
a lighthouse is more than just a towering structure amid a majestic landscape. In the old days, it served as a beacon for weary sailors, signaling the promise of land (and seeing their families again) after a long voyage at sea. Lighthouses symbolize hope and perseverance, and they make for interesting and emotionally engaging photographic subjects not only because of the dramatic scene they create but also because of what they represent.
If you’ve ever come across a particularly beautiful lighthouse scene and wanted to capture it in your photos, we’ve compiled a few useful tips for you. But first, here are the things that you’ll need.
What Equipment Do You Need for Lighthouse Photography?
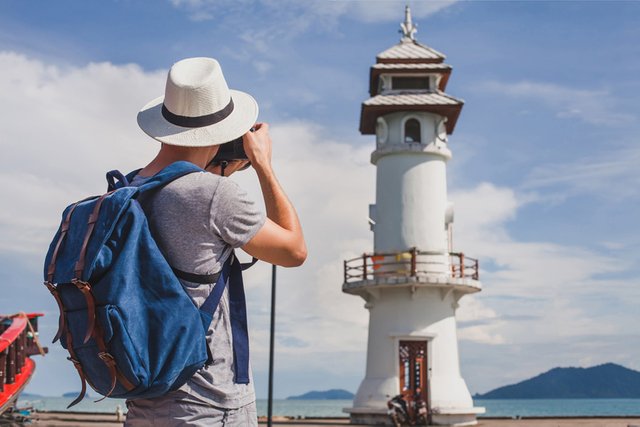
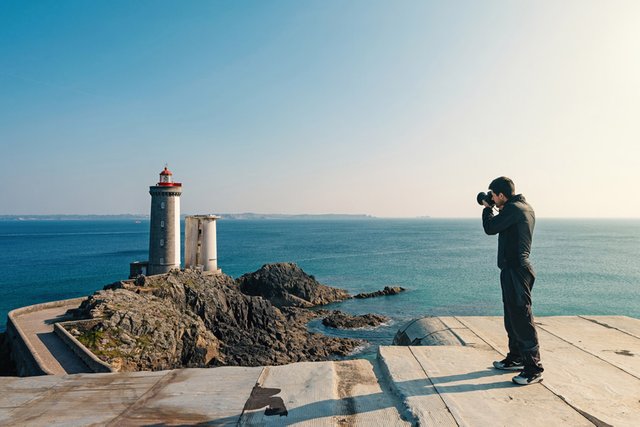
Wide-Angle or Telephoto Lens
The kind of lens you need will depend on what you plan to capture. If you want to take a lighthouse photo that captures the entire skyline or seascape surrounding it, use a wide-angle lens. Make sure that it’s wide enough to capture more of the scene, but not too wide wherein you end up with fisheye distortion. On the other hand, if you want to capture a closer view of the lighthouse, a medium telephoto lens is your best bet. It allows you to capture the interesting architectural details of the structure that you wouldn’t normally be able to highlight in a landscape scene.
Tripod
Lighthouse scenes fall under either landscape or architecture photography, and a tripod is an essential piece of gear for both of those niches. You’ll most likely be shooting at dawn, dusk, or night, which usually involves using slow shutter speeds. In such cases, a sturdy tripod will be extremely helpful for capturing well-exposed images without maxing out the ISO, which can ruin your image with excessive image noise, and for decreasing the chances of getting shaky shots during long exposures.
Filters
Scenes with expansive blue skies and large bodies of water can be particularly tricky to photograph in natural light due to the prevalent amount of glare and reflections. For lighthouse photography, it’s always a good idea to have a few filters on hand. There are three recommended types of filters for lighthouse photography: polarizing, split neutral density, and neutral density.
Polarizing filters are useful in getting rid of unwanted glare from reflective surfaces like bodies of water. You can also use it to naturally increase color saturation while deepening the blue tones of the surrounding skies. Meanwhile, you can also use neutral density (ND) filters to help filter some of the light entering your lens, which would allow you to use certain aperture, ISO, or shutter speed settings without risking overexposure.
Then there’s the split neutral density filter, which allows you to set specific exposure settings to brighten only half of your image. This is useful when you want to increase the exposure of the water or the ground without overexposing the sky, and vice versa.
Practical Lighthouse Photography Tips
Do Some Research
Before going out and visiting different lighthouses, spend a bit of time doing some online search to gather critical information you may need, such as GPS coordinates, visitor guidelines, and other details. If you plan to shoot a popular destination, make sure to arrive early so that you won’t have to deal with people being in the frame as you compose your shots.
If this is your first attempt at lighthouse photography, you may also want to check some of the photos that other photographers have shared online so that you can get an idea on how to compose your own shots.
Utilize Different Lenses to Vary Your Composition
A wide-angle lens will allow you to capture more of the scene, thus allowing you to establish context by showing the lighthouse amid its surroundings. This also helps you incorporate more interesting elements in your photo, such as the dramatic cliff on which the lighthouse stands, the waves crashing around it, the houses that were built around it over the years, and more.
On the other hand, if you want to capture the lighthouse up close or if it is simply too inaccessible, a telephoto lens will serve you well. Aside from allowing you to take photos from afar, a tele lens can give you a “compressed” effect in which the background appears closer to the subject and the subject itself appears larger than it really is. In some cases, this can be a desirable effect for artistic composition.

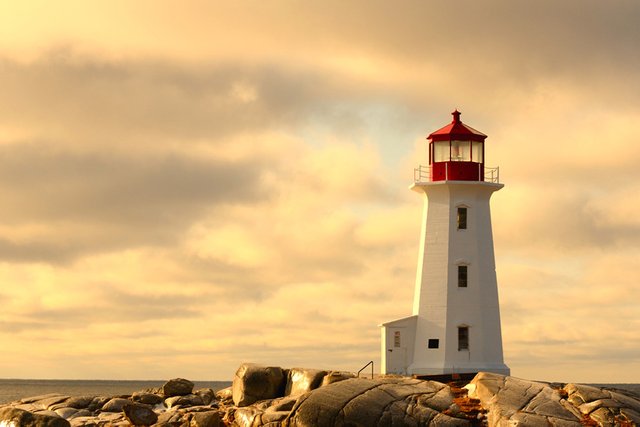
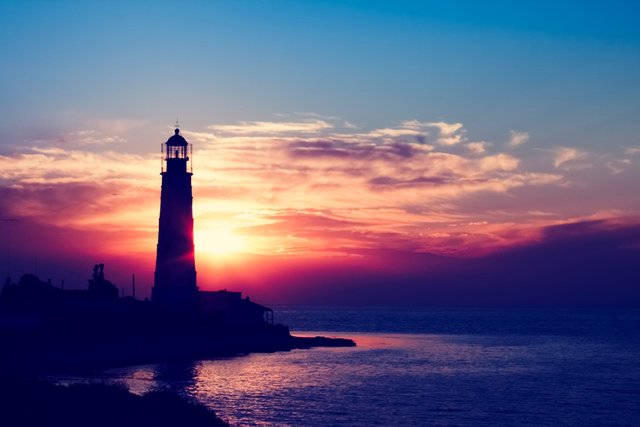
Choose the Right Weather Conditions
Achieving the look and feel that you want in your images will depend largely on the lighting and weather conditions on the day of the shoot. When planning your shots, take note of the weather in your preferred lighthouse’s location. If you want a warm wash of color in your photos, wait for mostly sunny weather and take your photos during early morning or sunset.
You can also try shooting in stormy weather for a gloomier, more turbulent feel. Waves hitting the shore may also be a great dramatic element to incorporate in your composition.
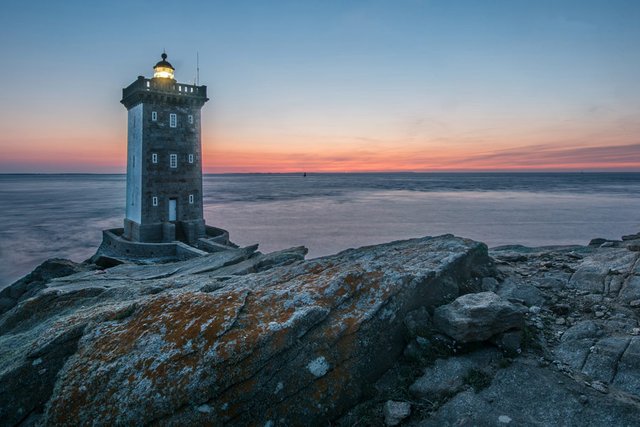
Add Foreground Interest
Establishing a foreground interest that complements the rest of the elements will usually give you a more visually appealing photo than one without. This can be a boat, a tree, some rocks scattered along the shore, and other nearby subjects.
Having a subject to focus on in the foreground creates a layered composition that allows you to draw the eye naturally, beginning with the focal point (the subject) and gradually moving on to other elements in the frame.
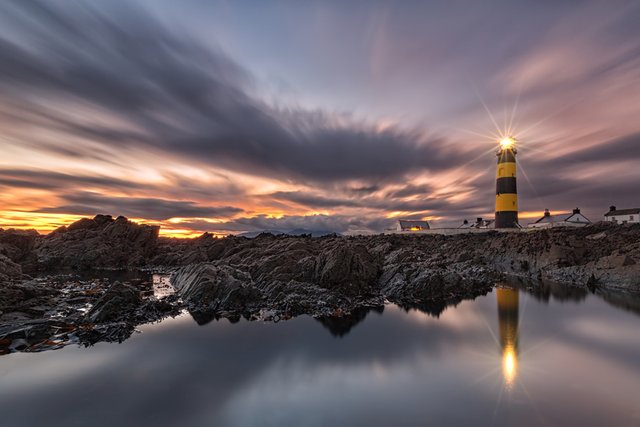
Use Long Exposures
Long exposures allow you to create the feeling of movement in your image. The effect of this approach is usually evident when you have moving water in the frame, which will appear frothy or milky and provide an interesting contrast to the parts of the image that are in focus. If you’re shooting on a particularly cloudy day, you can also use long exposures to create movement in the sky, rendering the clouds as colorful streaks.
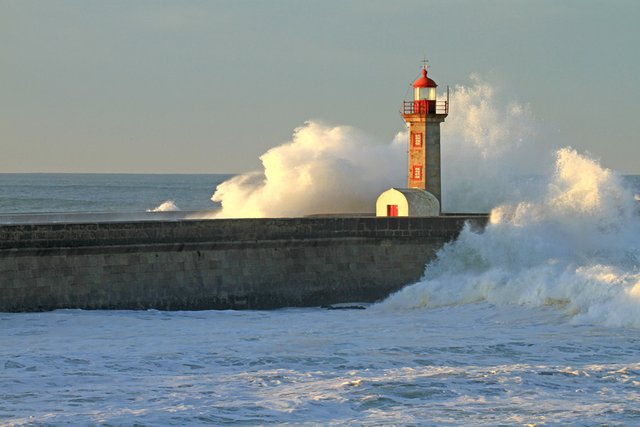
Use a Fast Shutter Speed to Capture Movement
You can also try going the other way and using a fast shutter speed to freeze movement and capture those dramatic seascape scenes that include violent waves crashing against the rocks. To achieve this, use shutter speeds of about 1/500 of a second or faster to effectively freeze the action.
You may want to bump up your ISO and use a larger aperture to properly expose your image, as using incredibly fast shutter speeds won’t allow for enough light to enter the lens.
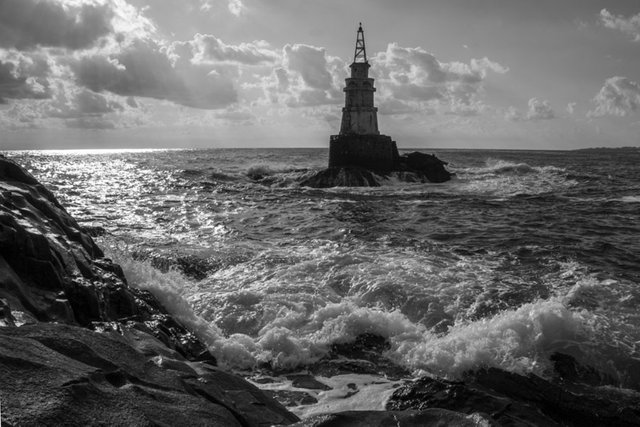
Go Black and White
Consider shooting your lighthouse images in black and white (or editing them later in the post-processing stage) to make them appear more emotional and dramatic. This is also a useful trick to salvage a good, well-composed photo that has a little too much noise due to using high ISO settings and fast shutter speeds. Image noise normally looks unacceptable in colored photos, but in a monochromatic image, it lends a grittier, more mysterious feel.
Blend Multiple Exposures
Another tip for breathtaking lighthouse photos is to shoot the same scene at different exposures and using a post-processing software to blend them into one image that has a richer range of colors, shadows, and highlights.
This is the same process used for HDR or high dynamic range photography, although you can also use it to solve gradient issues when using a graduated ND filter. To avoid having the lighthouse go from dark to light in the image, shoot the scene without the filter while making sure that the lighthouse is properly exposed. Then, shoot a second photo with the filter to balance the exposures of the sky and ground. You can then blend the two images to create one that has correct exposures in the upper and lower half, without affecting the lighthouse itself.
GuruShots Photography Challenge: Lighthouses, Piers & Ports
If you have any captivating photos of lighthouses, piers, docks, wharfs, quays, or seaports, the “Lighthouses, Piers & Ports” photography challenge by Adorama and GuruShots.com may be for you. Photo enthusiasts of various skill levels who are 13 years old or above are encouraged to join.
To participate, just send in up to four (4) of your best images that capture the beauty of lighthouses and other coastal or seaside scenes.
Winners will get any of the following prizes:
Top Photographer Award – $200 Adorama Gift Card
Top Photo Award – GuruShots bundle with 20 Swaps, 15 AutoFills & 10 Keys
Guru’s Top Pick Award – GuruShots bundle with 20 Swaps, 15 AutoFills & 10 Keys
Join the GuruShots Photo Challenge!
Interested participants can send up to four (4) photo entries only.
The photo challenge runs until December 26, 2017.
Entries submitted should be in JPEG format with a minimum resolution of 700 x 700 pixels and should have a maximum file size of 25MB.
Photos submitted must be distinct in subject, background, foreground, and location. Multiple cropped or edited images will not be allowed.
Photos must either have anything from a small pier at a cottage to large seaport in its composition. Docks, wharfs, quays are also allowed.
Your images must be completely your own; those who violate copyright rules will be disqualified.
Photos that are obscene, provocative, defamatory, sexually explicit, objectionable or inappropriate will be disqualified.
A “blind voting” method among GuruShots members will be used to determine the winners.
Photos will be ranked as follows
Upvoted for useful information :) Thanks