Shader Programming: Massively parallel art [Episode 3]
Shader Programming: Massively parallel art
Today, in our STEEM-exclusive journey into graphics programming with shaders, we introduce animation!
PART 3: We like to move it (move it)
Intro
In the previous installment, we learned how to calculate a colour based on where in the viewport the pixel we are rendering is located.
If we introduce the concept of time to our calculation, we go from looking at a static image to watching something that changes -- animation!
Handily, Shadertoy has made it easy for us. We have an input called iTime, which gives us the time in seconds since the shader started running (as a float). Not only that, but we also have an integer, iFrame, which will give the current frame number.
Let's go!
Have a look at the shader below (and go ahead and try it in Shadertoy).
void mainImage(out vec4 fragColor, in vec2 fragCoord)
{
    // Calculate uv coord (each axis normalised from 0 to 1.0)
    vec2 uv = fragCoord / iResolution.xy;

    // Start with a nice green
    vec4 colX = vec4(0, 0.7, 0.1, 1.0);

    // Add some red component based on time
    colX.r = iTime;

    // Scale by x coord as before
    colX = colX * uv.x;

    // Calculate another colour based on our y coordinate
    vec4 colY = vec4(0.5, 0.2, 0.6, 1.0); // A majestic purple
    colY = colY * uv.y;

    // Add them together and output to screen
    fragColor = colX + colY;
}
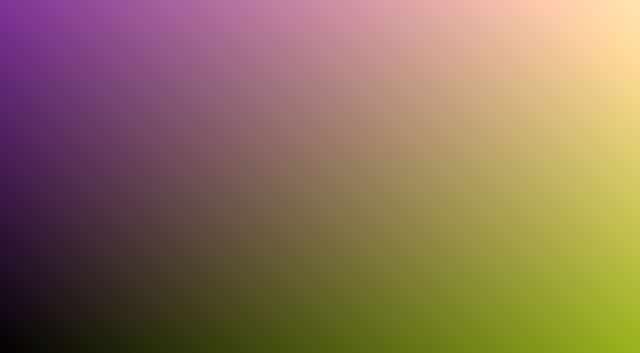
It's very similar to the last shader from the previous episode, but you'll see that now it changes as you watch. Before we scale the green colour by the x coordinate, we add some red component based on time.
One note about GLSL vectors: For convenience, for a given vector v, we can refer to the components as v.x, v.y, v.z, OR as v.r, v.g, v.b. The accessors are entirely equivalent, and v.x refers to the exact same component as v.r. Both accessors exist just so that we can talk about a given vector component in a contextual way.
If you press the rewind button in Shadertoy, underneath the render panel, you'll see that over the first few seconds the green on the right fades out to a peachy colour.
Repeating animation
Consider the following line in the shader above:
colX.r = iTime;
Since time increases forever, the red component will only ever grow; the yellow colour will never return to green.
Let's fix that and make a continuous fade back and forth. A time-honoured way to produce an oscillating signal from a continuous input is to use the sine function.
A first stab at this would be to change the line above to:
colX.r = sin(iTime);
However, the output of sine varies from -1 to 1. Since we don't want a negative value for our red component, and want to cap it at 1, we should add 1 to the output from sine to change the range to {0..2}. We should then divide by 2 to get the final desired range of {0..1}. Try substituting in this line:
colX.r = (sin(iTime) + 1.0) / 2.0;
Remember to click the Play button below the code editor panel when you make a change to the shader.
Isn't that pretty!
Note that GLSL is quite picky about requiring us to specify floats as e.g. 2.0 instead of just 2. It will complain if you try to do arithmetic with differing types.
Adjusting animation speed
If we want to change the speed of the colour fade, we can simply multiply time by some constant before taking the sine:
    // 10 times slower
    colX.r = (sin(iTime * 0.01) + 1.0) / 2.0;

    // 10 times faster
    colX.r = (sin(iTime * 10.0) + 1.0) / 2.0;
The mix() function
Let's look at a really useful GLSL function: mix().
We already know how to fade from black to a given colour (by multiplying the colour by a float between 0 and 1.0). However, we often want to mix between 2 specific colours, instead of between a colour and black.
mix() accepts 3 arguments: The first 2 are the vectors (in our case colours) that you wish to mix between, and the last argument is the mix amount, between 0 and 1.0.
For example, the following would give a 50% grey:
vec4 col = mix(vec4(0, 0, 0, 1.0), vec4(1.0, 1.0, 1.0, 1.0), 0.5);
Try the following shader, which will show a fullscreen repeating fade between green and purple.
void mainImage(out vec4 fragColor, in vec2 fragCoord)
{
    // Calculate uv coord (each axis normalised from 0 to 1.0)
    vec2 uv = fragCoord / iResolution.xy;

    // Define two colours
    vec4 col1 = vec4(0, 0.7, 0.1, 1.0);
    vec4 col2 = vec4(0.7, 0.2, 0.5, 1.0);

    // Mix them based on time
    float mixAmount = (sin(iTime) + 1.0) / 2.0;
    vec4 finalCol = mix(col1, col2, mixAmount);

    // Output to screen
    fragColor = finalCol;
}
Some housekeeping
Finally for today, I want to show a couple more niceties of GLSL that let us write terser code.
Consider the example line I showed for mix:
vec4 col = mix(vec4(0, 0, 0, 1.0), vec4(1.0, 1.0, 1.0, 1.0), 0.5);
The first thing to mention here is that the vec4 constructor will happily accept a single float, and assign ALL components to the value of that float. Therefore, it's equivalent to the above to write just:
vec4 col = mix(vec4(0, 0, 0, 1.0), vec4(1.0), 0.5);
Another spoonful of syntactic sugar to swallow concerned operator swizzling, as mentioned last time.
We can construct a vec4 (for example) by passing a vec3 to provide the vec4's first 3 components, and a float for the last component. So we can do the following:
vec3 col = vec3(1.0, 0, 0);  // RGB full red
fragColor = vec4(col, 1.0);  // Output final RGBA colour
This saves us from having to carry our alpha component (which is pretty much always going to be 1.0) through our calculations.
Furthermore, we don't need to include a trailing (or leading) 0 on floats. 1.0 can be written as 1. instead. And 0 doesn't need a . at all!
Combining all these concepts, our mix() example can now be written as simply as:
vec3 col = mix(vec3(0), vec3(1.), .5);
Nice!
Where we're at
Here's a humble shader which combines everything that we've talked about so far, and which you should now hopefully be able to understand :)
void mainImage(out vec4 fragColor, in vec2 fragCoord)
{
    // Calculate uv coord (each axis normalised from 0 to 1.0)
    vec2 uv = fragCoord / iResolution.xy;

    // Define a couple of colours for left side...
    vec3 colLeft1 = vec3(0.1, 0.8, 0.2);  // Green
    vec3 colLeft2 = vec3(0.8, 0.2, 0.1);  // Red

    // ...and right side...
    vec3 colRight1 = vec3(0.1, 0.2, 0.8); // Blue
    vec3 colRight2 = vec3(0.7, 0.8, 0.1); // Yellow

    // Get final left colour by mixing based on time
    float mixAmount = (sin(iTime) + 1.0) / 2.0;
    vec3 colLeft = mix(colLeft1, colLeft2, mixAmount);

    // Same for right colour, but using a different
    // time scale so left and right vary at different
    // speeds
    mixAmount = (sin(iTime * 0.3) + 1.0) / 2.0;
    vec3 colRight = mix(colRight1, colRight2, mixAmount);

    // Now mix the left and right colours based on uv.x!
    vec3 finalCol = mix(colLeft, colRight, uv.x);

    // Output final vec4, using our RGB colour
    // and including alpha
    fragColor = vec4(finalCol, 1.0);
}
Paste it into Shadertoy, and you should be rewarded with a constantly changing gradient effect.

If there's anything in the above shader that you're not clear on, please do leave a comment and I'll do my best to help.
Although things have been visually unimpressive so far, we now have enough background to code up an actual effect. See you next time, when we'll do exactly that!