Making Furniture out of Cardboard Boxes!!!
This project brings out the creative wild child in you instantly! It is so much fun and functional as well!!
I first had this idea when I was fixing up a bedroom that I didn't have any furniture for and couldn't afford to buy new. So I began searching on the internet for some ideas. I came across a few articles about cardboard furniture and immediately became excited! I love to reuse and recycle, its my nature, so I began keeping an eye out for boxes that looked like they might be durable enough. Costco was a good source as well as the furniture, appliance and electronic stores. Some dumpsters behind Stores are sometimes filled with broken down cardboard and I hit up a few of these as well. If you ask the store manager they are usually very accommodating!
Step ONE
I used Duct tape to secure the Boxes to each other once I had them in the design I was wanted to achieve. I love arches so I had to cut out one side of the box, using a ruler and scissors and some ingenuity and eyeballing ! HA.
If you find your walls are not strong enough you can reinforce them with pieces of cardboard cut to the desired size and either glued or taped on to the existing wall.
Step TWO
Next I covered all of the boxes with strips of Newspaper and plain ole white glue I bought at my local paint/harware store, they sell it in large bottles and because I was doing a large piece I was very glad to have it!
Now you can add a small amount of water to the glue if you want to make it a bit more spreadable, but don't water it down too much. I use a paint brush to coat the side of the boxI am working on with glue and then the my stripes of newspaper and lay them down in the glue. If you youtube Paper Mache you can see how this is done!
Now you have to also coat both sides of the paper, the side that is facing up as well as the one already stuck to your box, so things do get sticky, lay down some paper under your project as you are SURE to get glue in many unwanted areas! Also have a wet rag to wipe your hands off as you go.
You can do two layers of newspaper and glue however I only did one, I was impatient! Make sure you allow the layers to dry before beginning another one. Patience for this one is important because if it is too wet it can warp your project.
Step THREE
After I covered the whole piece and allowed it to dry for a few days, I then painted it with a base coat of Acrylic cream coloured paint I had left over from painting our house.
Step FOUR
On the bottom of the unit I bought four PVC end caps for legs so the unit was raised above the floor, so It wouldn't get wet when we mopped the floor and it is easier to move around. I sand papered the surface of the pvc for a better contact with the glue and I used hot glue to secure them on to the bottom of the box unit .
Step FIVE
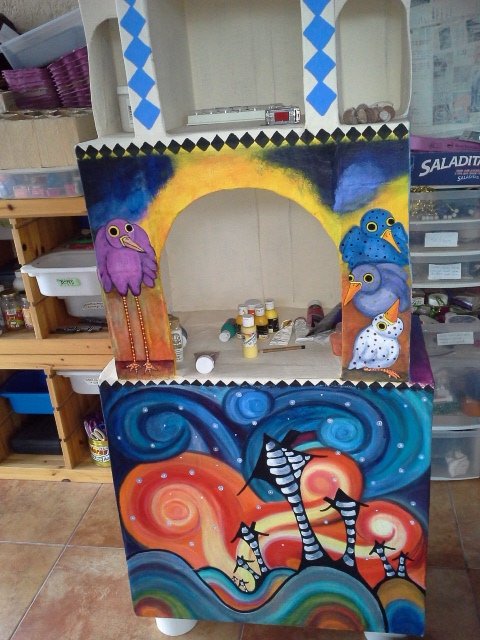
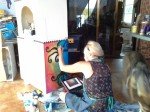
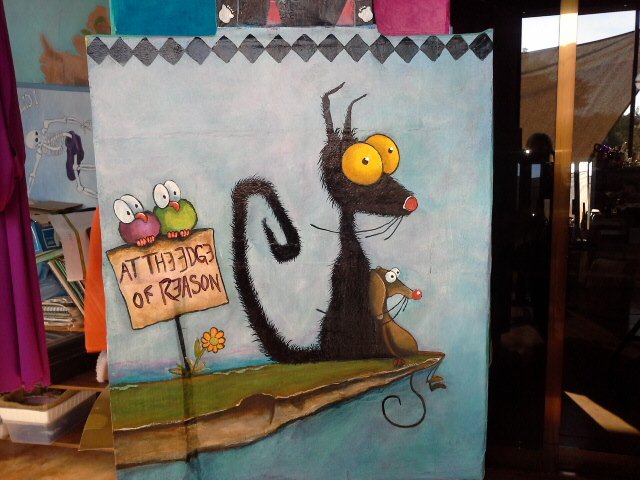
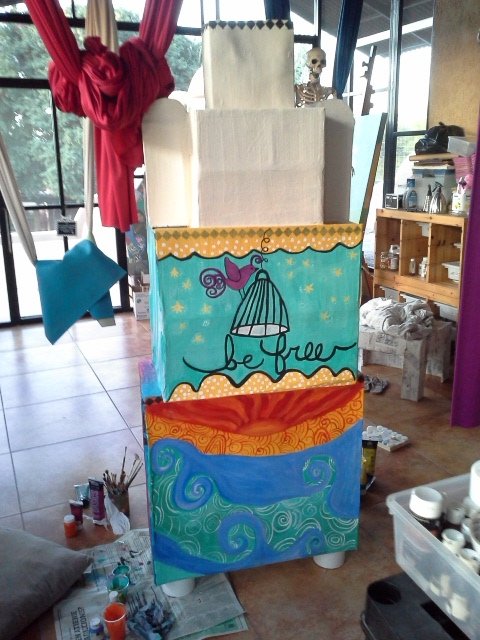
Now I wanted to cover it with colourful ART! I asked my daughter to help me and we just took what ever picture inspired us and lost ourselves in the flow of creation!
Step SIX
After we were finished we used a water based shine coat of varnish, you can use a stronger polyurethane and the unit will be even stronger!
We discovered that if you were to use the traditional paper mache paste with flour and water, it leaves the surface a bit more bumpy, (you can sand it after it is dry ) and it takes longer to dry, and there are certain insects as well as mice that will perhaps like to dine on your special creation! That is why elmers glue or any type of white glue is a better idea.
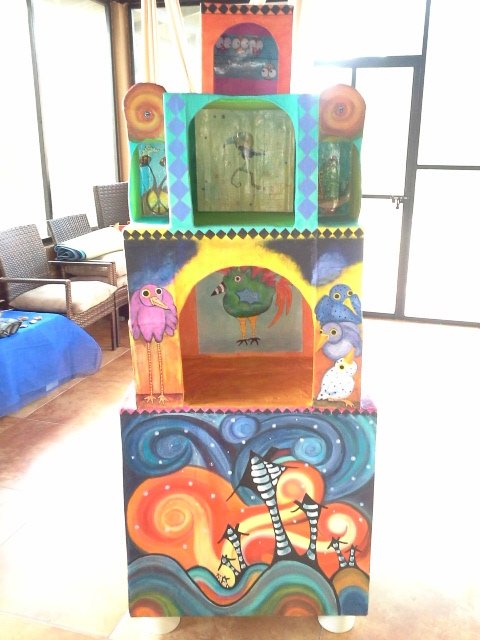
Over the course of a few weeks we finished the project and then placed it in its new home in the empty bedroom and SHAZAM! It awoke the whole room with its energy!
Because we made it ourselves it gives us a wonderful feeling when we enter the room.
If you put any thing in it with electrical cords that need to be plugged in, it is easy enough to cut a hole or drill a hole in the back of the unit to what ever size you need discreetly in a corner. You can find creative solutions to hiding the hole easily, especially if you incorporate them before the final stage of base paint.
Homemade Cardboard furniture art is absolutely beautiful and its uniqueness and imperfections lends to its beauty.
Enjoy! I would love to see any projects you have made with cardboard boxes! I will also be adding some of the other projects I have made with this fantastic resource!
Namastaynpaint x2!!
This is awesome, I am going to show my grandkids. Thanks for another winter project idea!
Thanks, it is really rewarding to make your own furniture, kids will love it!
This is a fabulous project.
Thanks phoenixmaid It was a lot of fun to make, took awhile to paint all of the different paintings but it was really worth it. It cheers up any room! :P