How to set up your Steemit account and blog like a pro?

So now you're done creating your account and you knew the difference between each of those Steemit Keys… WHAT NOW?
Set up your account, DESIGN!
I am Ms. know-it-all when it comes to prepping up my social media accounts. I rather use the same username I have from other platforms after declaring "monkeypattycake" as who I am in the digital world. That username isn't one in the popular list, that most people use as their alias on the web. Creepy as it is, I google searched monkeypattycake then my accounts and blog posts showed up in the top search results. That means… there is absolutely no monkepattycake elsewhere that exist than I. Perhaps, it's one the most important factors to consider when it comes to choosing the best display name to use on Steemit. Be unique enough that, you wouldn't end up as a clone of some infamous weirdo you will come across on this platform one day.
Check this topic I wrote here 6 months ago, it's a short HOW-TO design our Steemit blog page, understanding why it's important to make over or level up our page.
I mentioned there that when formulating a THEME, think about the kind of aura that you want to pass on your readers, what to write on the About Me section and even shared the best place where we could generate colorful text that we can use as Headers and Subheads. But upon re-reading it ALL. I noticed that I suggested putting Profile Photos, Cover Image, Dividers, Signature logo, and on the last part I also mentioned and brag about my own Footer/Banner but forgetfully, didn't give any details on HOW TO PUT and WHERE TO GET them?!
What a disaster blog! No wonder it worth $0.19, but still…. Better than nothing.
Let me correct those little errors I did there. Let me guide you about Profile Photos, Cover Image, Dividers, Signature logo, and Footer/Banner. Little by little.
How to put Profile Picture on STEEMIT?
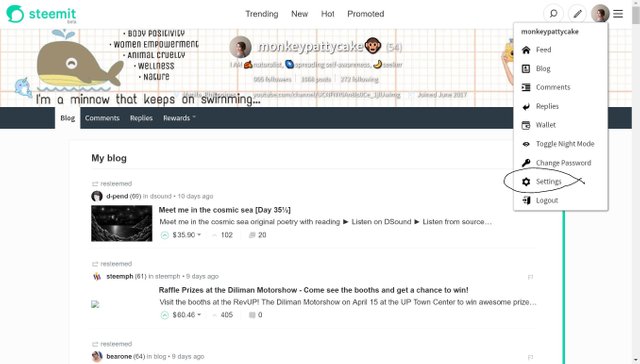
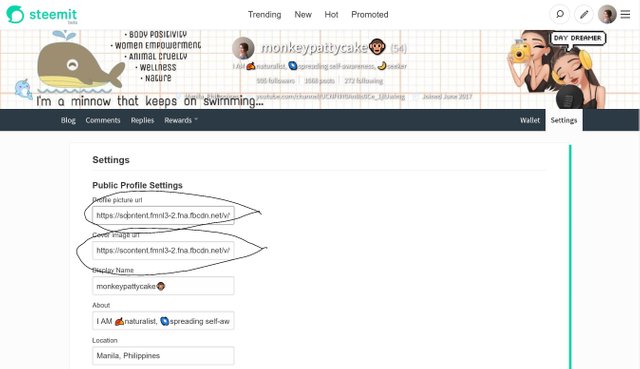
- Hover your cursor to the circle where your Profile Picture must appear, select SETTINGS. See? All you need is IMAGE URL for Profile Picture and Cover Image. I repeat... it's the IMAGE URL, not IMAGE LINK. Please avoid being confused with them just like me last night while guiding @bheathrize while she's pimping up her account.
Where to get Cover Image?
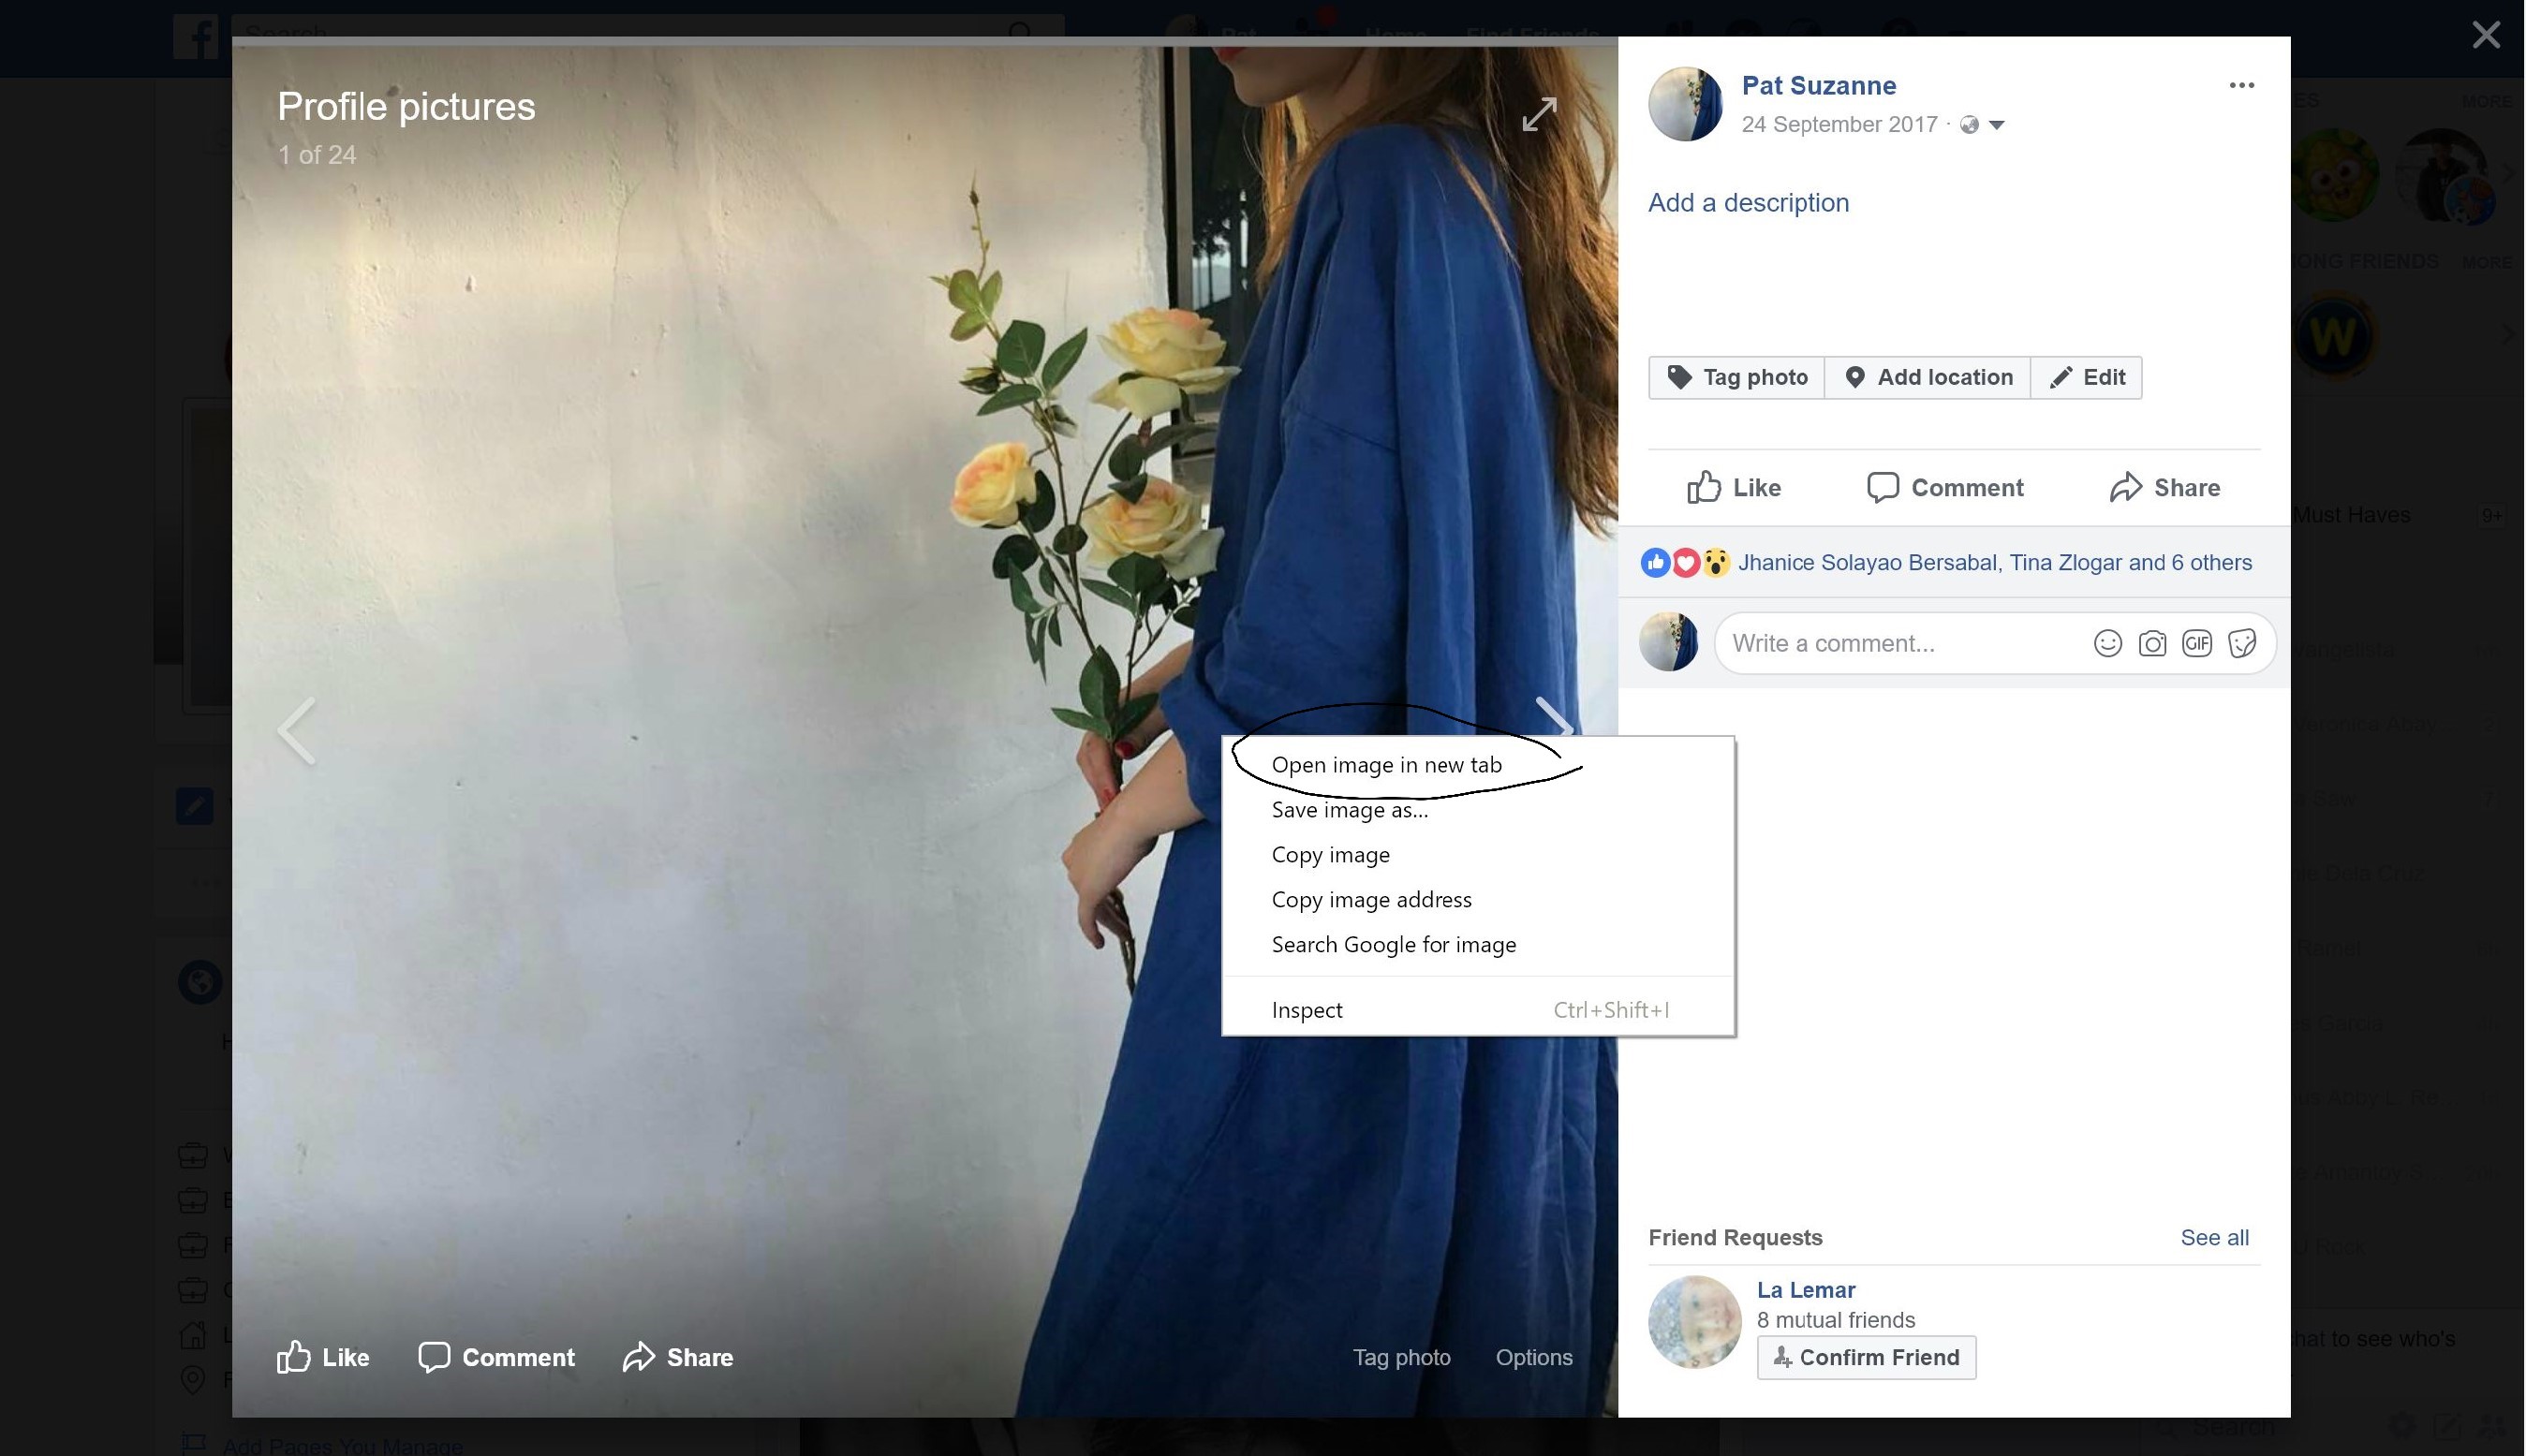
You can get one on free image sourcing sites like pixabay.com. However, it will not fit perfectly. Unlike to Facebook's and Twitter's cover photos, we can't adjust or reposition the Cover Image of Steemit. What I did is I customized my Cover Image using Picsart App. Just download the app and be creative. 1920x300 is the best dimension I ever tried to create a perfectly fitted image for Steemit. I never forget to upload the finished Cover Image on Facebook to get an Image Url that we need to paste later on. Just re-do the process I shared above to get a decent Steemit Profile Picture.
Where to get Dividers?


Look at these dainty dividers, aren't they pretty? Everyone is free to copy them and use. Just search free dividers for blog and you will find numerous free sites that let people use their dividers for free.
Footer/Banner
They are given mostly by community artist from different groups and organization that exist on Steemit. Sometimes, a Steemian can be recognized to which community he/she supports, or which community he/she belong from the type of Footer/Banner that they use in their blog post. Mine is from Momi @bearone of SteemPH. If you want to get one for yourself, just send your request on SteemPH Discord chat group. Then wait patiently and be grateful until yours have been customized with your own Steemit display/username on it.
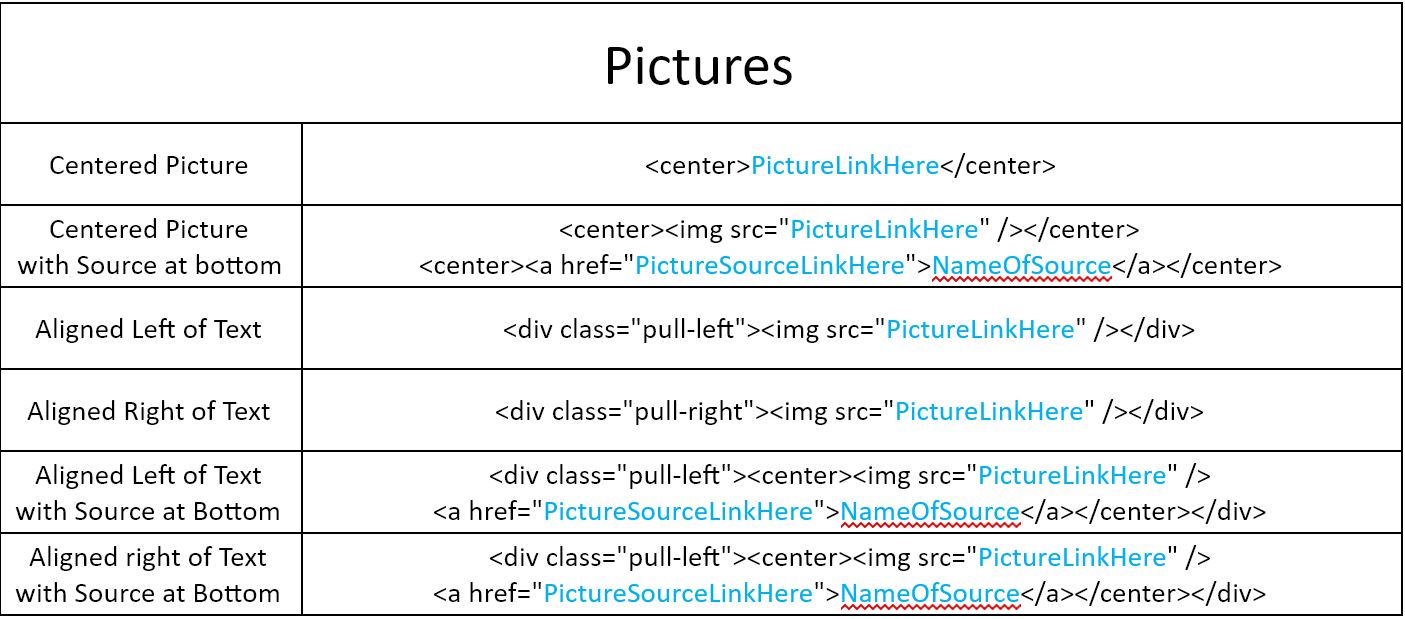
How to Position images?
To lay out your photos without a trouble, just copy & paste these codes. You can download the docx version here. This was made by our fellow Steemian @scrooger. Just save these codes to your notes and then copy paste it to your next post, delete the "PictureLinkHere" and then replace it with the image you'd like to use. Do not forget to delete at the head and tail of the picture link.
As clear as the sky today. This is my short HOW-TO for the day. I hope this will help newbies of Steemniverse. Thanks for reading. <3

Thanks for sharing. Good for newbies who want to make their page attractive.
This is just so helpful for a newbie like me. Thank you so much.