- DIY - HOW TO MAKE MAPLE SYRUP - PART TWO
I pray that you and your loved ones are hunkered down safely and are making the best of a very terrible situation. Staying in touch should provide us all with something to do as we wait to see what the future brings. Hearing from each other may also provide some comfort.
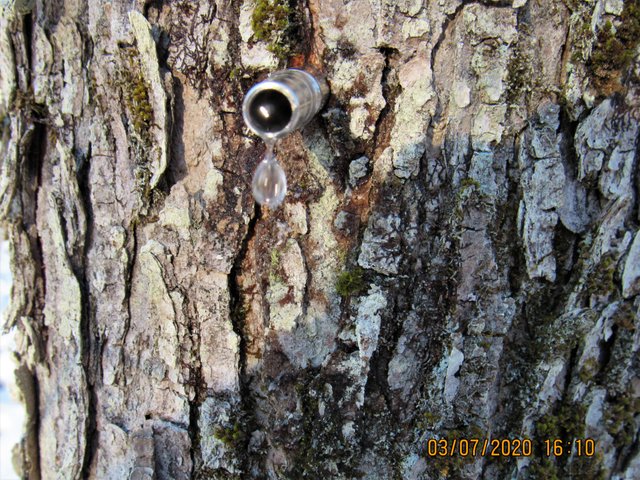
It's a busy time of year here in Upstate New York. The Sugar Maples are going through their yearly ritual of sharing their nectar with those willing to get outdoors and do a little tap dance for them. This blog will take you through the maple syrup making process.
If you missed my recent post on the taping and collecting of the maple sap, you can catch it here.
https://steemit.com/amazingnature/@thebigsweed/diy-how-to-make-maple-syrup
Making syrup does take the good part of the day, and starting early is key for me.
Making the syrup is just part of the fun. Being outside and enjoying nature and staying active just adds to the day's pleasure.
Before the sun came up, I sterilized the bottles that I hoped to fill.

The day before the boil I got the fire ready so that in the morning all it would take was a match.

Preparing the fire the night before would save me an hour in the morning.

It's a little bit of a process, but cooking the sap is all about the fire.

The key to a good fire is creating an even heat throughout the fire pit, and maintaining it.

With the fire now red hot, it's almost time to start cooking. 👌

Keeping the sap cold between boils is paramount. The sap must be used within 8 days. Like any other food, it has a shelf life. After a week's time, it's nice to have collected 50 plus gallons. In this case, we have collected 54 gallons of sap and should end up with at least a gallon of syrup.

With the fire rack in place, we are minutes from boiling. This fire pit was rather simple to construct and was designed around the pans we were going to use. The stainless steel pans measure 13 inches wide by 18 inches long and are 6 inches deep. Each pan starts out with about 4 gallons of sap, leaving plenty of room so that the sap doesn't boil over the sides. The rack consists of 2 pieces of 3/4 inch rebar, and the four cross members are steel legs from an old table.

From the time the fire is lit to the time it is ready takes about an hour. During this time a lot of prep is done. In this photo you can see the outside burner already fired up and cooking the sap. This is done prior to cooking on the fire pit.
As the sap is cooked down in the pans, additional sap is added. It is key to add sap that is not cold. You don't want to add cold liquid to the already boiling liquid and have the boil pause.
Pausing the boil produces a cloudy end product.

With all the pans on the fire, the first 20 gallons should be boiling in no time and it's only 8:42 AM. We've got a good jump on this day.

Full boil 34 minutes later.

You can see how vigorously the sap is boiling, that is why you need to leave room in the pans!
The two pieces of plywood seen in this picture, cover the holes that are in the side of the masonary block. A total of six block have been placed in this fashion around the perimeter. These vents help us to control the heat of the fire.

Throughout the cook, these vents are adjusted many times.

Building your fire pit in this way will allow you to feed the fire from both ends.

All during the boil, a foam will gather, it is necessary to remove this foam with a strainer.


What is being removed from the boiling sap are the sugar sands that gather in the foam. The more of this that is removed during the boil, the clearer the final product will be. Not to worry though, the sap will be strained three more times.


After you have run out of fresh sap to add to the pans, and the heat has boiled away much of the water, you want to start to combine the pans. You don't want to scorch the remaining sap.
We started with around 54 gallons of maple sap, and at this point, it has boiled down to approximately 9 gallons. You can see that the once clear liquid is turning a golden color, we're getting there.

After boiling off another 6 gallons or so, the remaining 3 gallons will be cooked over an outside burner. This gives me a little more control of the heat. This being our 4th year of making our own maple syrup, we only had a boil over once, and what a freaking mess.

As I had mentioned before, making maple syrup is no joke and you had better enjoy physical activity.
But there does come a time in the process when things slow down for an hour or so. By this point, a little break is well deserved, and it is after 12:00 in this neck of the woods.

With the boil almost complete, we go to an even smaller pan. Once again the liquid will be filtered, and the final boil should take an additional 30 minutes or so.

Most of the sugar sands are removed at this time.

With all of the water being boiled away, we now have 100% pure maple syrup.
The final product will be poured through this special maple syrup filter.
They wanted $45.00 for the stand, I #DIY it out of material I had saved, ching, ching.

So what do you think? When maple syrup is graded, Grade A: Golden Color & Delicate Taste, is what the so-called experts are looking for. You can tell the color matches their description, and I can vow for the taste, and come to think of it, so can @jlsplatts.I got you covered my friend, just a little something coming back at you in the next week or so. Robin and I hope everyone you love and care about are healthy!


Starting out with 54 gallons of sap should yield about a gallon of syrup. You never know exactly what the bounty will be until you collect every precious drop.

With the last of the syrup bottled, we'll line them up and see what the final tally is.

We got just over a gallon of syrup, 16 bottles x 8.5 ounces + 5ounces = 141 ounces of natures wonderful nectar.

What's not to love, just check out the weather on this fine day.
Activity packed day starting at 6:29 AM and finishing up at 6:00 PM. What a splendid day.

If you like the outdoors, you should give it a try. Between the two blogs and all of the photos, you should have a pretty good idea of how to get started.
STAY SAFE EVERYONE.
Always such a wonderful time of the farming year.
Go my sweed, you make me laugh.