Arduino Remote Home #15
Wow I can’t believe 5 months has past since ARH #14 was posted. I’ve accomplished a few things and have created some new issues.
As for the server not responding, it has been a long and arduous road for me. To date my conclusion from the last blog seams to have been correct. That is, there were 4 connections made and when I tried to connect, the server was un-able to process my request, making it appear as though the server had quit working. I tried lots of different things to fix this, but I’m only going to write about what actually seams to have remedied the problem.
After examining the code I came to the conclusion that the “keep-alive” part in the response header may be the root cause of this issue. But because I need to keep the connection open, in order to handle the AJAX requests that update the status of everything, I had to come up with something other than simply closing it. It seamed, that limiting the number of connections in the first place, would get me moving in the right direction. So now each time the server receives a request, it looks for two things. The first is a cookie.
On each of the browsers that I want to have access to the web server I placed a cookie. That’s really pretty simple. I wrote a separate Arduino sketch that only sets a cookie.
// typical server code
if (c == '\n' && currentLineIsBlank) {// send a standard http response header
client.println("HTTP/1.1 200 OK");
client.println("Content-Type: text/html");
client.println("Connection: close"); // close after sending response
client.println();
client.println("!DOCTYPE HTML");
client.println("html");
client.println("head");
client.println("script");
client.println("document.cookie = "key=value; expires=Tue, 1 Jan 2019 12:00:00 UTC";");
client.println("/script");
client.println("/head");
client.println("body");
client.println("p");
client.println("Just setting a cookie!");
client.println("/p");
client.println("/body");
client.println("/html");
break;
}
Note:(Not sure why but I had to remove the Left and Right HTML tag symbols from the above in order to show the text in the client.println statments. Be sure to include them in your sketch.)
There is a ton of info out there on this. I found the most useful info from: https://www.w3schools.com/js/js_cookies.asp .
The “key=value” can be anything you want. For example “car=Lambo” or “ duck=horseback”, it really doesn’t matter as long as it is in that format. Be sure to add the “expires=” part, set for some future date. The last part, “Just setting a cookie”, was added simply to provide some feedback that my device actually made a connection and the preceding code was executed, so to say. The cookie only gets written to the device browsers that accesses the web server while this particular sketch is running. For me that means all the phones, tablets and laptops that my family uses. A few notes, If you’re planning to access your server from an outside computer ie: a work, library or any other, this method will not let you. In fact it specifically limits traffic to your devices that have the cookie. I’m sure there is a work around for that but i’m not going down that road. That said, be sure to access your server while the set cookie sketch is running using both LTE and local WIFI network to be sure that you will be able to access the server when away from home. Also you must access the set cookie sketch from each web browser you plan on using to access your server, ie: FireFox, Chrome, IE, ect. ect.
The second thing I check, is the UserAgent of the browser trying to connect. If that test fails, the servers response to the request is, “404 not found”. W3 Schools has info on userAgent as well. You can also check your userAgent by going to http://whatsmyuseragent.org/ If you have never done this, you may be surprised by the amount of information held in your userAgent. In your Arduino server code you can decide to check the entire http userAgent header or any part of it. After failing either of these two tests the server immediately closes the connection. Thus limiting the number of open connections and allowing me access. Also keep in mind that the userAgent info changes when ever you update your devices. Meaning you may have to change the code that compares the userAgent in your sketch.
I’m building in one more thing into this issue and that is a remote reset for the Arduino. In the past, randomly, when I tried accessing the server I would get a blank page, meaning something went wrong somewhere. At those times I was however able to type in specific commands into the GET request and get the expected behavior. So far this is in the “to do” list, which keeps getting longer. I’ll post a separate entry on that modification next time.
As for that pesky to do list, I did take a week in July and nocked off most of the items. In particular the junction box in the basement. Here’s how it looks today.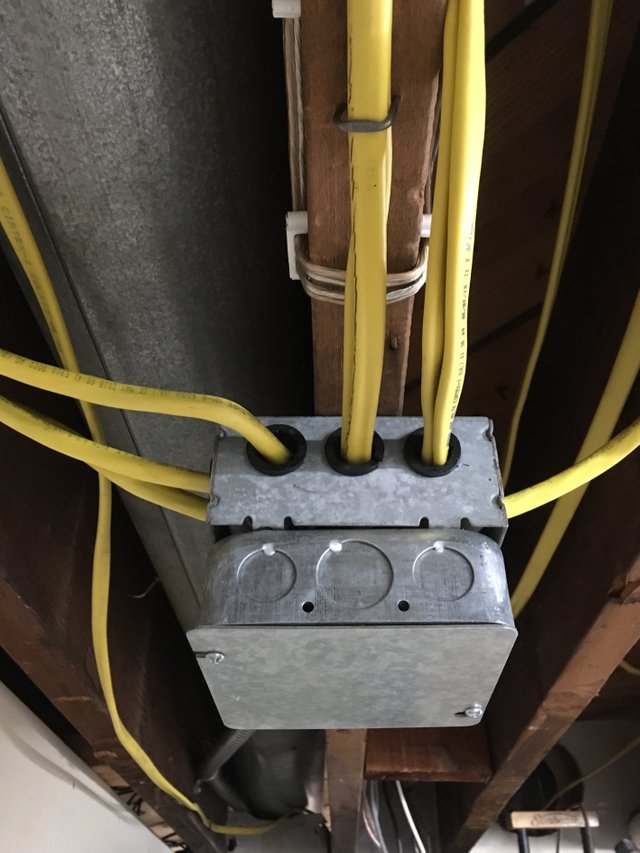
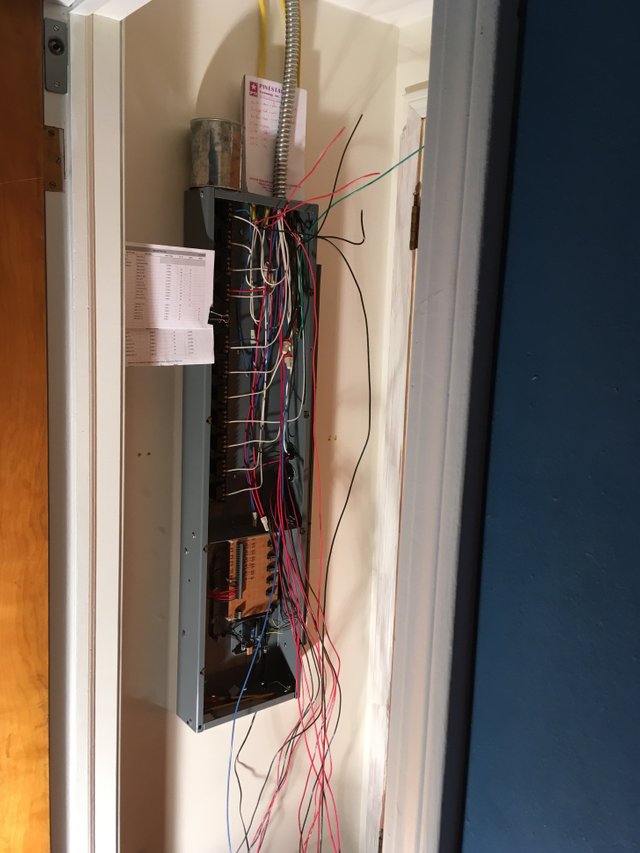
I also rewired the entire second floor lighting circuit and connected the light switches to the newly installed control center, shown in progress here.
So now to the part about new issues. The first, and by far the easiest to fix is this little diddy.
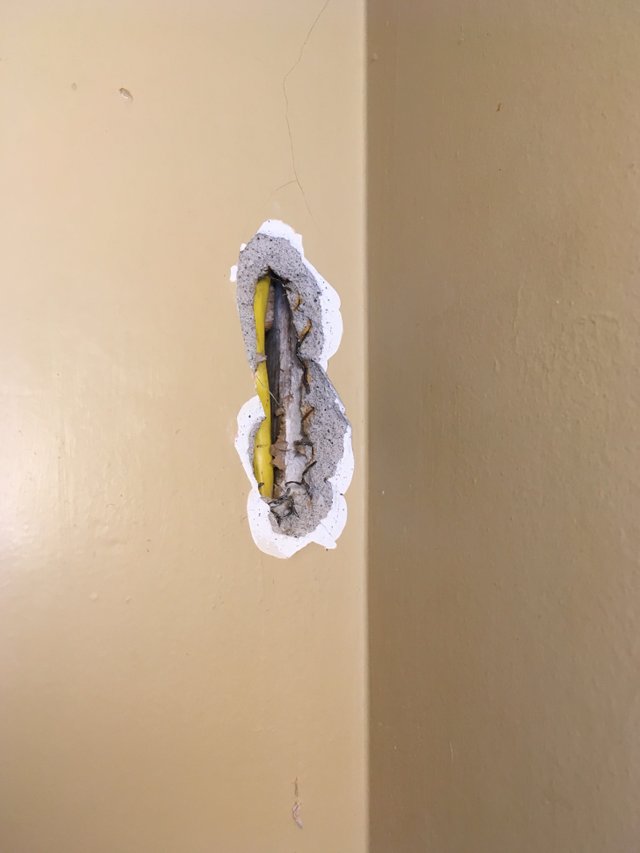
I was drilling down from the attic approximately above the bathroom light switch and the bit took a slight angle and came through the plaster, oops.
Second new issue is I have a serial communication problem between the 2nd floor Uno and the basement Mega. Everything I could read about it said as long as the cable length was less than 15 meters it should work fine. So I’m either over that distance, which I know I’m not, because the cable I purchased has foot markers on it, and I’m in the 13.75 meter range. Or I’m just asking to much of the UARTS. Regardless, I have to get the communication working between those two. To fix this I have chose to install RS 485 modules. I suppose I could have gone WIFI or xbee, but I prefer wires over radios 99% of the time. So this has created a physical space issue for me. Not that the modules I’m using need a lot of space, but if you have seen pics of the basement control box you know there’s no room. At first, I thought so too, and felt doomed. But by adding a piano hinge to the control boxes cover, 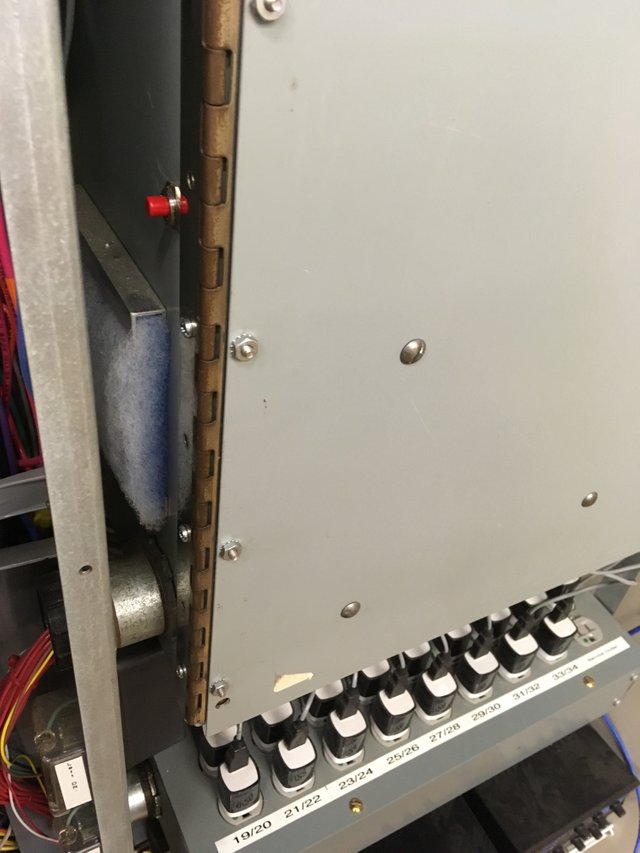
I picked up lots of space on the inside face of the cover to mount things to and still have the cover close all the way. The modules I’m using came from here, http://www.yourduino.com/sunshop/index.php?l=product_detail&p=323 shown below.
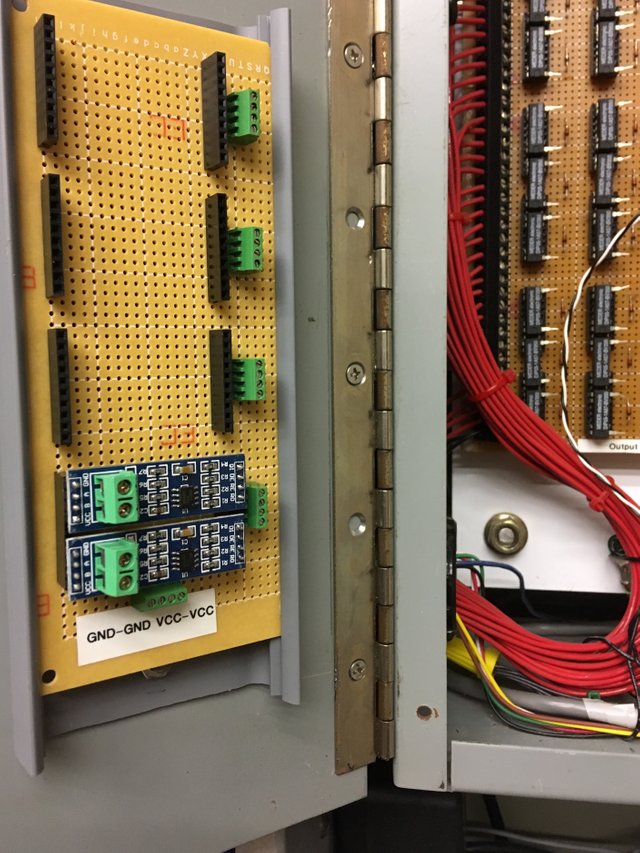
I finally got wise and made the board ready to handle three more sets of modules. That will max out the serial ports on the 2 basement Mega’s. As a recap, on both the “inPut” Mega and “outPut” Mega I left Rx0 & Tx0 un-used so I can use the serial monitor. Rx1 & Tx1 on both are connected to each other. And on the “outPut” Mega Rx2 & Tx2 will connect to the 2nd floor Uno, leaving Rx3 & Tx3 open for the future. Finally Rx2 & Tx2 and Rx3 & Tx3 of the “inPut” Mega are also open for the future.
As always, feel free to ask questions about this project through a reply. Also you can check out steemmakers right here on Steemit.

Awesome project!
What kind of protocol are you using with these? Just a serial connection or something more advanced like Modubus RTU for example?
Well my plan is just a serial connection. But as I think we all will agree, first laid plans......
I’m hoping to use these as “amplifiers “ so to say, to over come the garbly gook I’m currently getting with a serial connection over that nearly 14 meters. Any thoughts?
Thanks hawk399. Its been challenging and fun.
Congratulations @electricswine! You received a personal award!
You can view your badges on your Steem Board and compare to others on the Steem Ranking
Do not miss the last post from @steemitboard:
Congratulations @electricswine! You received a personal award!
You can view your badges on your Steem Board and compare to others on the Steem Ranking
Do not miss the last post from @steemitboard: