Home Improvement: Underground Drains for Gutter Downspouts
I've decided that I'm going to start posting about some projects that I've undertaken in the past and as I go, especially those that I feel would be most helpful to folks.
The first focuses on a problem many of us have to deal with as homeowners - water. A lot of people have trouble with water in their basements or crawl spaces and there are some relatively simple steps you can take to relieve some common issues. It's amazing to me the number of homes that have gutters but the water coming from the downspouts is deposited right next to the house - basically guaranteeing that it will enter into your house!
As a general guideline, you should try to extend gutters around 10 feet or 3 meters away from your house. Depending on the grade of your property, this should allow the water to migrate away. While this is quick, cheap and effective it can also be unsightly and take up space.
My personal preference is to take this a step further. In my previous and current homes, I have worked to put the downspout extensions underground and farther away from the house, eventually coming to the surface via pop-up drain cover. This is costs $100 - $200 and can be done in a weekend (if you’re a motivated digger)!
Supplies:
- Triple Wall Drain Pipe (4” x 10’)
- These are great because they’re not as tough and expensive as regular PVC drains. They are easy to cut and are resistant to frost.
- I used solid pipe for the majority of my drain but in areas where the ground is very flat, I installed perforated pipe with a porous sleeve to allow groundwater to enter.
- Selection of 4” PVC connectors and couplings (you will likely need 45-degree and 90-degree).
- 4” pop-up (picture credit: Bobvila.com)

- PVC glue (optional)
- 4” downspout connector (matched with the size of your downspout)
- Hacksaw to cut the pipes
- Spade to dig the trench!
Procedure:
- Plan your trench to connect as many downspouts as possible - consider the the size of your roof as you don't want to overwhelm a 4" pipe. I ended up with two trenches - effectively one for each side of the house.

- [Optional] Consider installing a cleanout tee in the event any blockages occur. This isn’t really necessary as you can access them from downspout connectors.
- Dig a trench roughly 12"- 18" deep and 4" = 6" wide.
- Ensure that there is a downhill grade from the downspout to the popup. It doesn’t need to be steep - I would estimate that a 10’ pipe would drop 1” - 2”.
- Where the popup will be placed, dig down an additional 12” and put a bag of sand in there. If the popup doesn’t already have a drain hole in the bottom, drill one out. The reason for this is that any water that collects in the popup will drain in the sand below. This is essential in the winter to avoid freezing water blocking the popup.
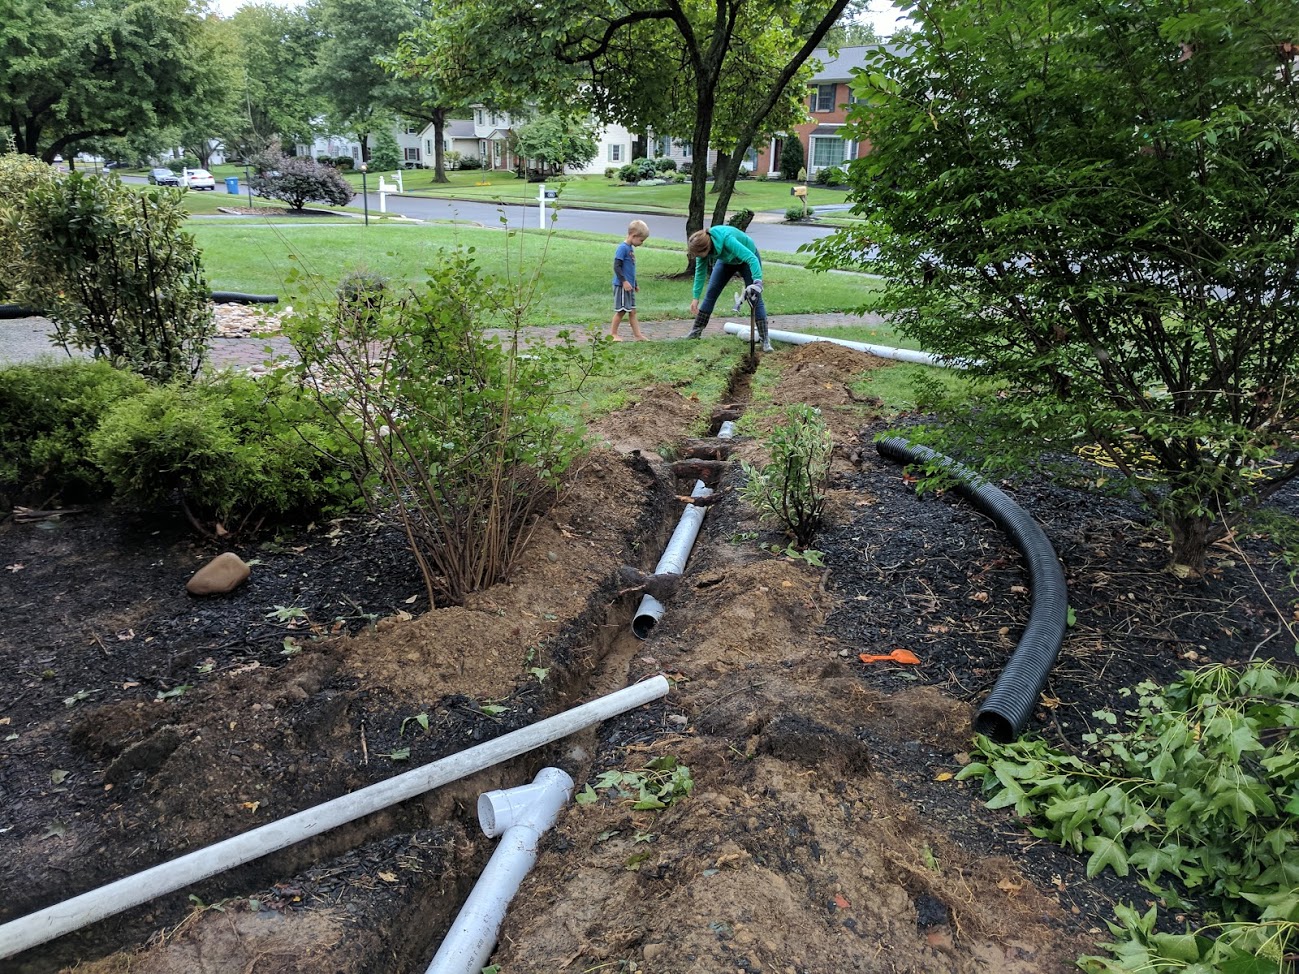
- Once the trench is dug, rough fit everything in place and double check the downhill grade. You can even run some water with a hose to double check - don’t worry about leaking around the joints as they will effectively be sealed once covered in dirt. The following picture shows one of the sections I dug, which was a nightmare thanks to a giant tree nearby and I had to dig under the roots!!

- I glued all joints together and once everything was connected, backfill the trenches, wait for the next rain storm and enjoy watching thousands of gallons of water be taken away from your house!
Additional comments/thoughts:
- Double check with your township to make sure there are no township regulations - in general, there are rarely issues unless you try to tie it into your sewer (big no no)!
- Periodically inspect the popups to ensure no blockages from leaves and other debris
Following you!
Congratulations @notasquirrel! You received a personal award!
You can view your badges on your Steem Board and compare to others on the Steem Ranking
Vote for @Steemitboard as a witness to get one more award and increased upvotes!