[ENG-ESP] SteemWomen Club Clam pinata tutorial / / SteemWomen Club tutorial de piñata con forma de Almeja
Hello world steemit, today I will show you a small tutorial on how to make a small and fun party piñata in the shape of a Clam I hope that with my step by step it will be easier for you when making a piñata for the little ones at home without further waiting for you like the tutorial ..
Hola mundo steemit hoy les mostrare un pequeño tutorial de cómo hacer una pequeña y divertida piñata de fiesta con forma de Almeja espero que con mi paso a paso les sea más fácil a la hora de hacer una piñata para los pequeños del hogar sin más espero les guste el tutorial..

Step 1: On a piece of paper, we are going to mark the silhouette of the oyster (model that I chose to make). I made it 40cm high by 60cm wide.
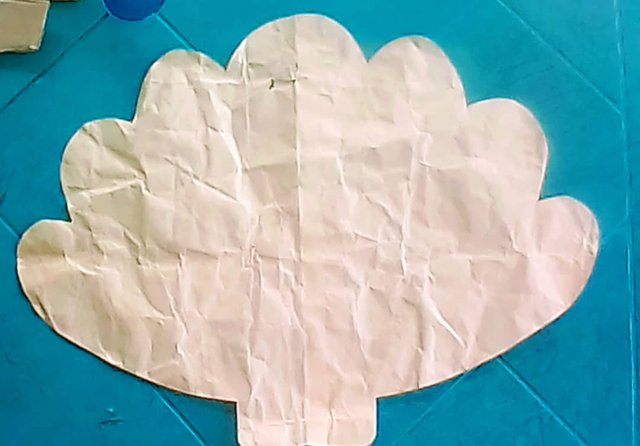
Paso 1: En un papel, vamos a marcar la silueta de la ostra (modelo que elegí realizar). Lo hice de 40cm de alto por 60cm de ancho.

Step 2: We are going to pass this mold into our cardboard box to remove two sides.
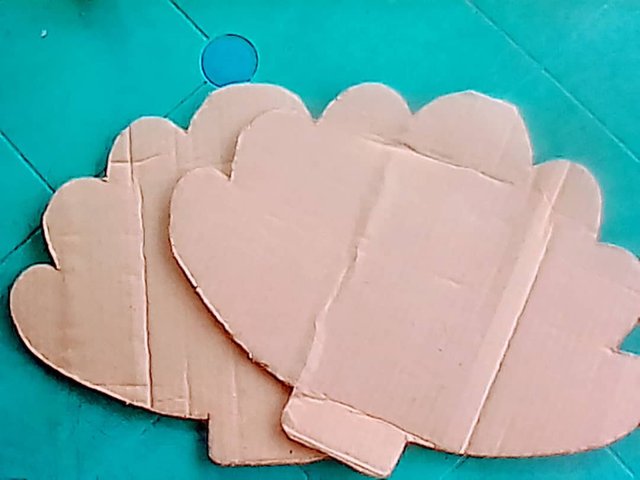
Paso 2: Este molde lo vamos a pasar a nuestra caja de cartón para sacar dos caras.
Step 3: In the same box, we will mark a 20cm wide tape and the longest log you can, this cardboard tape, we will sew it first to one of the covers.

Paso 3: En la misma caja, marcaremos una cinta de 20cm de ancho y log más largo que puedas, está cinta de cartón, la coseremos primero a una de las tapas.
Step 4: Next, we will sew the other cover to our ribbon. Remember to make a lot of eyelashes so that when it comes to molding and sewing the Process is much easier for you. Remember to leave a hole, which is where the piñata will be filled. You can make a lid of the measure that you have left to close it at the end.
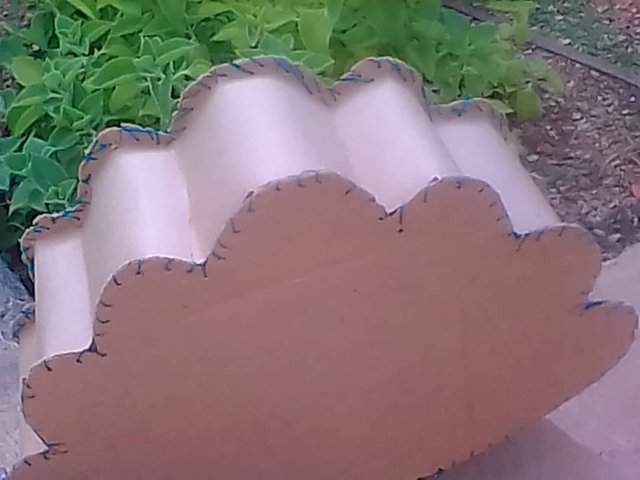
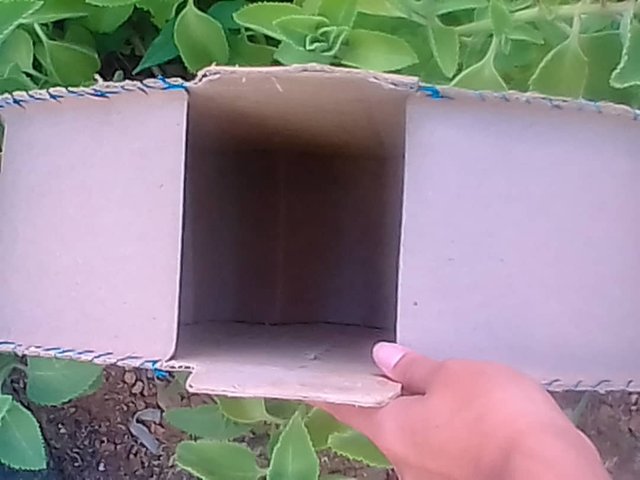
Paso 4: Seguidamente, coseremos la otra tapa a nuestra cinta. Recuerda hacerle muchas pestañitas para que a la hora de moldear y coser se te haga mucho más fácil el Proceso. Recuerda dejarle un orificio, que es por donde se va rellenar la piñata. Puedes hacerle una tapa de la medida que hayas dejado para cerrarla al final.
Step 5: We will begin to tear our bags and paste them with starch paste or cornstarch, previously prepared.
To make the paste, place about a cup of cornstarch (or whatever you think is necessary) in a container. And you add hot water little by little until a liquid mixture forms, but also a little thick. Add two tablespoons of sugar to make it more resistant. Let it cool and it is ready to use.
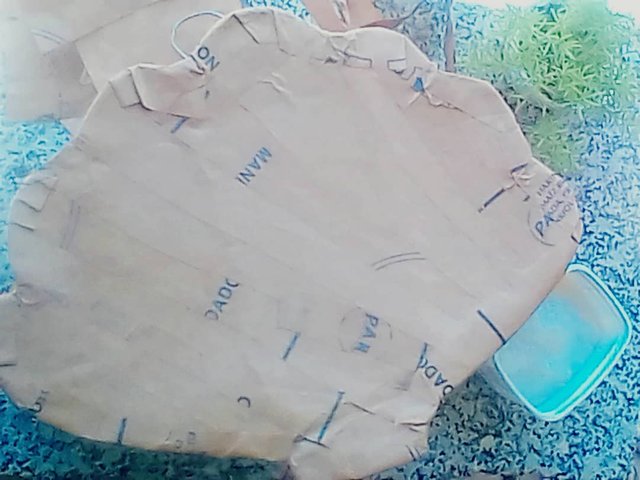
Paso 5: Comenzaremos a rasgar nuestras bolsas y a pegarlas con engrudo de almidón o maizena, previamente preparado.
Para hacer el engrudo, coloca alrededor de una taza de maicena (o lo que consideres necesario) en un recipiente. Y vas agregando agua caliente poco a poco hasta que se forme una mezcla líquida, pero también un poco espesa. Agrega dos cucharadas de azúcar para hacerlo más resistente. Deja que enfríe y estará listo para usar.
Step 6: Before covering the tape we are going to introduce the wire in the form of a bridge. And then we will proceed to cover it, this process is to harden the cardboard box, and make our piñata as resistant as possible. You can put the amount of layers you want and I only put 3 layers.
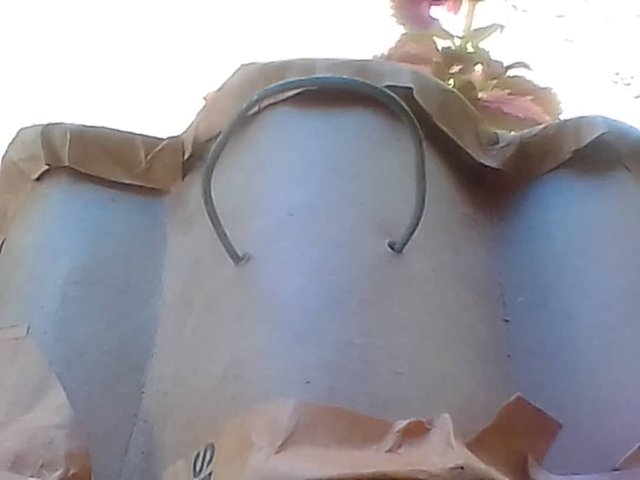
Paso 6: Antes de cubrir la cinta vamos a introducir el alambre en forma de puente. Y luego procederemos a cubrirla, este proceso es para endurecer el cartón de caja, y que nuestra piñata sea lo más resistente posible. Puedes colocarle la cantidad de capas que desees yo le coloque sólo 3 capas.
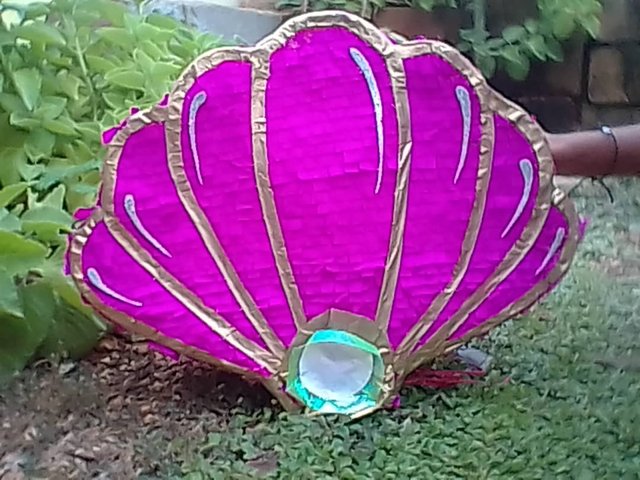
Step 8: Then with the Silk Paper we will decorate and shape the Ostra Marina as such. I usually decorate piñatas on one side, but it is up to you if you want to decorate both sides.
Step 9: We make some personal touch-ups at the end, to give it the finishing that our beautiful piñata needs. And ready! Dare to do it, it is an excellent idea to start and get extra money.
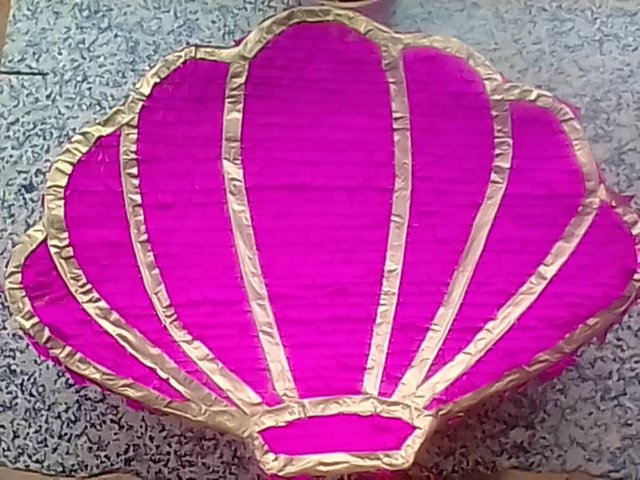
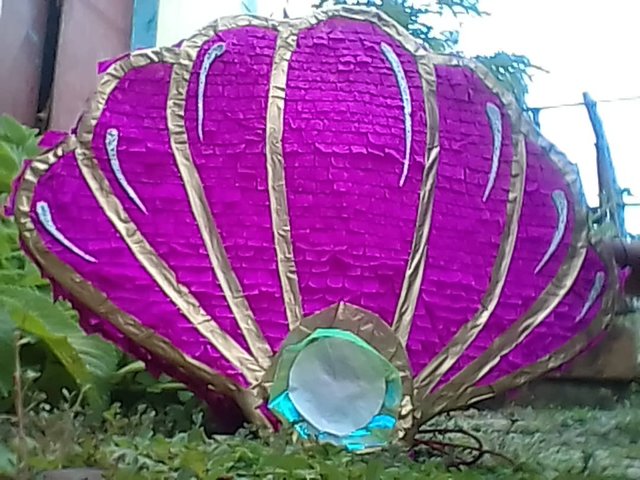
Paso 8: Luego con el Papel de Seda adornaremos y daremos forma como tal de Ostra Marina. Yo suelo adornar las piñatas por una sola cara, pero está en tu gusto si deseas adornar ambas caras.
Paso 9: Realizamos unos retoques personales al final, para darle la terminación que necesita nuestra hermosa piñata. ¡Y listo! Atrévete a realizarla, es una excelente idea para emprender y obtener un dinero extra.

Well people of steemit is everything for today I hope that in the step by step you have understood me perfectly, there is nothing left but to say goodbye to everyone and I hope that support from all of you will soon come with more tutorials
Bueno gente de steemit es todo por hoy espero que en el paso a paso me haiga entendido perfectamente no me queda más que despedirme de todos y espero ese apoyo de todos ustedes pronto vendré con mas tutoriales
Did you like the result? Comment if you liked the idea.
¿Te gustó el resultado? Comenta si te gustó la idea.

SteemWomen Club
Me gusto este trabajo muy bien elaborado.
Te quedó hermosa tu piñata