BASIC RULES FOR PHOTOGRAPHING ARCHITECTURE. PART III
Hello again to all photography and architecture lovers.
Today we are going to talk about how to photograph interiors, but before we start with this new chapter, I advise you to take a look at the two previous installments.
Interior photography can be considered as a speciality in its own right, within architectural photography. Here again, the two main parameters that we saw in exteriors apply:
- perspective correction
- the positioning of the camera with the sensor parallel to the wall or façade.
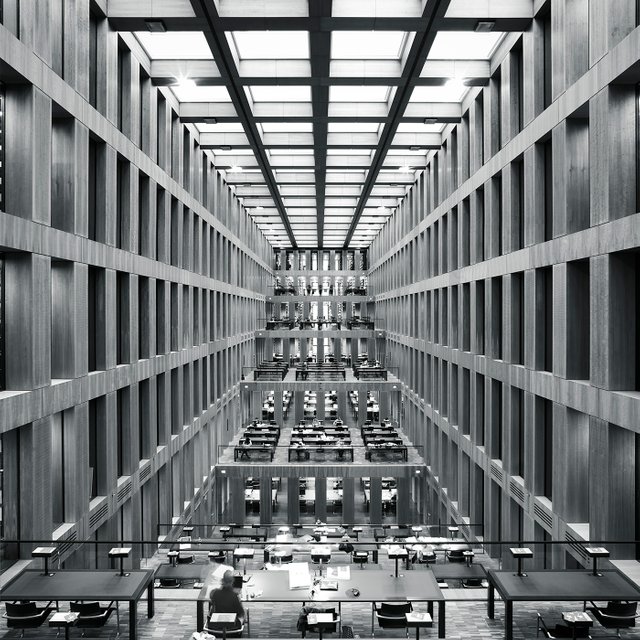
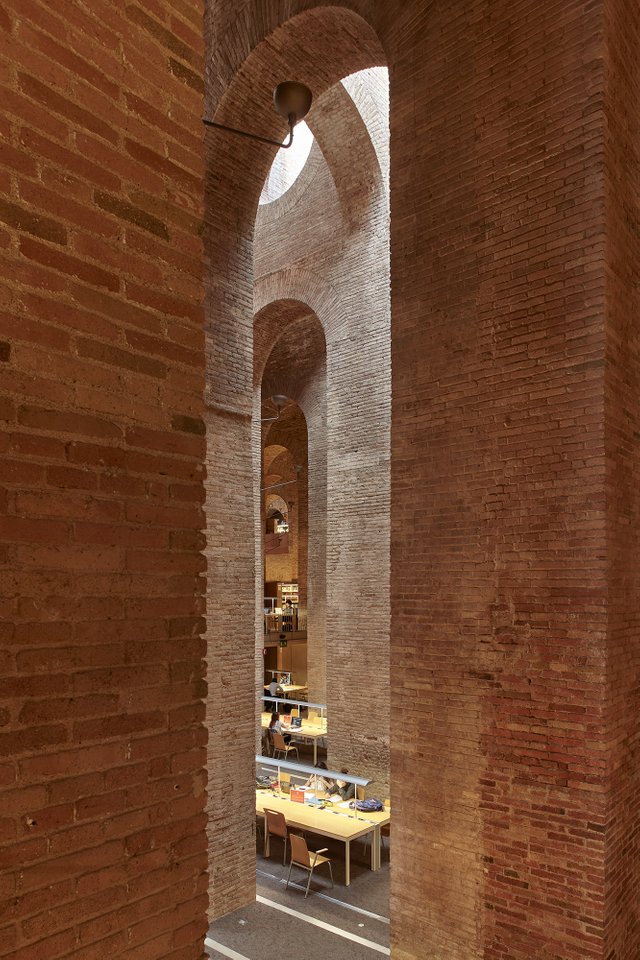
This shot of the Humbolt University Library in Berlin is a clear instance of the two rules mentioned before, perspective correction and camera and sensor completely parallel to the oposite wall.
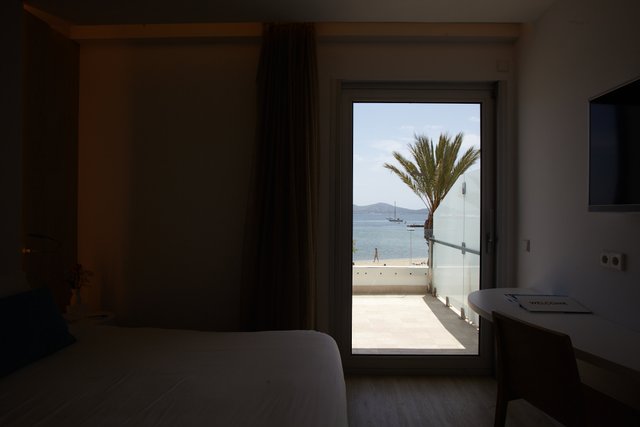
But there are a few more things to bear in mind. The first is that interiors almost always have some kind of furniture, and those furniture or objects have a visual weight in the scene, with one main characteristic: they are all on the floor. There is no furniture hanging from the ceiling, or at least that is not the norm. Well, this furniture conditions the height at which we place the camera, and the camera should generally be placed at eye level in a seated position. Although it is not possible to generalize, in most cases this is the case.
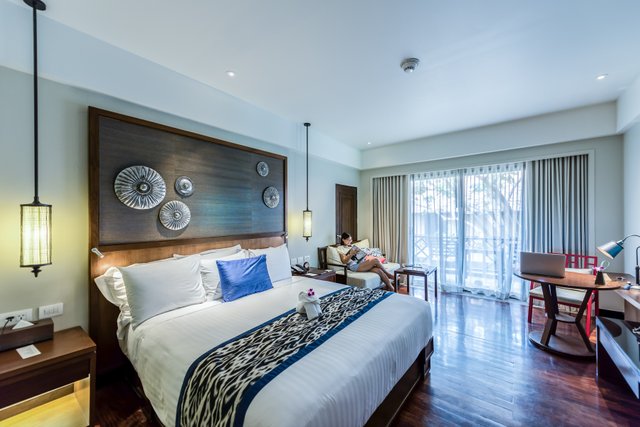
This camera height is not very pleasing to the eye.
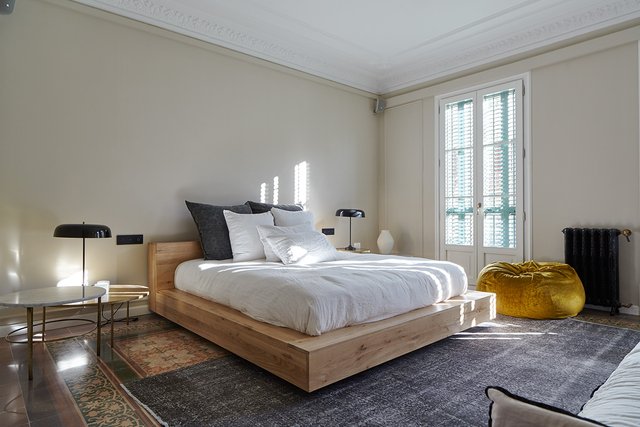
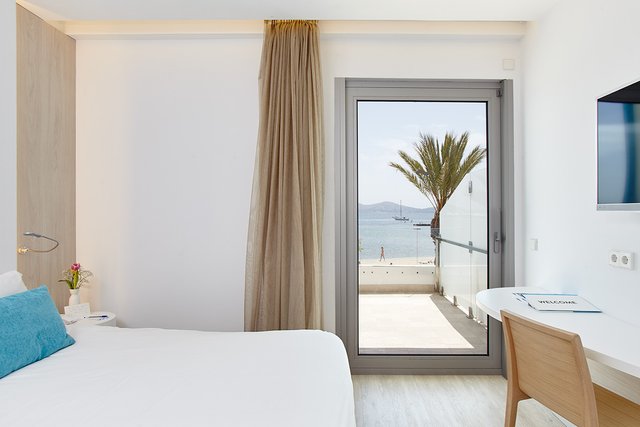
With the camera lower, almost at the height of the bed, the feeling is much more pleasant.
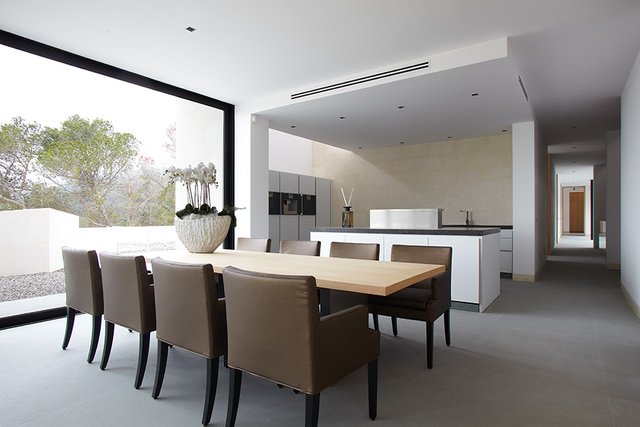
The exception is that when there are very high tables, the surface of the table should be slightly visible.
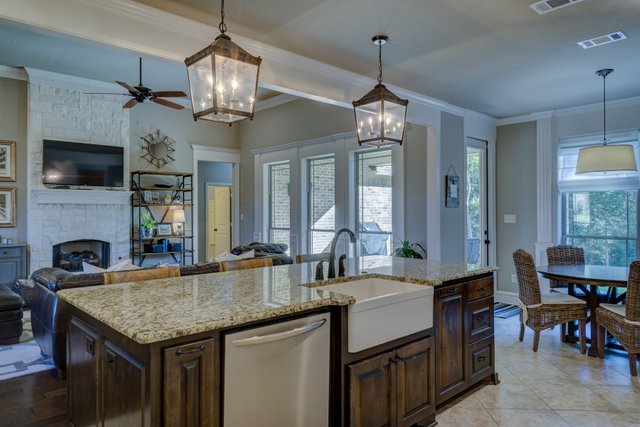
The height of the surface determines the height of the camera.
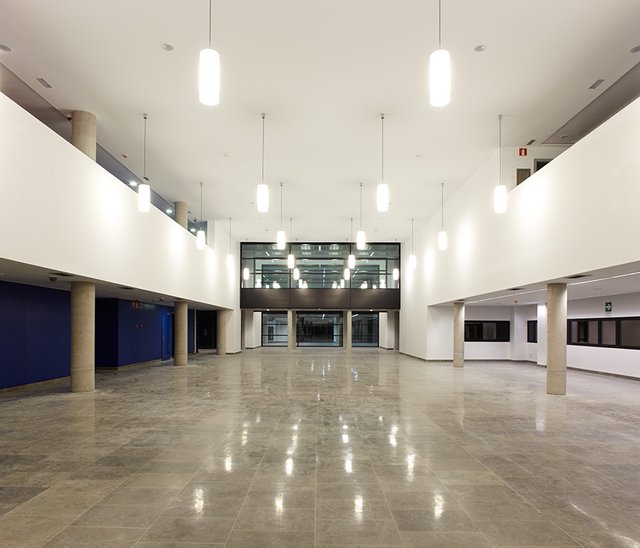
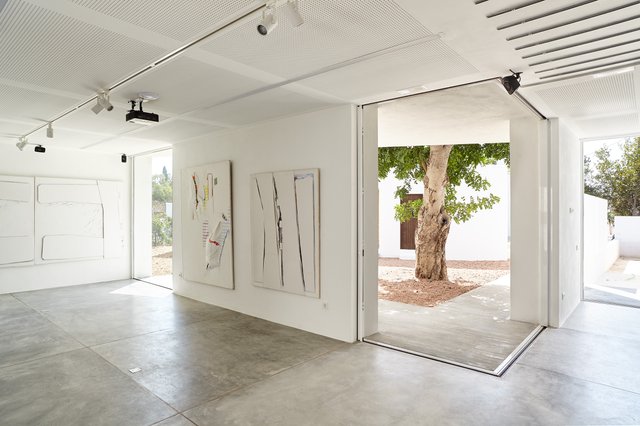
Another aspect to take into account is that sometimes we have to take oblique or diagonal shots of the space and we cannot place the camera parallel to the back wall. In these cases it is advisable that the corner of the room is not centred in the frame and another solution is to look for a visual line that guides the gaze towards other parts of the house or space.
Instance of parallelism with the oposite wall.
Example of an off-centre oblique shot where the angle that divides the space, is placed on the right.
In this oblique shot, a visual exit was sought that gives it more depth.
Another oblique shot, this time centred, but in which the visual output exerts a great attraction.
These two rules are perfectly feasible so that photos can be taken with any type of device, camera, mobile phone, tablet, etc.... But there is a third value that is used a lot in interior photography, which is very difficult to do if you don't have a camera and a tripod. And it is the double exposure, which is done when we want the exterior and the interior to come out with the correct light for each of them. We must take into account that if we take a photo indoors, the windows or doors facing outdoors will be "burnt", as there is much more light outside, remember that the human eye compensates for the difference in light, the sensor cannot do it. Then we have no other solution than to take two photographs, one for the exterior and one for the interior and then join them together in the editing programme. But remember it can't be done without a tripod.
This shot is for the right exposure to the outside view
This is the final shot with the two parts, interior and exterior, correctly exposed.
I think that with these basic tips our interior photos of buildings and houses can be quite attractive. It only rest to practice, practice and more practice.
Of course there are many aspects of architectural photography that have been left out, there is not enough space in a post to summarize what is a speciality like this, but we will try to keep evolving the topic.
And that's all for today. I hope these tips will be useful and that some of you will be able to apply them to your photos of buildings and interiors.
Thanks to @xpilar and moderator @stef1 for giving me the opportunity to publish these articles.
If you are interested, feel free to ask your questions.
Unless stated otherwise, all the pictures and the words are mine.
Do not use this images without my written permission.
Thanks for stopping by and taking a look.
Camera: Canon EOS 5 Mk II and MkIII
Lens: Carl Zeiss 21 f:2.8, Canon 16-35 f:2.8 and Canon 24Ts f:3.5
Processed with Capture One
Thank you, friend!


I'm @steem.history, who is steem witness.
Thank you for witnessvoting for me.
please click it!
(Go to https://steemit.com/~witnesses and type fbslo at the bottom of the page)
The weight is reduced because of the lack of Voting Power. If you vote for me as a witness, you can get my little vote.
Upvoted! Thank you for supporting witness @jswit.
Great tips, thank you!!
Many thanks to you as well for commenting!
Great tips, thanks @xaviduran
It is interesting to apply your recommendations when visiting the museum. It's been a long time since I've been to a museum... :)
By the way, about shooting with double exposure. In principle, this can be done without a tripod, if you maintain relative immobility. The function "Combine photos into a panorama" in the Lightrum program does this. If you slightly shifted the camera when shooting the second time, then the HDR result will have uneven edges that can be cropped.
I often use this technique for HDR and panoramas when there is no tripod.
Thank you for your advice.
Отличные советы, спасибо @xaviduran
Интересно применить твои рекомендации при посещении музея. Давно я не был в музее... :)
Кстати про съёмку с двойной экспозицией. В принципе, это можно сделать и без штатива, если сохранять относительную неподвижность. Функция "Объединить фото в панораму" в программе Лайтрум делает это. Если вы слегка сместили камеру при съёмке второй раз, то на HDR результате будут неровные края, которые можно обрезать.
Я часто пользуюсь этим приёмом для HDR и панорам когда нет штатива.
Спасибо за ваши советы.
Hi @bambuka
Many thanks for commenting.
I do not know Lightroom and I have never heard about this capability. I use Capture1 to process the raw files.
On the other hand, regarding to double shots, while shooting panoramic format is relatively easy do it by hand, but when you talk about to integrate two images exactly in one, in the same frame, it is completely different. I do not think there is a software that get a high quality image matching exactly two pictures taken without a tripod.
Please, tell me something about your visit to the museum.
Now I will give an example of getting a panorama from two pictures without a tripod.
Here are two initial photos without processing
Then I opened them in the Lightroom and applied the union to the panorama
It remains only to trim and process in the desired style
I was shooting with an OKS 1-21-1 lens (wide angle).
Ok. This is a kind of panorama.
Have you tried to do the same with a double exposure image?
Double exposure means, the correct exposure for inside and other picture with the right exposure for outside, as we may see in the last instance of the entry.
Please show me the final result.
I do not use an exposure meter and do not determine exactly the two correct exposures. But when I feel that I lack dynamic range, I take several pictures with different shutter speeds. Usually without a tripod.
Why do I combine these photos in HDR in the same way as the panorama. Here is an example:
And here is the result after pruning:
Beautiful photos! Lovely perspective.
This topic is also interesting, now we go to the inner part.
I really like the first photo that gives the sensation of a tunnel.
I didn't quite understand what this means:
Centered in the frame, does it mean the center of the photo?
well, I believe that a principle is to take care not to centralize some elements...
Well I'm just an amateur and apprentice...
I will continue reading 😊