Drawing like a pro - 95, Commenting on your drawing- Drawing from a photograph

Hi friends!
I am pleased to comment on @stef1's drawing based on a study of a photograph submitted for analysis in perspective.
This is her post: https://steemit.com/hive-185836/@stef1/drawing-like-a-pro-77-homework-contest-9-drawing-from-a-photograph-tutorial-by-jorgevandeperre
As we can see the one-point perspective work is very well done and we can see it in the drawing process shown in her post.
The drawing is consistent in this sense, there are no errors. So I am very happy to see this beautiful drawing with her imprint.
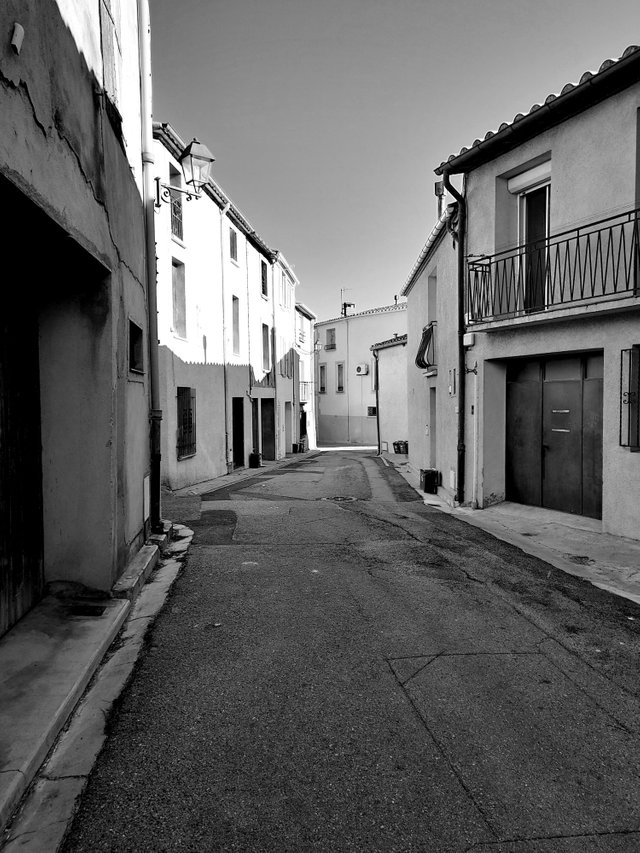
I loved the attention to detail, like the lantern, the bars in front of the windows, and the cracks in the wall.
Also interesting is the light on the facades of the houses on the left in contrast to the shadows on the opposite side. That is a beautiful point of attraction.
I hope @stef1 continue making her own exercises to become strong in perspective so she could centre her attention on other aspects of drawing we will see in the next posts, such as depth and distance through the tones.
As the drawing and perspective are very well done I suggest you pay attention to aspects related to tones.
See this lesson 16

In this picture we can distinguish three basic tones plus the shadows. Try to capture these in your drawing.
A good way to distinguish differences in tones is by squinting. Look at the model with narrowed eyes and then do the same with your drawing. That will let you know where you should darken your drawing the most and where to keep the light ones.

I wish you a very nice day and good exercise!
https://steemit.com/hive-185836/@fumansiu/color-and-light-orange-round-3
is his newest lesson.
Very interesting indeed!
Well, our friend @arcoiris is back with his magnificent watercolour lessons.
Check out this last post that contains very interesting and useful advice about watercolours in different qualities and formats from different brands.
Here are the links to the previous related posts.
1 - 2 - 3 - 4 -
5 - 6 - 7 - 8 - 9 - 10 -
11 - 12 - 13 14 - 15 -
16 - 17 - 18 - 19 - 20 - 21 - 22 - 23 - 24 - 25 -
26 - 27 - 28 - 29 - 30 - 31 - 32 - 33 - 34 - 35 - 36 - 37 - 38 - 39 -
40 - 41 - 42 - 43 - 44 - 45 - 46 - 47 - 48 - 49 - 50 - 51-feedback - 52-Masterclass - 53-Homework Contest #6 - 54-Lesson - 55-Lesson - 56-Lesson - 57-Lesson - 58-feedback - 59-feddback - 60 Masterclass - 61-HW Contest #7 - 62-Lesson - 63-Lesson - 64-Lesson - 65-Lesson - Lesson-66 - 67-feedback - 68-feedback - 69-feedback - 70-Masterclass - 71-Homework Contest #8 - 72-Lesson - 73-Lesson - 74-Lesson - 75-Lesson - 76-Masterclass - 77-Homework - 78-Lesson - 79- Lesson - 80-lesson - 81-feedback - 82-lesson - 83-Masterclass - 84-HW contest - 85-feedback - 86-lesson - 87-lesson - 88-lesson - 89-feedback - 90-feedback - 91-lesson - 92-Masterclass - 93-Masterclass II - 94-Masterclass III
Also, thanks to @xpilar for making these initiatives possible with their great support.
This is getting very advanced! nice work!
Thank you very much, friend!
Nice detailed drawing. If it was a photo, then during post-processing I would look for a "black point".
If I may, I'll experiment a little... :)
Of course!