SIZ Approved Course | Microsoft Word - Basic to Advance Level | LECTURE 1 | BASICS OF MS WORD AND BASIC EDITING SKILLS|| 20 % Payout to @siz-official
Hello Everyone!
Hope everyone is doing well!
My special gratitude to @cryptokraze and @siz-official, for Providing such a platform for Learning some new things, where we can also share the knowledge we have and we can help others in a way to educate them by our knowledge.
Course Name :
4 Week Course on Microsoft Word - Basic to Advance Level || Lecture # 1
Getting Started
This is our first lecture of Microsoft Word - Basic to Advance Level Course, where we will learn about the some basics of MS WORD and basic use of MS word, which will lead us to learn the second Lecture.
Brief Contents of Lecture # 1
- Starting Word
- Basic Orientation of Page
- Quick Access Toolbar
- Home Tools
- Insert Tools
- Page layout Tools
- Creating a Document
- Use of formatting Tools
- Saving a document
- Conclusion

Starting Word
To open the MS Word 2016 Application first click on the Start button present on the desktop of the window. Then the Start menu will appear then On the Start menu, locate Word 2016 and click the icon.
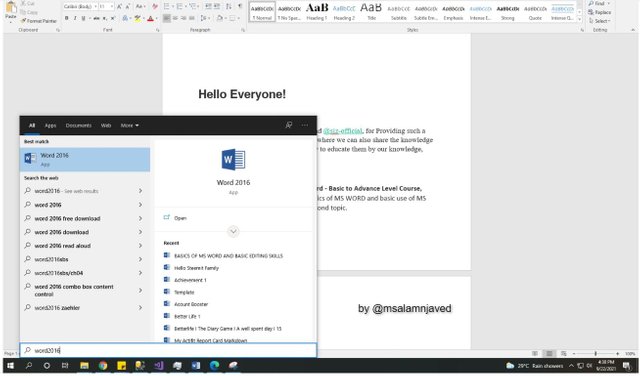
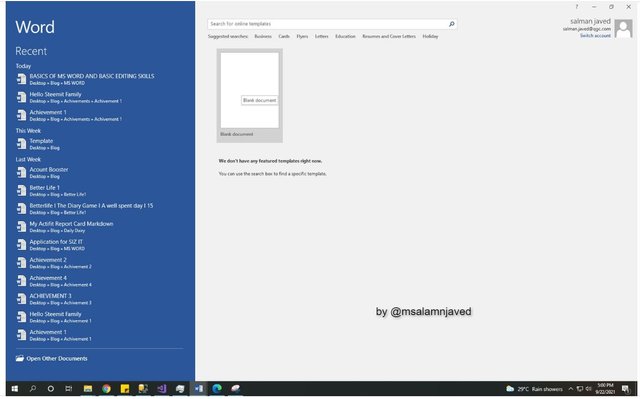
Then MS Word 2016 application will open with the interface you will see on the left side all the recent documents will appear and on the right side you may choose a blank new project.
Basic Orientation of Page
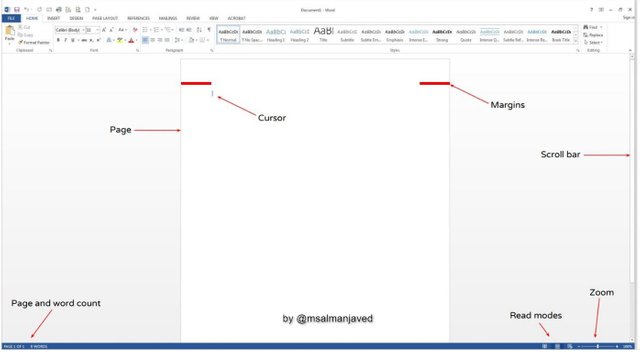
Above are some basics of MS word Page, here we have
Cursor: Define as writing pointer, which shows the position where we can start the writing.
Margin: These are spacing’s on both sides of page, define text area to write on the page and this is use for set the
printer preferences.
Scroll bar: By using this we can move up and down of a page.
Page Count: On the Extreme right side of page Count of word is showing this is complete count of words on page.
Zoom: This is use for the zoom in and zoom out of the page, for better styling in case of images addition.
Working With Tools
Let’s start from the introduction of tools given in the MS Word, which we will use frequently for the writing on the Page,
Let’s begin.
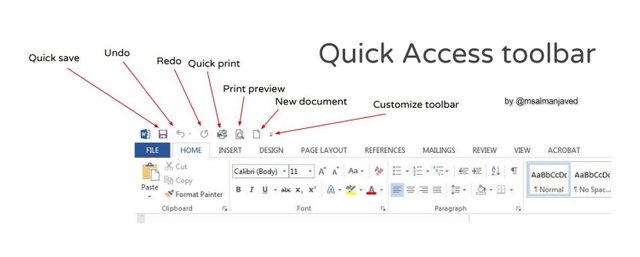
Quick Access Toolbar
This is located on the top of the MS WORD application Window, which is majorly use for the save, undo and copy pasting and we can also use it to access different controls in the Application. Here is the Demonstration of it.
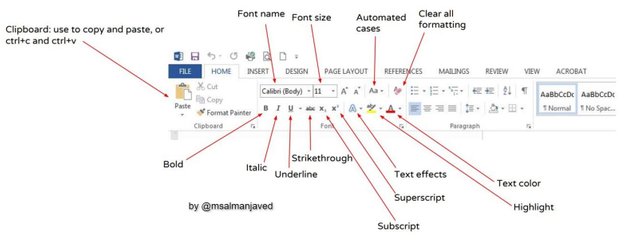
Home Toolbar
The next toolbar right below the Quick access tool bar, is Home tool bar, which carries multiple and major controls in the application which we use frequently.
1. Font style & Clipboard
Here are some controls used in the styling of a paragraph, included different Font Families, and size options and different color options which we will use in our Next lectures, these controls make our text Interactive and beautiful.
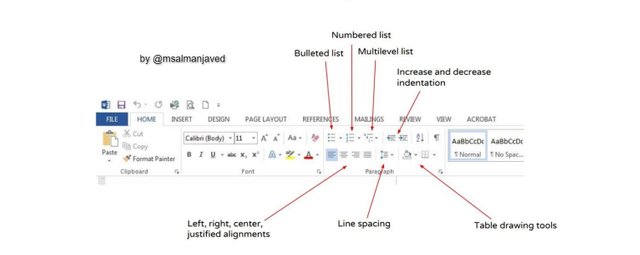
2. Format Paragraphs
The Second of home Control tool bar including all the controls related to formatting of a paragraph, where we have some options like write our paragraph into bullets points, with starting of numbers, how we can manage the line spacing and margins of alignment of Paragraphs etc. all tools present here.
These are main tools of MS Word Application, everyone should know about.
Insert
After home bar second tool on the Bar is Insert, which is having controls related to all type of insertions in document, we can insert multiple charts, graphs, images, table, shapes and screen shots, to make our writing more interesting and creative,

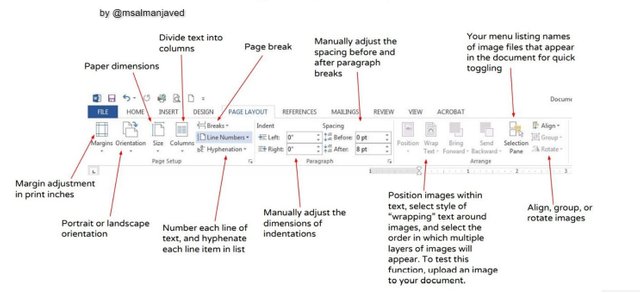
Page lay out
There are multiple tools present on the Bar, in MS Word, but we will focus on the tools of our concerned the very next tool which I think everyone should know about is the page layout. Which help to define the layout of our document, we can set margin between line, line breaks, manage page size, its Orientation and other many operations by using Layout option
This was the basic Introduction of the MS Word Application, I will try my best to introduce all the other controls and tools gradually, in my next lectures, and this will help the beginners to learn about the Basics of MS word.
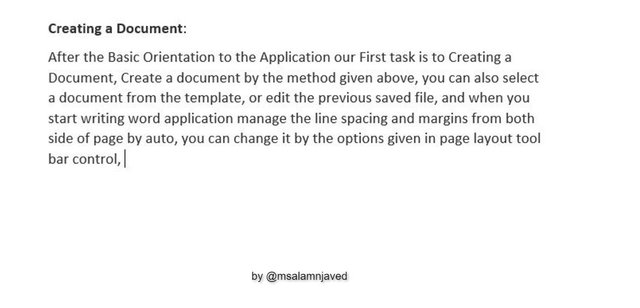
Creating a Document
After the Basic Orientation to the Application our First task is to Creating a Document, Create a document by the method given above, you can also select a document from the template, or edit the previous saved file, and when you start writing word application manage the line spacing and margins from both side of page by auto, you can change it by the options given in page layout tool bar control.
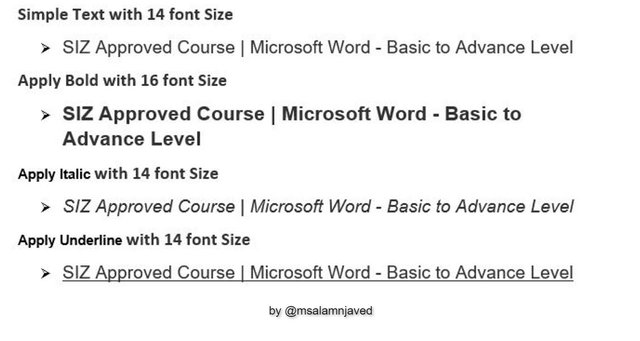
Use of Formatting Tools
The Given text is Just example on which I used Bold, Italic and under line tool, and also implement some Headings, font families and font size, this will clear how we can make better and stylish writing.
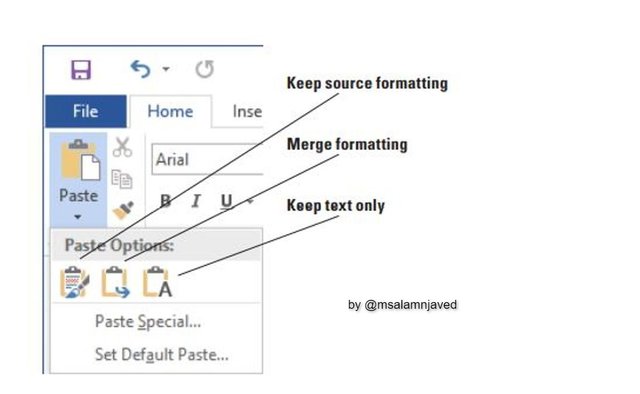
Cutting, Copying, And Pasting Text
We can also copy a text from one source and paste it to our desire place in the document, for this purpose we can copy the text selecting the text with mouse and By Command (crtl+C) or by right click on and select copy option then we can paste it to Our desire Place by Command (crtl+V) or by right click and paste option , We can also use the
Control From Home Tool bar as in image.
When you copy some text and paste it to somewhere there would be three different options
Keep source formatting: Keeps the selected text with the original format, including hyperlinks.
Merge formatting: Keeps the selected text with the Destination format where you are pasting.
Keep text only: Keeps the selected text Regardless of its font, size, and formatting, when pasted.
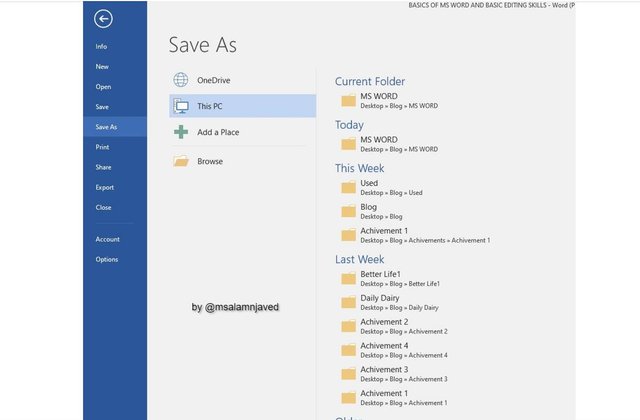
Saving Document
After creating a document and some writing to save the document press (crtl+S), or you can click on first icon from quick access toolbars.
By default when you save a document it named the file from the closely related to content of file, you can change the name and also change the location of file, by browse new place.
Conclusion
This was the first lecture of MS Word, I tried to cover all the necessary details about basics of MS Word 2016 Application in this Lecture , I hope it would be helpful for everyone to understand the Basics of MS Word, I would appreciate the questions and confusions about this lecture, You Can ask me anything about it in Reply of this Post. Your Suggestions Would be appreciated Also.
Regards
@msalmanjaved
On the End also special thanks to Steemit Infinity Zone team
@cryptokraze | @vvarishayy | @suboohi | @arie.steem | @qasimwaqar

Thank you very much for sharing your quality content in detail on the SIZ Community. -We gave 40% support to this post from the siz official account. Congratulations ! Keep producing content in the SIZ Community . :)
You can delegate your SP to @siz-official and take benefit of our Delegation Rewards Offer of receiving up to 200% Curation Rewards
You can check our Steem Investment Plan and Receive 5% Profit Monthly
Thanks alot for your kind words, these are motivation for me to create some unique and better content in future, and i would definitely work on it,
Very well detailed dear friend. Thanks for sharing a good information with us my best wishes for you.
@vvarishayy
#sizcomments
https://steemit.com/hive-181430/@siz-official/siz-commenting-contest-round-3-let-s-encourage-others-by-apreciating-their-work
Thanks alot dear @faran-nabeel, you are also my source of motivation, i have learnt many things from your posts also,
A very wonderful course to learn about, and your explanation is superb, it's very easy to understand. Keep up the good work sir
@usmanismail882 Thank you so much for your words dear
You are welcome sir