ADOBE PHOTOSHOP TUTORIAL -LESSON 25
Hi friends.,
Hope you are all fine and safe,
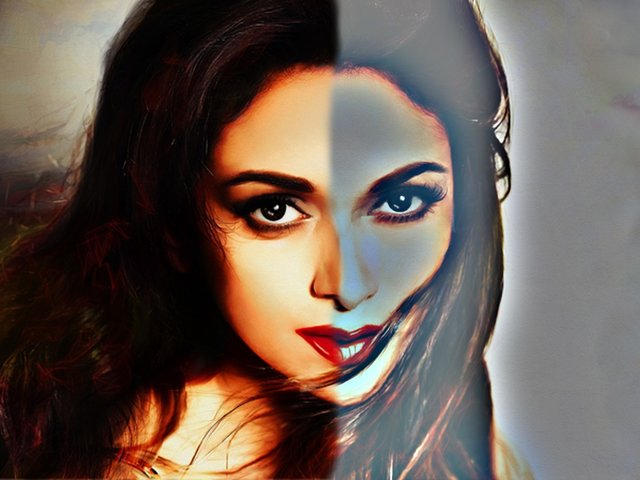
My self @poorvik ima graphic designer from India. Im here going to give you atutorial about burn image effect. This is lesson 25 in my series of Photoshop tutorials. By demonstrating how to make burn effect on any photo in Photoshop, I hope that this post will help you learn the programme.
Adobe Photoshop Tutorial

Lesson : 25
Burn Image effect
Step1:
For this effect I have donloaded an inmege from pixabay th link given below

pixabay
Step2:
One a new drawing sheet with size of 12x16 inches and resolutopns of 300 pixels

Step3:
Open the downloaded image and drag it in to the drawing sheet

Step4:
Enlagrge the image by using transform tool ctrl+t, then fo to menu> filter> other> 1st option and choose 20% using the slider bar

Step5:
Now bring the originla image on the edited one and cut it using rectangulkar marquee tool

Step6:
Save the image as JPEG or PNG file

Every one can do this effect using above mentioned yools and steps, just need to do pratctice of photoshop.
In the following lessons, we will learn about other tools of photoshop. Below are the links I have created for posts of previous studies so far. I hope it will be helpful for you. LESSON1 | LESSON2 | LESSON3 | LESSON4 | LESSON 5 | LESSON 6 | LESSON 7 | LESSON 8 | LESSON 9 | LESSON 10 | LESSON 11 | lesson12 | Lesson 13 | Lesson 14 | Lesson 15 | LESSON 16 | Lesson 17 | Lesson 1718| Lesson 19 | Lesson 20 | Lesson 22Lesson23 | Lesson 24
Thank you for reading, lets meet in the next lessons.

Greetings, you have been supported by @hindwhale account for your post. To know more about our community, you can visit our introduction post here. To contact us directly, please visit our discord channel.
Telegram ----- Discord
Nice tutorial my friend.