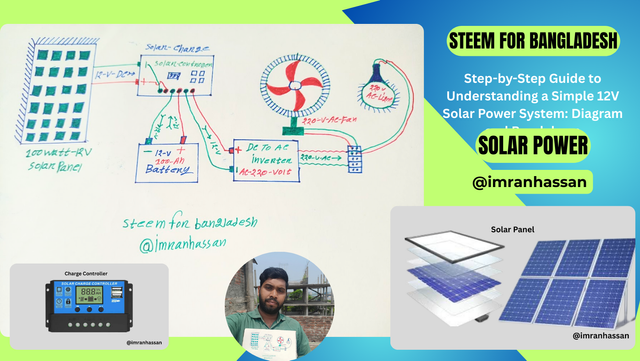
Step-by-Step Guide to Understanding a Simple 12V Solar Power System: Diagram and Breakdown
Assalamualaikum Everyone. I am @imranhassan
From #Bangladesh
.png)
| Solar Panel |
|---|
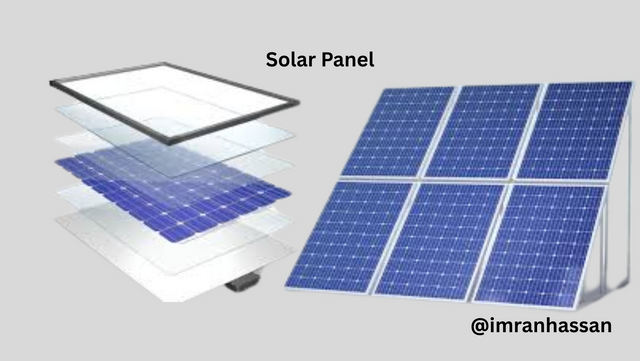
Solar panels generate electricity from sunlight. It consists of photovoltaic (PV) cells, which convert sunlight directly into DC electricity. Usually, panels of different capacities are used for 12V, 24V or 48V systems.
Voltage: Usually 18V to 24V DC (for charging 12V batteries)
| Charge Controller |
|---|
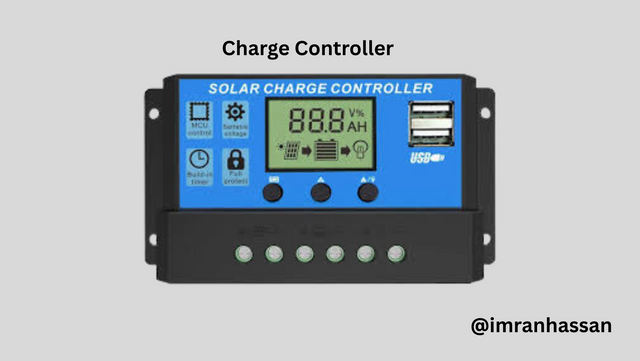
The charge controller controls the DC electricity coming from the solar panel and helps in flowing the right amount of charge to the battery. It protects the battery from overcharging or discharging.
Type:
PWM (Pulse Width Modulation)
MPPT (Maximum Power Point Tracking)
Voltage: Input 18-24V DC, Output 12V DC
| Battery |
|---|
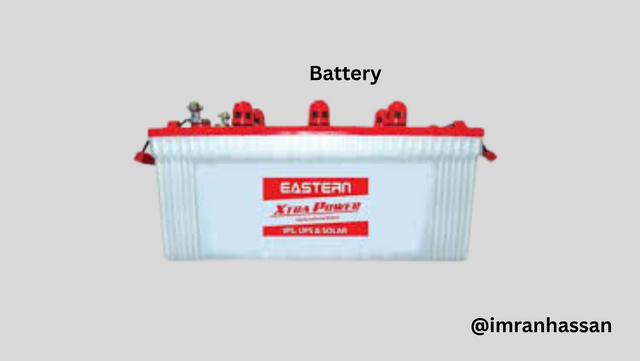
The battery stores solar power, which can be used at night or on cloudy days. Lead-acid and lithium-ion batteries are more commonly used.
Voltage: Usually 12V or 24V DC
Type:
Lead-acid battery
Lithium-ion battery
| DC to AC Inverter |
|---|

An inverter converts DC electricity into AC electricity, which is used to run common electronic devices in the home. Voltage: Input 12V/24V DC, Output 220V AC
Type:
Modified Sine Wave Inverter
Pure Sine Wave Inverter
Load - User Devices
Load refers to the devices that receive power from the inverter, such as fans, lights, TVs, computers, etc.
Voltage: Usually 220V AC
✅ List of estimated costs for a typical 12 volt solar system setup
| Component | Quantity (Qty) | Estimated Price (BDT) | Comments |
|---|---|---|---|
| 12 Volt 100W Solar Panel | 1 | 4,500 – 5,500 Taka | Price will be higher if it is a good brand |
| Solar Charge Controller | 1 | 1,000 – 1,500 Taka | Variable according to PWM or MPPT |
| 12V 100Ah Battery | 1 | 10,000 – 13,000 Taka | Can be lead acid or gel type |
| DC to AC Inverter (1000W) | 1 | 3,000 – 5,000 Taka | Modified or Pure sine wave type |
| Fans and Lamps (Load) | 2–3 | 1,000 – 2,000 Taka | General DC or AC Home Appliances |
| Wires and Connection Materials | – | 500 – 800 Taka | Varies according to length and quality |
| Total Estimated Cost | – | 20,000 – 27,000 Taka | May vary according to system capacity |
| I am sharing with you the step-by-step process of creating a solar power diagram. |
|---|
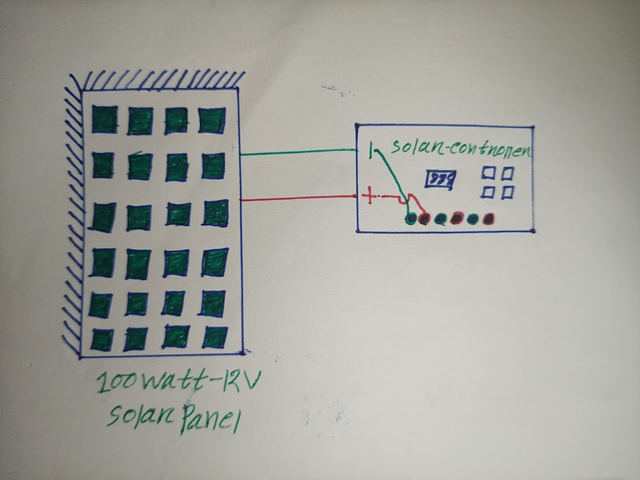
First, I took a white art paper and used red, green, and blue pens to draw. Then I drew a 12-volt, 100-watt solar panel on the diagram. On the right side of the panel, I drew a solar charge controller. It has a small display-like part, which is used to show the status of the system. This controller has a total of six connection points.
| Connection Type | Quantity | Purpose |
|---|---|---|
| Solar Panel Connections | 2 | To connect the panel with the charge controller |
| 12 Volt Battery Connections | 2 | To store energy from the charge controller |
| DC to AC Inverter Connections | 2 | To convert and deliver AC power to appliances |
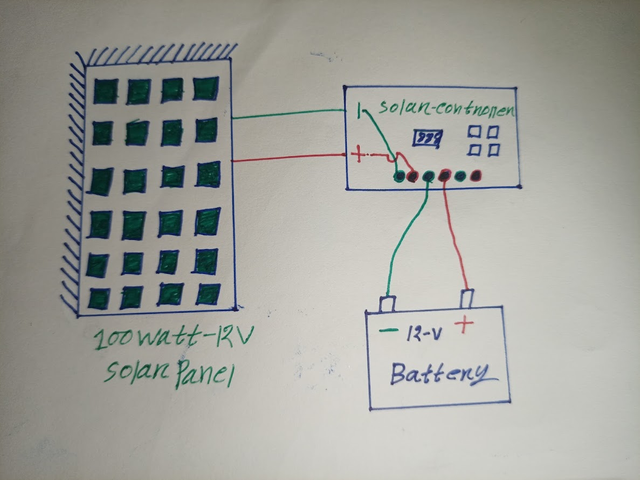
Next, I drew a 12-volt, 100-ampere battery. I connected a positive and a negative line from the solar charge controller to the battery. This connection has to be done in the same way in a real-life system—so that the charge controller can send charge to the battery correctly.
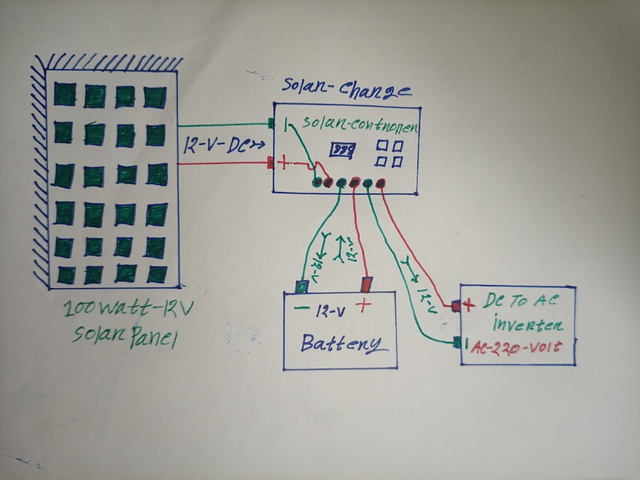
Next, you can see a picture of an inverter on the right side of the battery. This inverter converts 12-volt DC voltage to 220-volt AC voltage, through which we can run our common 220-volt fans, lights, etc., in our homes. I have connected the connection points 5 and 6 of the charge controller to the input of the inverter, as is done in reality.

In the last step, I have drawn a picture of a fan and a lamp at the bottom of the diagram so that you can easily understand the functioning of the entire system. Here it is explained how we can generate electricity using the energy of the sun and use it to run the fans and lamps in the house. The 220-volt AC current comes out of the inverter and directly runs these fans and lamps. In this way, a complete solar power system can be understood very easily.
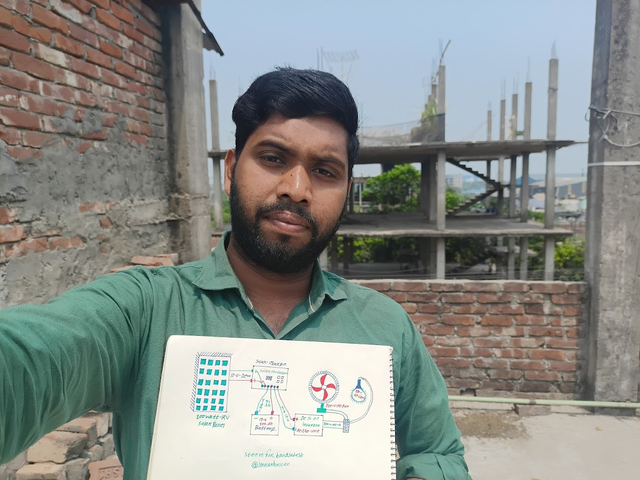
I have taken a selfie next to my hand-drawn diagram artwork, which proves the reality and authenticity of this work. Hopefully, through this diagram and step-by-step explanation of mine, you can easily understand and learn how a 12-volt solar system works. InshaAllah, in the future I will bring you a UPS system diagram, which operates using 220-volt AC current.
.gif)
Hi @imranhassan , that was some great basic info for starters in the field of solar.
However, over times, I discovered people neglecting MCBs in their illustrations...especially in Nigeria where I come from. Maybe, people underate this - forgetting the importance.
Is it also comon in Bangladesh?
Have you considered adding (MCBs) to your diagram?
Thank you brother, for your valuable comments and suggestions.
I have presented this diagram in a simple way for beginners to understand the basic workings of solar power.
What you mentioned is absolutely correct — MCB (Miniature Circuit Breaker) is an important safety device that protects the system from short circuit or overload. Generally, small-scale domestic solar systems are often controlled by the on-off switch of the inverter, but adding MCB is definitely a safer and more professional method in terms of safety.
I will definitely update the next diagram with the exact location of MCB, so that beginners can better understand and safely build a solar system.
Thanks again, if you want to give any further guidance, I will gratefully accept it.
https://x.com/ImranHosen98536/status/1908771769324081507
Thanks brother for your valuable submission. It helps us to know how solar panel work.
ধন্যবাদ।
প্রিয় সাজিদুল ভাই,
আসসালামু আলাইকুম, প্রথমত, আপনার ধন্যবাদ জানানো আমার জন্য সম্মানের বিষয়। তবে, আমি একটু জানাতে চাই, Steemit প্ল্যাটফর্মে কমেন্ট করা এবং প্রতিক্রিয়া জানানো খুব গুরুত্বপূর্ণ, এবং কিছু নিয়মকানুন অনুসরণ করতে হয়।
এখানে, কমেন্টের মাধ্যমে আপনাকে আরও অনেক কিছু শেয়ার করতে হবে, যাতে পোস্টের মূল বিষয়বস্তুর সাথে সম্পর্কিত থাকে। অর্থাৎ, আপনি যদি অন্য কারো পোস্টে মন্তব্য করেন, তবে সেটা কেবল ধন্যবাদ জানানো নয়, বরং পোস্টের বিষয়বস্তুর সাথে সম্পর্কিত চিন্তা, মতামত বা প্রশ্ন রাখতে হবে। এতে শুধু পোস্টকারীর সাথে একটি সুন্দর আলোচনা হতে সাহায্য করবে, বরং প্ল্যাটফর্মের অন্য ব্যবহারকারীরাও আপনার মন্তব্য দেখে আরও কিছু শিখতে পারবেন।
এছাড়া, Steemit একটি নির্দিষ্ট নিয়ম ও সংস্কৃতি অনুসরণ করে, যেখানে আপনার প্রতিটি পোস্ট এবং মন্তব্যকে গুছিয়ে ও মনোযোগ দিয়ে লিখতে হবে। এতে আপনার পেজ এবং উপস্থিতি আরও শক্তিশালী হবে। তাই, ভবিষ্যতে মন্তব্য করার সময় পোস্টের মূল বক্তব্য বুঝে এবং প্রাসঙ্গিক বিষয় নিয়ে আলোচনা করবেন, তাতে আপনার লেখা আরও মানসম্মত হবে এবং সবাই এটি পছন্দ করবে।
আশা করি, আপনি এগুলি মাথায় রেখে Steemit-এ আপনার যাত্রা চালিয়ে যাবেন এবং আরও সফল হবেন।
ধন্যবাদ এবং শুভকামনা।
Bro your detailed explanation of solar power system is really great, you have presented the whole process step by step so clearly that it has become very easy to understand for anyone. The detailed explanation you have given about the efficiency, cost, and connection of solar energy will be very helpful for a new user. The hand drawn diagram artwork and detailed presentation is really admirable! It will help to raise more awareness towards the use of solar energy. Thanks for sharing such a nice post with us.
Thank you very much, brother, for your beautiful comment. Your comment will inspire my work. I have tried to present a basic system of solar energy in a way that is easy for beginners to understand through simple language and hand-drawn diagrams. It is really a pleasure and encouragement to receive such positive comments from experienced and aware readers like you. I intend to share some more works and diagrams in the future on the importance and proper use of solar energy. I will always be by your side.
Brother, your initiative and knowledge-based work is really commendable, your attempt to present the basic concepts of solar energy in a simple way for beginners is very important and effective. I will look forward to your future projects. Your research and educational presentations that are making people aware of the importance of solar energy are undoubtedly a great initiative. Come up with more new projects, we all want to enjoy your valuable work.
I am sharing my experience on the Steemit platform, as well as my experience working in a factory. I am happy to inform you that for the past week and a half, I have been working as a consultant in the 23rd season, and I have posted 18 tutorials. These 18 things were for people in my area to fix, and I got paid from there. And for this I have been given very good priority on the Steemit platform. I would like to thank them. I would also like to inform you that in my area I always do this kind of work and benefit people, and I take very little money from them as wages, so they are happy to give me a lot of work.
Your experience is truly inspiring, the recognition of your skills and hard work on the Steemit platform is undoubtedly commendable. Your tutorials have been helpful to the people of the area, and the service work you are doing is even more commendable. The mentality of helping people for a low wage has made you even more important to the community. The happiness of the locals after seeing your work is the real measure of your success.
Now that winter is over, summer has arrived, and the problem of load shedding has increased. I have already received the work of three 12-volt mini IPSs and two solar systems. I will do these slowly, and I will buy the products from our old Dhaka Gulistan market so that those who gave me work can also get the work done with less money and so that I can also get some pocket money...