How are you all? Hope you are well. Alhamdulillah, I am well too. Welcome to my eighth post of Home Repair Club. The 23rd season of Steemit Learning Club has started with new enthusiasm and positive expectations. Each season brings new challenges, but our main goal is to make the learning process easy and effective.
In today's post, I will show you how to change the tip of an old soldering iron and make it as usable as new. Those of us who do electronic work using soldering irons often face various problems when the tip is damaged. The solder in the old tip does not melt properly, and even if it melts, it does not connect to the circuit properly. This disrupts work and we get annoyed. 😩
Essential components for soldering and their benefits
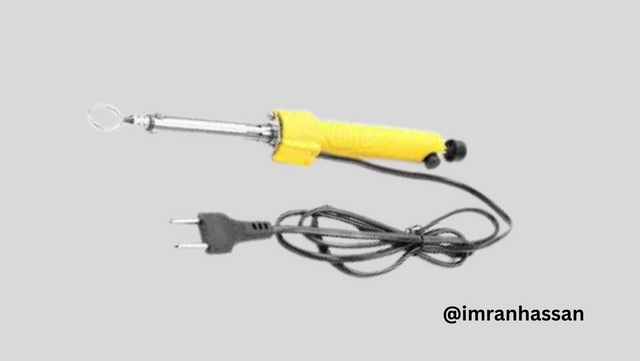
A soldering iron is an electrical device that generates heat and helps to create connections between metal parts by melting solder. There are different types of soldering irons available, such as temperature-controlled soldering irons, station-type soldering irons and pencil-type soldering irons. Using a good-quality soldering iron makes the job faster and easier.
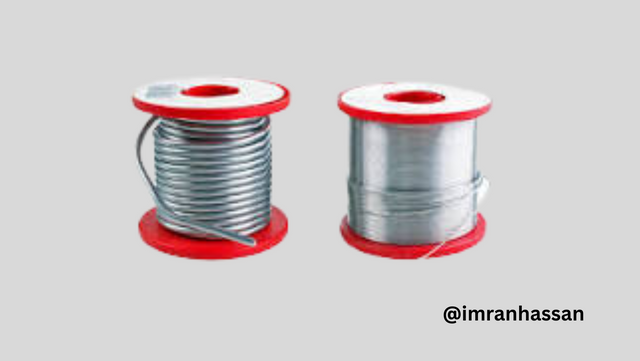
Solder wire
This is a special type of metal wire, which is mainly made of a mixture of tin (Sn) and lead (Pb). Some high-quality solder wire is lead-free, which is environmentally friendly. It helps to make circuit boards or metal connections by melting. Using good-quality solder wire makes the connection stronger and the work lasts longer.
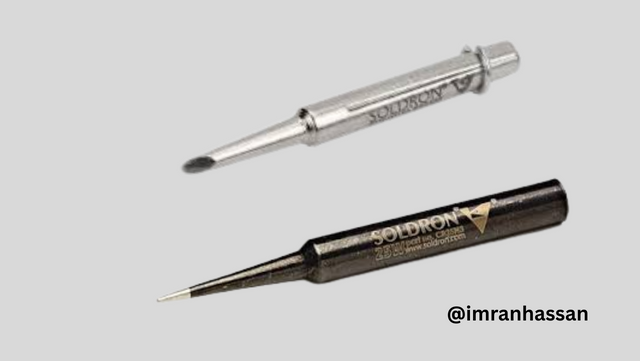
Ceramic or copper bit
This is the tip of the soldering iron, which retains heat and is used to melt the solder properly. Ceramic bits last longer and are not easily damaged, while copper bits conduct heat well, which helps in melting the solder quickly. Replacing the old bit increases the efficiency of the soldering iron and makes it work like new.
Flux cleaning chemicals
Flux is a chemical substance that removes oxidation or dirt from the surface of metal connections during soldering. It makes the solder connection stronger and longer lasting. Without flux, it is not possible to melt the solder properly, and the connection may be weak.
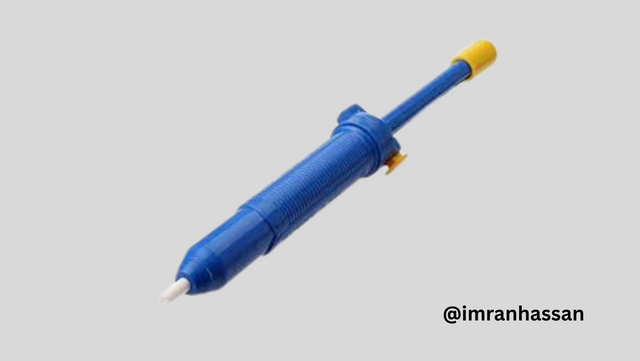
Desoldering pump, solder removal pump
It is mainly used to fix incorrect connections or remove excess solder. If solder is applied incorrectly to a circuit board, this pump can be used to clean it. As a result, damage to the circuit is reduced, and the work can be done perfectly.
Soldering stand
The soldering iron is very hot during use, so a stand is used to keep it safe. Using this prevents the soldering iron from falling and burning anything.
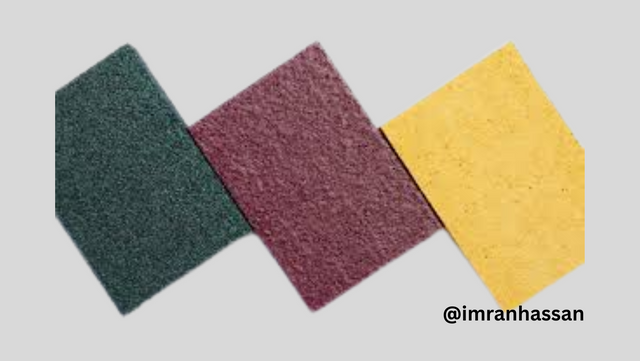
Sandpaper
It is used to clean old or damaged bits. Due to long-term use, rust or black coating forms on the soldering bit, which reduces its heat transfer capacity. Cleaning with sandpaper makes the bit look like new and retains heat properly.
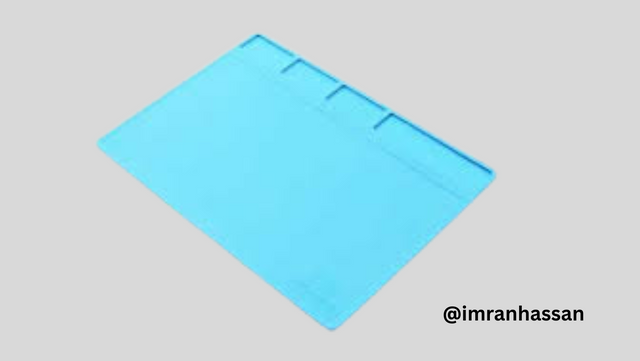
Heat-resistant pad
It protects the circuit board or other components from excessive heat damage. Sometimes, high temperatures during soldering can damage other parts of the circuit. Therefore, using this pad can prevent excessive heat.
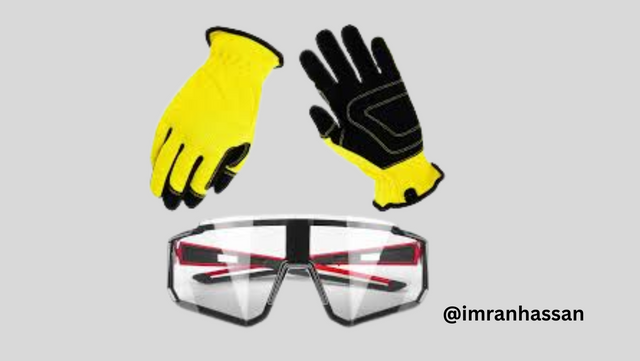
Safety gloves and glasses
Heat, chemicals, and fumes during soldering can damage the eyes and hands. Wearing safety gloves protects the hands, and using glasses can keep the eyes safe.
The necessity of changing the tip of the soldering iron.
Many people then throw away the old soldering iron and buy a new one, which costs between 350 and 400 taka. But the same problem occurs with new soldering irons because their bits are usually made of low-quality iron or aluminum, which quickly wear out.
The best solution to this problem is to buy a new ceramic bit and replace it with an old one. This will make your soldering iron work like new and will allow you to melt and connect solder properly. This will also save you from additional costs. I used my old ceramic bit for more than a year, but over time, its copper layer came off and it lost its effectiveness. So, I bought a new ceramic bit and replaced it. Let's see how to do it easily.
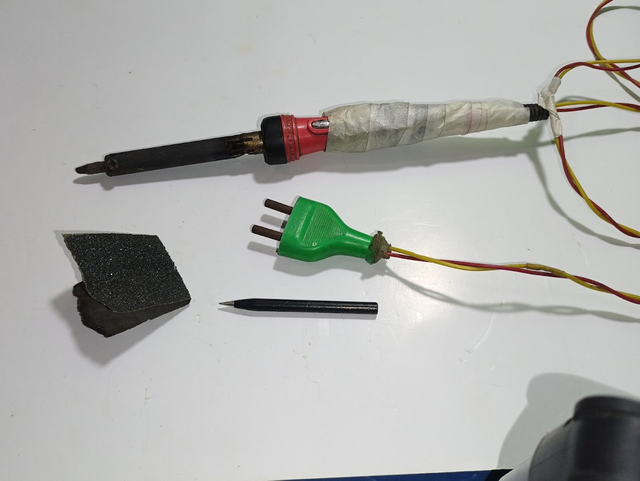
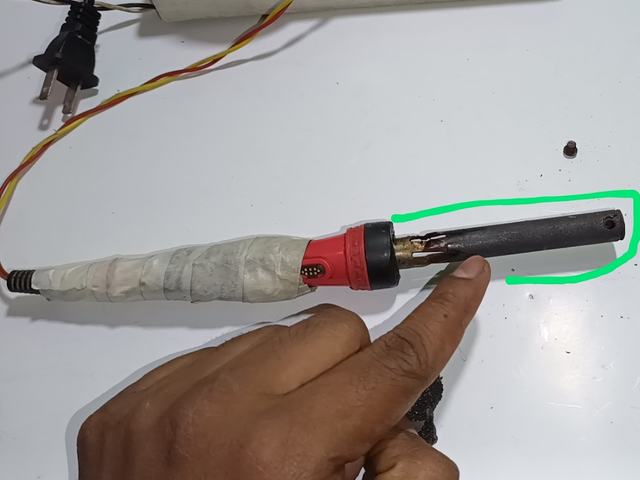
Step -01
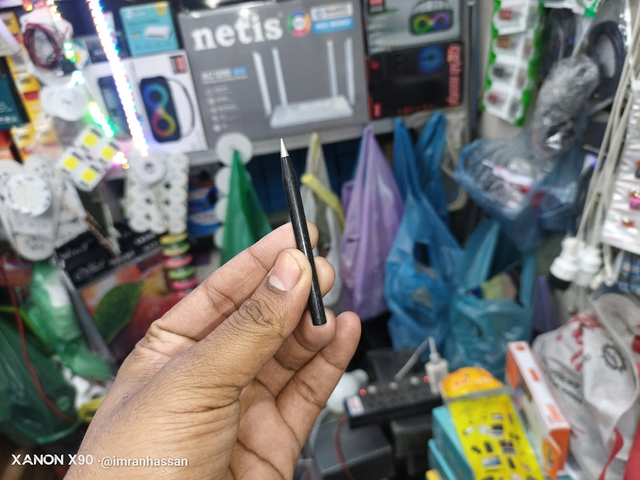
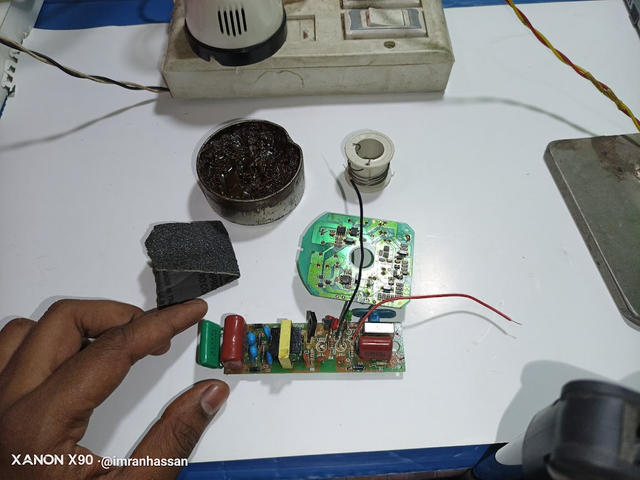
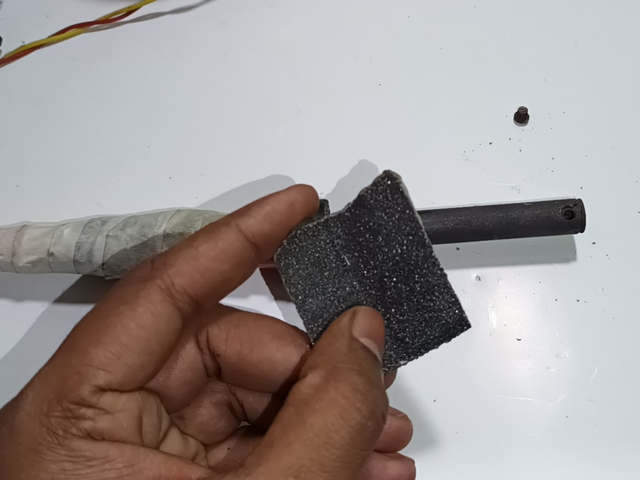
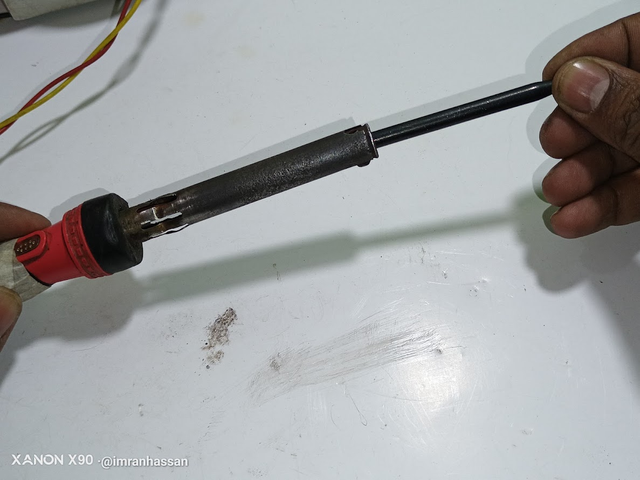
First, I took my old soldering tool with me and you can see a series of papers in my hand and a new ceramic bit. These two things are basically the first source of our repair today. And you can see, I'm highlighting here, showing you that the one I have on my old soldering iron is completely damaged and very difficult to work with. Now the new ceramic bit that you see in my hand, if you work with it, the kids will be able to work beautifully because it is very expensive, 100 to 120 taka and its solder melts like water, it is very easy to work with. And now the series of paper that you see, by rubbing it with it, I will rub the body of the soldering iron that has been burned, the body that has been burned, the body that has been rubbed clean.
Step -02
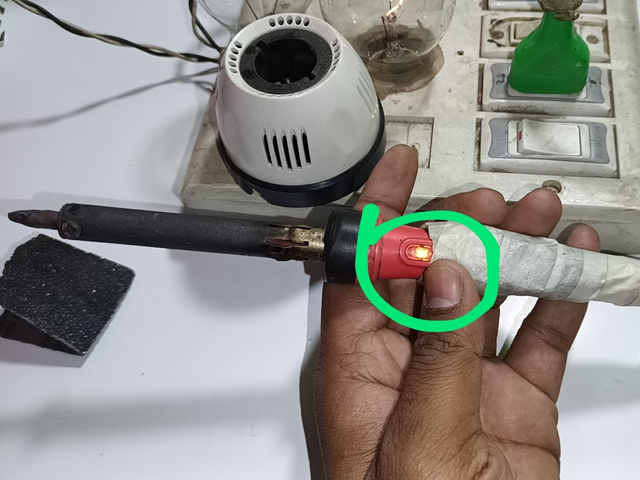
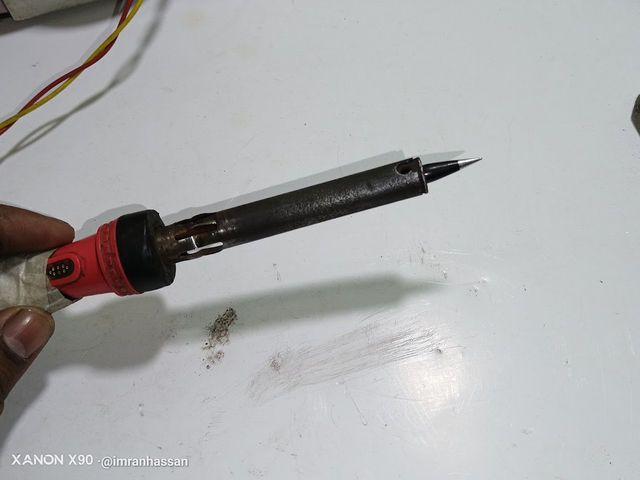
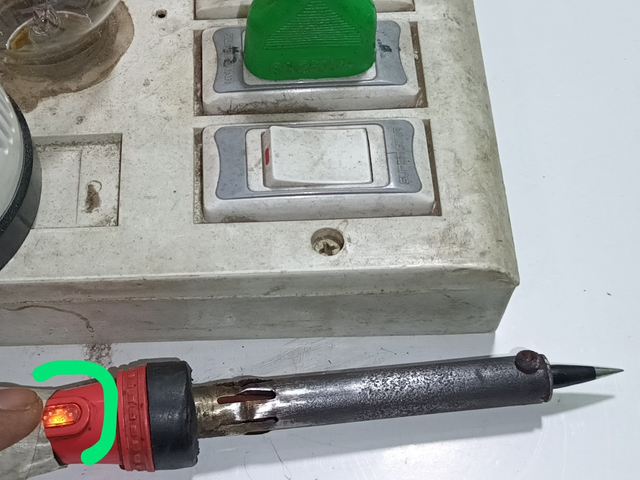
So now we will test our previous broken soldering iron with the bit. Is it working or not? That's why I took the series line and gave my soldering iron 220 volts of input voltage. Then to check, as you can see, I took some broken circuits and took solder wire and solder paste. After giving 220 volts, I waited for a while, and our soldering iron got hot, and as you can see, my soldering indicator light is on and there is enough heat. So let's test the circuit now.
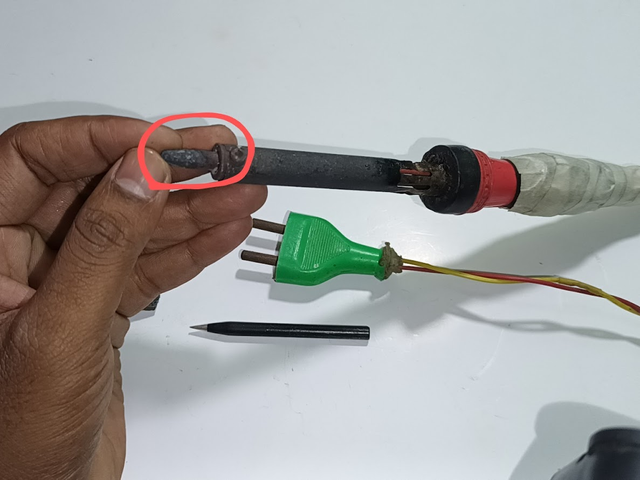
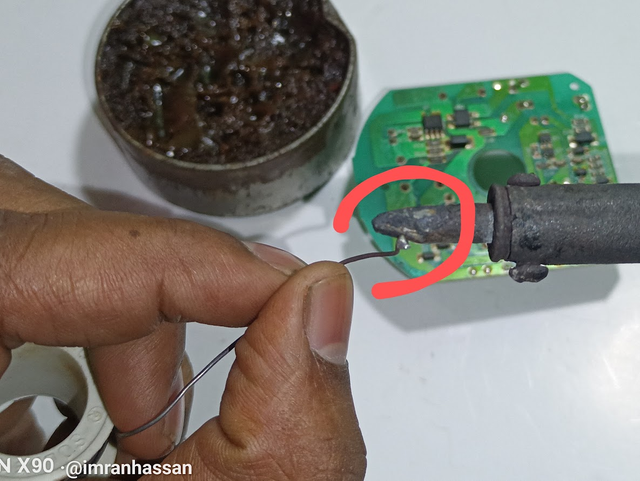
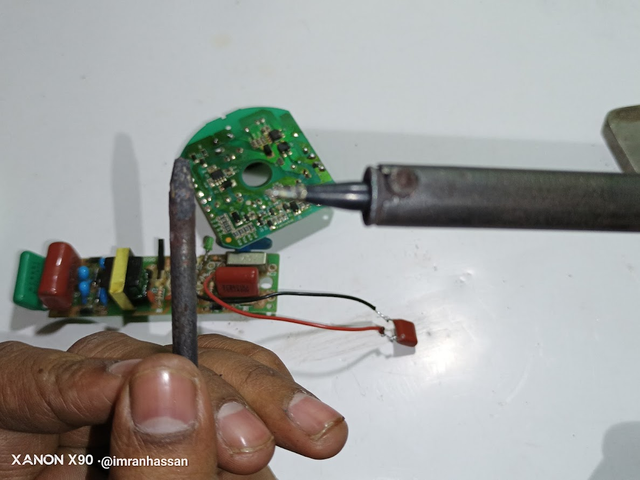
Step -03
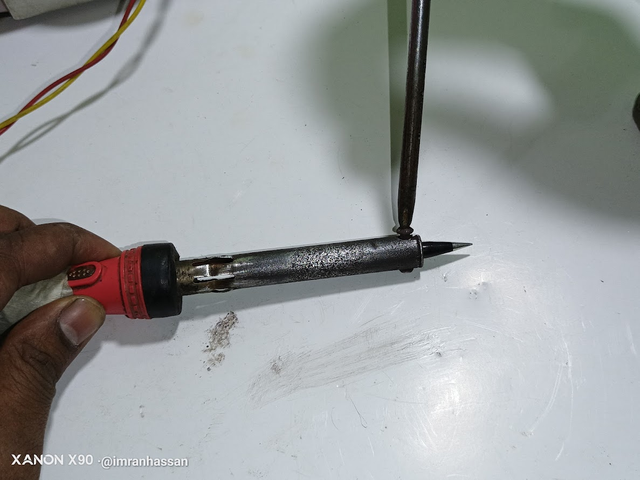
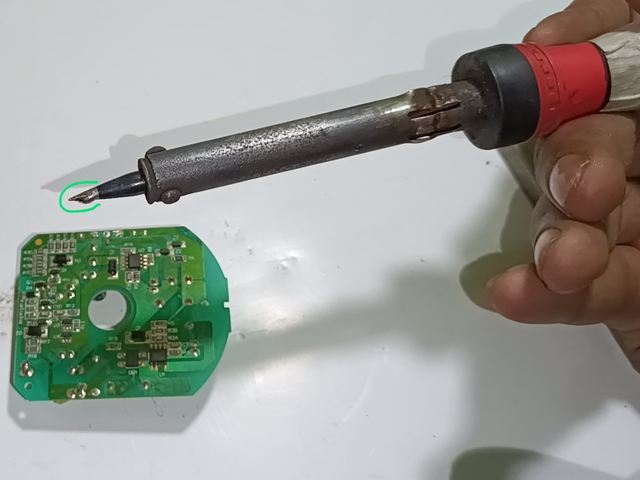
Now you can see in the first picture that my soldering bit is not catching my solder wire, and I put it next to the circuit; it is not heating anything there, and it is not catching a part of the solder, which is very difficult. Let's now throw away this old bit and replace it with a new ceramic bit here. For this, we turned off the soldering 220 volt input voltage line. Then I used a screwdriver to remove the solder bit from the soldering iron.
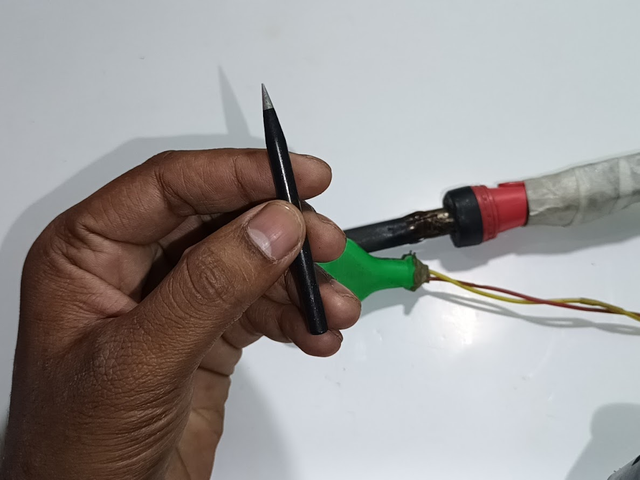
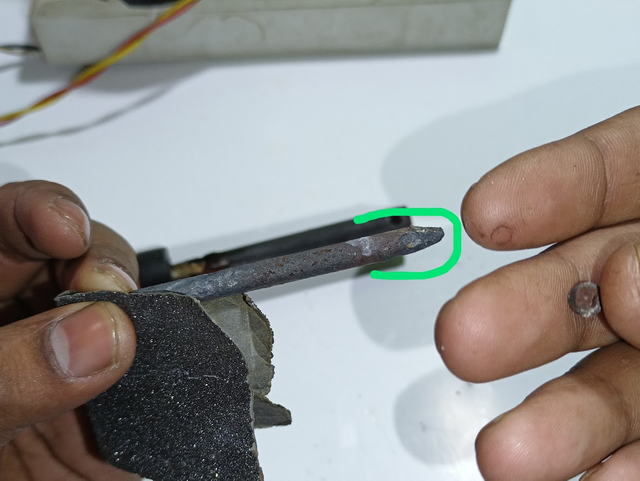
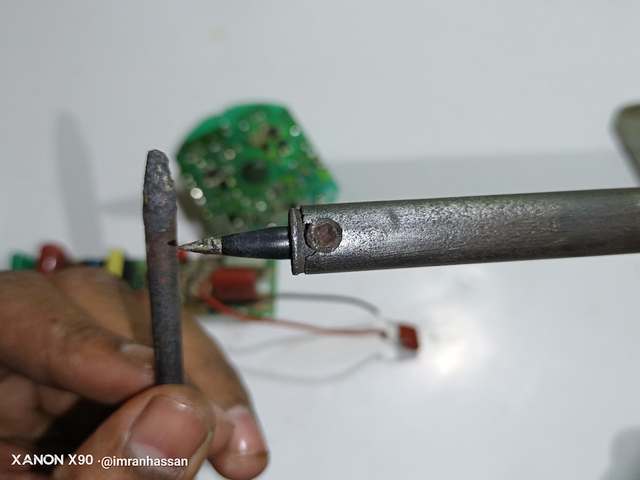
Step -04
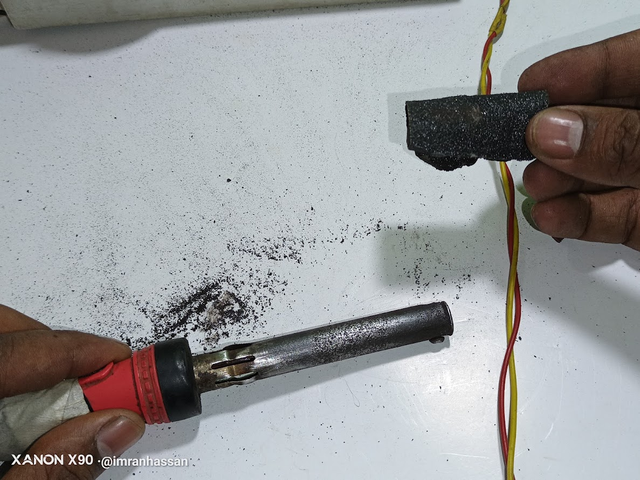
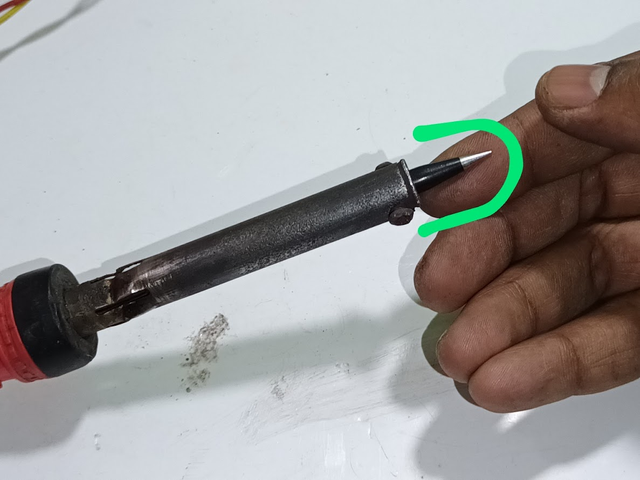
Then you can see that I took the old soldering iron bit, and its front and back parts were damaged all over. It was not ready for this job. Now let's clean the body of the soldering iron by rubbing it well with sandpaper and removing the black dirt. You can see that I have rubbed the dirt very well with sandpaper, and the body of the soldering iron looks very clean.
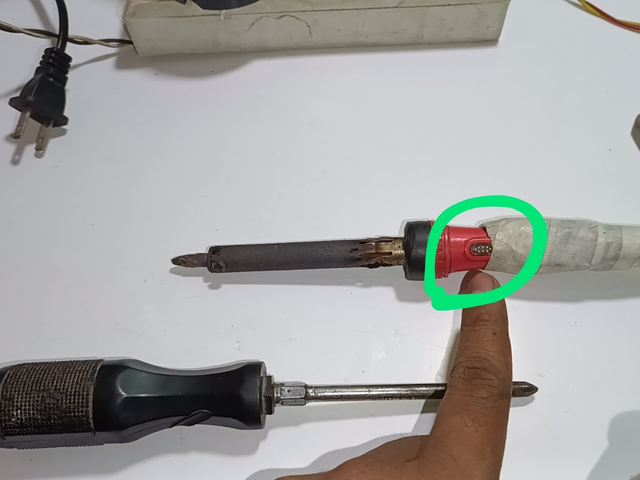
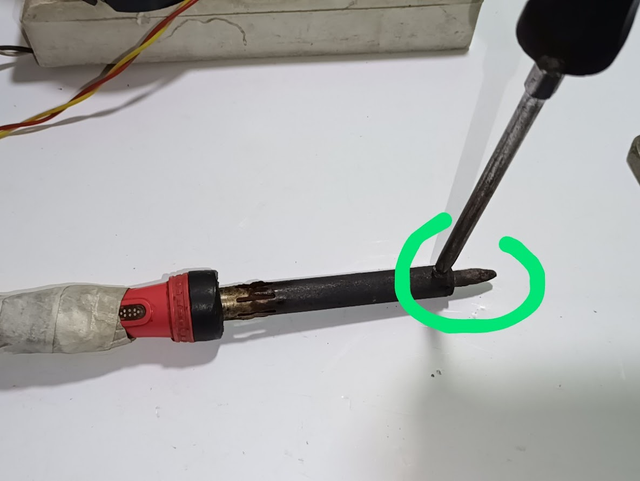
Step -05
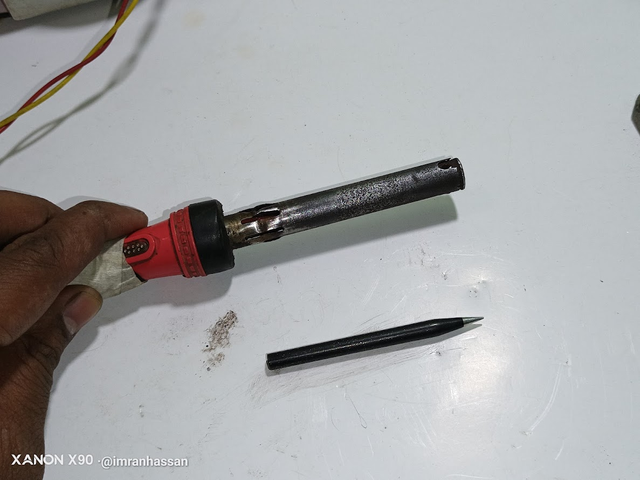
Once I had cleaned the body of my soldering iron, I took the new ceramic bit. And inserted it into the 60-watt coil of the soldering iron. After fitting it properly, you can see that I have tightened the screw with a screwdriver.
Step -06
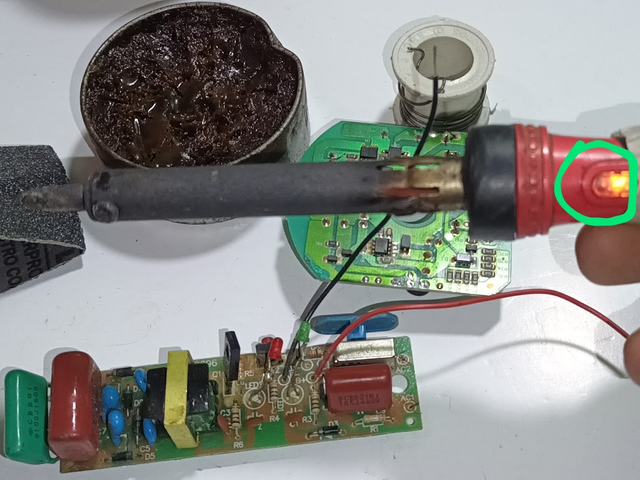
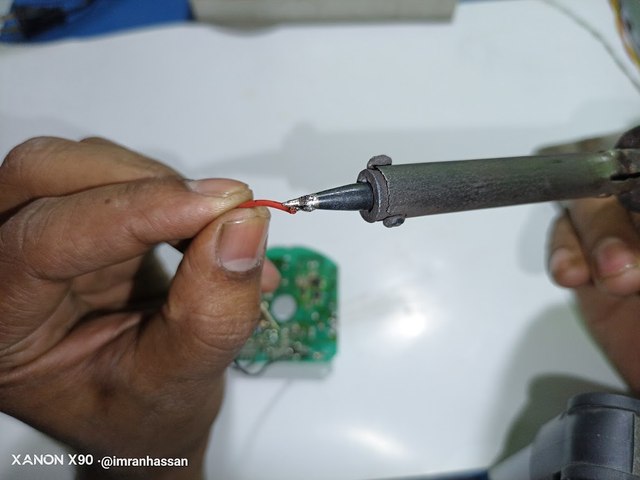
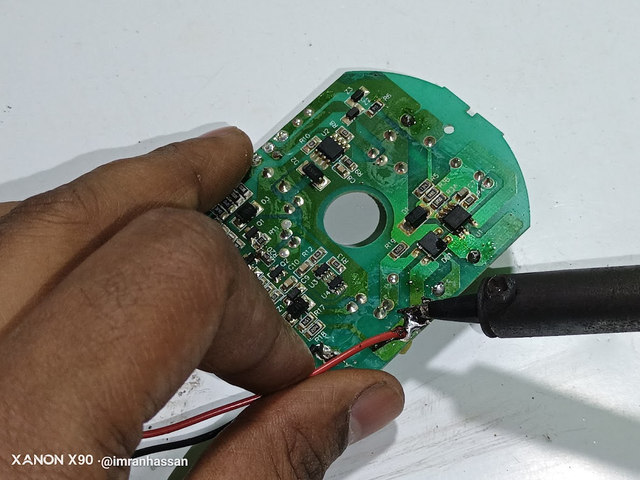
Then, after rubbing the inside of my soldering iron and putting the new ceramic bit in, you can see it looks great. Hopefully it will work great. I put the 220 volt input voltage back in and waited for the soldering iron to heat up. After my soldering iron heated up, I first put some solder wire in there and saw that it grabbed like a magnet and melted like water, which I was very happy to see. Then, as you can see, I easily soldered a red and a black wire into a circuit, and it soldered very easily.
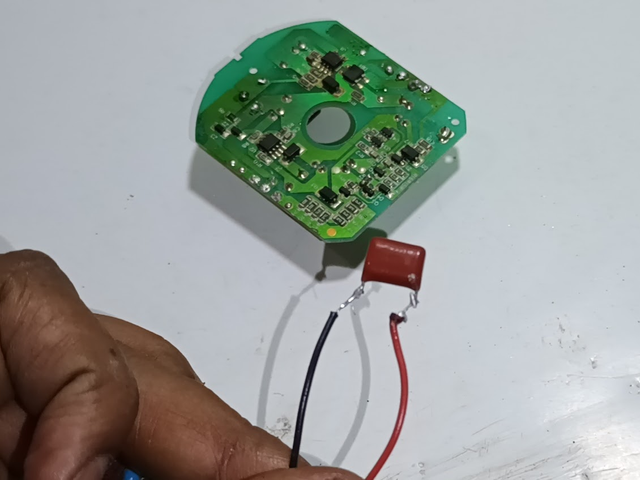
Step -07
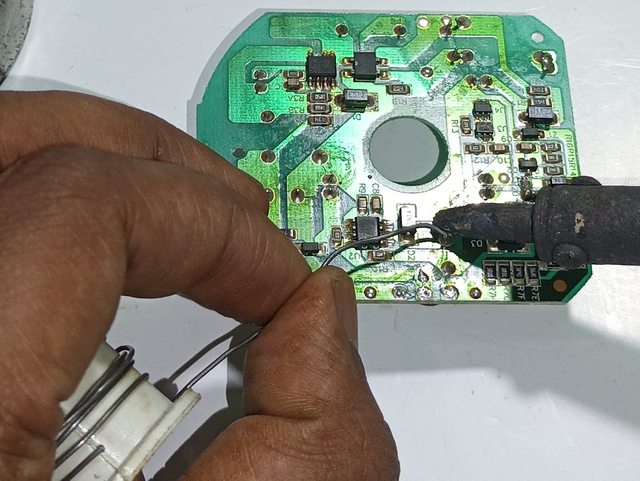
Now my soldering iron is working 100% so beautifully that when I go to solder somewhere on the circuit board, you can see that it melts like water and works. And I put some solder on the tip of the wire; it solders very nicely here. I have attached that wire to the circuit board to show you a closer look, and it sits very nicely. Then, to better explain the working of the soldering iron, I removed a capacitor from the circuit and showed you two of my wires connected to it.
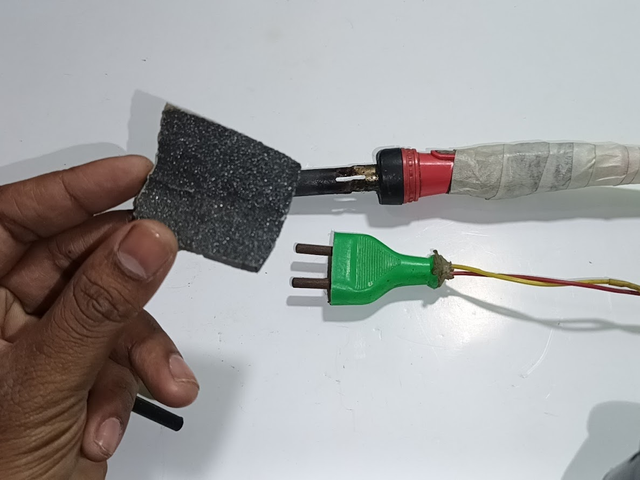
Step -08
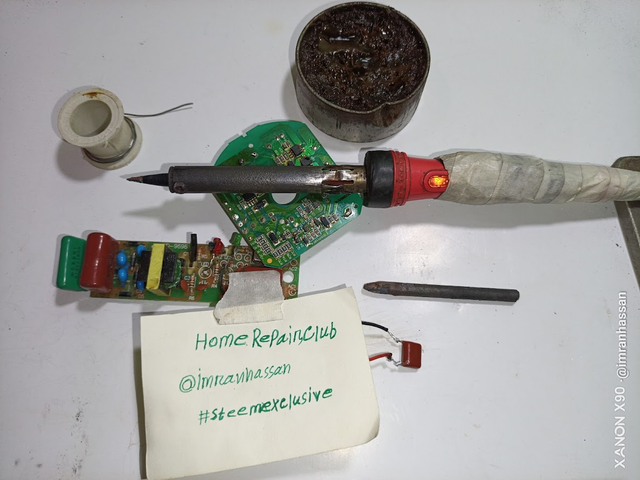
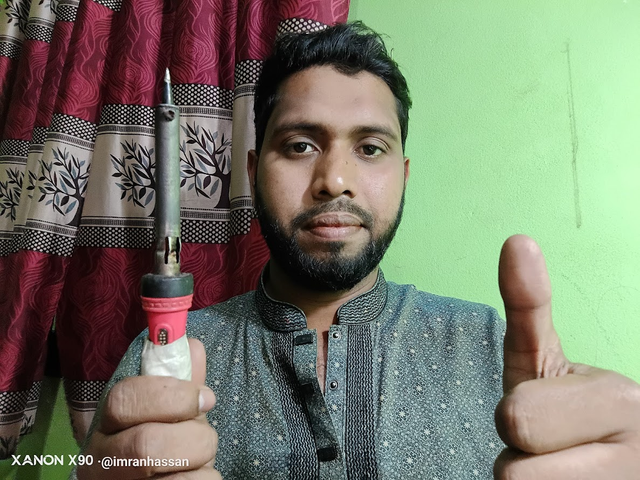
Now I want to tell you something here. First, I removed the old solder bit, and in the second step, the coil body of the soldering iron was burned. I cleaned it with a series of papers, which you can see in the picture. I have shared with you my experience of soldering iron problems and troubleshooting in this entire tutorial. And to verify the authenticity of my work, I have taken a picture with all the necessary materials and my username, my club name, and a selfie with me.
Soldering Iron Technical Specifications
Technical Specifications
Appliance
Soldering Iron
Brand
Dunia BD
Model
220V 60W
Voltage
220V
Power Consumption
60 Watts
Heating Element
Ceramic Core
Handle Material
Heat Resistant Plastic
Tip Material
Copper with Iron Plating
Indicator
LED Light
Cable Length
1.5 meters (Approx)
Failure
Soldering bit changed and ceramic bit installed
Video Tutorial: To better understand the practical part of this tutorial, you can watch the video below.
📢 Course and Challenge Deadline: These courses and challenges will start on February 3, 2025, and will run until Sunday, March 9, 2025, at 11:59 PM (UTC). So be sure to participate in time.
Thanks @shihabuddin48 brother, it's good to know that you learned about electronic devices by reading my post. Your comment is encouraging for me. I will try to share more useful tutorials in the future. Thanks for being there.
Mantener nuestro cautín en buen estado y reemplazar las puntas cuando ya están desgastadas nos facilita el trabajo al momento de realizar una soldadura.
Es muy malo trabajar cuando el estaño no se funde adecuadamente, haciendo que la soldadura tenga apariencia arenosa.
Al momento de soldar se debe contar con los requerimientos mínimos para obtener bueno resultados.
Lo primordial es la punta del cautín, lijarla ayuda mucho a que la punta distribuya de manera homogénea el calor.
La calidad del estaño también es importante, uno con aleación 60/40 es ideal, sin embargo a veces la calidad es mala y a pesar de que el empaque diga que es aleación 60/40, el estaño no se funde con rapidez.
El grosor del alambre de estaño también influye, más aún cuando sabemos que nuestro cautín es de baja potencia.
Nos muestras un resumen muy completo para tener en cuenta al momento de soldar con estaño.
Espero que puedas adquirir nuevas herramientas con las ganancias del Home Repair Club.
@rmm31 bro, thanks for your detailed explanation. Indeed, taking good care of the soldering iron is essential for proper soldering. Especially replacing and cleaning the tips helps in improving the quality of the work.
The information you mentioned regarding 60/40 alloy is also important because using low-quality tin makes the work quite difficult. Also, maintaining the right temperature and keeping the soldering iron tip well prepared play an important role.
It is good to hear that you are buying new equipment with the profits of the Home Repair Club 😃 Hopefully, I will be able to do better work with better equipment in the future. Thanks again for your valuable comments.
.png)


I learned about the names and uses of electronic devices through your post.And I saw your work skills.Thank you.
Thanks @shihabuddin48 brother, it's good to know that you learned about electronic devices by reading my post. Your comment is encouraging for me. I will try to share more useful tutorials in the future. Thanks for being there.
I promoted my post X here.
thank you so much for sharing a important post.
Thank you so much, @alomgir121 brother I'm glad you found the post important. Stay connected for more helpful tutorials. Your support means a lot.
Mantener nuestro cautín en buen estado y reemplazar las puntas cuando ya están desgastadas nos facilita el trabajo al momento de realizar una soldadura.
Es muy malo trabajar cuando el estaño no se funde adecuadamente, haciendo que la soldadura tenga apariencia arenosa.
Al momento de soldar se debe contar con los requerimientos mínimos para obtener bueno resultados.
Lo primordial es la punta del cautín, lijarla ayuda mucho a que la punta distribuya de manera homogénea el calor.
La calidad del estaño también es importante, uno con aleación 60/40 es ideal, sin embargo a veces la calidad es mala y a pesar de que el empaque diga que es aleación 60/40, el estaño no se funde con rapidez.
El grosor del alambre de estaño también influye, más aún cuando sabemos que nuestro cautín es de baja potencia.
Nos muestras un resumen muy completo para tener en cuenta al momento de soldar con estaño.
Espero que puedas adquirir nuevas herramientas con las ganancias del Home Repair Club.
@rmm31 bro, thanks for your detailed explanation. Indeed, taking good care of the soldering iron is essential for proper soldering. Especially replacing and cleaning the tips helps in improving the quality of the work.
The information you mentioned regarding 60/40 alloy is also important because using low-quality tin makes the work quite difficult. Also, maintaining the right temperature and keeping the soldering iron tip well prepared play an important role.
It is good to hear that you are buying new equipment with the profits of the Home Repair Club 😃 Hopefully, I will be able to do better work with better equipment in the future. Thanks again for your valuable comments.