How are you all? I hope you are well. By the grace of God, I am also well. Welcome to my second repair tutorial of Home Repair Club. The 23rd season of Steemians Learning Club has started with new hopes and positive expectations. Although we know that a new season means new challenges. However, our goal is to make the learning process easy and fruitful for everyone. Therefore, this tutorial has been arranged in such a way that those interested in learning about home repair can easily follow and apply it in practice.
Today I repaired an AC DC LED light. The circuit of this light, the LED chip, or some part of the bulb was damaged. So it was possible to repair it by changing the LED driver circuit and the LED chip. If your AC/DC LED light is not working and the circuit or light is damaged, then this tutorial will help you.
Now I am going to start my tutorial post.
We use 220-volt AC/DC LED white lights in our homes every day, which light up even when there is current and turn on when the current goes out, and we throw these lights away when they break. Through today's tutorial post, I will show you how to fix an AC DC LED light by spending very little money and modifying it to make it last longer.
The light that I repaired today was very dim and did not work when the current went out. And the battery and body of this light were good, and I had to throw away the circuit and LED chip and modify it and connect it again. So let's see step by step how I made it work.
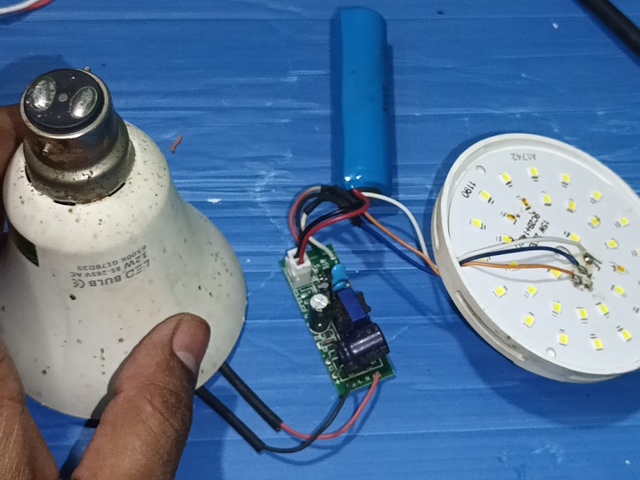
Step -01
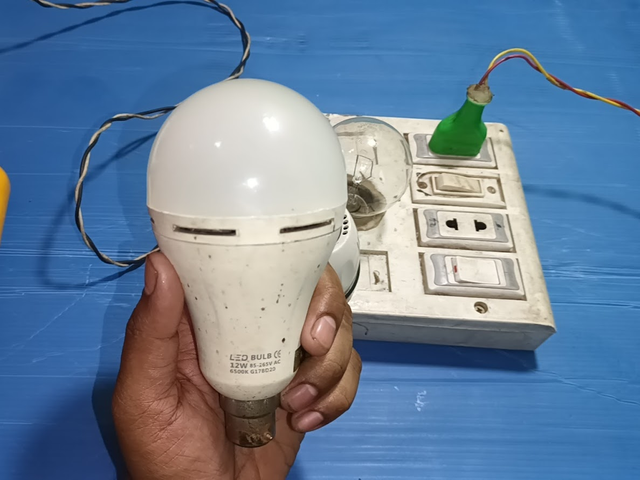
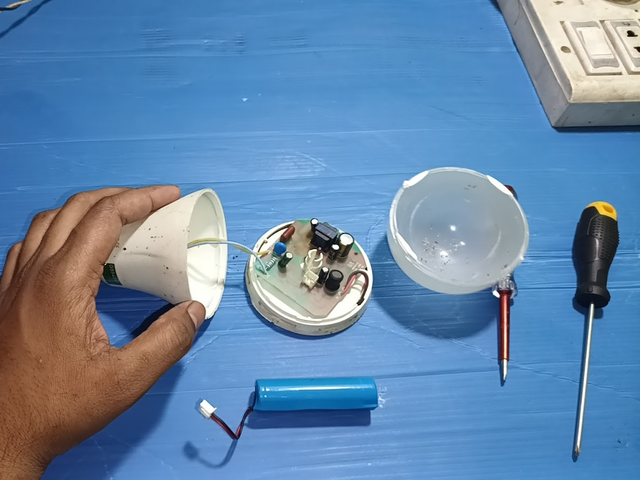
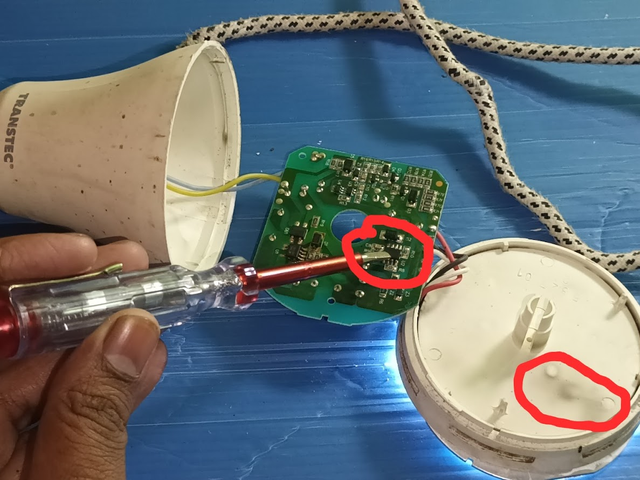
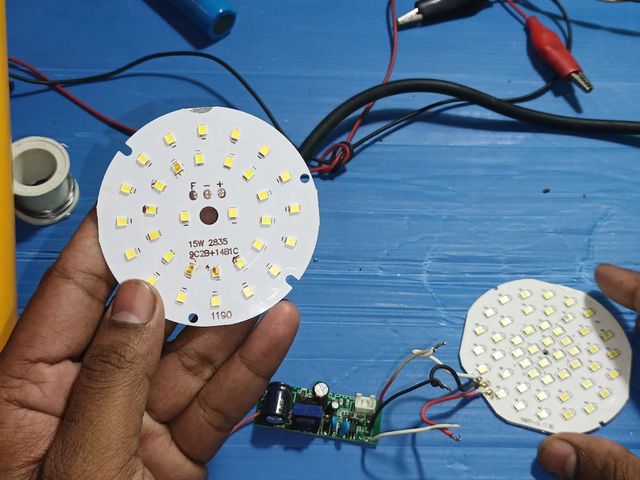
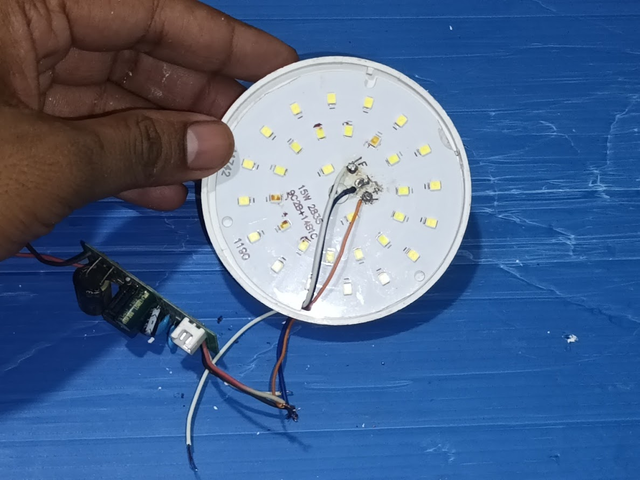
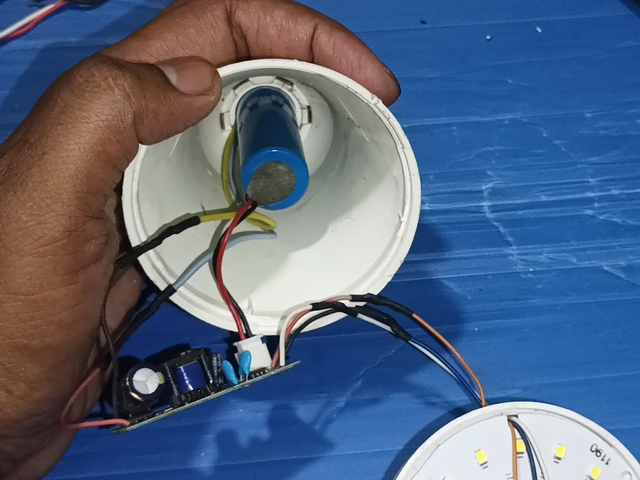
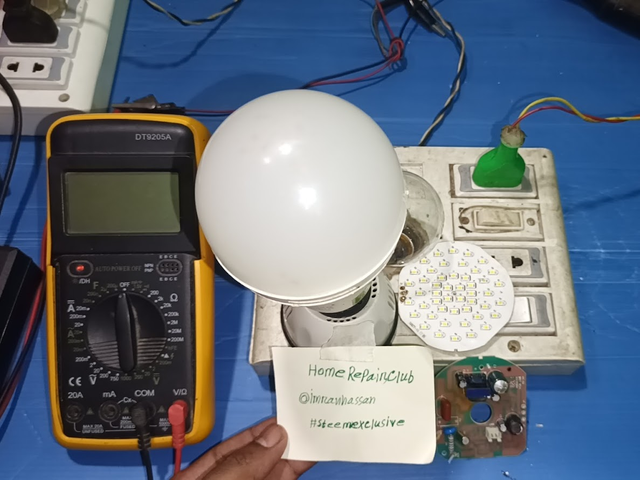
First, for the convenience of work, I put my series line board in front and took the broken LED light in my hand. Then, I opened the white cover on the top of the LED light and tried to find the cause of the problem. I saw that the LED chips were fine. Next, I tested the DC output with a digital multimeter and found that it was not giving the correct output. So, using a screwdriver, I started opening the LED light.
Step -02
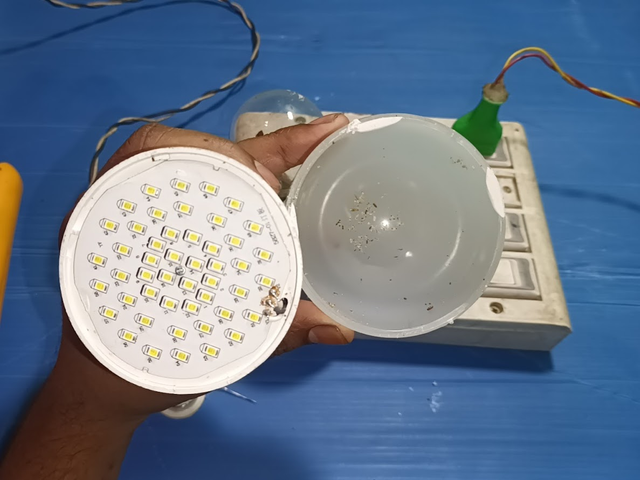
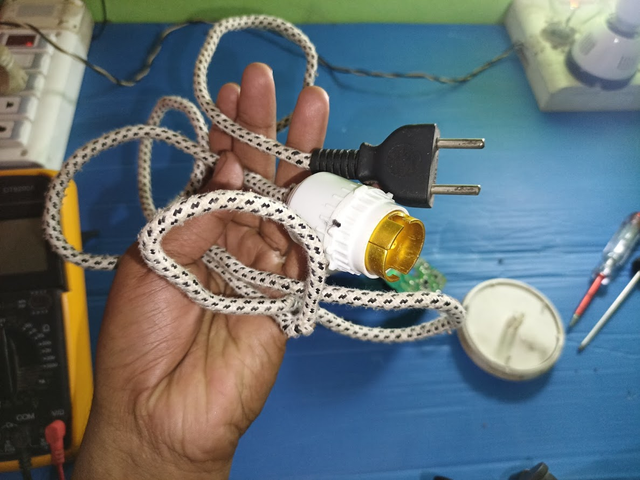
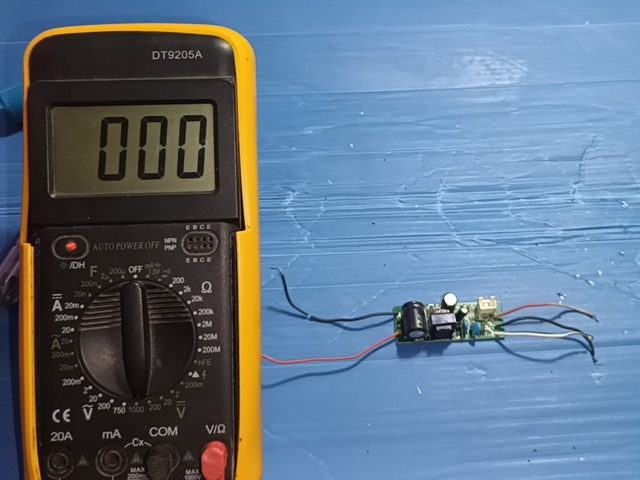
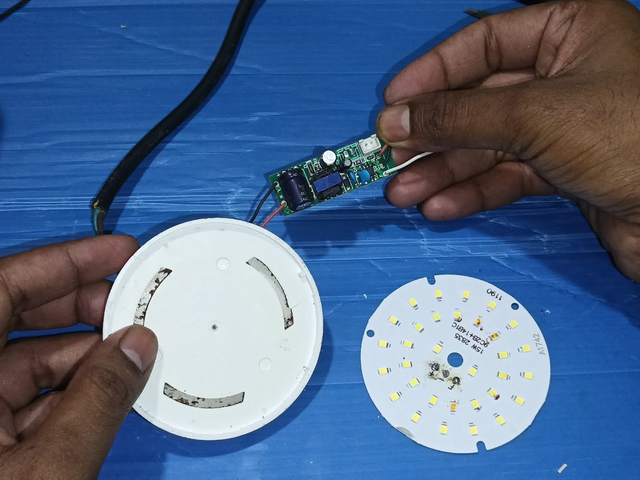
Then I completely opened the light and took out the circuit from inside. I separated the 3.7-volt battery that was in the AC-DC line of the circuit and kept it aside. Next, I tested the DC output with a digital multimeter and found that the battery was fine, as it was showing 3.40 volt DC output. Next, I used a separate wire to test the circuit with a 220-volt AC input voltage, to which the light holder and two-pin plug were connected.
Step -03
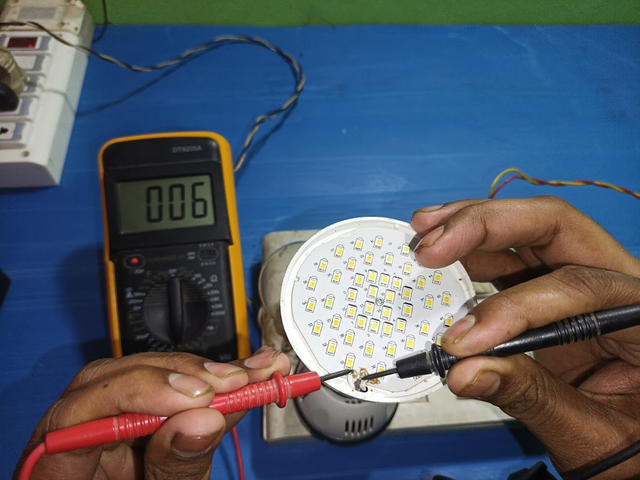
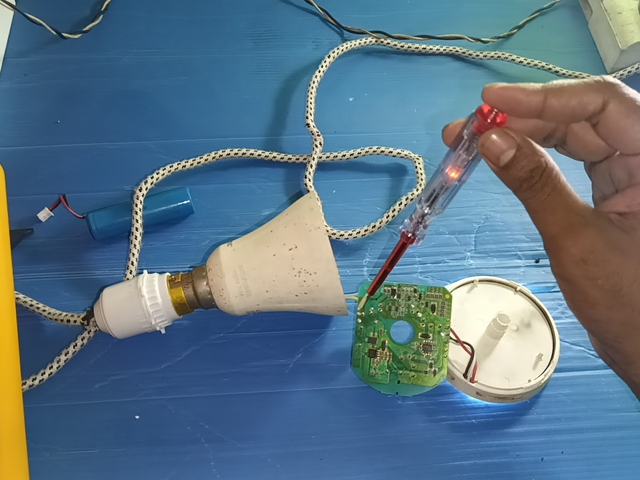
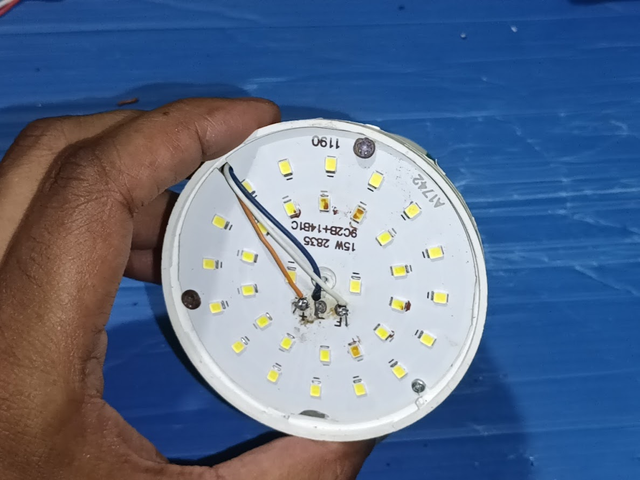
Then I connected the LED light to a separate holder so that I could easily test it. Next, I tested the 220-volt AC current with a tester and confirmed that it was fine. However, while applying power, I noticed that not all the LEDs were lighting up properly; some LEDs were off. Some parts of the circuit body were blackened, and an IC was burnt, due to which the circuit was not working properly. Then, I decided to change the circuit and procured an AC-DC LED light circuit from a Chinese company. The market price of the circuit is around 70 taka in Bangladeshi taka.
Step -04
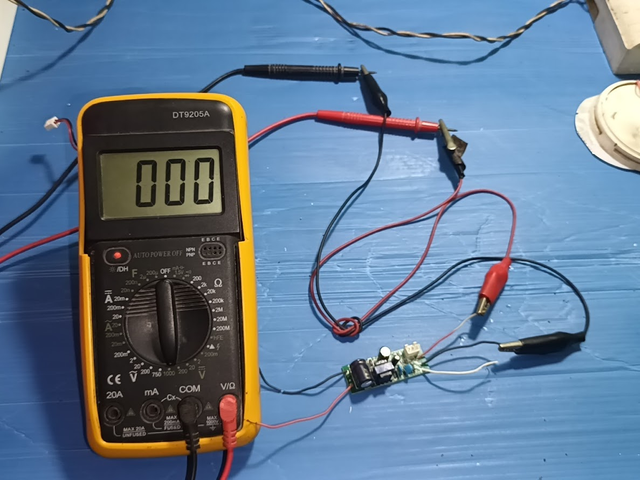
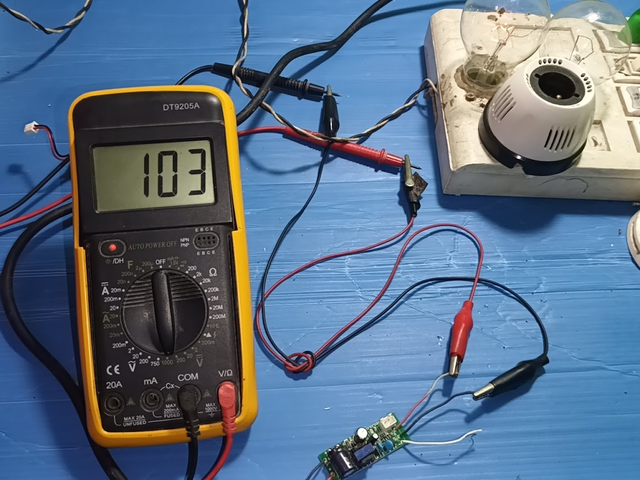
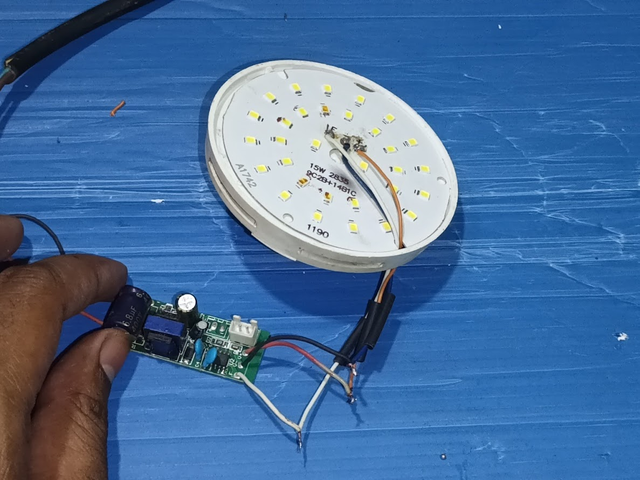
Then I connected the multimeter with the connector wire to measure the DC output voltage of the circuit. Then I measured the output voltage by connecting the input voltage of the LED circuit to 220 volts. The multimeter showed DC 103 volts, which is suitable for a 15-watt light.
Then I connected the new circuit with the old LED chip, but it was not working. In accordance with the circuit, I procured a new LED chip, which you can see on your screen. Then I decided to connect the new circuit with the new LED chip. And the Bangladeshi market price of this LED chip is 25 taka.
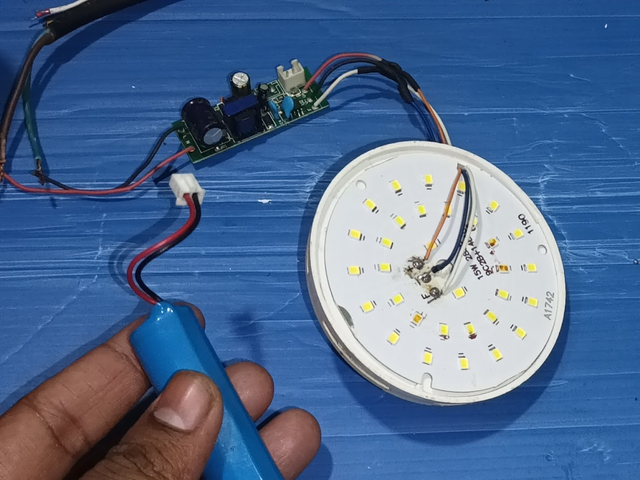
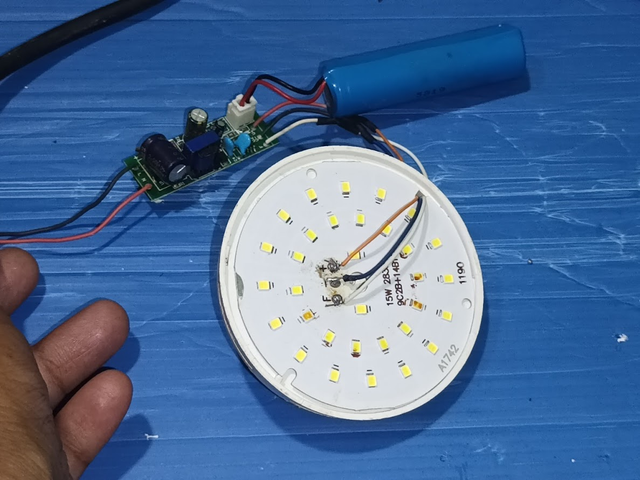
Step -05
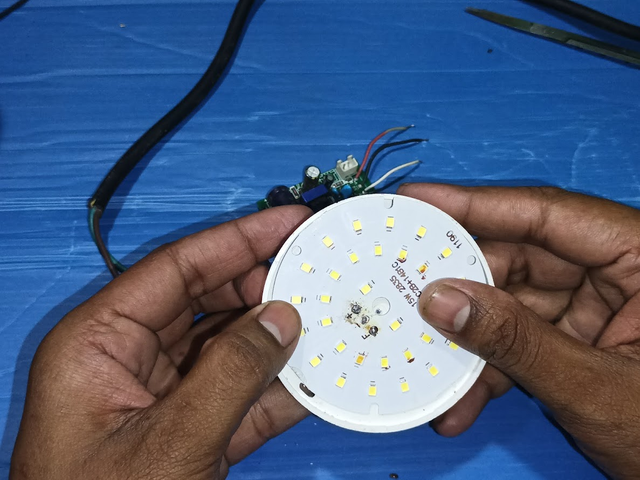
Then I placed the LED chip neatly in the body of the light. Then I soldered three different coloured wires properly to connect it to the circuit. I connected the plus, minus, and battery lines correctly and connected them to the circuit.
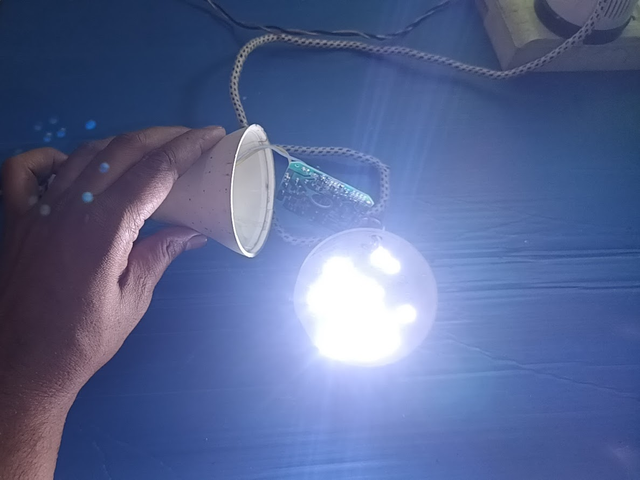
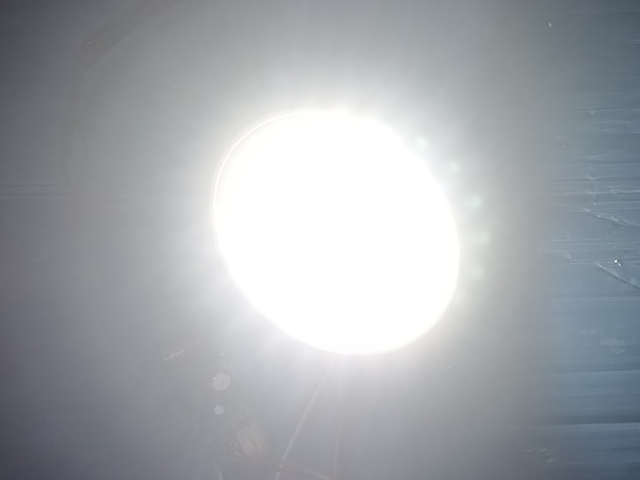
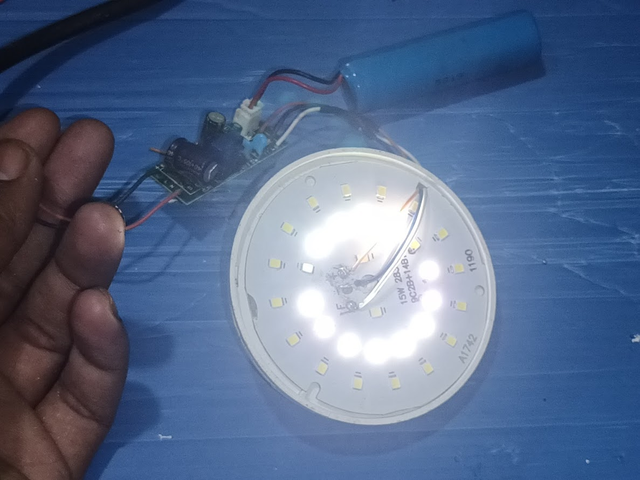
After completing the connection, I checked before insulation to see if the light was working properly. Then I connected it to the series board and retested it and found that the light was glowing nicely.
Step -06
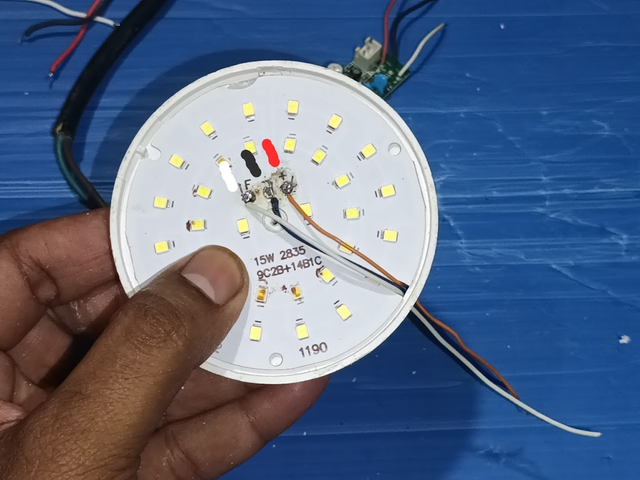
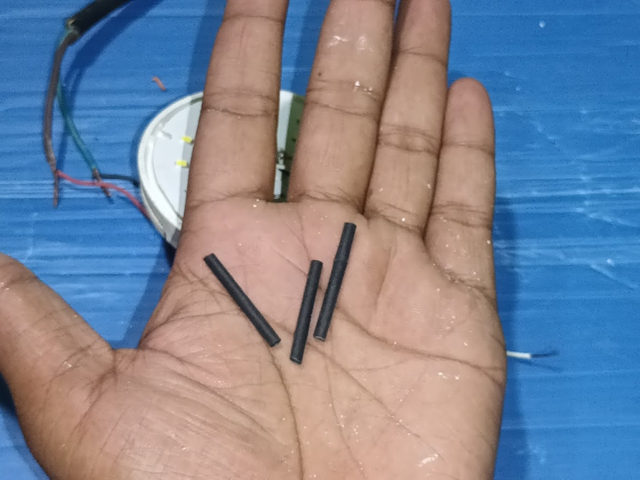
Then I took a 2 mm insulation rubber tube and inserted the insulation rubbers on the three wires of the LED chip. Then I connected it to the circuit and soldered it properly. Then I checked the battery again to make sure that it was working properly. If everything was fine, I connected the battery to the circuit.
Step -07
Then I checked the DC battery line to ensure the battery connection. No additional voltage should be applied while checking this. If the two wires where the 220-volt AC input voltage enters the circuit are held together, the 3.7-volt battery will activate and start giving 5-watt light.
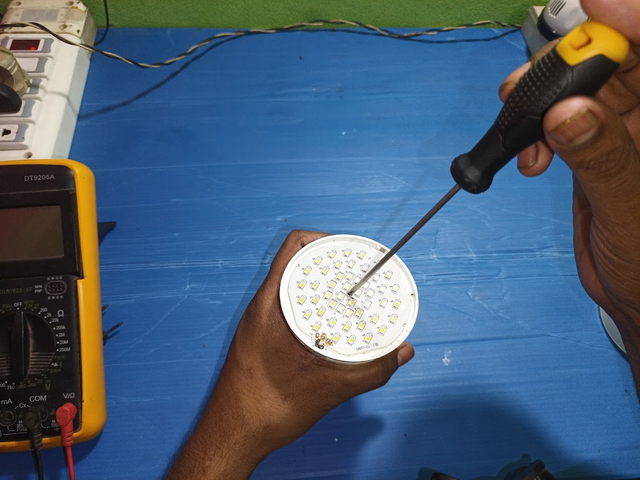
If everything is fine, I soldered and insulated the AC 220-volt input voltage of the circuit to the light holder before fully fitting the battery, circuit, and light. Then I fitted the battery circuit and LED chip neatly inside the light and screwed the LED chip securely in place.
Step -08
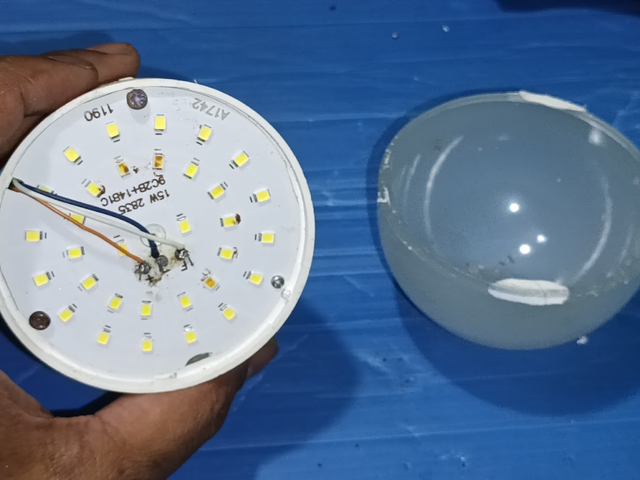
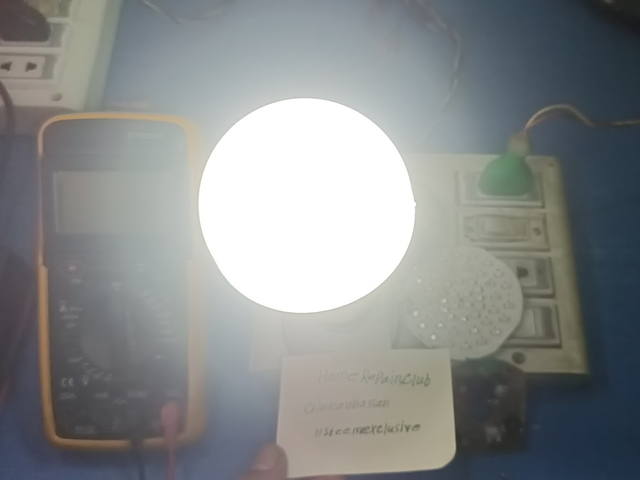
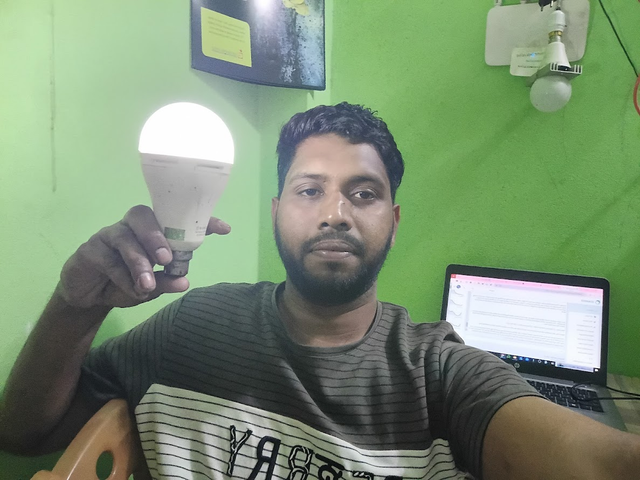
Finally, I fitted the white cover neatly over the LED light. After reconnecting and fitting the entire light, I ran it for a long time and made sure that it was working properly. Finally, I placed the repaired light on my series board and took a picture of it next to the previously damaged circuit and LED chip with the club name and my username to prove my work.
Technical Specifications
Appliance
AC DC LED Bulb
Brand
TRANSTEC
Model
G17BD20
Voltage
85-265 V AC
Resistance
15 Watts
Failure
* LED lights with burnt IC and no light.*
Our repair tutorial series will provide step-by-step instructions, following which you will be able to easily solve various problems. This tutorial will be published within a certain time, so if you want to participate, then complete your work within the specified time. And for your convenience, here is a video as per the tutorial in this post.
Start date: 17 February 2025 End date: 23 February 2025, 11:59 PM (UTC)
Hopefully, this initiative will be helpful to you and provide you with an opportunity to learn something new.
The tutorials for the first week of your Home Repair Club will be tracked using a specific tag, #slc-clubrepairs23w1. You can publish it on your blog or favourite community if you want. Also, encourage your friends to join this learning club so that they can gain skills in repairing. I hope this tutorial will be helpful to you. If you have any questions or feedback, please let me know in the comments. I will answer you with interest.
Thank you very much, @alomgir121 I am glad you liked the article. Your support is very valuable. Stay tuned for more helpful tutorials.
The Steemit team has launched Home Repair Club in Learning Challenge Session 23. (home repair items): mobile charger, power bank, USB cable & adapter, electric fan (ceiling/table fan), light (LED bulb, tube light), electric switch & multiplug, emergency light & torch, trimmer & shaving machine, hair dryer, electric kettle, rice cooker, blender & juicer. And you can share new projects.
I am @imranhassan and @rmm31 as mentors in this challenge, so I invite you to join us. I hope you will join our club and participate in the challenge.
Brother, your second repair tutorial on Home Repair Club was quite informative and helpful. The explanation and detailed description of each step of AC DC LED light repair is really admirable.
Best wishes for the new season and hope your initiative will be helpful to many. Those who are interested in knowing about home repairs can learn a lot from your tutorial. This tutorial of yours will serve as a useful guide for many and help them repair LED lights.
Hope your initiative will be successful and will provide an opportunity to learn something new. Best wishes to you and may your efforts be successful.
Thank you very much, @mueeinislam I am truly grateful for your kind words and support. My goal is to make home repair tutorials as easy and informative as possible so that anyone can learn and apply the knowledge. I am glad that you found the AC DC LED Light Repair Tutorial helpful.
Your enthusiasm inspires me to create more valuable content for the community. Stay tuned for more tutorials, and feel free to share your feedback or any repair topics you would like to see next. Best of luck to you too.
The Steemit team has launched Home Repair Club in Learning Challenge Session 23. (home repair items): mobile charger, power bank, USB cable & adapter, electric fan (ceiling/table fan), light (LED bulb, tube light), electric switch & multiplug, emergency light & torch, trimmer & shaving machine, hair dryer, electric kettle, rice cooker, blender & juicer. And you can share new projects.
I am @imranhassan and @rmm31 as mentors in this challenge, so I invite you to join us. I hope you will join our club and participate in the challenge.
Saludos Mentor @imranhasan. Nos has compartido una forma bastante sencilla de cómo recuperar una bombilla led del tipo recargable utilizando partes de otra. A este tipo de artefactos que sirven como piezas de reemplazo suelo llamarlos donantes.
Nos explicas paso a paso como se pueden reciclar las piezas para armar una nueva. Afortunadamente la batería estaba en buen estado y pudo servir para el nuevo bombillo.
Ahora, mi ojo detector de fallas ha visto un capacitor inflado en el circuito de la placa inicial, no será este el causante de la deficiencia en el suministro adecuado de energía para recargar la batería?
En tu tiempo libre te invito a revisar ese capacitor, reemplazarlo y probar la salida de voltaje que alimenta la batería.
Thanks for your observation, @rmm31 Sir, I actually changed the previous circuit completely and used a new circuit. So I didn't have a chance to test by changing the capacitor. But your analysis is absolutely reasonable, sometimes when the capacitor swells, it can cause battery charging problems. If I encounter such a problem in the future, I will definitely keep this in mind. Thanks for your valuable advice.
.png)


I promoted my post X here.
thank you so much sir, for sharing a nice article.
Thank you very much, @alomgir121 I am glad you liked the article. Your support is very valuable. Stay tuned for more helpful tutorials.
The Steemit team has launched Home Repair Club in Learning Challenge Session 23. (home repair items): mobile charger, power bank, USB cable & adapter, electric fan (ceiling/table fan), light (LED bulb, tube light), electric switch & multiplug, emergency light & torch, trimmer & shaving machine, hair dryer, electric kettle, rice cooker, blender & juicer. And you can share new projects.
I am @imranhassan and @rmm31 as mentors in this challenge, so I invite you to join us. I hope you will join our club and participate in the challenge.
👉 For details: Steemit Learning Clubs Season 23 | Home Repair Club Introduction and Welcome
Brother, your second repair tutorial on Home Repair Club was quite informative and helpful. The explanation and detailed description of each step of AC DC LED light repair is really admirable.
Best wishes for the new season and hope your initiative will be helpful to many. Those who are interested in knowing about home repairs can learn a lot from your tutorial. This tutorial of yours will serve as a useful guide for many and help them repair LED lights.
Thank you very much, @mueeinislam I am truly grateful for your kind words and support. My goal is to make home repair tutorials as easy and informative as possible so that anyone can learn and apply the knowledge. I am glad that you found the AC DC LED Light Repair Tutorial helpful.
Your enthusiasm inspires me to create more valuable content for the community. Stay tuned for more tutorials, and feel free to share your feedback or any repair topics you would like to see next. Best of luck to you too.
The Steemit team has launched Home Repair Club in Learning Challenge Session 23. (home repair items): mobile charger, power bank, USB cable & adapter, electric fan (ceiling/table fan), light (LED bulb, tube light), electric switch & multiplug, emergency light & torch, trimmer & shaving machine, hair dryer, electric kettle, rice cooker, blender & juicer. And you can share new projects.
I am @imranhassan and @rmm31 as mentors in this challenge, so I invite you to join us. I hope you will join our club and participate in the challenge.
For details: Steemit Learning Clubs Season 23 | Home Repair Club Introduction and Welcome
Saludos Mentor @imranhasan. Nos has compartido una forma bastante sencilla de cómo recuperar una bombilla led del tipo recargable utilizando partes de otra. A este tipo de artefactos que sirven como piezas de reemplazo suelo llamarlos donantes.
Nos explicas paso a paso como se pueden reciclar las piezas para armar una nueva. Afortunadamente la batería estaba en buen estado y pudo servir para el nuevo bombillo.
Ahora, mi ojo detector de fallas ha visto un capacitor inflado en el circuito de la placa inicial, no será este el causante de la deficiencia en el suministro adecuado de energía para recargar la batería?
En tu tiempo libre te invito a revisar ese capacitor, reemplazarlo y probar la salida de voltaje que alimenta la batería.
Thanks for your observation, @rmm31 Sir, I actually changed the previous circuit completely and used a new circuit. So I didn't have a chance to test by changing the capacitor. But your analysis is absolutely reasonable, sometimes when the capacitor swells, it can cause battery charging problems. If I encounter such a problem in the future, I will definitely keep this in mind. Thanks for your valuable advice.