How to Draw Hands Like a Pro Without the Struggle (Promise, Bes!)
Hey there, beshies! 🌸 Okay, let's talk about something that almost every artist has had a meltdown over at some point: drawing hands. Like, ugh, why are they so complicated? They’re just fingers and a palm, right? But then you try to sketch them, and it’s like your paper rejects your idea of anatomy. Don’t worry, though! I’ve got the tea on how to slay those hand sketches without breaking a sweat.
So, I stumbled upon this super helpful YouTube vid (shoutout to Mark, the coolest art teacher ever 👏), and let me tell you, it was a game-changer. He broke it down so even if you're an “art baby” (LOL, relatable), you can totally nail it. Here’s the lowdown for my fellow artistas who just want to draw hands that don’t look like mutated claws.
Step 1: Start Simple, Like Super Simple
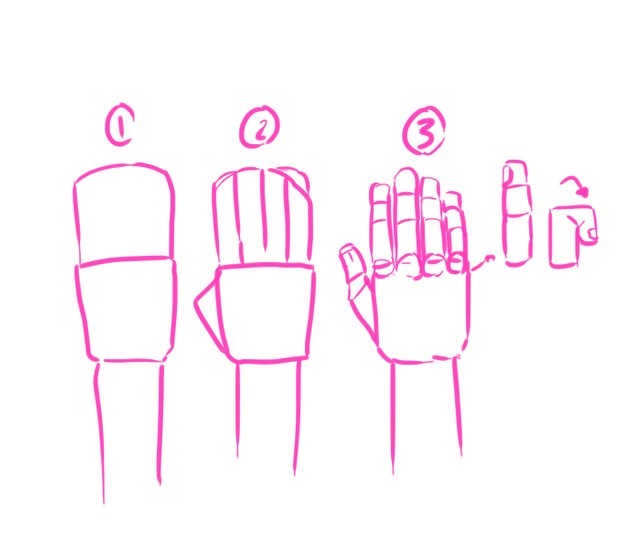
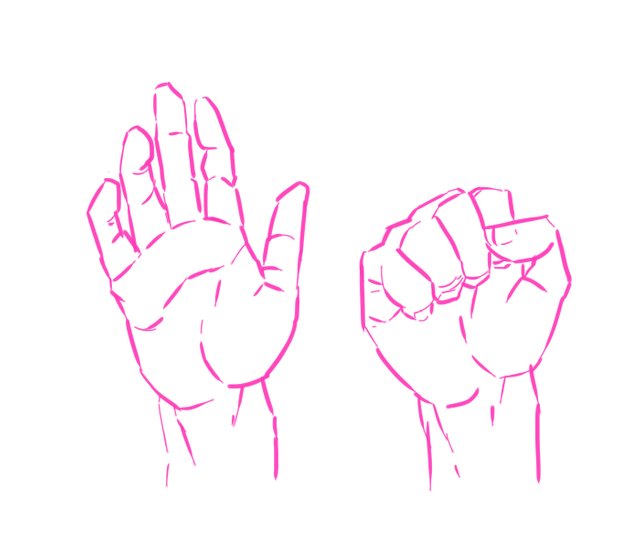
First up, we’re not going full Leonardo da Vinci here, sis. We’re starting with simple, cartoony hands. Mark says the trick is to focus on basic poses like the top view of a hand, the palm, and even a fist. Trust me, you don’t need to overthink it. Just draw a square for the palm, add some rounded edges, and then plop in the fingers and thumb. Don’t forget to curve the top of the palm for that extra realism. Pro tip: Make the fingers narrower at the tips. Instant glow-up!
Step 2: Bent Fingers and Fists Made Easy
Okay, so what if your hand needs to look like it’s doing something cool, like making a fist or pointing at your bestie’s messy art table? Mark’s hack: Think of fingers as little cylinders. Start with the knuckle (a tiny sphere), then divide the finger into sections. When you bend them, they form a cute little “Y” crease in the middle. Oh, and for fists, just focus on the intermediate parts of the fingers. Add a hint of nails, and boom—your hand looks snatched.
Step 3: Level Up with Realistic Hands
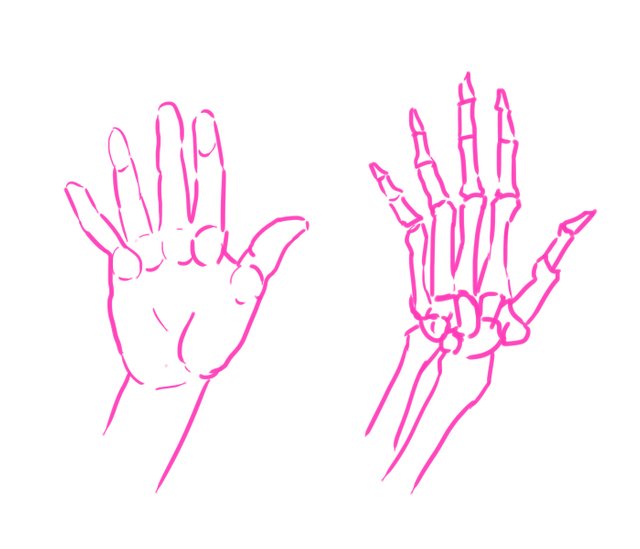
When you're ready to go legit, it’s time to think 3D. Realistic hands need volume, so imagine the palm as a rounded brick. Fingers? Cylinders. Thumb? Another rounded bit. This part is a little trickier, but if you keep practicing, it’s like unlocking the next level of your art game. Mark even suggests using photo references or (brace yourselves) your own hand! Mind-blowing, right?
Bonus Tips & Tricks
💕 Foreshortening is scary, but don’t be shy! Use those cylinder shapes to guide your proportions.
💕 Start with simple poses. Like, save the dramatic hand-on-the-forehead poses for when you’re feeling extra confident.
💕 Practice makes progress! Don’t stress if your first hands look like they belong to an alien. Improvement is the real flex.
And there you have it! Drawing hands doesn’t have to be a nightmare, bestie. With these tips, you’ll be sketching hands like a tita-approved pro in no time. Oh, and Mark mentioned that he’s giving away his main brush pack for free in the video description (yes, FREE, girl). So, go grab it and start practicing!
Let me know in the comments if this helped you or if you’ve got other drawing struggles—maybe we’ll tackle noses next? 😘 Happy sketching, babes! 💕
Thank you for sharing this tutorial with us! Am sure this will be very useful to the ladies…..
Vote @pennsif.witness for growth across the Steemit platform through robust communication at all levels and targeted high yield developments with the resources available. Vote here