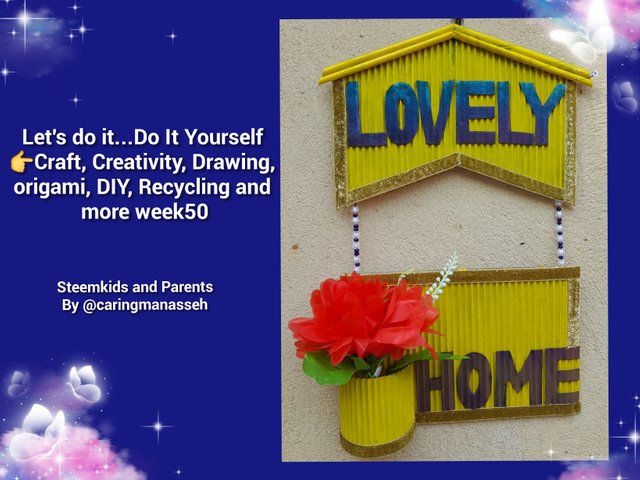
Let's do it...Do It Yourself👉Craft, Creativity, Drawing, origami, DIY, Recycling and more week50
Materials For Construction
- Waste carton
- Acrylic colour
- Brush
- Adhesive
- Evostik gum
- Bias material
- Ruler
- Pencil
- Leather material
- Flower
- Old newspaper

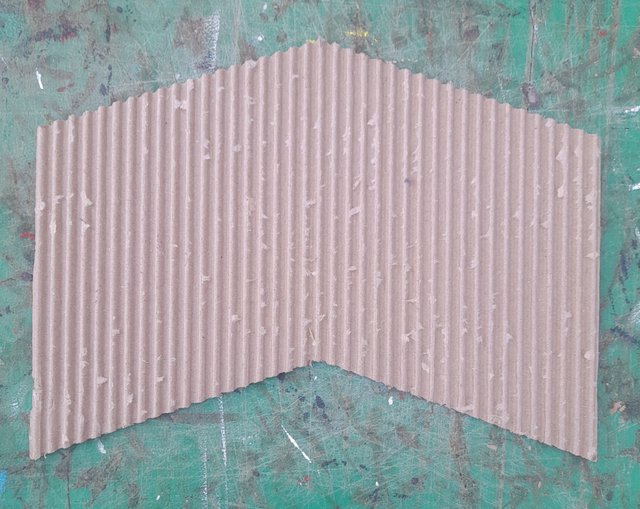
Step 1
I cut a waste carton measuring 11.5 meters by 8.5 meters. I marked the centre of the carton and reshaped it. After the reshaping, I peel one side of the carton.
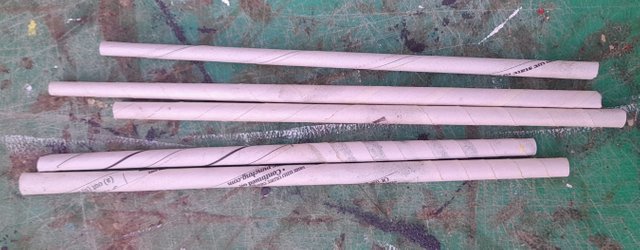
Step 2
I used an old newspaper at this step by rolling it with a stick and evostik gum to form the shape below.
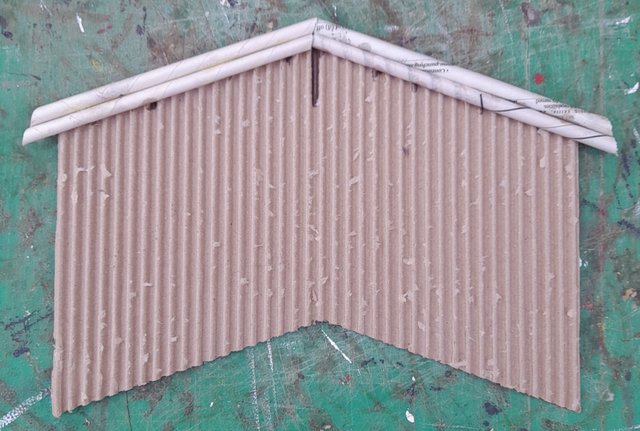
Step 3
I gummed the rolled newspaper of step two above on the shape formed in step one using Evostik gum.
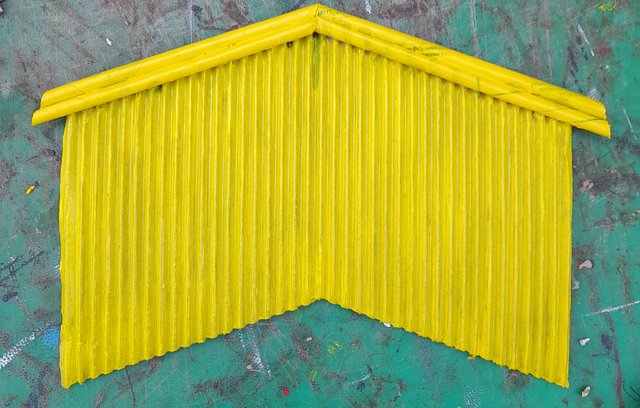
Step 4
I coloured the work in step three with a yellow acrylic colour.
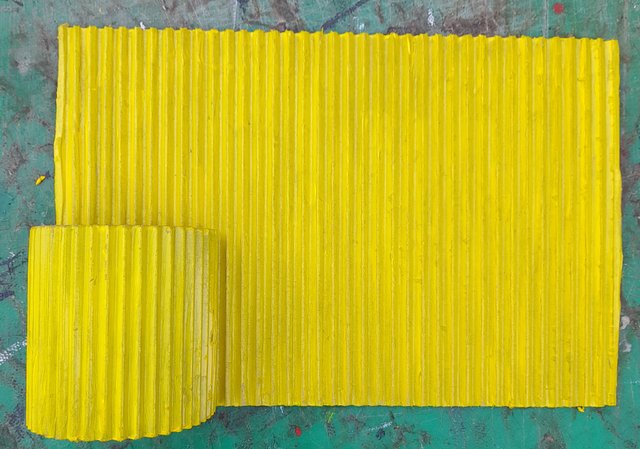
Step 5
I cut another waste carton measuring 11.5 meters by 8.5 meters. I peeled one side of the carton and on it, I formed a small flower vase with a carton measuring 17cm by 8cm. After the construction, I coloured it with yellow acrylic colour.
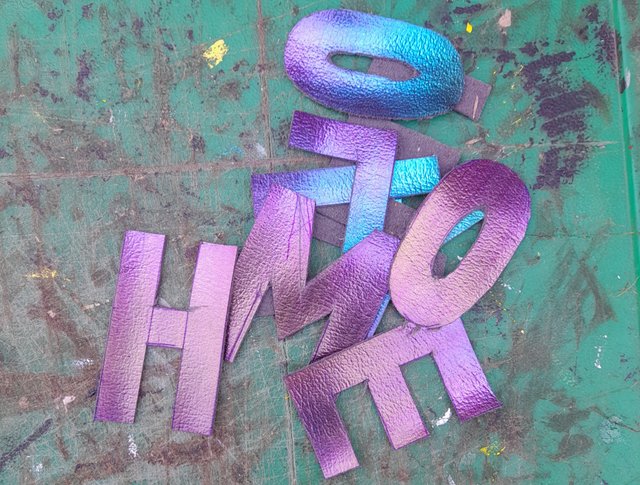
Step 6
I wrote "LOVELY HOME" on a spoiled leather material and used my cutter to cut out the letters one after another
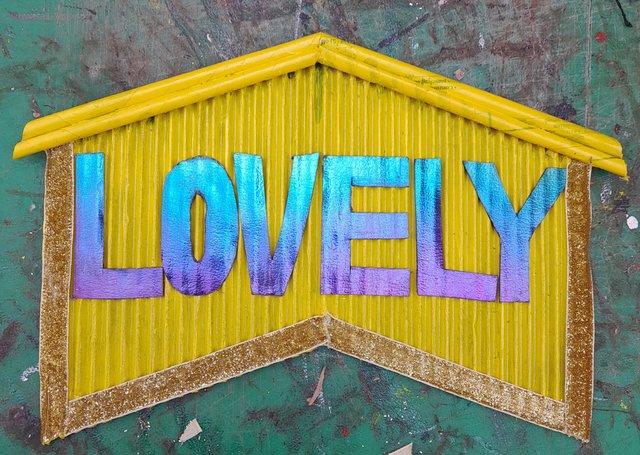
Step 7
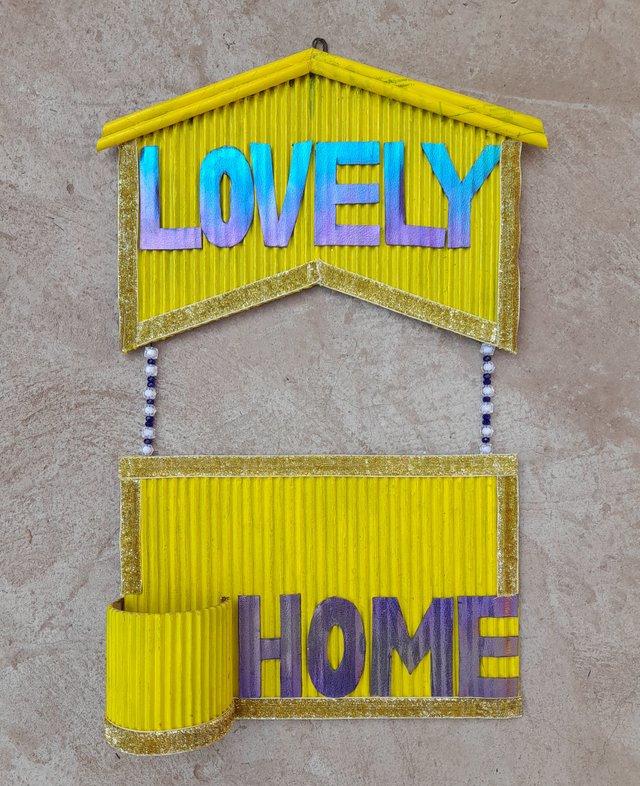
I gummed the word "LOVELY" on the coloured carton in step 3 using Evostik gum. The letters were gumned one after the other because they were cut separately. Finally, I gummed a yellow shining bias material around the construction.
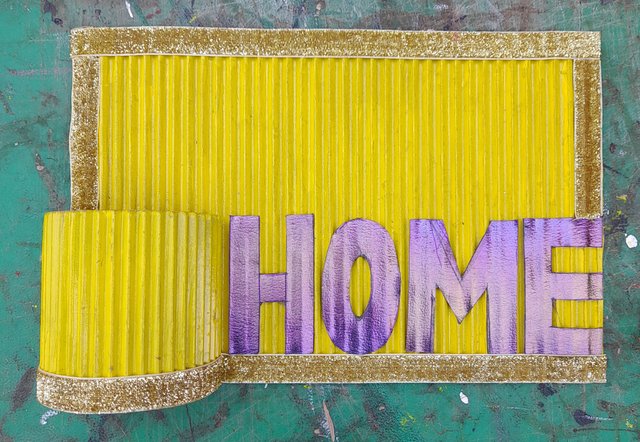
Step 8
I gummed the word "HOME" on the second carton that has a flower vase. I also gummed a shining yellow bias material around the carton to make it beautiful. I used evostik gum to glue both the letters and the bias.
Step 9
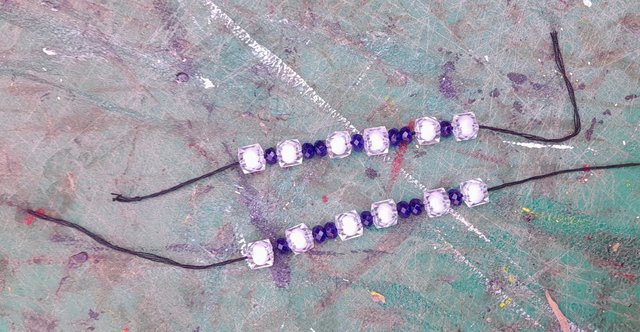
I beautifully arranged white and purple beads to serve as a connection between the two constructed works. Here, I double a sowing thread into four, and with the help of a sowing needle, I arranged the beads in this order ( one white, one purple, one white and two purple).
Step 10
I used the arranged bead in step 8 above to connect the two constructed works using adhesive and masking tape. I first applied adhesive to the thread holding the beads and the constructed craft at both ends and waited for a few seconds. Later on, I sealed it with masking tape.
Step 11
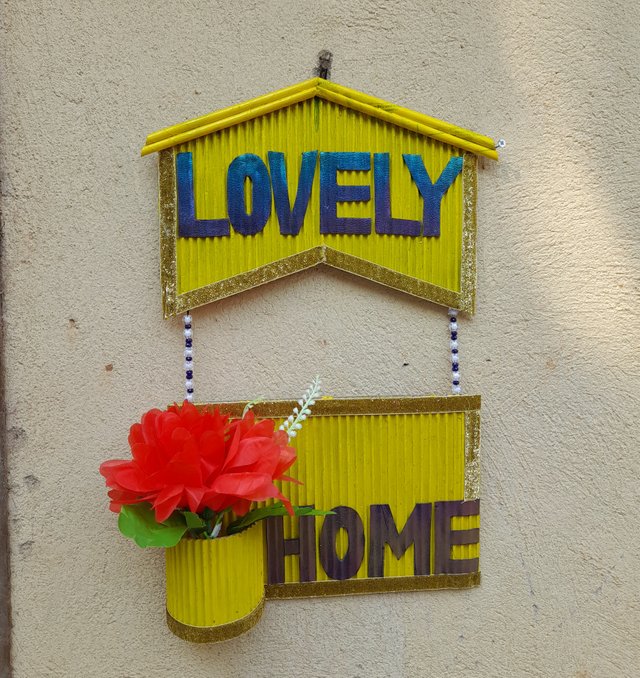
I dropped a flower into the small flower vase of the craft to show how beautiful the finished work was.
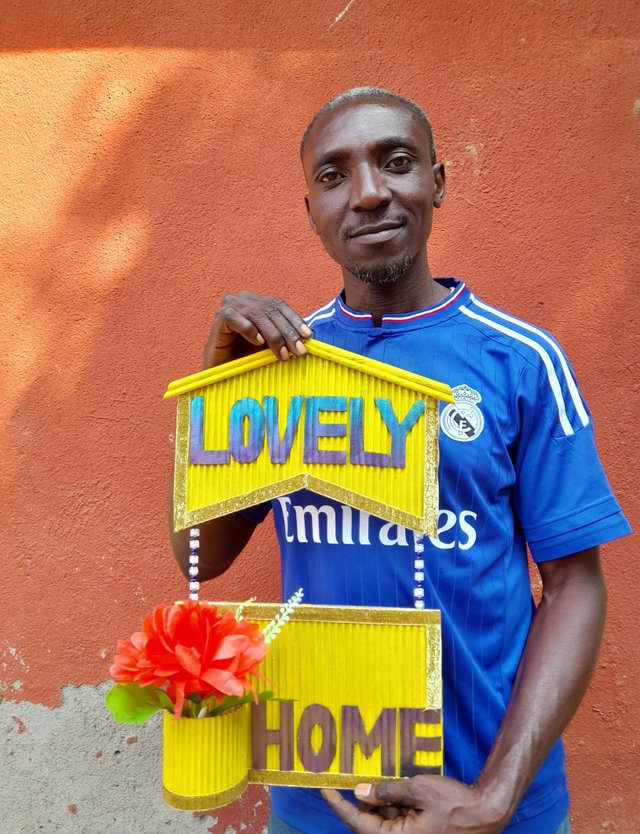
My Selfie
Conclusion
This is my craft for this week's contest. I hope you will find it interesting. I,, therefore invite @zisha-hafiz, @shawlin, @dequeen and @composart to also participate.
Cc
@mesola
@ngoenyi
@steemkidss
10% beneficiary support to @steemkidss
X share (Twitter) Link
https://x.com/Manasseh3600/status/1887420007778328787?t=SbaCXjMMN8U4DZFh8adn9w&s=19
Thank you
Thank you for publishing an article in the Steem Kids & Parent community today. We have assessed your entry and we present the result of our assessment below.
MODs Comment/Recommendation:
Makes a whole lot of sense seeing this exclusive craft. Weldone. Looking forward to seeing more of your works. I really Appreciate.
Remember to always share your post on Twitter. This POST LINK is a guide to that effect.
Such a beautiful decoration, it truly brings out the beauty of home. Well done and great job 👍.