How To Make a Wire Wrapped Ring
In this photo tutorial I will share my technique on how to to wire wrap a flat bead and make it into a beautiful ring.
I am using a flat tiger eye bead, 16mm, and artistic wire, silver plated copper, 20 gauge square, 22 gauge half round and 28 gauge round.
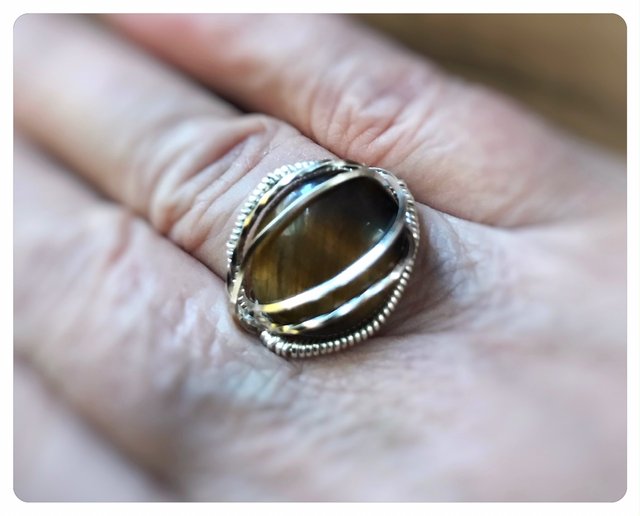
My ring size is 7. This is how my tiger eye ring looks like.

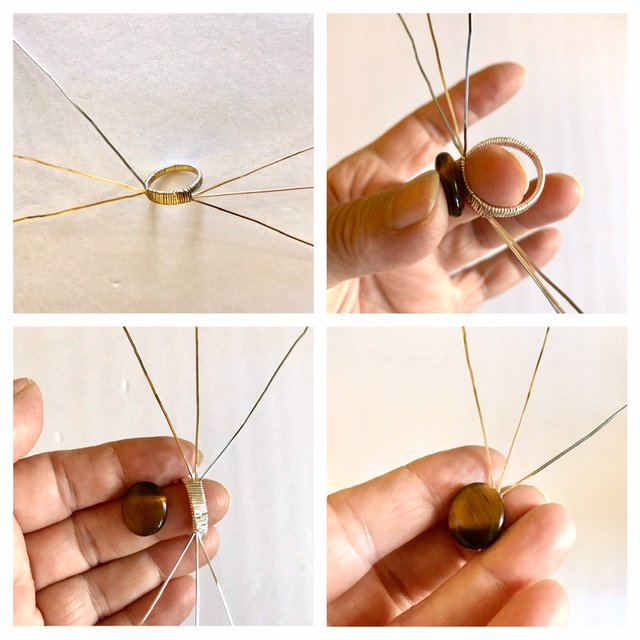
I need 3 pieces of square wire, 9 inches long each. For wrapping the shank, I need about 20 inches of half round wire. For decorating, I need another 20 inches thin wire.
Wrap the 3 square wires neatly and check the size on the ring mandrel. When it reaches the size you need, wrap all 6 wires to create the portion of the bead setting. The half round wire you are using for wrapping helps a lot, trust me. 😊

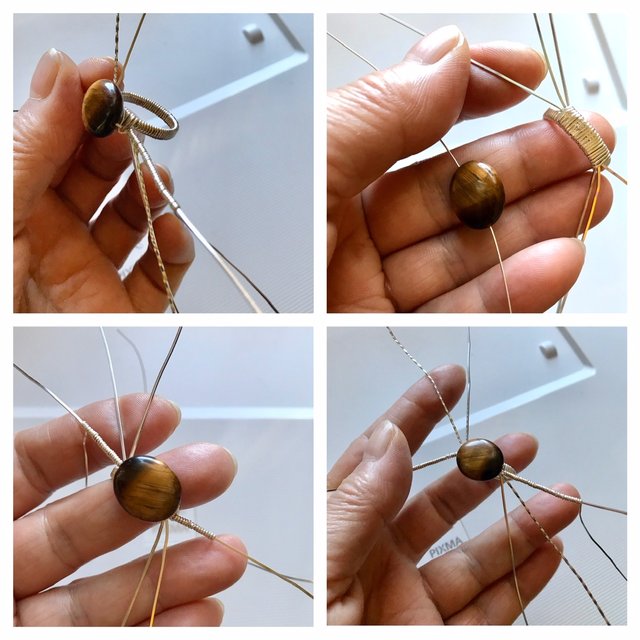
Position your flat bead on the shank and thread the 28 gauge wire into the bead. Secure the bead, and coil the thin wire around the outer square wire, as shown in the photo. Wrap about 1 inch, or a sufficient length to go around your stone.
I like to twist the middle wire, so it will look a little fancier. Now you have the bead secured and the wires as shown below.

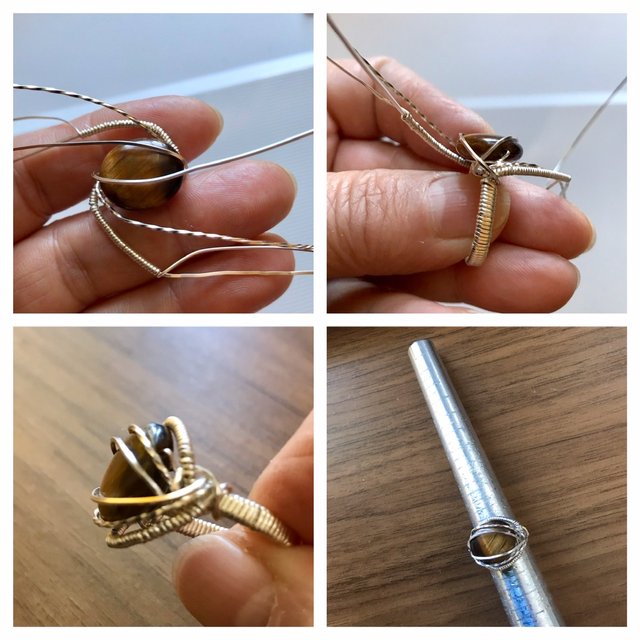
This is the best part! Turning the wires around the stone and shaping the ring design. The bare wire will be the inner one, second is the twisted, and third is the coiled. Once you have them in place, connect them to the shank, and trim them. Make sure you tuck the wires in, so they don’t scratch the skin.
The last step is to put the ring on the mandrel and shape it again. At this point you can tap it lightly with a hammer, but be careful, because it will get a little bigger.

I hope you liked my little tutorial and maybe you’ll want to try to make a ring like this. It is a beginner’ s project, trust me, it is easy. The advanced wire artists use this same technique to wrap expensive stones with precious metal wires. I’ve seen beautiful faceted stones and also cabochons wrapped with silver wire, even gold plated. Those stones are not drilled, so you need some serious skills to create perfect settings and keep them in place.


Thank you for participating in the contest and using the recommended tag/s. This post has been manually rewarded with BUILD tokens in the form of an upvote. You can buy, stake, and exchange our "BUILD" tokens for steem on steem engine or SteemLeo
Build-it is a central hub for DIY and How-To projects. It's an opportunity to find and share the latest in DIY, and How-To tutorials. The recommended tags required when creating a DIY article are #diy, #build-it. #how-to, or #doityourself. Please subscribe to our community here
Chat with us on our discord and telegram channels Discord, Telegram.
That's so pretty!! The tutorial is very clear and easy to follow as well