Needleworkmonday | Crochet Pencil Case Pattern
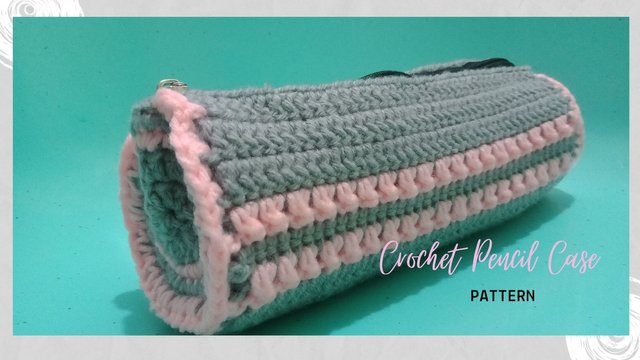
So I finally completed one of my commissioned work, the crochet pencil case. I am very much delighted with the result. I guess it was the excitement I felt while working on the pattern that helped me finish this project in a span of 12 days! As promised, I am going to share the pattern for this crochet pencil case.
Materials:
3.5 mm crochet hook
4 ply Monaco Acrylic crochet yarn (gray and pink)
Thread snipping scissors
zipper
Needle
Pattern:
The pencil case
I figured that the pencil case should be sturdy and hard enough to hold the pens and still should take the tubular form. One way to do this is to use the pelon cloth as lining on the inside of the pencil case. But I thought of using the thermal stitch instead.
I was too over excited while working on the pencil case so the process pictures I took while working on it was very few. So for the purpose of this pattern, I am taking pictures of the process on a different set of yarn. I hope I don't confuse you. Please bear with me.
Chain 44
Row 1
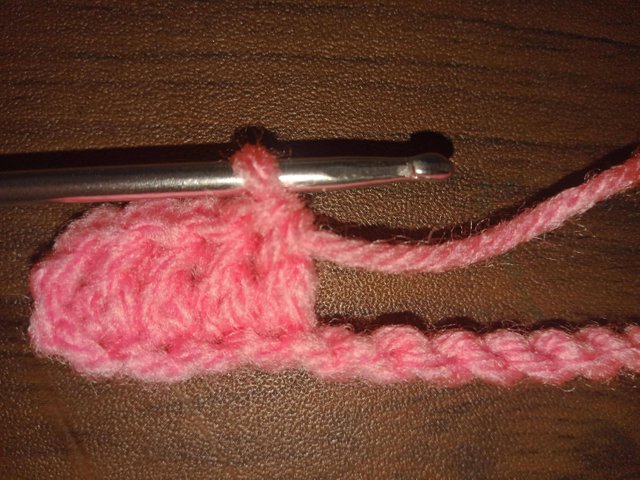
Double crochet stitch on the 4th chain from the hook but work on the back bumps. This way, the top view of the row will look exactly the same as the bottom view. DC across the remaining chains. Chain 3 then turn.
Row 3
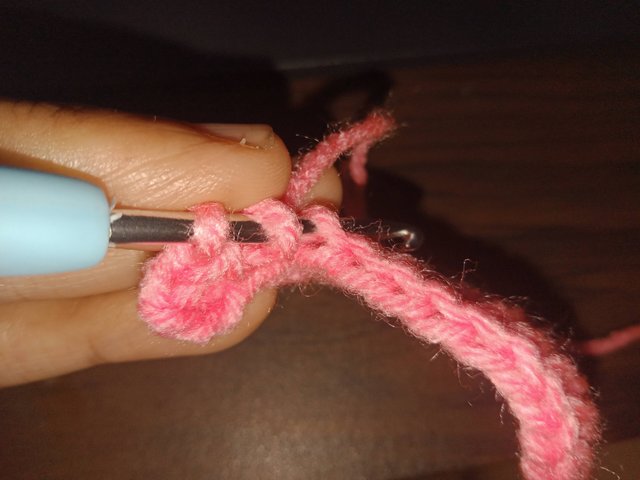
DC on the first stitch, working back loops only. (BLO) Continue until the last stitch. Chain 3 then turn.
Row 4
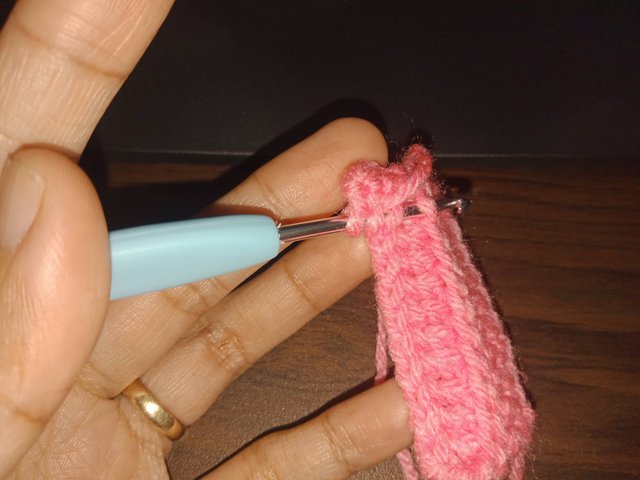
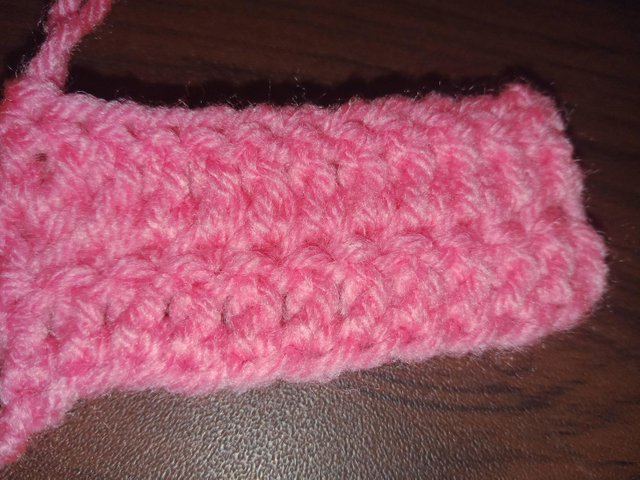
Yarn over, insert the hook on the front loop of the first stitch and into the front loop of the first stitch on the previous row. Pull the yarn through the loops then do the double crochet as you normally would.
The front part should look like this:
The back part should look like the photo below. Notice that there is a sort of like a ridge on the bottom part where the first row is? That should be okay because that is the part of the pencil case where I attached the zipper on the latter part.
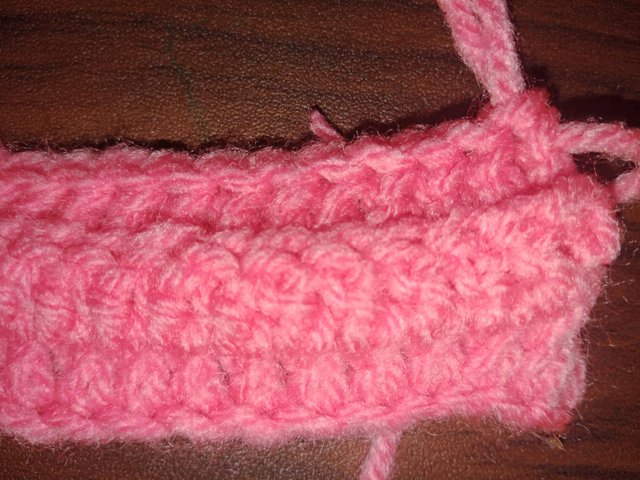
That stitch we just made is called the thermal stitch.
Row 5-6
Repeat rows 3 and 4.
Note: You may finish the entire pencil case using rows 3 and 4 until the end but if you'd like to add some highlights to your pattern, you may continue reading.
Row 7
Change yarn color. (Pink)
Yarn over, skip a stitch, insert the hook on the front loop of the next stitch and the front loop of the stitch right below it on the previous row. You've made a diagonal double crochet. Yarn over, insert your hook into the front loop skipped stitch and into the front loop of the stitch right below it on the previous row. Now you've made a thermal crochet stitch variation of the criss cross stitch. Do the same across the entire row. chain 3 and turn.
Row 8
Change yarn color. (Gray)
Repeat row 4 except do just 1 chain instead of 3. Turn
Row 9
Do a single crochet thermal stitch. That would be the same procedure as row 4 except you'll be doing a single crochet instead of a double crochet.
Row 10
Repeat row 4.
Row 11
Repeat row 7
Row 12-22
Repeat rows 3 and 4
Row 23
Repeat row 7
Row 24
Repeat row 8
Row 25
Repeat Row 9
Row 26
Repeat Row 7
Row 27-32
Repeat rows 3-4
That should leave you with a square of thermal stitches with edges for the zipper.
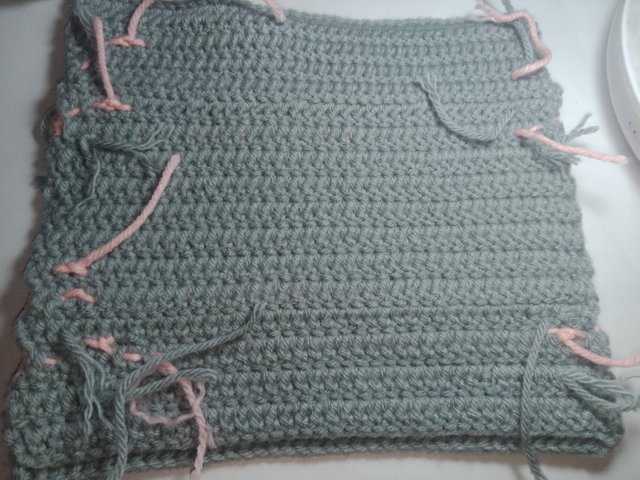
This is the back part or the inside of the pencil case.
The side panels
Your next step is to crochet the side panels.
This is actually very easy as all you need to do is to crochet 2 circular panels. I used the magic ring for the first round. You may use sc of dc if you wish, depending on your preference. All you need to ensure is that the cirlces will match the circumference of the square you made once it is rolled.
Attach the zipper
You may use a sewing machine to attach this or you may hand sew it like I did. To make sure that the zipper is properly placed, I first used a temporary stitch to hold it in place before I went ahead and sew it using back stitch.
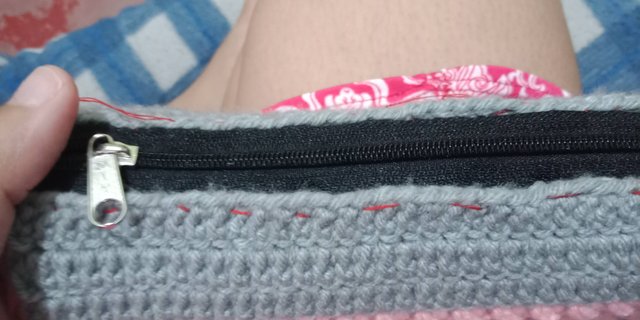
Note: For a more decorative effect, you may also opt to use the opposite color for your back stitch.
Attach the side panels
To add more pink highlight to the gray pencil case, I used the pink yarn to attach the side panels. I also got a little more creative with the panels itself, I slightly changed the yarn threads as I was working on it. :)
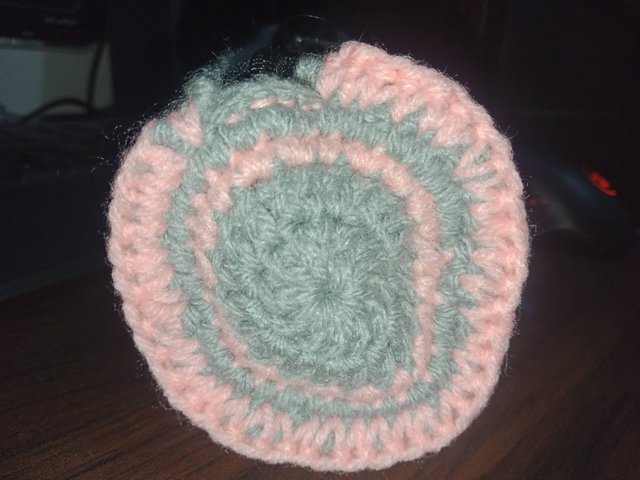
So there you have it! The very first self-made pattern I ever made myself. Woohoohoo! I got the ideas from so many other projects online. I came up with the designs and the techniques and combinations as I went through the entire process.
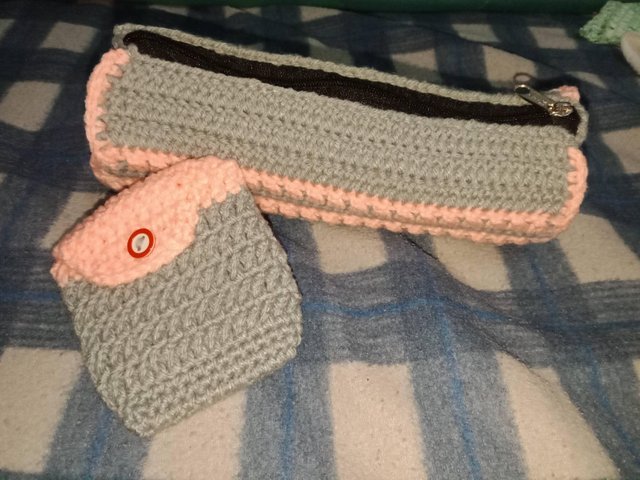
My beautiful client also wanted to have a headset pouch so I also made a version 2.0 of my previous headset pouch project. But that's another story. And I assure you that one's much less complicated compared to the pencil case.
Hello!
This post has been manually curated, resteemed
and gifted with some virtually delicious cake
from the @helpiecake curation team!
Much love to you from all of us at @helpie!
Keep up the great work!
Manually curated by @georgeboya.
@helpie is a Community Witness.
This post was shared in the Curation Collective Discord community for curators, and upvoted and resteemed by the @c-squared community account after manual review.
@c-squared runs a community witness. Please consider using one of your witness votes on us here
Thanks for sharing your creative and inspirational post!
This post got curated by our fellow curator @tibfox and you received a 100% upvote from our non-profit curation service!
Join the official DIYHub community on steem and show us more of your amazing work!
Thank you for your wonderful design! And congratulations to this. I already wrote you that I love the soft hues and the round form of the pencil case. YOu did an amazing job (especially with the zipper... I am a bit afraid of sewing zippers in)
Thank you. You are too kind. I was actually nervous with the zipper. I made two bags before that had to have the zippers removed and reattached a lot of times before I got it right. I guess I did learn from those projects before. :)
According to the Bible, Graven Images: Should You Worship These According to the Bible?
Watch the Video below to know the Answer...
(Sorry for sending this comment. We are not looking for our self profit, our intentions is to preach the words of God in any means possible.)
Comment what you understand of our Youtube Video to receive our full votes. We have 30,000 #SteemPower. It's our little way to Thank you, our beloved friend.
Check our Discord Chat
Join our Official Community: https://steemit.com/created/hive-182074