How To Build a Cryptocurrency Mining Rig From Scratch
Build a Mining Rig from Scratch
On the other hand, when you start building your own cryptocurrency mining rig, it can be specially designed and customized to run the algorithm of the cryptocurrency you want to mine the most.
This means that you will need to get specialized parts to build the platform. For example, in order to mine bitcoins, you need to have various components and features such as motherboard, GPU, graphics cards, PSU, riser cards and other components.
This makes the system powerful, efficient and, if done correctly, can bring significant profits to its users.
Continuing with the example of a bitcoin mining rig, you will need a motherboard with a lot of processing power for this, so that the graphics cards can run the algorithms faster. The number of graphics cards that can be installed on the motherboard will determine the number of GPUs you should purchase. PCIe risers are used to connect graphics cards to the motherboard.
Keep in mind that Bitcoin mining rigs consume a significant amount of electricity and typically remain operational 24/7. Consequently, if you want your system to run continuously, you will also need a high-quality, high-capacity, high-performance power supply (PSU) and potentially an uninterruptible power supply (UPS) as a backup.
How to Build a Bitcoin Mining Rig from Scratch
The only function of a dedicated cryptocurrency mining rig is to run the algorithm for your chosen coin. In addition to being much more energy efficient, it also provides a higher return on investment (ROI).
Remember that cryptocurrency mining equipment requires the purchase of specialized components - this means that you will have to spend a lot more time sourcing and
physically building the equipment.
Oh, and it's not just the hardware you need to consider. Cryptocurrency mining requires installing the right software and locating the best mining pool. Getting things started is difficult and requires a lot of foresight, leadership and persistence.
What is the Best Bitcoin Mining-Specific Motherboard?
The first thing you need is a mining specific motherboard. An excellent example of this is the Asus B250 Mining Expert.
This absolute beast of a motherboard can support up to 19 graphics cards at once, which allows algorithms to be executed significantly faster and blows many other devices without this board out of the water. It is a great investment if you are really serious about Bitcoin mining in 2022. However, you'll need to get 19 separate GPUs on top of that, which can add up quickly due to the high cost of modern graphics cards.
Since the Asus B250 Mining Expert motherboard itself is not able to support directly installed 19 graphics cards, you will also need a PCIe riser in addition to the already mentioned GPU, CPU and motherboard. With the riser, you can easily connect your GPUs one at a time.
How to Build a Six-GPU Bitcoin Mining Rig from Scratch
While the Asus B250 Mining Expert is an incredible piece of hardware, it's out of the reach of many first-time Bitcoin miners.
The following instructions will show you how to build a six-GPU mining rig instead. This guide is recommended for people who have never built a computer themselves.
We will build an NVidia mining rig that runs on Windows 10. But this tutorial can be used on any OS and with any AMD graphics card.
do not forget! On the software side, an operating system, mining software and a cryptocurrency wallet are required to store the mined cryptocurrency.
What parts will I need to build my first bitcoin mining rig?
The following is a breakdown of the various components you’ll need to build a bitcoin mining rig:
Component, Description and Suggested Purchase
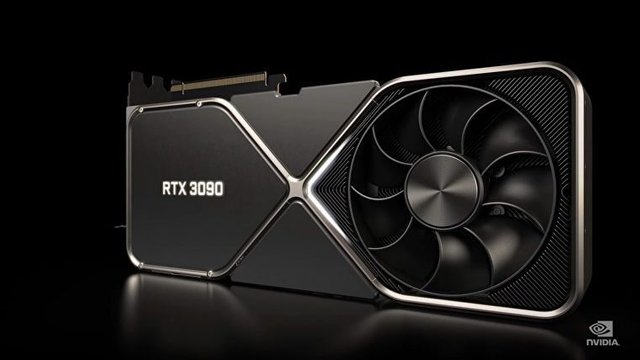
GPU
It is the most important part of the mining rig setup as it generates profits. Your best bet is to buy six GTX 1070 cards. Unless you want to make a massive investment right away to get started, you'll only need one.
Motherboard A few things to keep in mind when buying a motherboard are the type of CPU socket and the number of graphics processing units (GPUs) you might want to use.
CPU
Choosing a high-end CPU is essential if you plan to mine exclusively with CPU. However, in this case we will use the GPU for mining. No need to buy an expensive computer to run our bitcoin miner. To be safe, it is recommended to buy an Intel 1151 Socket processor from the 8th or 9th generation.
.jfif)
RAM
Although RAM is a less critical part of our mining setup, it is still essential.
.jfif)
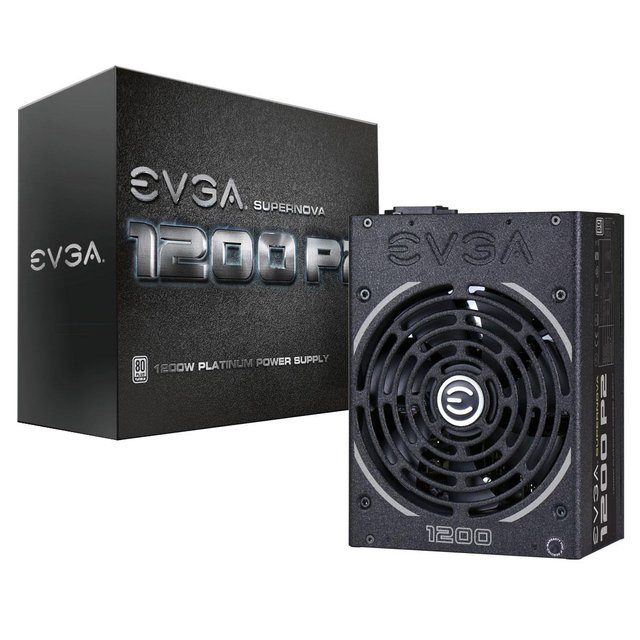
PSU
Any platinum rated 1200W will do.
If you don't have the PSU mentioned above, you may need a PCI-e Y-Splitter.
PCI-e Risers
Provides improved cooling and increased airflow can be achieved by using PCI-e Risers that allow the GPU to rise above the motherboard.
.jfif)
SSD
Any SATA SSD with a capacity of at least 240 GB will do.
.jfif)
Connect to the Internet Either with a wired Ethernet cable or purchase any Wi-Fi adapter
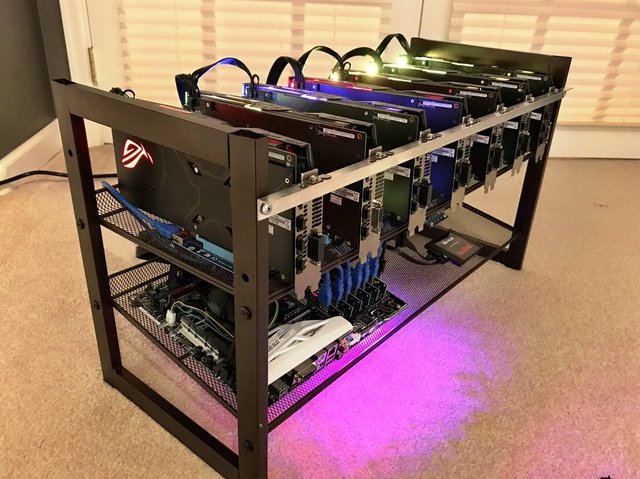
Mining Rig Frame It is possible to build your own mining rig frame with 6 GPUs. You can also buy just one.
USB flash drive With a storage capacity of at least five gigabytes.
Cable Ties These will come in really handy for sorting and organizing the countless wires and components you'll have.
After you’ve gathered all the necessary components, you’ll need to start putting the rig together.
Step-by-Step Guide to Building a Bitcoin Mining Rig
To build a bitcoin mining rig, think about it like putting together a Lego set if you follow the instructions to the letter.
Step 1
Connect the motherboard to begin
The mining rig’s motherboard with 6 GPU support should be placed outside of the frame.
Ensure the lever holding down the CPU socket protection has been released before moving on to the next step.
Step 2
Install the processor
Next, you must connect your processor to the motherboard.
Place your CPU of choice in the motherboard socket. Place it carefully.
When installing your processor into the motherboard socket, you must exercise extreme caution, especially concerning CPU pins. There is a risk of the entire CPU being damaged if pins bend.
You should always keep a copy of the instruction manual on hand. Use it as a reference when mounting the CPU’s heatsink on top of it.
Before attaching the processor to the heat sink, you must first apply the thermal paste. The power cable for the heat sink should be connected to the “CPU_FAN1” pins. If you can’t find it, you should consult your motherboard’s user manual.
Step 3
Insert the RAM
Installing RAM, or system memory, is the next step in the process. Inserting the RAM module into the motherboard’s RAM socket is a cinch. The RAM module must be gently pushed into the RAM socket after the side brackets on the motherboard have been opened.
Because the RAM can only lock into the socket in one direction, this step necessitates extra caution. To get the RAM into the correct slot, you may have to give it a little more of a push than usual. When the RAM is installed correctly, the side brackets will automatically lock in place.
Step 4
Fix the motherbord to the frame
The motherboard must be carefully placed on the mining frame or whatever you are using in its place.
When handling the motherboard, you should take extra precautions to avoid scratching the bottom. The motherboard should only come into contact with the metal frame of a mining rig where screw holes are present. Tighten the screws to ensure that the motherboard is securely attached.
Step 5
Attach the power supply unit
Place the PSU close to the motherboard for optimum performance and longevity from it. The power supply must fit in the mining rig, so make sure you have enough room for it. On most motherboards, you’ll find a 24-pin power connector. One 24-pin connector is standard.
They must be firmly attached to the motherboard, or the mining rig won’t start up. The 8-pin power connector of the CPU should be connected to the motherboard closest to the processor. PCIe 6+2 power and CPU connectors are both 8-pin, so you must be careful not to confuse them. The PCI-e cable is thinner than the CPU cable.
Step 6
Add risers to the system
PCI-e x1 is a shorter version of PCI-e and is required for the x16 USB riser assembly. The motherboard must be connected to this. You’ll need an electrical connection to power the risers. A PCIe six-pin connector, a SATA cable, or a Molex connector may be required depending on your riser model.
Ensure that all of the corresponding power cables are connected to each of the USB risers before connecting them. Each power supply cable can have up to two Molex or SATA connectors.
Step 7
Attach GPUs
Use the USB riser to ensure that all of the graphics cards are firmly attached to the motherboard frame. Ensure that the PCI-e 6+2 power connectors are connected to your GPU. Later, you’ll need to connect the remaining five GPUs to these connectors.
Now that you know how to build a bitcoin mining rig, all that’s left is the software, which will be discussed in a future guide.