Tutorial - Hard Drive Replacement, Bootable Media Preparation and Windows 10 Installation. 💻💽 | Steem Studios
Hello everyone, this time I bring you something different and I think it will be very useful at some point. Sometimes it is important to know some computer topics because it is our day to day. Of course, for that there are specialists in the most difficult areas, but this tutorial can be done by anyone, you just have to dare.
At some point it has happened that our computer stops working for whatever reason and we have to turn to the neighbor, friend or brother. But this does not mean that we are not able to solve this, many times we can do it ourselves.
I am a Technical Support Specialist (Lenovo) and I worked in this area for more than 5 years, I have already lost count of how many computers I have formatted and repaired for different reasons, but most of them due to user errors.
Currently the prices of formatting a computer can vary in different countries, here in Venezuela it is between $10 to $30, money that you can save if you do the job correctly. This tutorial will be a bit long, because I wanted to detail the steps as well as possible.
A few days ago, a friend (@sabrip) told me that her laptop had problems turning on and that it was probably the hard drive since the HP Diagnostic system indicated that there was a failure in the drive. So I asked him to give me the laptop to check it and make a diagnosis.
The first thing I did when I had the laptop was turn it on to see if the error persisted, and indeed it did. So I unplugged it from the laptop and plugged it into my personal computer to discard and check if the PC detected the drive. The bios did not detect any disk so it probably has bad sectors or the disk plate has been burned.
I was interested that it at least detect it in this way I could recover the information from the hard drive. So I did a deeper check, <<I won't dwell on this step because it's not the point of this tutorial>>.
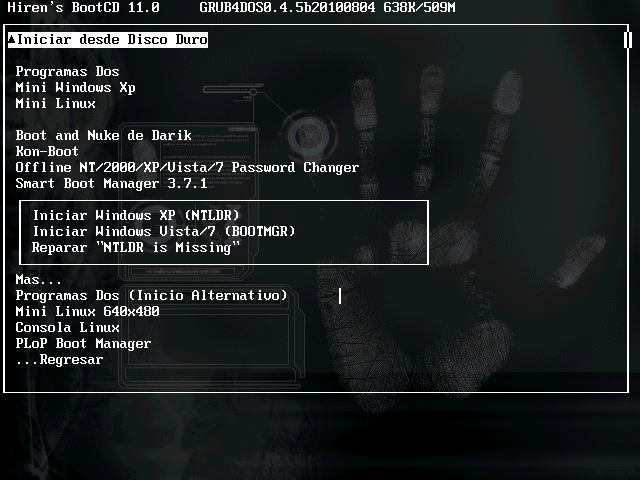
To check I installed Hirens Boot on a flash drive, this program has many hard drive repair tools, among many other functions. In addition, it also has a mini Windows XP where it is very useful to recover information from hard drives or repair failures in the operating system. Unfortunately I could not execute any function since the disk was not detected by any of the tools and we can conclude that the hard disk is damaged.
 |
|---|
I don't think it is completely damaged, because if the board is damaged it can be changed but this would be more expensive than a new hard drive. So in Venezuela (I don't know if anywhere else) it's better to buy a new hard drive than take it in for repair.
I finally gave my diagnosis to my friend, and recommended that she buy a new hard drive. I sent her the specifications and in a few days she brought me the new hard drive. By the way, you can see TheDiaryGame by @sabrip where he mentions when he bought the hard drive. So now we can start with this tutorial.
Hard Drive Replacement
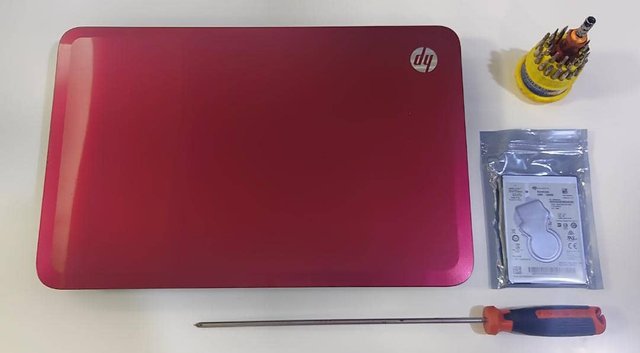
For this tutorial we will need a screwdriver kit. I have a cheap kit that cost me about 5$ USD (≈13.80 STEEM) some time ago, and of course the new hard drive that we will replace, this drive cost 35$ USD (≈96.57 STEEM). I have another Black & Decker slotted screwdriver that is the one I use the most to assemble tower computers, for this tutorial I will use that one so you can see the images well.
 |
|---|
Step 1.
We disconnect the laptop from the current and remove the battery to cut off any power passage to the equipment.
 |
|---|
Step 2.
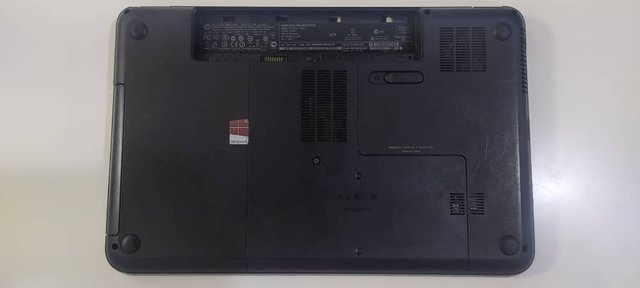
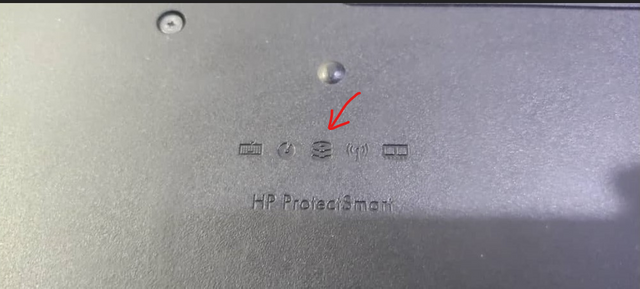
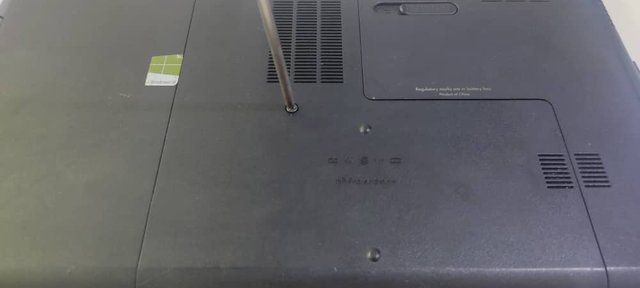
We identify where the hard drive is. In general, laptops have symbols engraved on the casing to know what is under the covers. As you can see in the image, the identified symbol is the one that corresponds to the hard disk, in this way you can already know where the disk of your laptop is. Then we unscrew the screw from the cover.
 |  |
|---|---|
Step 3.
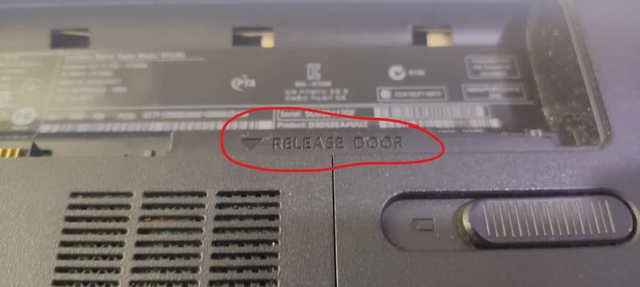
As you can see in the following image, it tells us that we must slide the cover down to remove it. In general, all laptops have these indications that are very useful for anyone to handle it.
 |  |
|---|---|
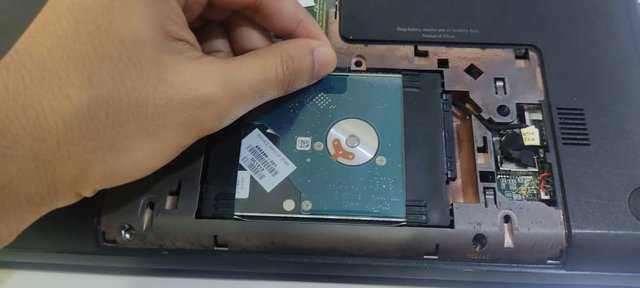
Step 4.
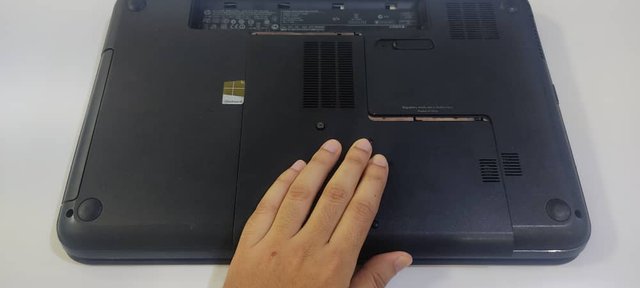
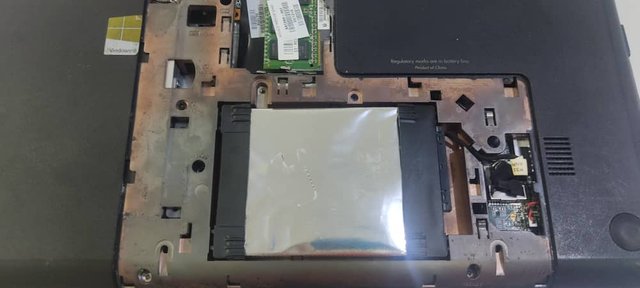
Once we remove the cover, we can already see the hard drive. You can also identify it because it is the largest part or hardware of the laptop (except the motherboard). Some hard drives are wrapped in an acetate protector and it has a strip where we can take it and remove it.
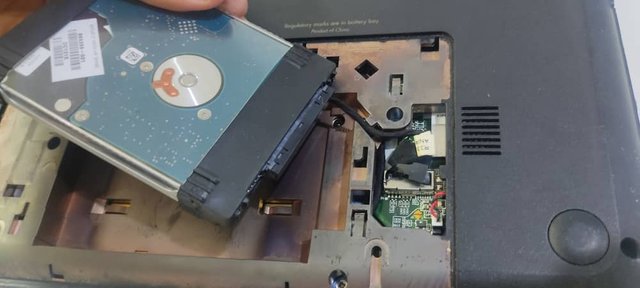
After having removed it, we disconnected the SATA connector from the hard disk, this connector is not snap-on and does not have a safety pin, but you must be careful with the plug cable because it is fragile. So my recommendation is, with your thumb, put it along the plug and disconnect a little on one side, and then on the other side evenly. In 3 movements it should already be disconnected.
 |  |
|---|---|
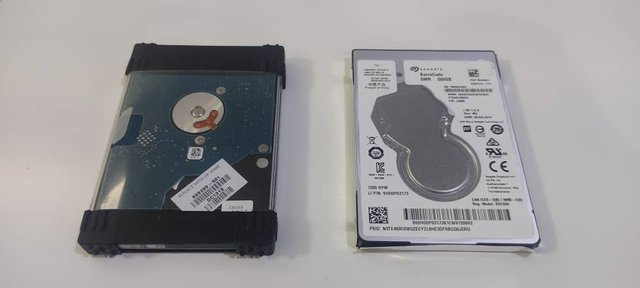
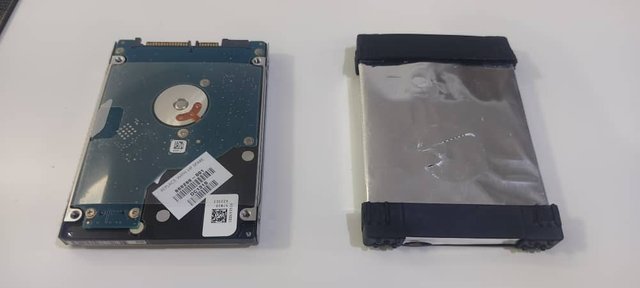
Step 5
In general, the disks have a casing that adapts to the place where they should go, in this case the damaged hard disk has rubber bands on both sides. We remove those rubber bands and put it on the new hard drive. Although it seems insignificant, this is very important because otherwise the hard drive will not fit snugly and can be hit if the laptop is shaken.
 |  |
|---|---|
Step 6
We connect the new hard drive, close and secure the case. Now we are ready to install Windows.
 |
|---|
Bootable Media Preparation
To prepare Windows 10 on a bootable pen drive, you need to download a software called Media Creation Tool from Microsoft official site. We must also have a flash drive of at least 8 GB, in my case I have a 32 GB one.
This software will download Windows and set up the bootable pendrive so that computers can recognize it.
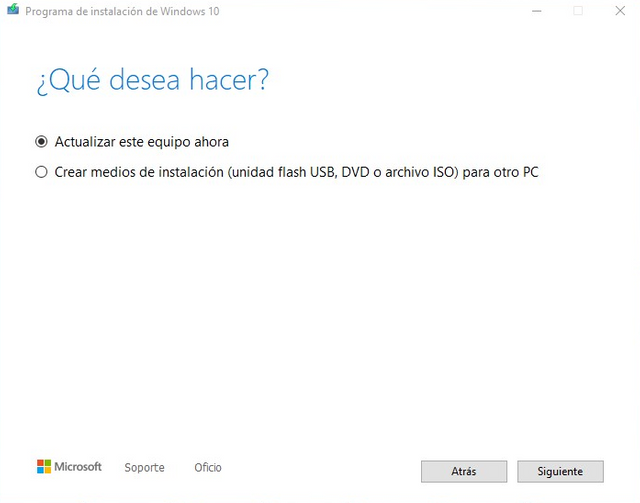
It offers us two options, Update the current operating system or create an installation medium. In this case we will create a USB installation medium.
 |  |
|---|
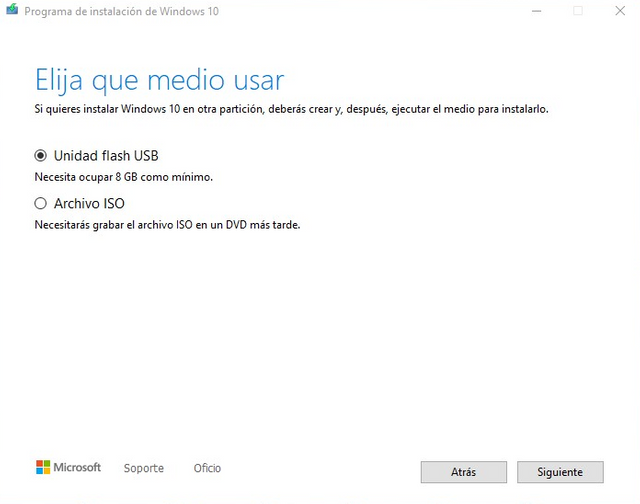
In this step it will ask us if we want to create an installation medium through a pendrive or create an ISO image to be used later. As I said before, we will prepare a USB flash drive to install Windows. So option 1.
 |  |
|---|
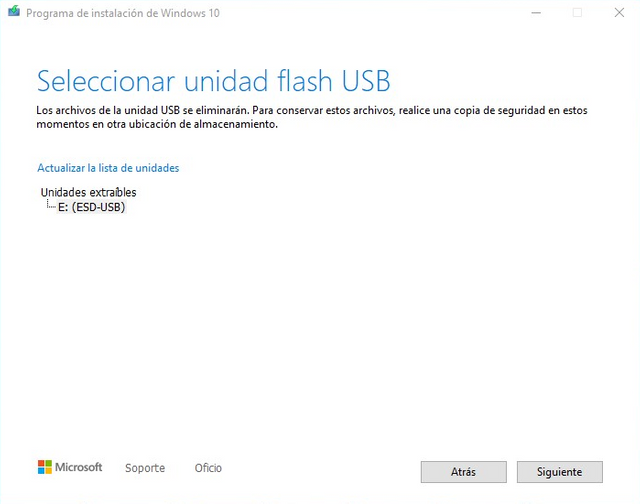
It is important to note that you must save the files that are on the flash drive before continuing with this step. Since the program will format the pendrive.
 |
|---|
The download of Windows can take some time depending on the speed of your internet, in my case it took about 4 hours to download. Once the operation is finished, we continue with the installation.
Windows 10 Installation
Step 1
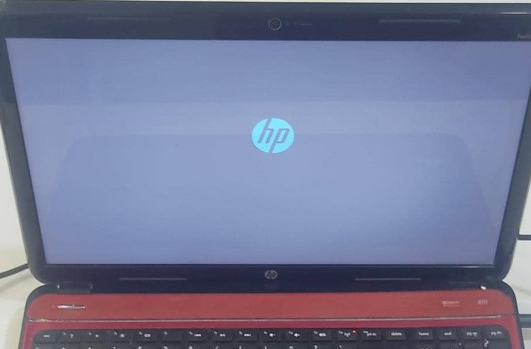
Before turning on the laptop we connect the pendrive with Windows. Once we turn on the laptop, it will not be necessary to configure the Boot because we have an empty hard drive and a pendrive connected to be recognized. So the system will detect it automatically.
 |
|---|
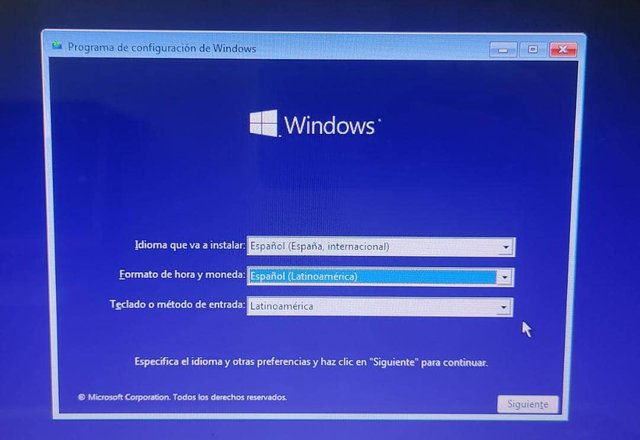
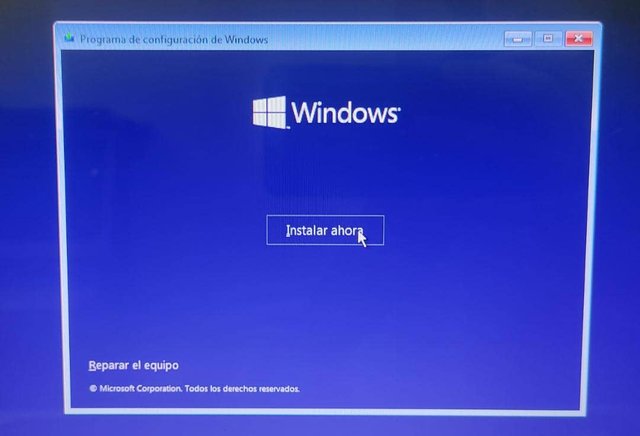
Step 2
We select the options according to the region and then in Install.
 |  |
|---|
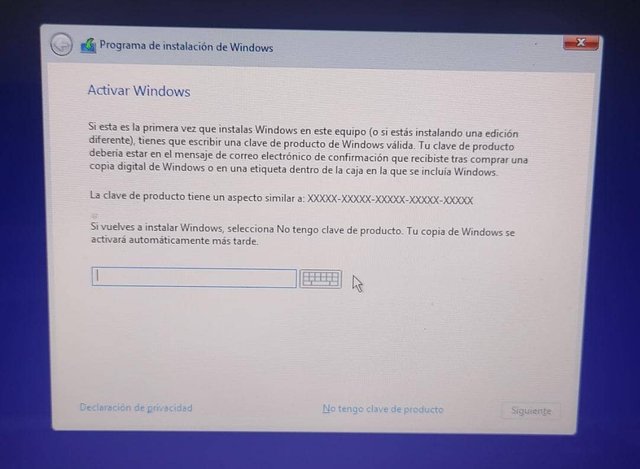
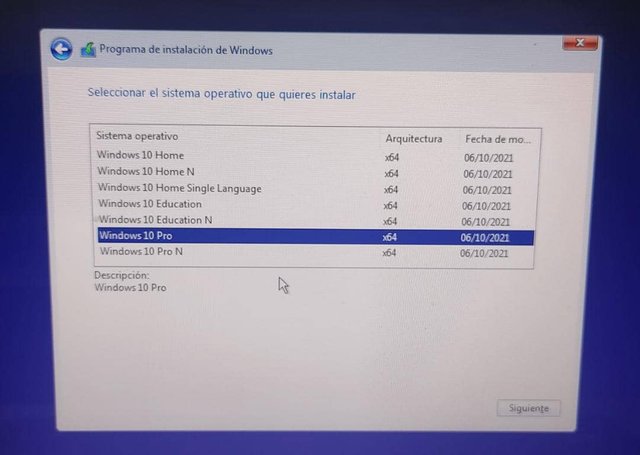
Step 3
For now I won't activate the product so I'll click "I don't have a product key". Then I select the version of the operating system that I want to install, in this case I will install Windows Pro since it has exclusive tools.
 |  |
|---|
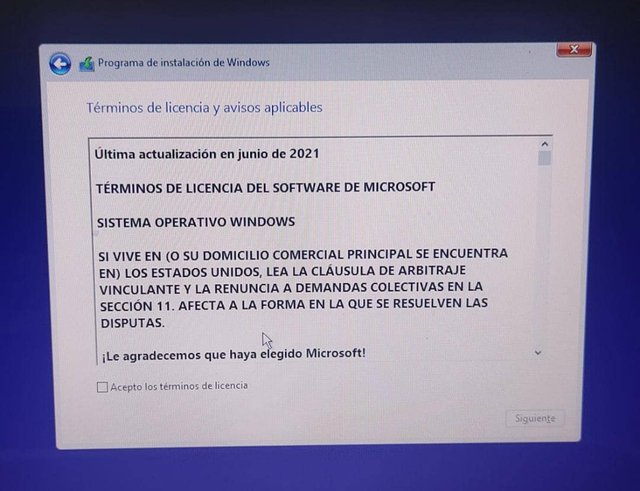
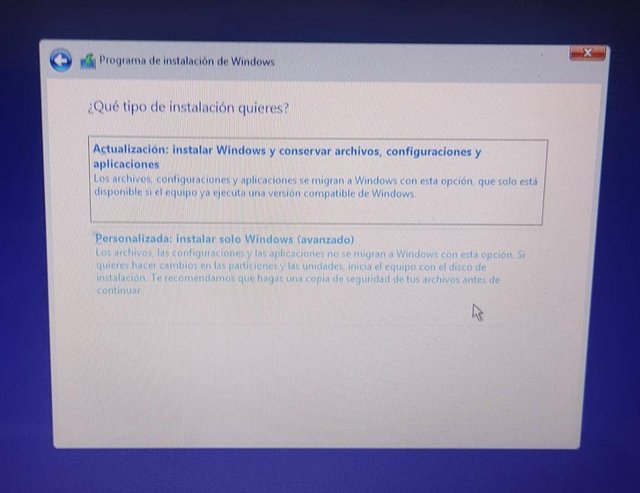
Step 4
We accept the Terms to continue. In the next option we click on "Custom..." since we will install a new Windows and we will not update.
 |  |
|---|
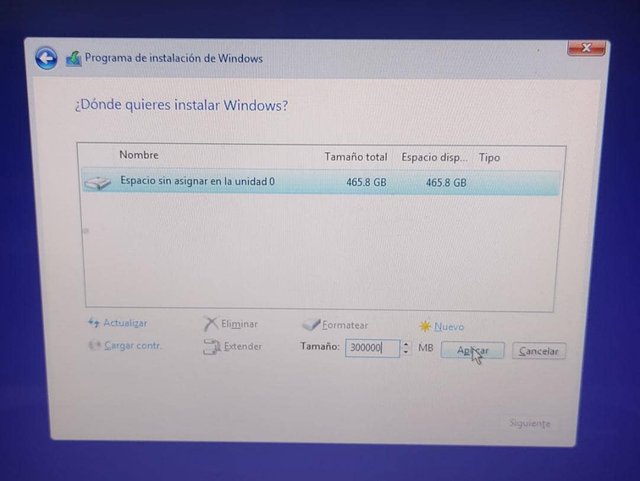
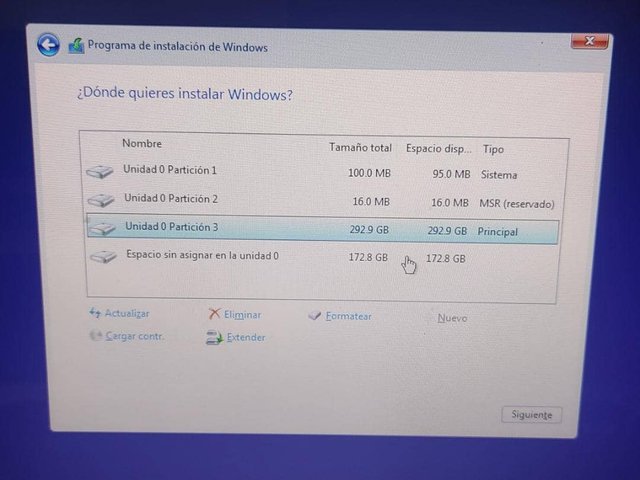
Step 5
We select the unallocated space on the disk and click New. In this case I will make a main partition with 300 GB and another backup partition with the rest. I always do this because if there is a problem with the C drive we can format it and the second partition will remain intact with the information saved.
 |  |
|---|
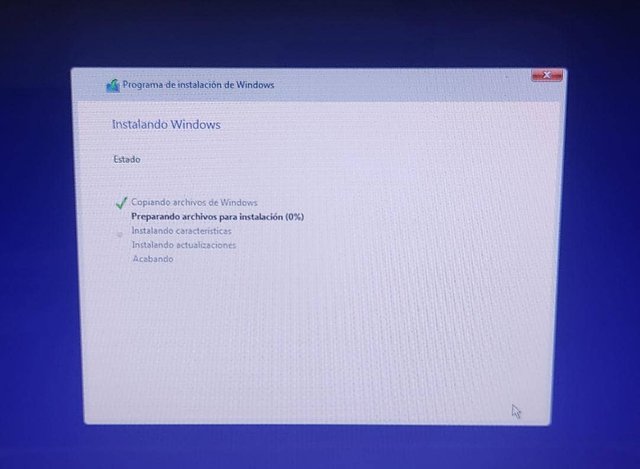
Step 6
Now we will wait for the windows files to load and install on the hard drive.
 |
|---|
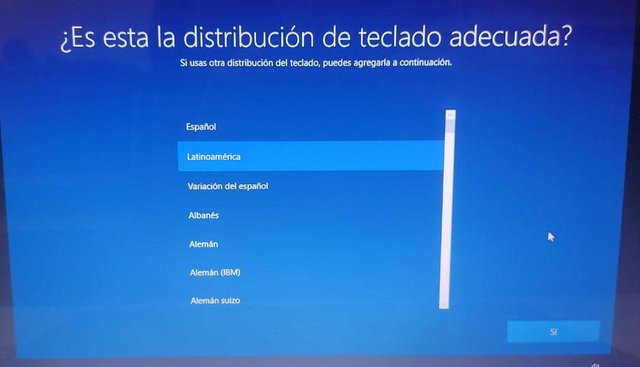
Finishing Windows installation.
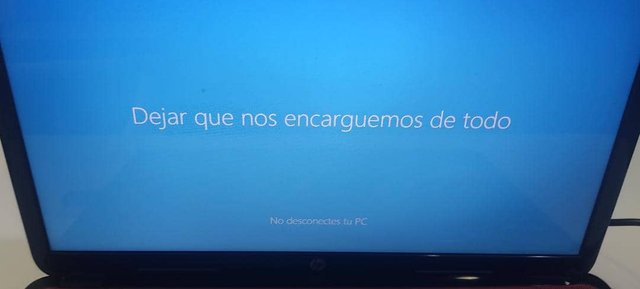
When the load is finished, the laptop will restart and then show the following screen, this means that we are in the final stretch and we only need to configure the operating system. Select the keyboard layout you use.
 |
|---|
If you use an additional layout you can add it in the next step otherwise you can click Skip. On the next screen it will ask you to connect to a network, if your Wi-Fi network appears you can connect without any problem and continue with the configuration that is requested.
In the next steps you will be asked to write the username or to log in with your email, provide the requested data until you see a screen like this.
 |
|---|
It is important not to turn off or unplug your laptop from power, because if the laptop is turned off during this process, the operating system or even the hard drive may be damaged.
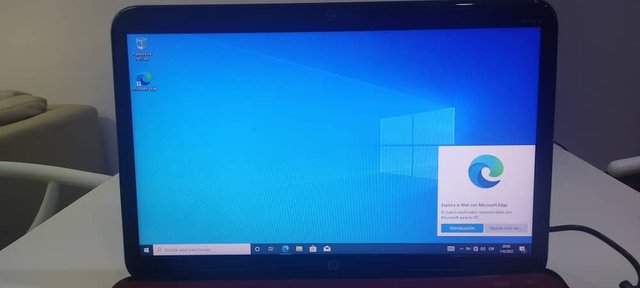
When the load is finished, it will show us the Windows desktop. We have achieved it! We replace a damaged hard drive, prepare removable media to install Windows, and install Windows 10.
 |
|---|
- Repaired Equipment: HP Pavilion g6
- Damaged hard drive: Seagate 500GB Momentus Thin 7200 rpm
- New hard drive: Seagate 500GB Barracuda 7200rpm
Conclusion
We have learned a little how to detect disk failures using Hirens Boots (I may extend this in another tutorial), we also learned how to identify where our laptop's hard drive is located and how to remove it safely, and finally we prepare a removable disk USB with the Windows 10 operating system using a very useful tool from Microsoft and then proceed to install it on a laptop or any computer.
Now my friend can be happy and continue posting her diaries comfortably from her laptop. In addition, I have done this as a friend and not as a client.
I hope you have learned a lot from this tutorial and it has helped you, I feel this is an important thing to know and you don't need to have a lot of computer experience to do this.
All the best!
Note: All images have been taken from my Redmi Note 9S phone.
| 👾Join the Community | 💬 Join to Discord | 📌 General Rules |
|---|
| 50 SP | 100 SP | 250 SP | 500 SP |
|---|---|---|---|
| 800 SP | 1000 SP | 1250 SP | 1500 SP |

Congratulations for this post so elaborated and enriched with useful information that any of our users will love to know, really a solution to a problem that many may have and do not know how to solve. greetings friend @oscarcc89
Thanks for the support @irawandedy. I will continue to post quality content. Thank you
Too much quality information in this publication that we must put into practice if we have a problem like this. It's great that he had someone to help him solve it and even more so that through being able to have the opportunity to give support, you share it in the community so that we all learn or dare as you mention to put into practice with this tutorial. Very complete, very useful, thanks for the very specific way to get the equipment to work correctly. Greetings.
Hola amigo, la verdad es que estoy muy agradecida por este excelente trabajo, pensé que era el final de mi laptop, ya son 9 años con ella. Este tipo información es muy buena, un paso a paso muy detallado y explicito.