How to Make a Custom Golf Yardage Book Using Google Earth and Inkscape.
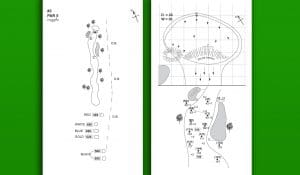
Yardage Books have forever been a golfer’s fantasy. The reason? Only because yardage books make the game a whole lot simpler and easier. This pocket-sized, super handy booklet or pamphlet basically contains detailed illustrations of all holes present on the golf course. The illustrations are carefully designed as to allow the player to get a good view of each hole while also having an idea of yardages to and from potential hazards and landmarks associated with each hole.
While this is a very helpful tool for a golfer, is it also simple to create? You’d think not, but it kind of is. It is not only super easy, but also super exciting and extremely fun! Needless to say, creating Yardage Books is as an activity on its own.
Your Yardage Book can very well be customized to best suit your personality; you can make it as glossy and shiny as you want; or keep it basic with neutral colors (black and white) – it is really all about how you want it to be. A Yardage Book is like a golfer’s diary, if you will.
Following is a step-by-step guide to help you create a unique Yardage Book of your own:
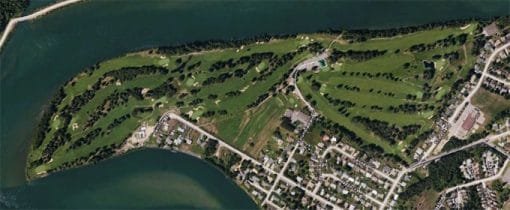
Google Earth can be a very helpful tool for capturing images of the golf course and importing them into Inkscape and starting work on them.
Look up the name of your desired golf course in the Google Earth search bar and Google Earth will slowly zoom in to that area.
Once you have successfully navigated to your desired area, click on the Edit menu – and “Copy Image”.
You can simply paste the image in Inkscape just like standard copy and pasting procedure.
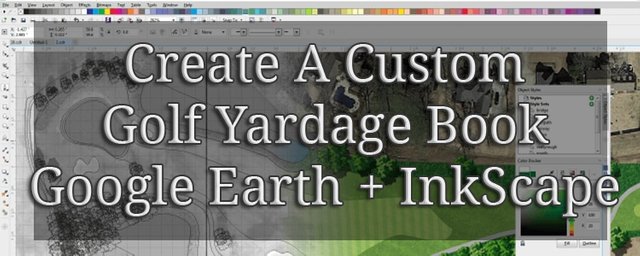
Inkscape is the program that mainly allows you to get crafty!
Using Inkscape you can outline the Image From Google Earth or just leave the screenshot and add additional features. In my opinion is looks way more professional to outline the contrours of the green and fairways in Inkscape and delete the Image after from Google Earth.
Set up your Inkscape Template – Before you get to work, you ought to have an appropriate design space set out before you. Enter the right dimensions and make sure your template is just the right size (not too large, not too contained).
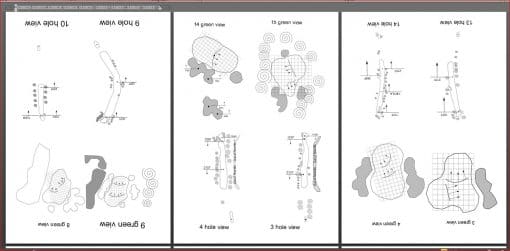
Add the hole information – Information like Hole Number, Handicap and Par etc. is vital to the effectiveness of your Yardage Book. You must add this information for each tee that’s associated with each hole. Tip: Set a color for each box to match the tee color that you’re setting the information for, so that you can easily differentiate and strategize well.
Draw a compass – whilst on the course, you will, at all times, need to know what direction you are facing. You do this by simply drawing a circle, entering text (W for West, E for East, S for South,and N for North), and positioning them as you see fit. It is important to signify north with, say, a triangle, this is because North is usually the general point of reference.
Draw a legend of symbols – You must draw symbols to denote certain features of the course; these may include Yardage Marker, Front of Green, a symbol for Distance To Green, Distance To Tee Box etc.
So, put your artist’s hat on and design your Yardage Book however you like with Google Earth and Inkscape. You can learn this very fast and will not take long to get the hang of. Im sure there are many more applications you can use these two pieces of software to create awesome projects,
Have fun!