Straw Bale Gardening: The Ultimate Gardening Hack That Saves You Time, Money, and Your Back
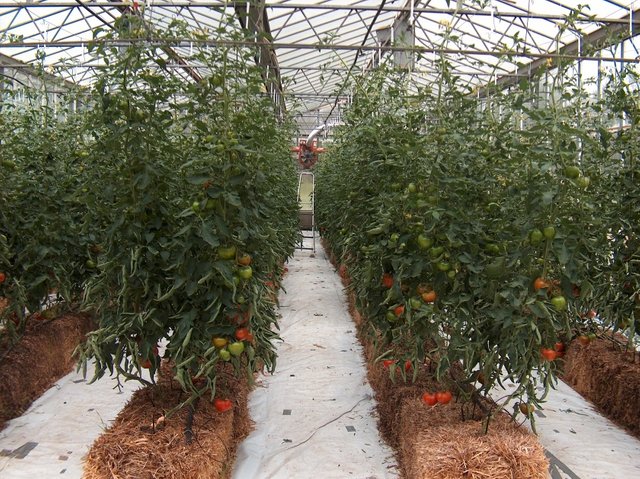
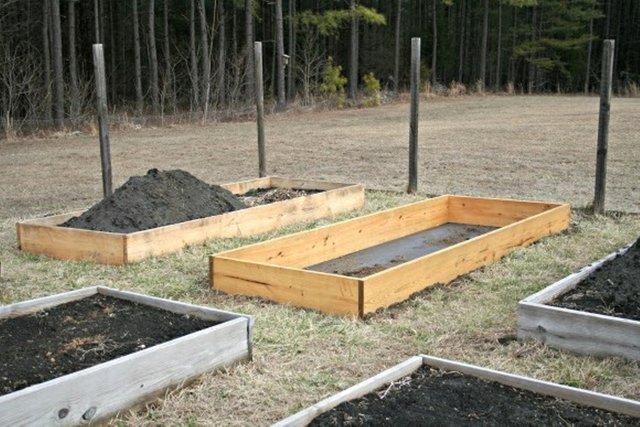
Not every plot of land is ideal for growing a vegetable garden. Some lots may be too small or soil conditions may require too much effort and money to make them viable again. Many gardeners swear by raised garden beds. They do work very well and provide great soil drainage and other wonderful benefits but most people build their beds with border material that can be toxic. Chemicals that are used to treat certain types of lumber can leach into the vegetables. And lets not forget the cost of the materials to build raised garden beds. You have to buy the lumber, screws, and top soil. You also need minor woodworking skills to complete the beds.
Also, let's not forget that raised garden beds are a permanent structure and when you aren't growing something in them they can become an eye sore.
After many years of traditional soil-gardening and back breaking work preparing my soil, I decided to take a break and try something new. Growing vegetables in bales of straw. Sounds crazy, I know, but I was pleasantly surprised.
What are the benefits of straw bale gardening?
The greatest benefit, in my experience, is not having to drag out the old gas-powered tiller and spending the day battling the heat and mechanical breakdowns. Gardening with straw bales eliminates the need to cultivate land, saving a lot of time and effort.
Straw bales also raise the vegetables off the ground. By doing this, many soil born fungal diseases are eliminated that destroy many different crops such as tomatoes. Tomatoes are extremely susceptible to fungal diseases such as fruit rot, early blight, and late blight. Straw bales help raise the vegetables away from the soil and allow for proper water drainage as well.

Straw bales also allow for earlier planting in colder climates. Did you know straw bales will get hot by themselves even in cold temperatures? Bales of straw go through what we call a “heat”. When straw is tightly baled, bacteria inside the bale begin eating the sugars within the straw, breaking them down into energy. This process is called respiration. Once the bacteria completely consumes the natural sugars (glucose) transforming them into carbon dioxide, water and energy the temperature of the bale will rise. Although it's rare, some have even spontaneously caught fire. This heat allows for earlier planting and an even later growing season going into the fall.
Straw bales also hold in moisture even in dry weather. The tubular vesicles that make up the straw absorb and slowly release moisture over time creating an excellent environment for roots to obtain necessary amounts of water even during times of drought. This helps reduce the amount of watering needed and sometimes even eliminates the need to water vegetables altogether.
Not only do the bales increase the growing season, as they begin to break down they actually become food for the vegetables. The rotting straw inside the bale provides many nutrients and carbon dioxide for the plants.
Let's not forget that straw bales are cheap. Very cheap. If you live in a rural area you can find local farmers practically giving the bales away for as little as a dollar per bale. If you purchase them from a local garden center you may expect to pay $2 or $3 per bale.
How do I start my own straw bale garden?
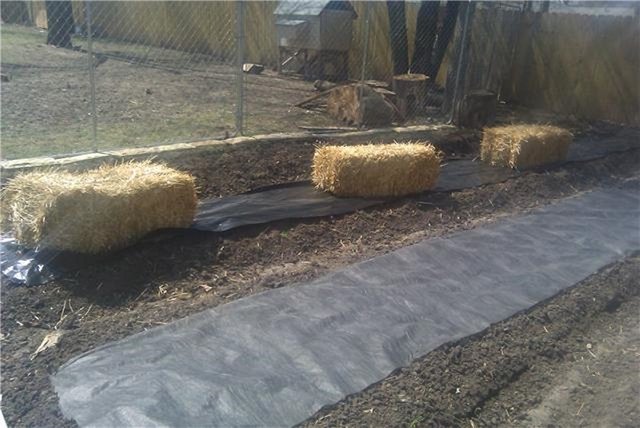
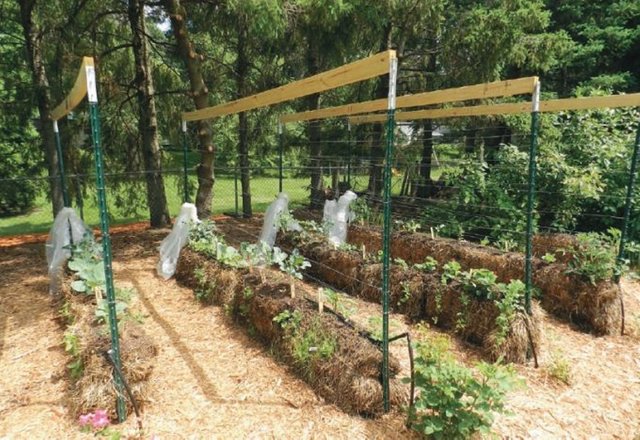
Step 1: Lay out a layer of landscaping fabric on the ground where you wish to place your rows of straw bales. The landscape fabric will keep weeds from growing into the bales.
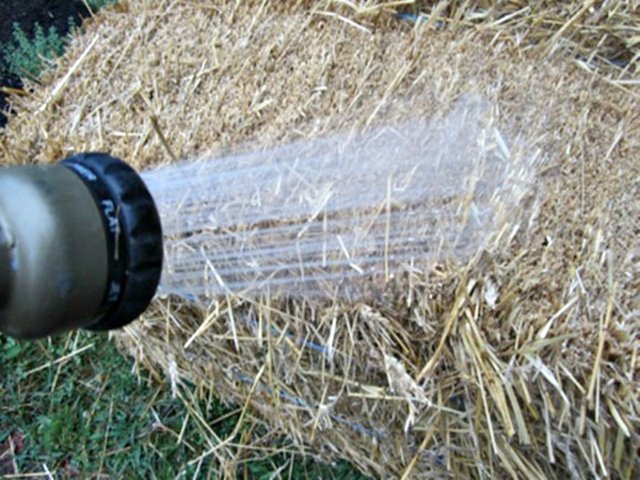
Step 2: Lay out your bales on their sides on top of the landscaping fabric. 10 to 15 days before planting you will need to spark the process of respiration (heat) inside the bales. To do this you will need to water down the bales and add fertilizer to the bales. This will begin the composting process inside each bale. For the first week you will need to add at least two cups of fertilizer per bale every other day and then completely saturate each bale with water every day. The last couple of days you will need to add about half as much fertilizer while still completely saturating the bales with water. If you place your fingers inside the bale and its getting hot then the process is working.
Step 3: Add a makeshift trellis. Green t-posts found at local hardware stores work best. Place t-posts every 8 or 10 feet depending on how long your rows are and then string metal wire between the posts about 12 inches from the top of the bale. As the plants continue to grow taller you can add additional strands of wire.
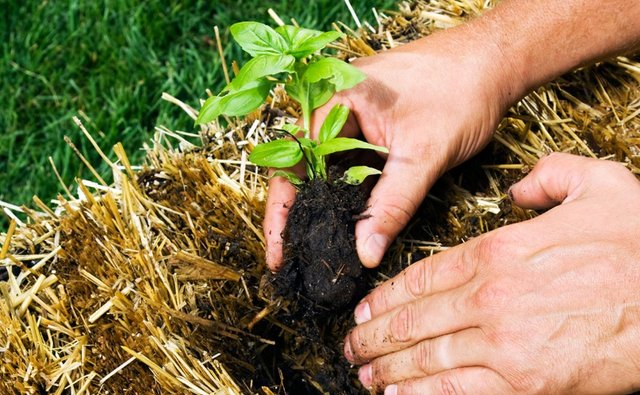
Step 4: Now that the bales are ready it's time to begin planting. If you are planting seedlings simply spread the layers of straw and plant the seedling covering the root ball. If you are planting seeds, spread a couple of inches of top soil on top of the bale and place your seeds in the soil.
Step 5: For the first couple of weeks water the new beds once every morning until the seedlings and seeds take hold.
Once the plants are established you may water as often as you feel is needed. With this method of gardening there is no need to worry about constant weeding, adding chemicals to combat soil born diseases, or other annoying things commonly associated with other forms of gardening. Just sit back, relax and prepare for a bountiful harvest.
It really does work! You just have to be sure you've got STRAW and not HAY! We also do "no till" gardening. Just mulch, mulch, mulch the living daylights out of your garden. Don't till it (exposing weed seeds to the sun so they can grow). You just clear a little spot to plant in the soil. You won't have to weed or water nearly so much. It's the lazy gardener's secret.
We also have chickens, and they're wonderful gardening partners. Their poop is good for the soil. We turn them loose in fallow beds to do their thing. They'll also eat bugs, which I appreciate. Just be sure these little garden helpers don't get into the beds you've planted, because they'll eat your produce! Also, they'll eat kitchen scraps (including... chicken, which we don't do). Oh, and eggs! You get lovely eggs!
I tried this with potatoes once and it worked. People should definitely give this a try. Thanks for taking the time to post.
That is absolutely awesome! Who knew that you could grow plants in straw bales? Great article!
Wow, that looks great! How is it with the nutrition for the plants? Won't they lack certain components as the straw does not have all the minerals soil does?