Dev Blog — Generating Planets for Hash Rush
Greetings,
A lot of progress has been made on Hash Rush since the end of our ICO. We’ve moved offices, moved our mining farm (allowing us to grow it further) and put together an amazing team with some pretty famous names. Now all that is missing is for us to really dig deep into what we’re creating and give you some juicy information from the core of Hash Rush. So without further ado, let’s begin!
Hash Rush is an online RTS game where your main goal is to extract the valuable crypto crystals from deep within your planet. Over time, you will be able to look to the stars and move to new planets within the Hermeian universe.

A core part of the game comes from how the planets look, feel and behave (there are NPCs after all) as these factors will dramatically affect your gameplay. We’ve certainly been aware of that, and it’s been one of our major tasks to create a system where we can produce unique and exciting planets for you, our players, to explore and master. To tackle this, we’ve created a special Hash Rush Planet Generation process that we are now going to talk you through. By the end of this article, you should have a pretty good idea of how planets are made in Hash Rush.
Phase 1 — Preparing the Planet
The first phase is to create a generic planet that stores the planet definitions. Think of this as an empty sphere that has all the planets parameters locked deep inside.
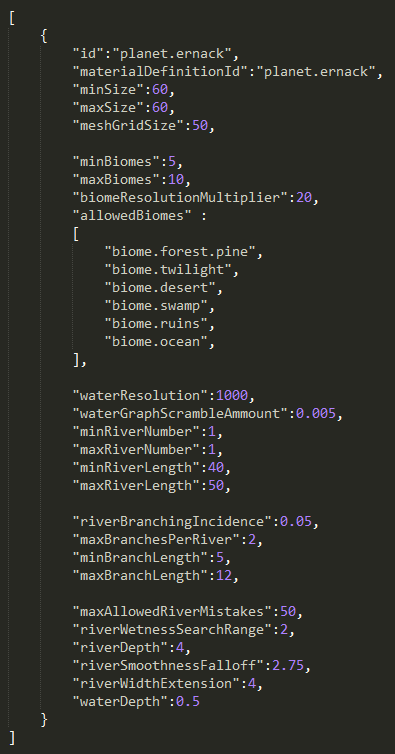
When the planet generation process starts, we take in several key variables via an RNG seed that controls how the planet looks and feels. This ranges from a number of different biomes/environments to the number of rivers and the length of the rivers.
Once all the variables have been selected, we get a piece of code that looks like this.
.png)
Here we can see an example of the planet definition data.
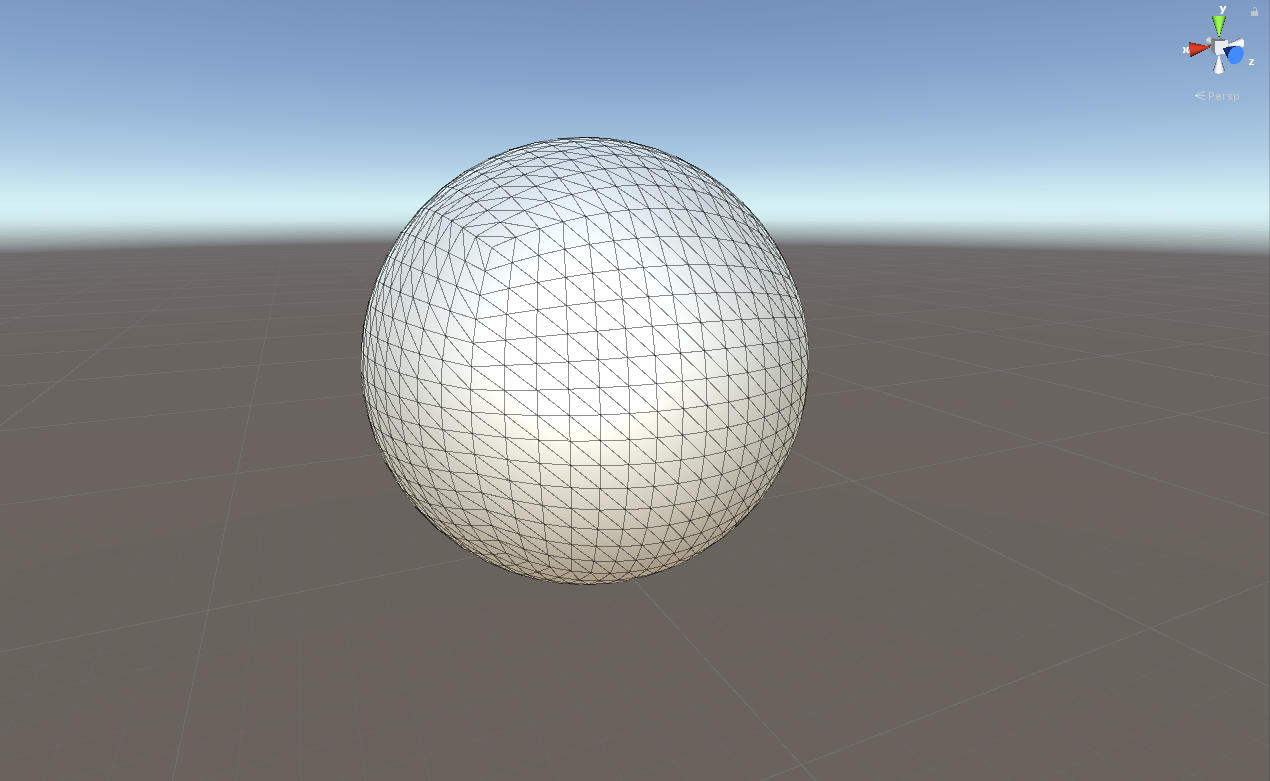
Once the planet definitions are set, it’s time to start creating the planet. We start by creating a mesh that forms a Quadrilateralized spherical cube, or Quad Sphere for short, (see image below) then add all of the planets variables to it, this will form the base of our planet.
Once the planet definitions are set, it’s time to start creating the planet. We start by creating a mesh that forms a Quadrilateralized spherical cube, or Quad Sphere for short, (see image below) then add all of the planets variables to it. This will form the base of our planet.
.png)
An example of a Quad Sphere that forms the base of a planet in Hash Rush!
Phase 2 — Preparing for Biomes
Step 1: Preparations for Textures — UV Mapping
With the foundation of our planet now set up, we now need to find a way to apply the various different regions, biomes, and environments to the planet.
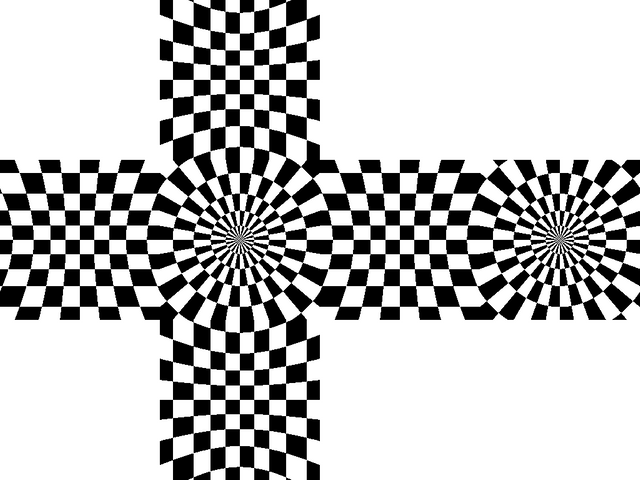
In order to do this, we first need to set up a UV Map for the mesh. UV mapping is the process of projecting a 2D image to a 3D model’s surface. Once we have the 2D image, we can easily apply a texture map to it, which in turn can be wrapped back around the 3D image producing the planet.
In the example below, we can see how a UV map is to create a representation of our planet earth.
.png)
An example of a UV Map for a Quad Sphere, an important part of our planet generation process.
Step 2: Preparing for the Regions — Voronoi Graphs
The next step is to divide our planet into regions. The purpose of this is so that each region can be assigned a specific Biome, we manage this by generating a Voronoi Graph on the surface of the planet. A Voronoi graph (sometimes called a Voronoi diagram) is a mathematical method of partitioning a plane into regions based on the distance to given points.
%20(1).png)
This is what our planet looks like with the Voronoi graph applied to it.
As the Voronoi graph is created by a script, there will always be parts that do not work too well, either they are too small or may overlap a bit. For that reason before moving to the next step in this phase we take some time to refine the placement of the Voronoi sites, to make sure that everything is perfect before applying any Biomes to the cells.
Phase 3 — The Biomes
Step 1: Geo-Modifiers
Our planet is now starting to take shape. At this point, we are almost ready to apply the Biomes to each Voronoi cell, however before we do that, we will apply the major geo-modifiers to our planet. In this step, we add in the core terrain to our planet; the mountains, rivers, volcanoes are all added now.
Step 2: Assigning Biomes
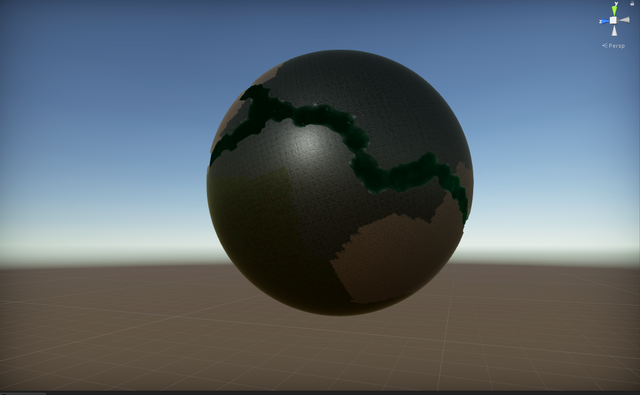
With the major terrain in place, it’s time for us to really get into planet building. In this step, we assign a Biome to each Voronoi cell.
In order to keep the quality high, we have several rules to make sure that neighbouring Biomes do not dramatically change, for example, the forest Biome can share a border with the swamp Biome, however, it should not share a border with a desert Biome.
.png)
Our planet at this stage.
If we wanted to, the entire planet can also be assigned a single Biome. So when you are playing Hash Rush, you may come across a planet that is one giant swamp, populated by many Fishers!
Step 3: Populating the Biomes
With each Voronoi cell assigned a Biome, we now have to fill the regions with the environment you would expect to find. Here we make use of several scripts to automate the process.
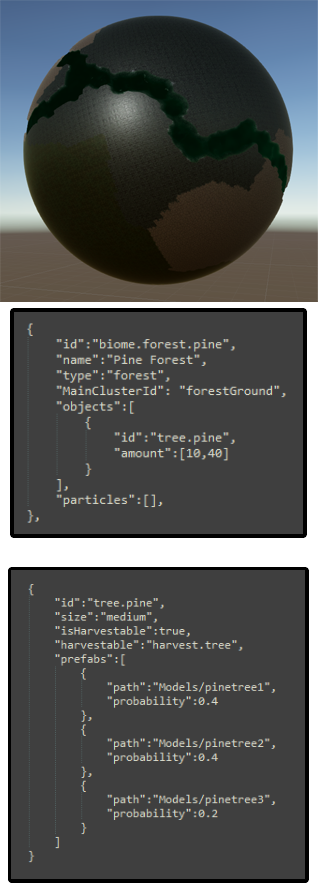
Taking a look at how Hash Rush populates the Biome, we have this process.
.png)
To explain the steps in the image:
We first look at the entire planet and then select a specific region. These regions are simply a Voronoi cell that has a Biome attached to it, and as each Biome comes with it’s predefined environment, we know how to proceed. In our case, the Biome is a Pine Forest, and it should only have one type of object found in that region; between 10 to 40 Pine trees.
The next step is to look at the characteristics of the objects that are to be found in the region, (pine tree’s in our case). From the code snippet, we can see that there are 3 different types of trees and that they are resource trees, meaning that our players will be able to harvest them for wood. Finally, we can also see that there are in-fact three variants of the pine trees, two of which (variant 1 and 2) will be slightly more common than the third variant.
Step 4: Topology
The result up to this point is that we have a planet that has the environments placed in each region (trees, swamps etc), however, with the exception of adding in the major geographical features (volcanoes, rivers), we have not yet tackled any of the topological features. This results in a planet that has trees, rock formations, rivers, but has no elevation or depressions at all. Look back at the previous images of the planet, and you will be able to see that it is flat.
So what we do now is to apply the geographic modifiers, elevate the ground, let the rivers sink into the planet, this will give us a more realistic planet.
Step 5: Refining the Biomes
Up to now, the steps that we have described are fully automated. Unfortunately, this can result in a few less-than-ideal-scenarios, especially when there are multiple objects that need placing. For example, if crystal veins (crystal mines can only be built on these locations) were included as well as trees, we would have to make sure that the in-game units would be able to walk to the area.
For this reason, we now take a step to do some manual work refining the Biomes, as well as adding in the finer details to each Biome.
In this step we:
- Make sure that all areas of the planet that need to be accessible are accessible to the players.
Progression from one Biome to another looks and feels natural. - Manually place general objects such as rocks and trees, and create natural paths that help the player.
- Add in Biome specific sound. (1)
- Create the sky and the Atmosphere
(1) We tackle the sound with a mindset that each Biome should be as unique as possible. To help achieve that feeling we decided that each Biome should have its own unique soundtrack. To make this work, audio components and triggers are added, so that as the player moves to look over a particular Biome, the soundtrack for that Biome is started (or is queued).
Step 6: The Atmosphere
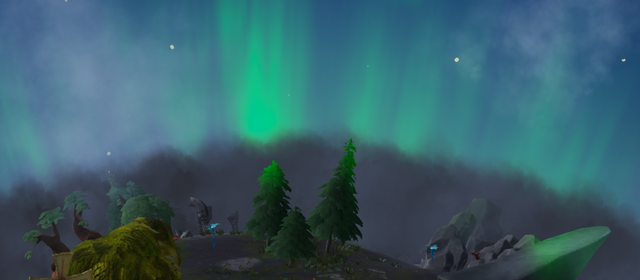
The final step of this phase is to add the planet’s sky and atmosphere. We think that it is the attention to fine details that separates a good game from an excellent game, and so we’ve made sure to give each planet as much detail as possible, the sky and atmosphere of our planet is a great example of that.
.png)
Phase 4 — Pathfinding
By this point, our planet is almost complete, but before we can declare it ready to be used we need to run our pathfinding manager. This script travels through the entire planet and detects all collision objects, and forms the pathfinding.
The pathfinding method that we use is the tried and tested A* algorithm, but we use a point graph that is generated by placing points on the planet at a specific distance from one to another on the regions that the units can walk on.
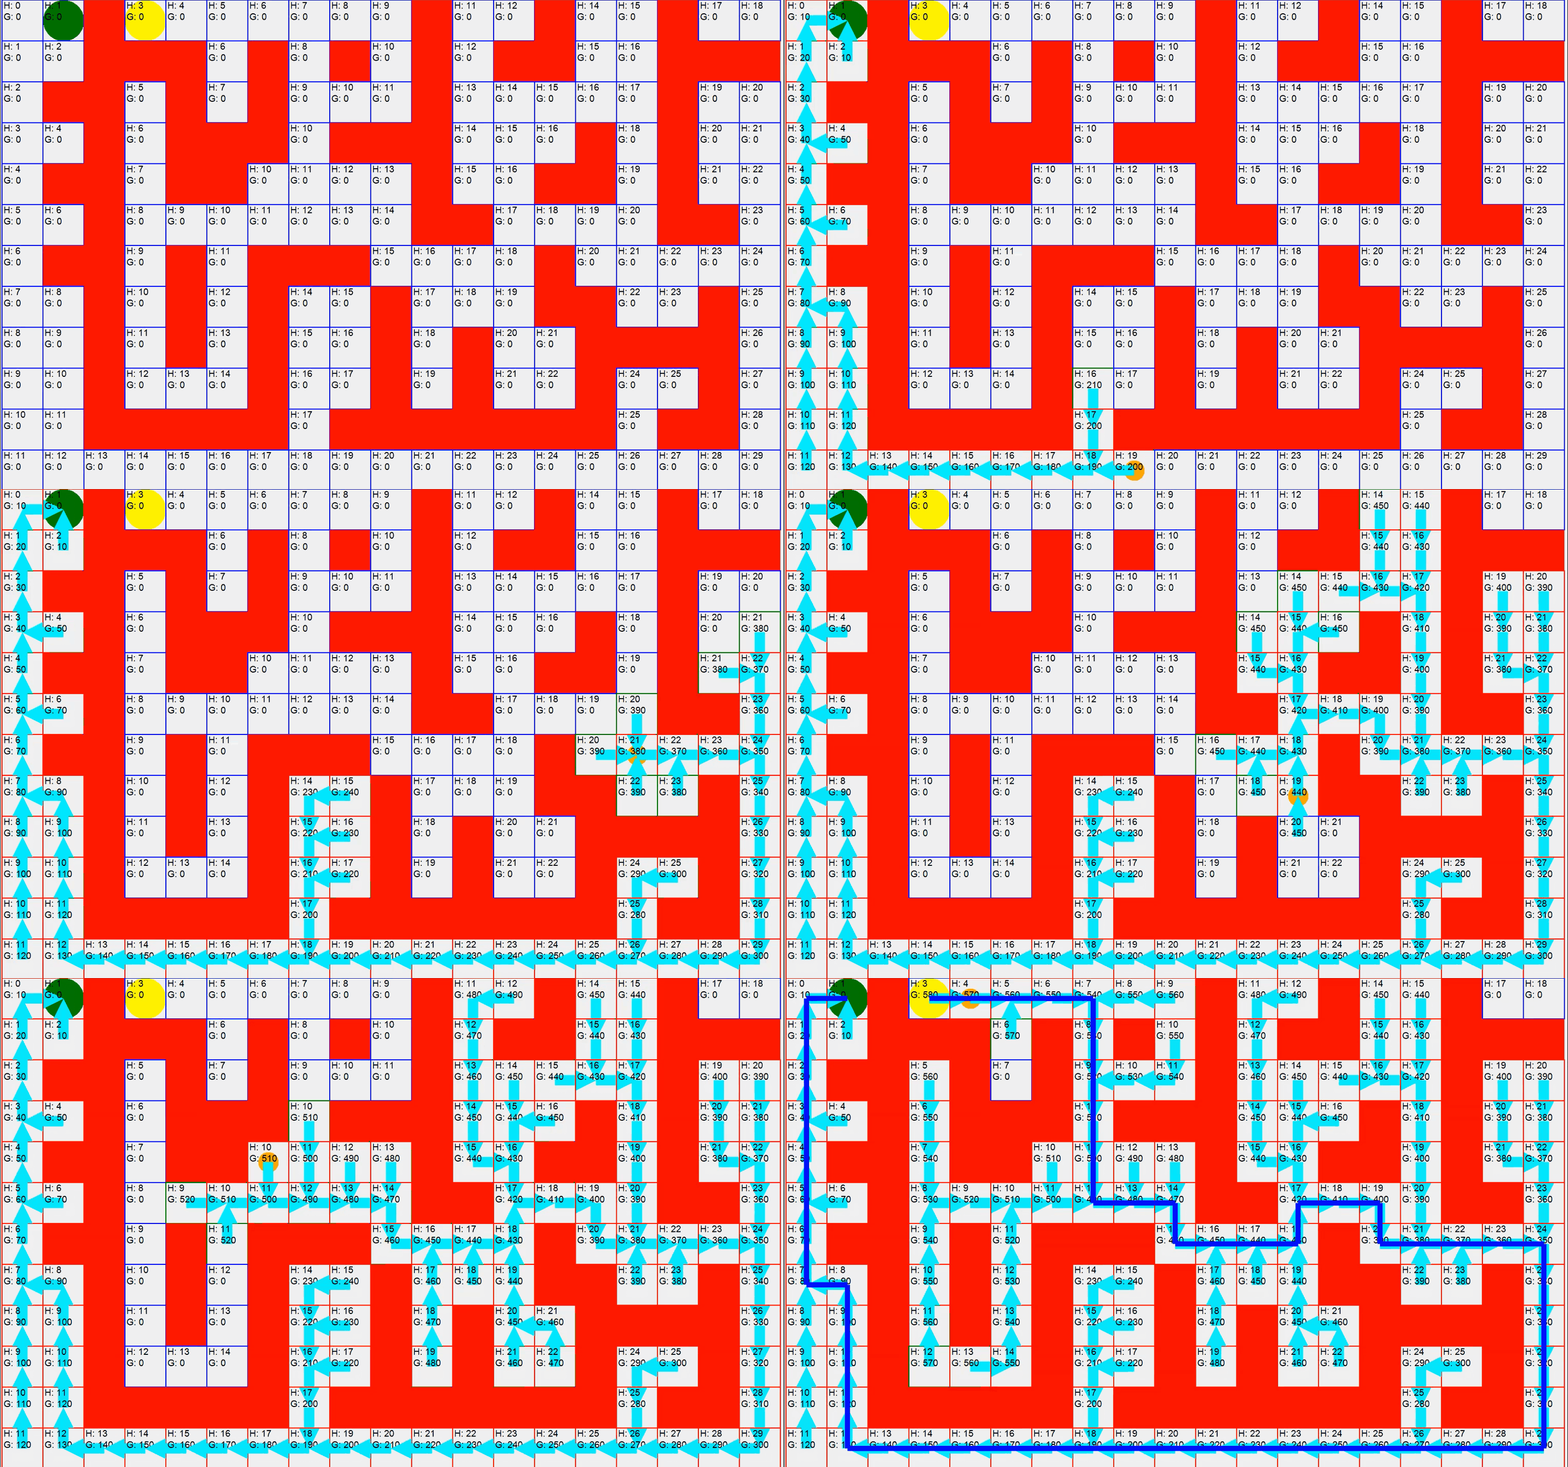
An example of how A Star Pathfinding works, credits to Frank De Jong for the example program.
To understand the GIF, the A* Pathfinding is an algorithm that finds the shortest path from point A (in our case the green dot) to point B (yellow dot) while taking into account the obstacles on the way (the red blocks represents the obstacles). Hash Rush uses this algorithm to map the entire planet so when you move a unit in the game, it will know the shortest route to the destination, while avoiding all obstacles.
The Results
With the pathfinding complete we now have our completed planet, ready for our players to explore and mine.
%20(1).png)
Our completed planet
So, there we have it, a step by step guide on how Hash Rush creates the planets that our players will master. We hope that you’ve enjoyed reading this dev blog, it’s surely been exciting and fun to write it up for you. We’ll be back soon with our next instalment — talking about how Hash Rush handles cryptocurrency transactions by using our very own Rush Network.
For the latest Hash Rush news, go to our website, follow our blog, join our newsletter or talk to us on Discord!
Your post was upvoted by the @archdruid gaming curation team in partnership with @curie to support spreading the rewards to great content. Join the Archdruid Gaming Community at https://discord.gg/nAUkxws. Good Game, Well Played!