When deciding to create a video game it is vital to have an idea of what you want to do, in case you do not have one, we will go to the second step, make a meeting with your work group to listen and evaluate the opinions and ideas of all.
Once the main idea is conceived, it is necessary to reinforce it, carrying out an investigation on the specific topic on which your videogame will be based, such as, gender, history, platforms, context, programming language, type of art, etc.
In our case we decided to create something basic and fun that we could offer for free in our institution and at the same time be recognized for our work, for this reason we opted for a parody of our university creating a "Runner", which is simply based in traveling a map without specific objectives.
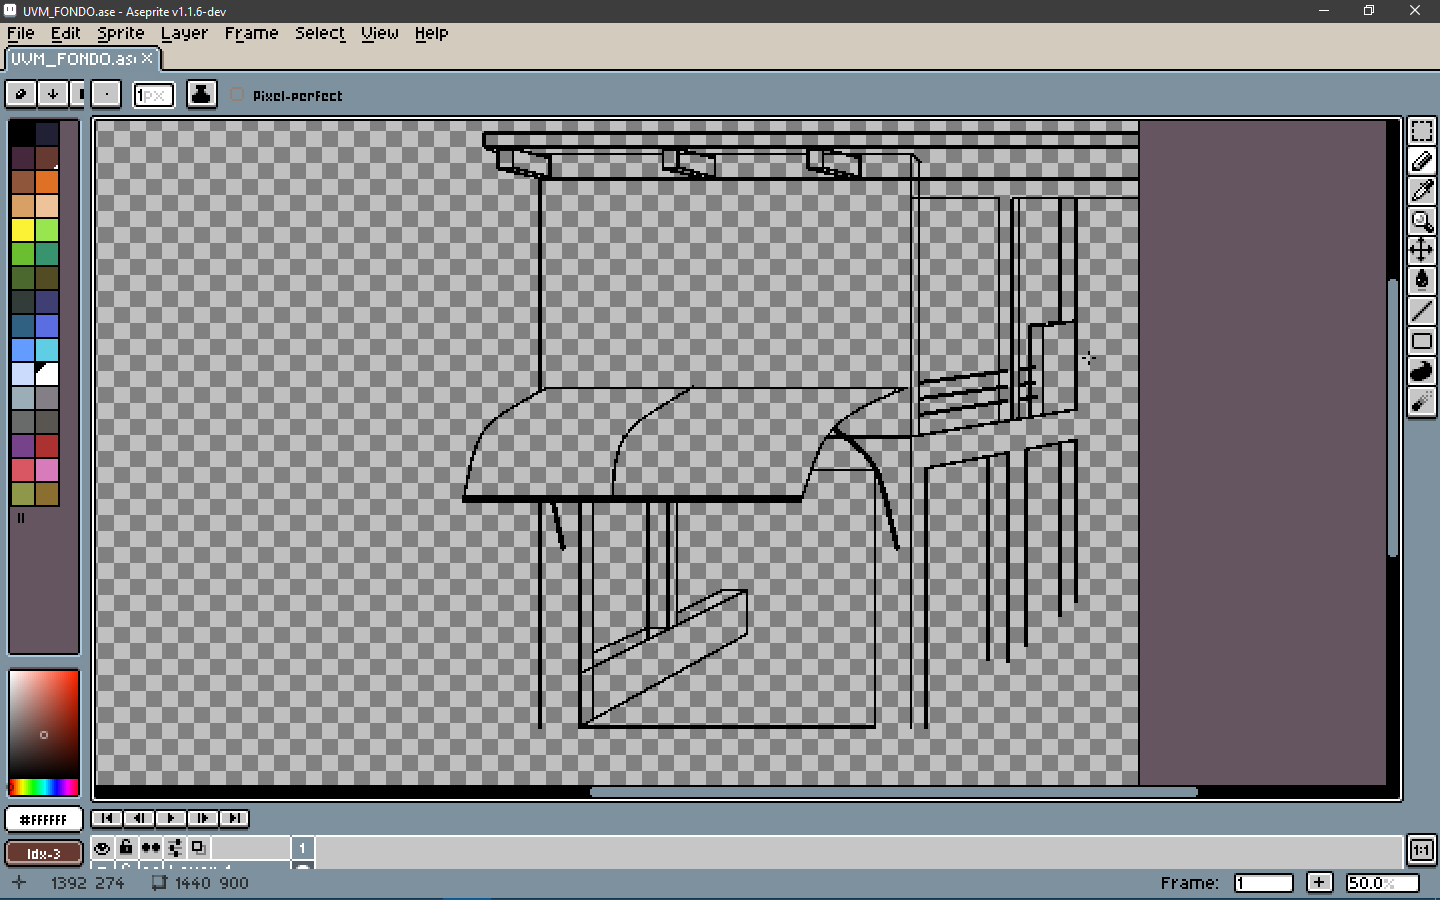
For being one of our first projects we decided to create all the art in two dimensions "2D" with a pixelated touch. For this we use a program called Aseprite version 1.1.6.
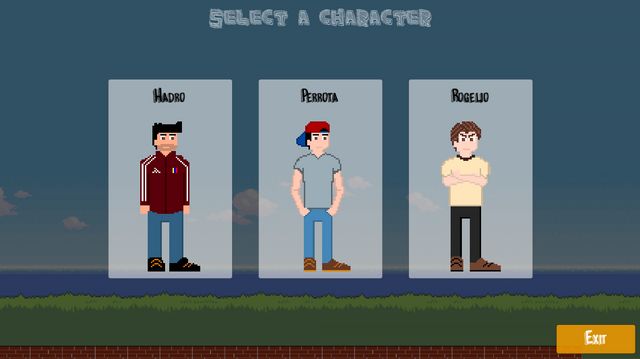
One of the reasons for this project was to let us know, it was decided that the characters of the video game would be its creators, so we made three characters each personalized and with their respective names.
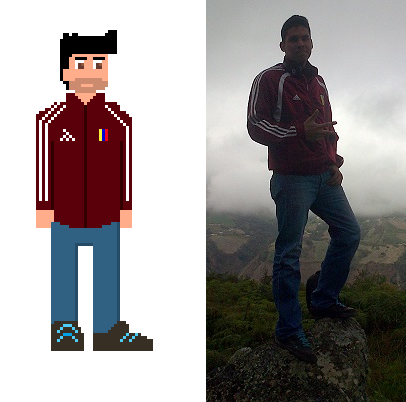
Yes, that's me. With the jacket of my beloved Venezuelan soccer team.
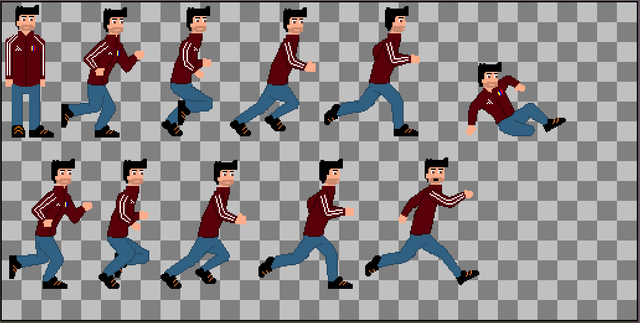
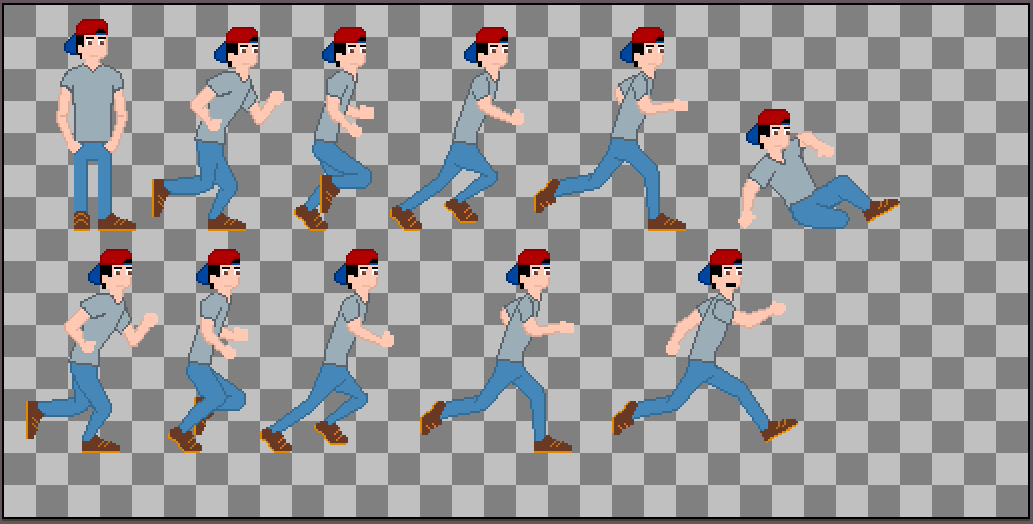
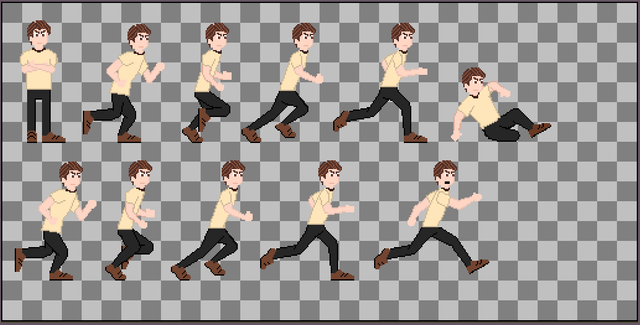
My specialty is designing in 3D, so it was a real challenge to learn and create 2D designs since it was the first time. However, it's like drawing with Paint, you just have to practice and polish your skills. We must create a sequence of designs of our character for their different movements and so then be able to create a fluid animation with these images, in my case I have created one for the "static" state, one for the "jump", one for the "slip" "And eight for the state" run ". We must keep in mind that our designs are proportional to each other, in a few words they must have the same height, the same thickness and be attentive to details.
Then we create the platforms or the ground by which our character will run, jump and slide. Here we can be creative and create concrete, grass, wood, even clouds. In addition to this we created four more objects for this project, one will be the currency that will give us points along the map and the other three will be the powers that our character will be able to obtain to overcome his journey.
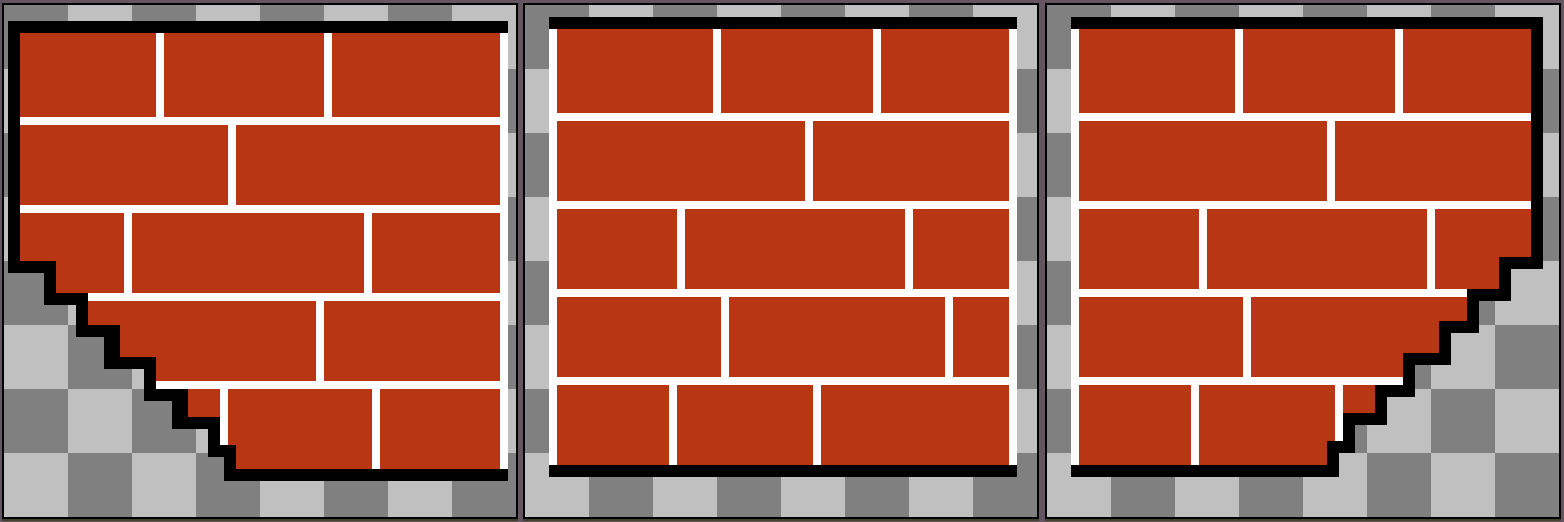
Three sections with which we can create platforms of different lengths.
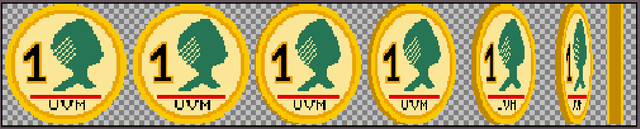
Currency with its sequence of movements to turn.
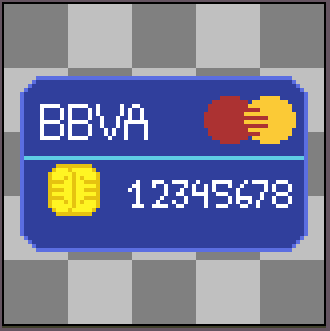
Credit card
You attract the coins to you for a period of time.
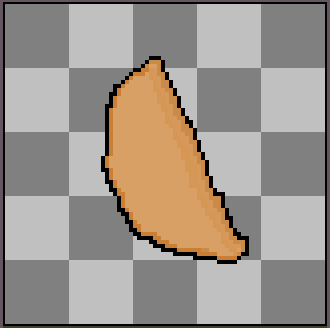
Patty
You attract the powerups to you for a period of time.
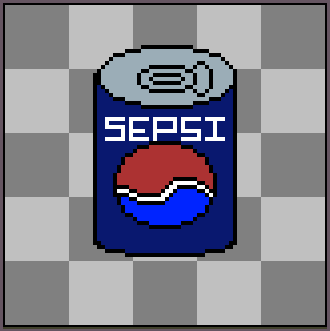
Can of soda
It allows you to fly for a period of time.
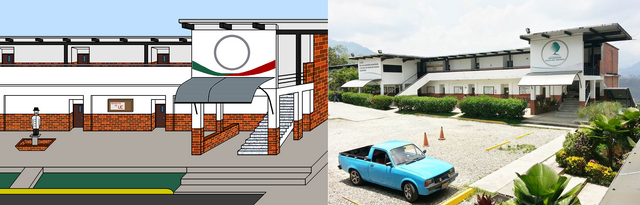
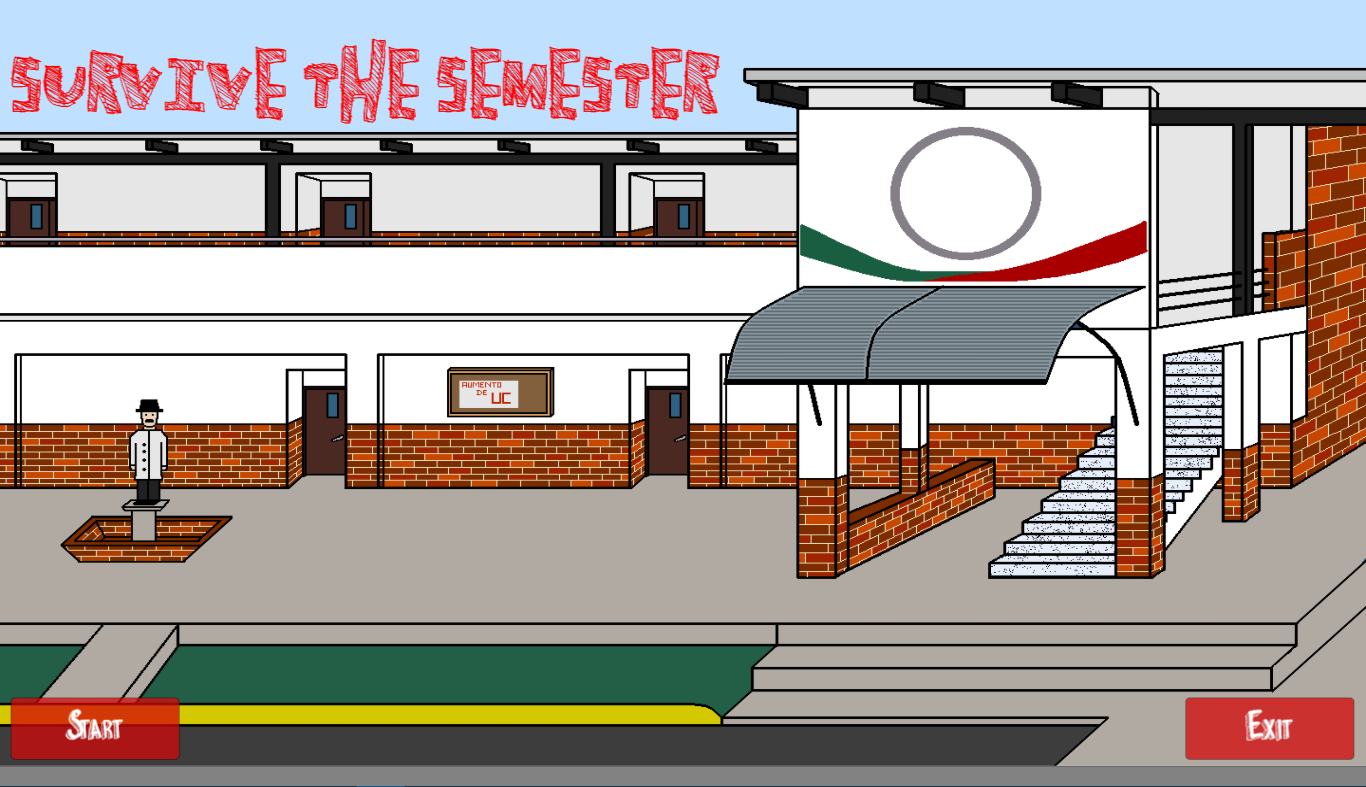
Finally we created a design for the main menu, for which we took as a reference a photograph of the institution, leaving aside logos and names to avoid legal problems.
Scene construction
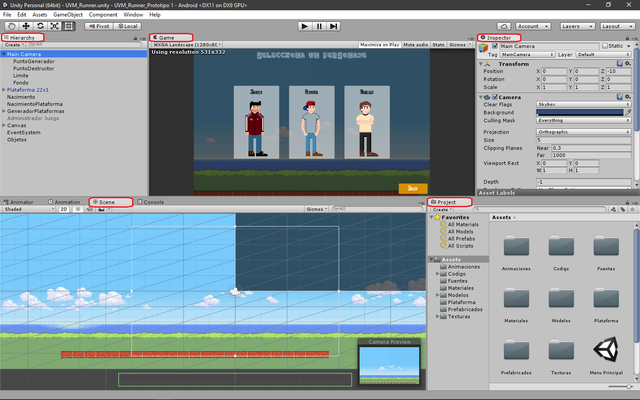
For this we will use the Unity program, which is a free software that allows us to create applications and video games in 2D, 2.5D and 3D. This can be used with the following programming languages C Sharp (C #) or JavaScript (JS).

This program has many tools to prepare and build our videogame, but we will focus on the most important ones, which are:
Hierarchy: In this window we will list all the objects that we have in the scene, whether they are visible or not, such as cameras, lights, characters, among others. In addition we can also create new objects in this one.
Scene: In this window we can observe, move, rotate and select the objects that we have in the scene, in other words here we will build the scene to our liking.
Project: In this window we will visualize all the folders of our project, in which we will have designs, textures, animations, among others. From here we pull everything we need to our scene.
Inspector: In this section we will see the details of the object that we have selected such as position, type, parameters, etc.
Game: In this window we can visualize the running videogame and play it as a test to find faults, it allows you to work with different resolutions to see how it adapts.
At the time of starting the construction we must create certain objects in our scene, such as:
A main camera (usually appears by default in the scene).
An empty object to store our codes.
An object (Start or birth point) which we will position in the place where our character will appear when the game starts.
An object as a point of birth for the platforms that will appear.
A base platform for our character to position himself when he appears.
A plan which we will give dimensions that cover the entire camera, to then place an image and be our stage background.
After this we will configure the animation of our character, for this we open the window "Animator". Then we create a state for each animation sequence (static, jump, run and slide). We will work with three variables velocity, inGround and inAir so we will know when it is running, when it is jumping or sliding. In the following image we will see how transitions are.
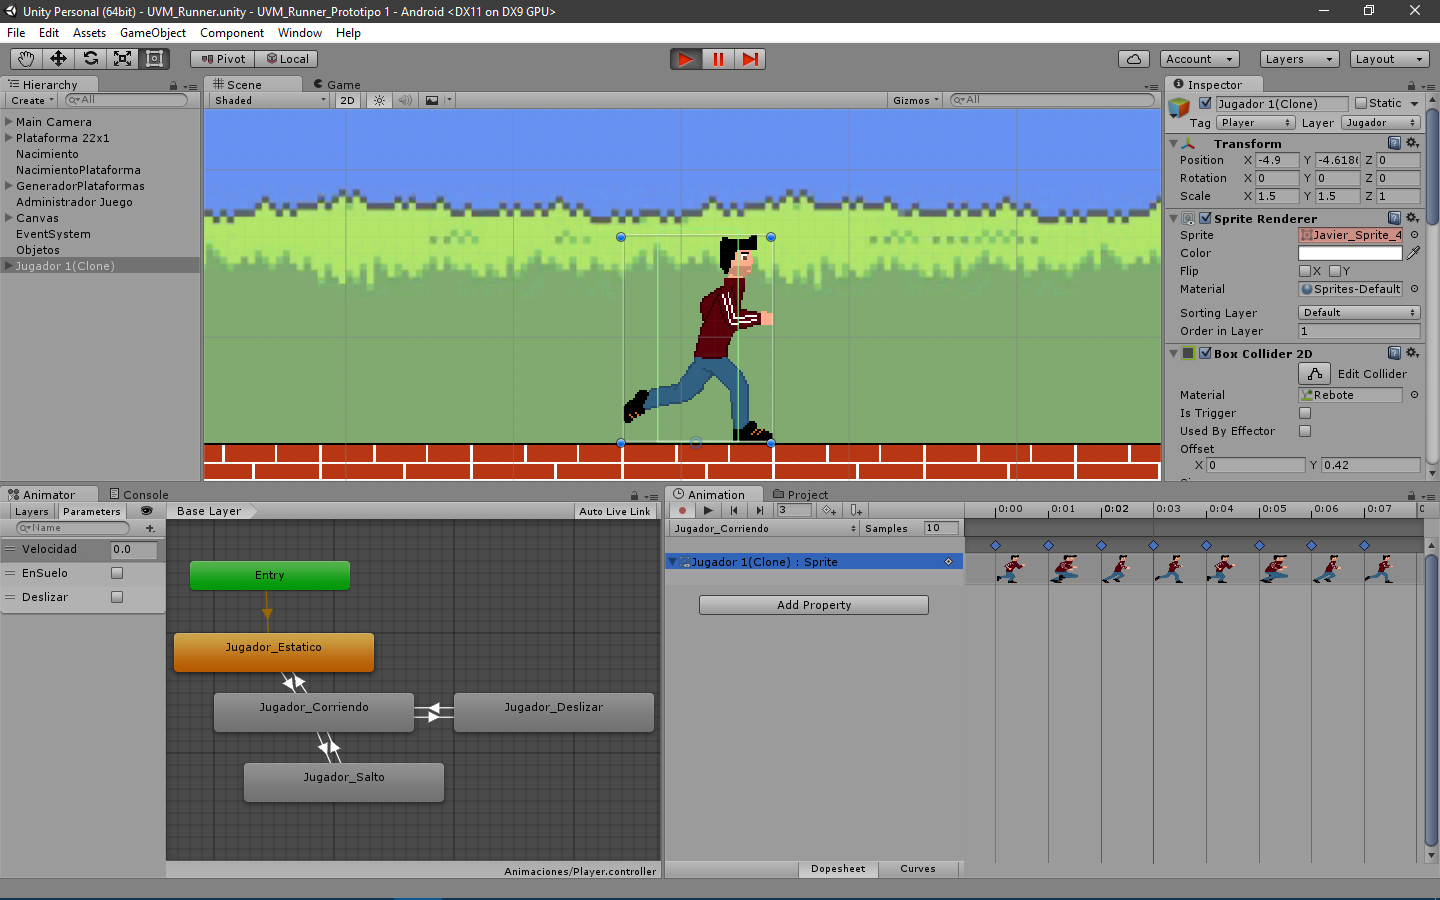
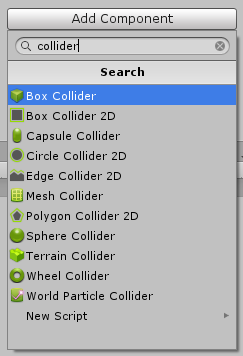
Once the animations are ready, we start creating the collisions, because we need our character to detect the ground through which he runs. For this we simply select the object in this case first the character and then the platforms, in the window "inspector" we will select add component, we write "Collider" and we will find several options with different forms we will use the one that suits us best for our object, although for the purpose of testing we can use the square "Box Collider 2D" .
Programming
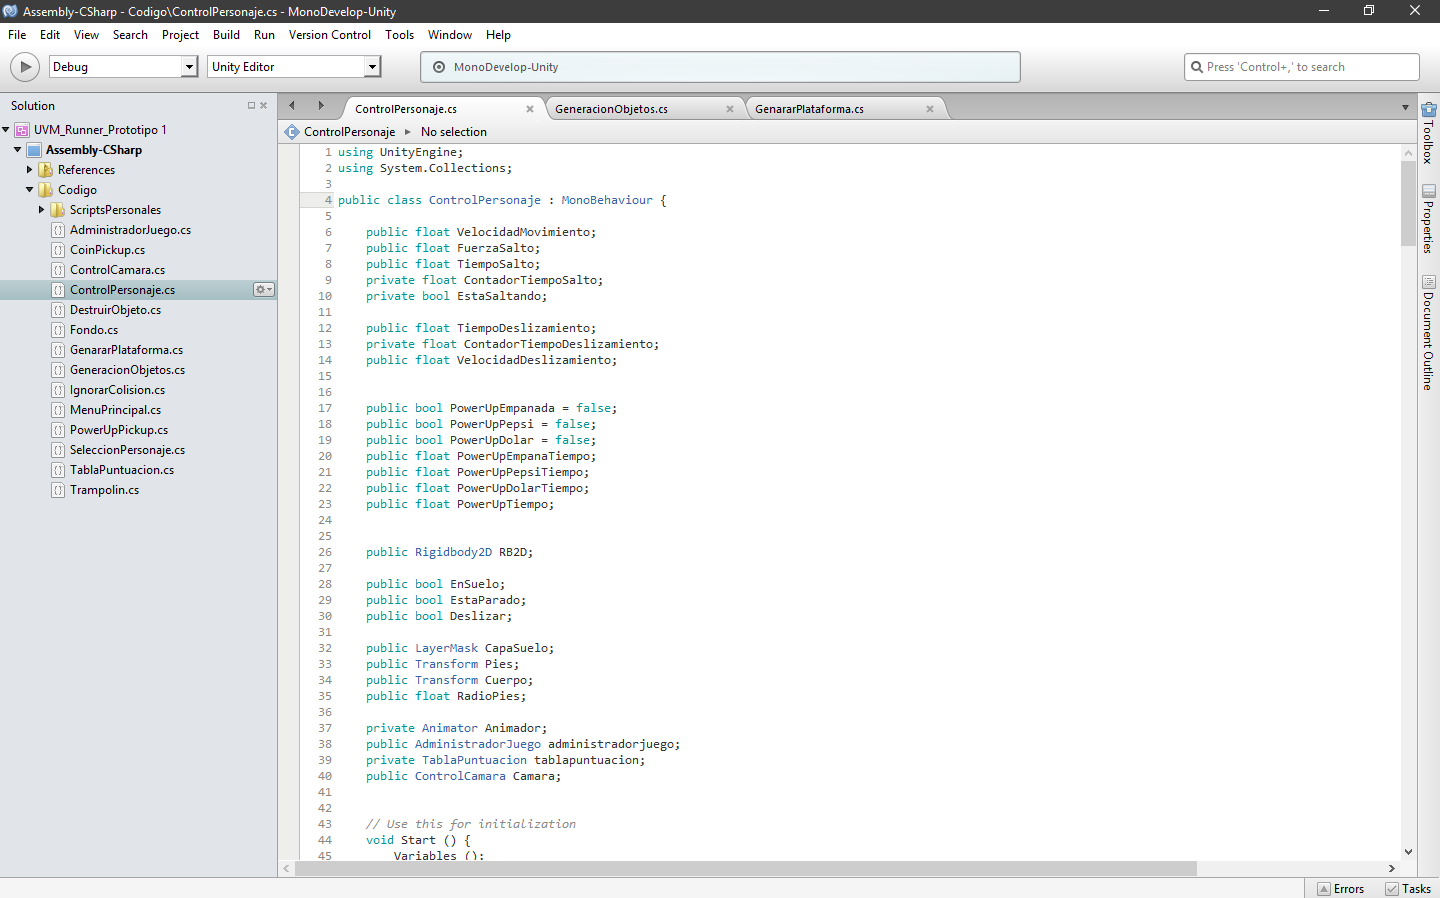
In this last stage we create what gives life and action to our game, the code. The main thing is to give movement to our character and to execute the desired actions when we press a certain key. Unity to do this gives us two programs that come with it, one is called MonoDevelop (which is what I use) and VisualStudio.
Not to make this post so long I will focus on the movement generated to play it on a computer and the generation of platforms, but here below I will show you all the code files that were used in the project (in the column on the left).
CharacterControl.cs
void Update()
{


        if (!standing)
            {
                RB2D.velocity = new Vector2(MovementSpeed, RB2D.velocity.y);

            //Jump
            if ((Input.GetKey(KeyCode.UpArrow) || Input.GetMouseButton(0))
                {

                if (!Slide)
                {
                    if (inGround)
                    {
                        TimerJump= JumpTime;
                        RB2D.velocity = new Vector2(RB2D.velocity.x, JumpingStrength);
                        isJumping= true;
                    }

                    if (TimerJump> 0 && isJumping)
                    {

                        RB2D.velocity = new Vector2(RB2D.velocity.x, JumpingStrength);
                        TimerJump-= Time.deltaTime;
                    }
                }

                }

            if (Input.GetMouseButtonUp(0) || Input.GetKeyUp(KeyCode.UpArrow))
                {
                    TimerJump= 0;
                    isJumping= false;
                }

            //Slide

            if (TimerSlide< SlideTime&& !Slide)
            {
                TimerSlide+= Time.deltaTime;
            }

            if (Input.GetKey(KeyCode.DownArrow) || Input.GetMouseButton(1))
            {

                if (TimerSlide> 0) {
                    Slide= true;
                    RB2D.velocity = new Vector2 (RB2D.velocity.x + SlideVelocity, RB2D.velocity.y);
                    TimerSlide-= Time.deltaTime;
                }

                if(TimerSlide< 0  || TimerSlide== 0)
                {
                    Slide= false;
                }

            }

            if (Input.GetKeyUp(KeyCode.DownArrow) || Input.GetMouseButtonUp(1))
            {
                Slide= false;
            }


                Animador.SetFloat("Velocity", RB2D.velocity.x);
                Animador.SetBool("inGround", inGround);
                Animador.SetBool("Slide", Slide);


            }
            else
            {

                if (Input.GetKeyUp(KeyCode.RightArrow) || Input.GetMouseButtonUp(0))
                {

                    Camara.GetComponentInChildren<Background>().enabled = true;

                    standing= false;
                }

            }

    }
Maybe for some it seems a bit complicated, so I'll explain their function a bit. The running function is activated with the variable standing, if its status is "False" the character will start running. At the beginning of the game this is "True" and when we press Left Click or the right arrow will pass to "False", this value is automatically modified to "True" when the character dies.
Then we have the variable isJumping if this is "False" Pressing Left Click or Up Arrow will allow us to jump and while we are in the air this will change to "True" It returns to its original value when we touch the ground.
Then we have the slide action that is activated with the right click or the down arrow and also has a variable called Slide that works in the same way as jumping. It should be noted that each process except the running have a counter, this in order not to jump or slip infinitely. Finally, we send the data of the variables to the external animation variables so that they execute the movement.
GeneratePlatform.cs
void GenerationPlatforms()
    {
        if (transform.position.x < GenerationPoint.position.x) {

            int Platforms= Random.Range (2, 6);

            for (int i = 0; i < Platforms; i++)
            {
                float PositionY = StandarHeight[Random.Range (0, 6)];

                Distance= Random.Range (MinDistance, MaxDistance);

                PlatformsSelector= Random.Range (0, Platforms.Length);


                transform.rotation = Quaternion.Euler (transform.rotation.x, transform.rotation.y, Rotacion);

                transform.position = new Vector3 (transform.position.x + PlatformsWidth[PlatformsSelector] + Distance, PositionY, transform.position.z);

                Instantiate (Platforms[PlatformsSelector], transform.position, transform.rotation);

            }
        }
    }
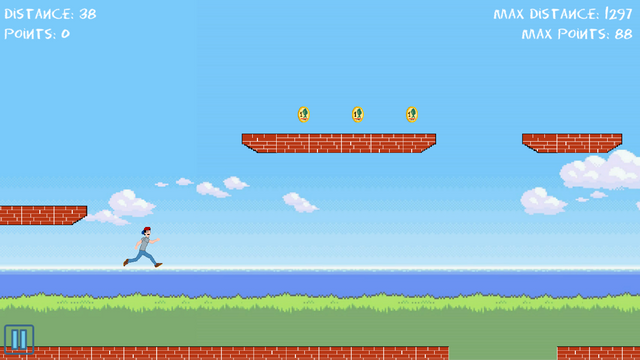
Now for the generation of random platforms we must first verify that the position where the next platform is going to be generated is far enough from the previous one, then it is given a random length, besides that it appears at a random height and distance under a range settled down. Next we assign to our point of birth neutral values of position and rotation so that our platform appears well positioned, finally with the command "Instantiate" we will make our platform appear directly from a predetermined folder where they are stored the files. With that we can run our game, below I attach an image of how the game looks.
Well friends I hope you have liked this project, here below I will leave the download links for you to try and give me your opinion, I accept any suggestion or opinion on your part. Later I will be uploading projects from scratch for those interested in this subject and who wish to learn more about this wonderful area. I thank you that you have taken the time to stop by and see my post, a hug and until next time.
😜 | @Hadro | Upvote | Follow | Restem | @Hadro | 😜
This is so cool! I'm very jealous that you and your friends can just create a game if you fancy making one! Very cool mate well done.
Thank you very much, when you like something, you always dedicate yourself to the maximum. regards
True!
@originalworks
The @OriginalWorks bot has determined this post by @hadro to be original material and upvoted it!
To call @OriginalWorks, simply reply to any post with @originalworks or !originalworks in your message!