TUTORIAL: Random Name Picker Part 3

In this tutorial we are going to do the UI which will show the name that is picked. links to part 1 and part 2 of this Tutorial Series.
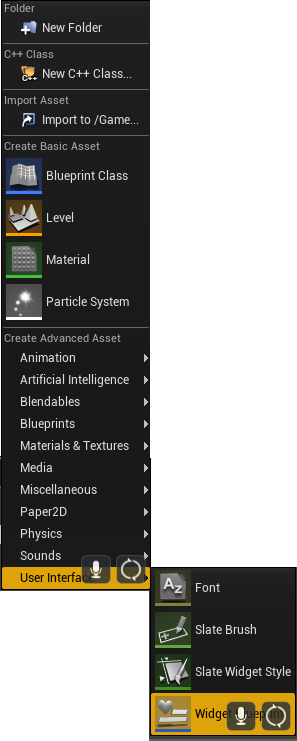
As we have done in part 2, we need to create a new blueprint. This time we are going create a Widget blueprint. To do that, you will need to right click in the content area which will show a menu. Unlike part 2 this time we will go to the bottom of the menu and hover over User Interface, A side menu will appear. go down to Widget Blueprint and select it.
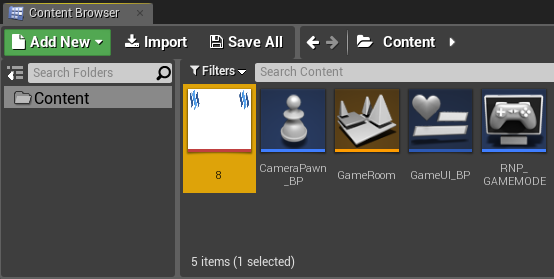
Once again call it what ever you want. In my case I am going to call it GameUI_BP. Once you have named it and saved it, double click on it and open it up.
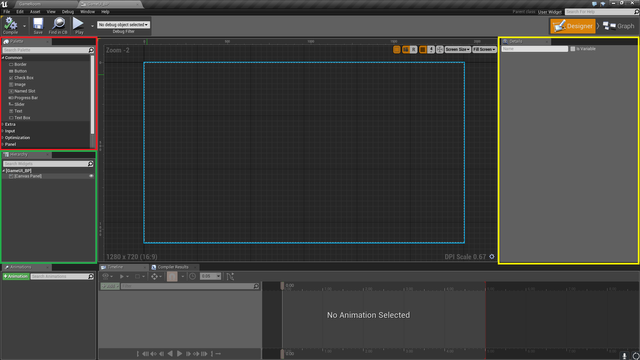
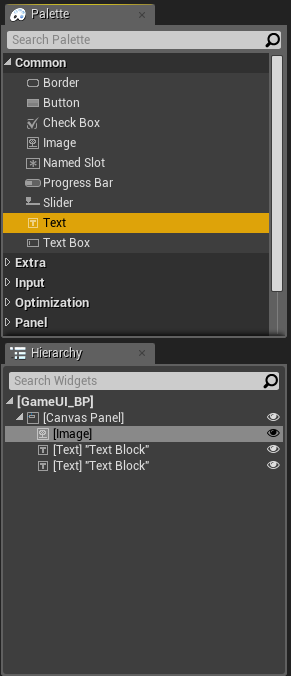
Once you open the widget blueprint up, you'll see this layout. The BLUE BOX is which represents the screen. The RED BOX shows all the things that you can add to put on the screen. The GREEN BOX is the Hierarchy of the items as you can stack images, text boxes progress bars and so on. The YELLOW BOX is the detail of each item. So you can adjust size, opacity, name and also turn the object into a variable so you can add code to adjust or change it during game play.
First, we'll add a image as our background. So look for image, hold left mouse button and drag it over Canvas Panel. You should see it highlight and show text saying image with a green tick. Let go of the left mouse button and it will drop a image container into the Canvas Panel. As shown below.
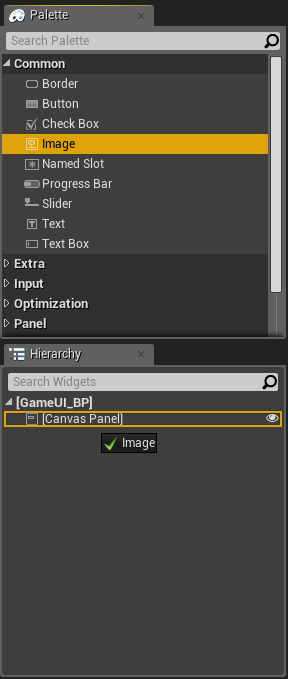
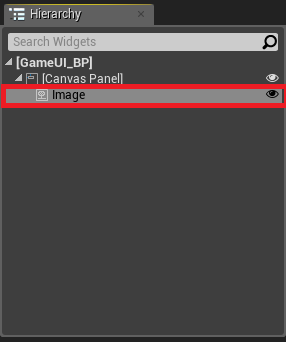
Now select image in the Hierarchy Tab, Shown in the RED BOX.
Now go to the details Tab, click on Anchors. A drop down menu will appear. Click on the center Anchor. What this does is, centers the UI no matter the screen resolution.
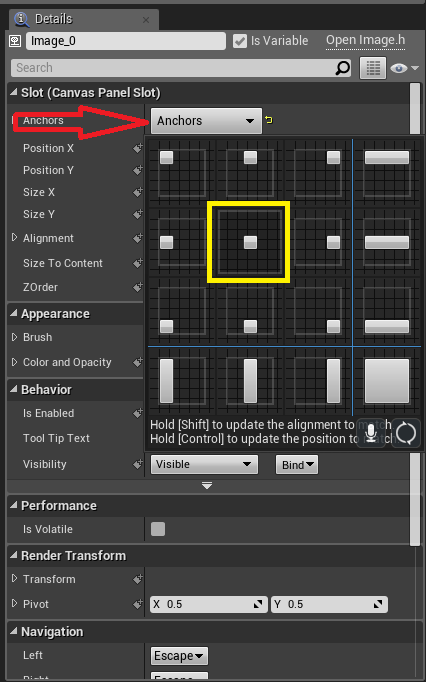
This isn't going to be changed by code so we don't need it to be a Variable. So you can un-check that(just left click in the box). Then we are going to set the image size and position.
Position X : -860
Position Y : -440
Size X : 1720
Size Y : 880

Now we need to import the image that is going to be our background of the UI. So go back to the game editor. Go down to the Content Browser Tab. You'll see Import. Click on that.
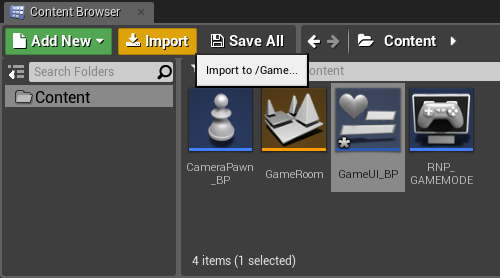
Find where you save the background image from part 1. click on it and import.
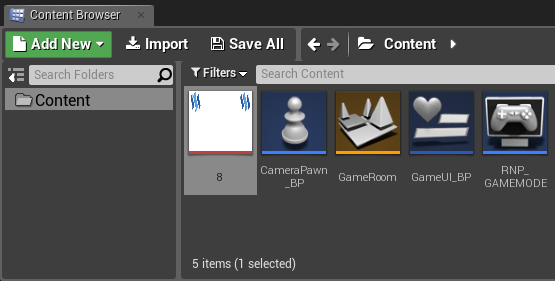
Once you have done that, it should show up in the Content Browser.
Select it and then go back to the Widget Blueprint. Go to the Details Tab, look for Appearance, and click Brush. This will expand and show the section that we will be placing our background image in. Then click on the Arrow Icon pointing to the left. This will drop our image and set it as the background.

Before we go any further. I suggest clicking compile and save in the Widget Blueprint.

Now we need 2 Text Blocks. One is for doing our Draw Number and the other is for Printing the Name that is picked. So just like we did with getting image and dropping onto our Canvas Panel. We need to pick Text hold it with our left mouse button and drag it down so it is over Canvas Panel and drop it there. Do that twice. So you Hierarchy Tab should look like this.
In the Hierarchy Tab, click on the first Text Block. Then go to the Details Tab, Click on Anchors and once again click the center Anchor like we did with the Image. Then set the positions and sizes to.
Position X : -852
Position Y : -258.5
Size X : 1700
Size Y : 75
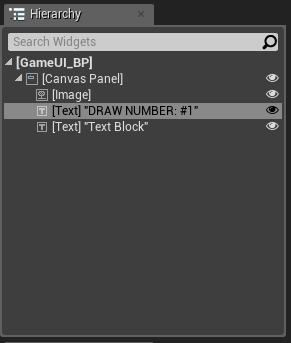
In Content put what you want. In my case I am going to use DRAW NUMBER: #1. Then in appearance you'll see font, set size to 50. Then go down to Justification and set that to center.
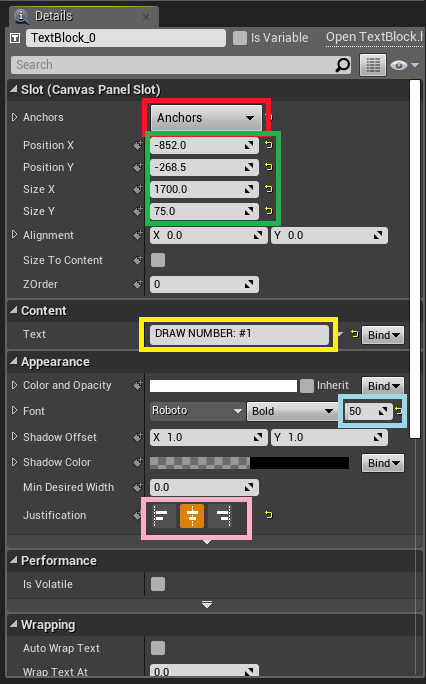
Now go to Color and Opacity in the Appearance section, left click. The Color Picker will open and set the colour to black.


This time we are going to know do the other Text Block which will be the Text Block that will display the name that is picked from the list of names.
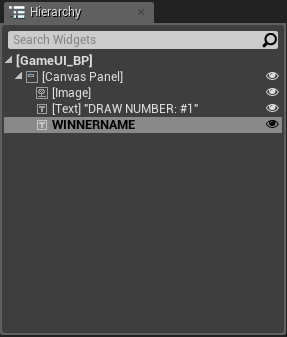
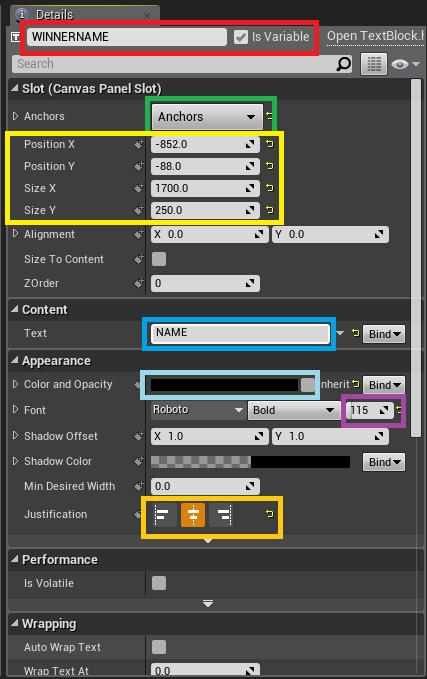
So Select the Second Text Block. This time in the Details Tab, We'll give the Text Block a name I put WINNERNAME and set it as Is Variable by clicking the box. This will give us a variable which we can change via code. The variable name is what we just named it (in my case I named it WINNERNAME). Then go to Anchors and once again click the center Anchor. Then set the positions and sizes too.
Position X : -852
Position Y : -88
Size X : 1700
Size Y : 250
In the Content Section Just Type NAME, Then in the Appearance section, Set color and Opacity to black, Size to 115 and Justification to center.
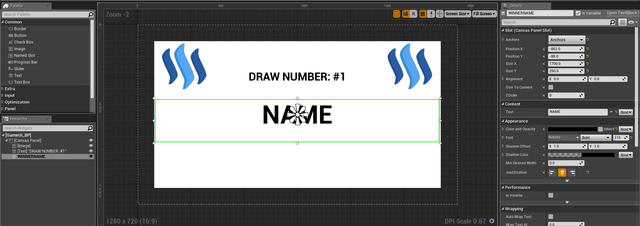
Your Widget Blueprint should look like this. Once you are done Click compile and save.
That is it for Part 3 of this tutorial. We have finished setting up the UI. The next Tutorial Part 4, we will do the coding and get it so the name will be picked from a list of names.