TUTORIAL - FUSION360, create a knife in few minutes.
A short tutorial on how to create a Mora knife in Fusion.
Autodesk Fusion is a simple and intuitive cad program that is free to use for students, educators or enthusiasts (that is if you make less than 100 000 USD a year). It is cloud based and has all the bells and whistles that the other big cad systems out there also have. I have no knowledge nor equipment to record stuff in video, for Youtube, so this will be an image driven tutorial. But you will se that this program is very easy to work with.
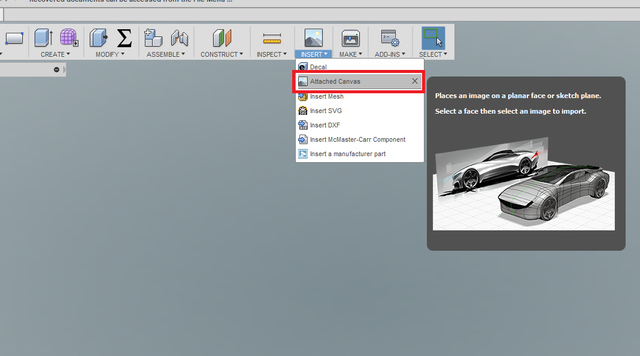
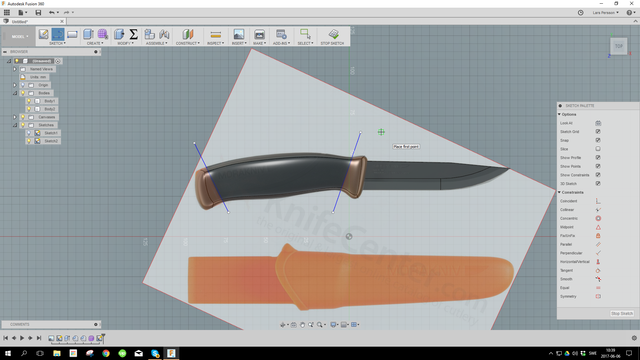
Step1. insert an image of the knife being modeled.
.png)
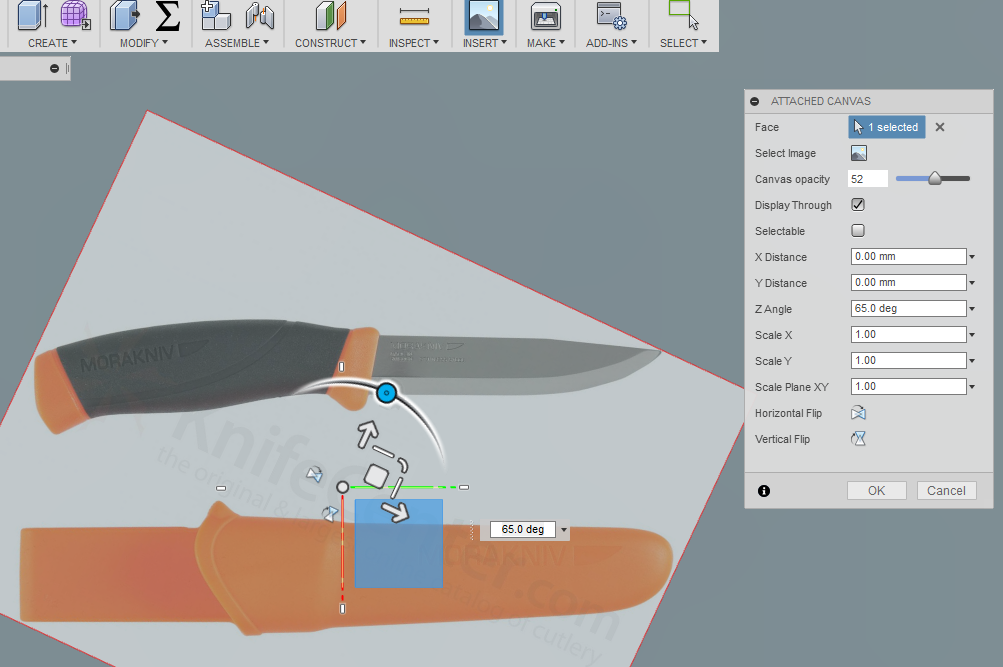
Position it and lower the opacity to around 50%. Check the display through box.
.png)
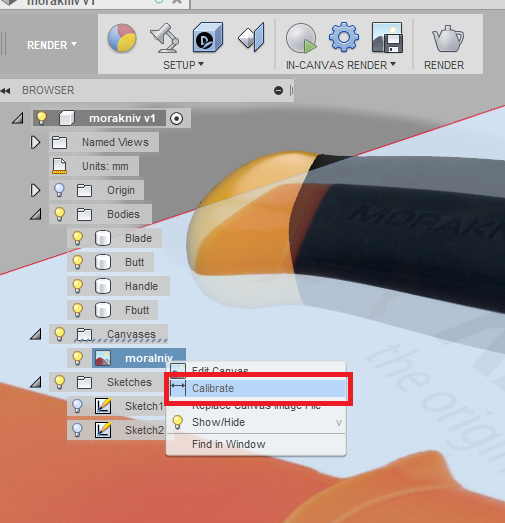
Calibrate the size of the image by right clicking on the Canvases entry in the browser to the left and choose calibrate. Klick on two places on the image and specify the desired distance between these two points and the program will stretch the image to the correct size.
.png)
Step 2. Design the blade
Start a sketch on any plane. Outline the blade in any way you fashion.
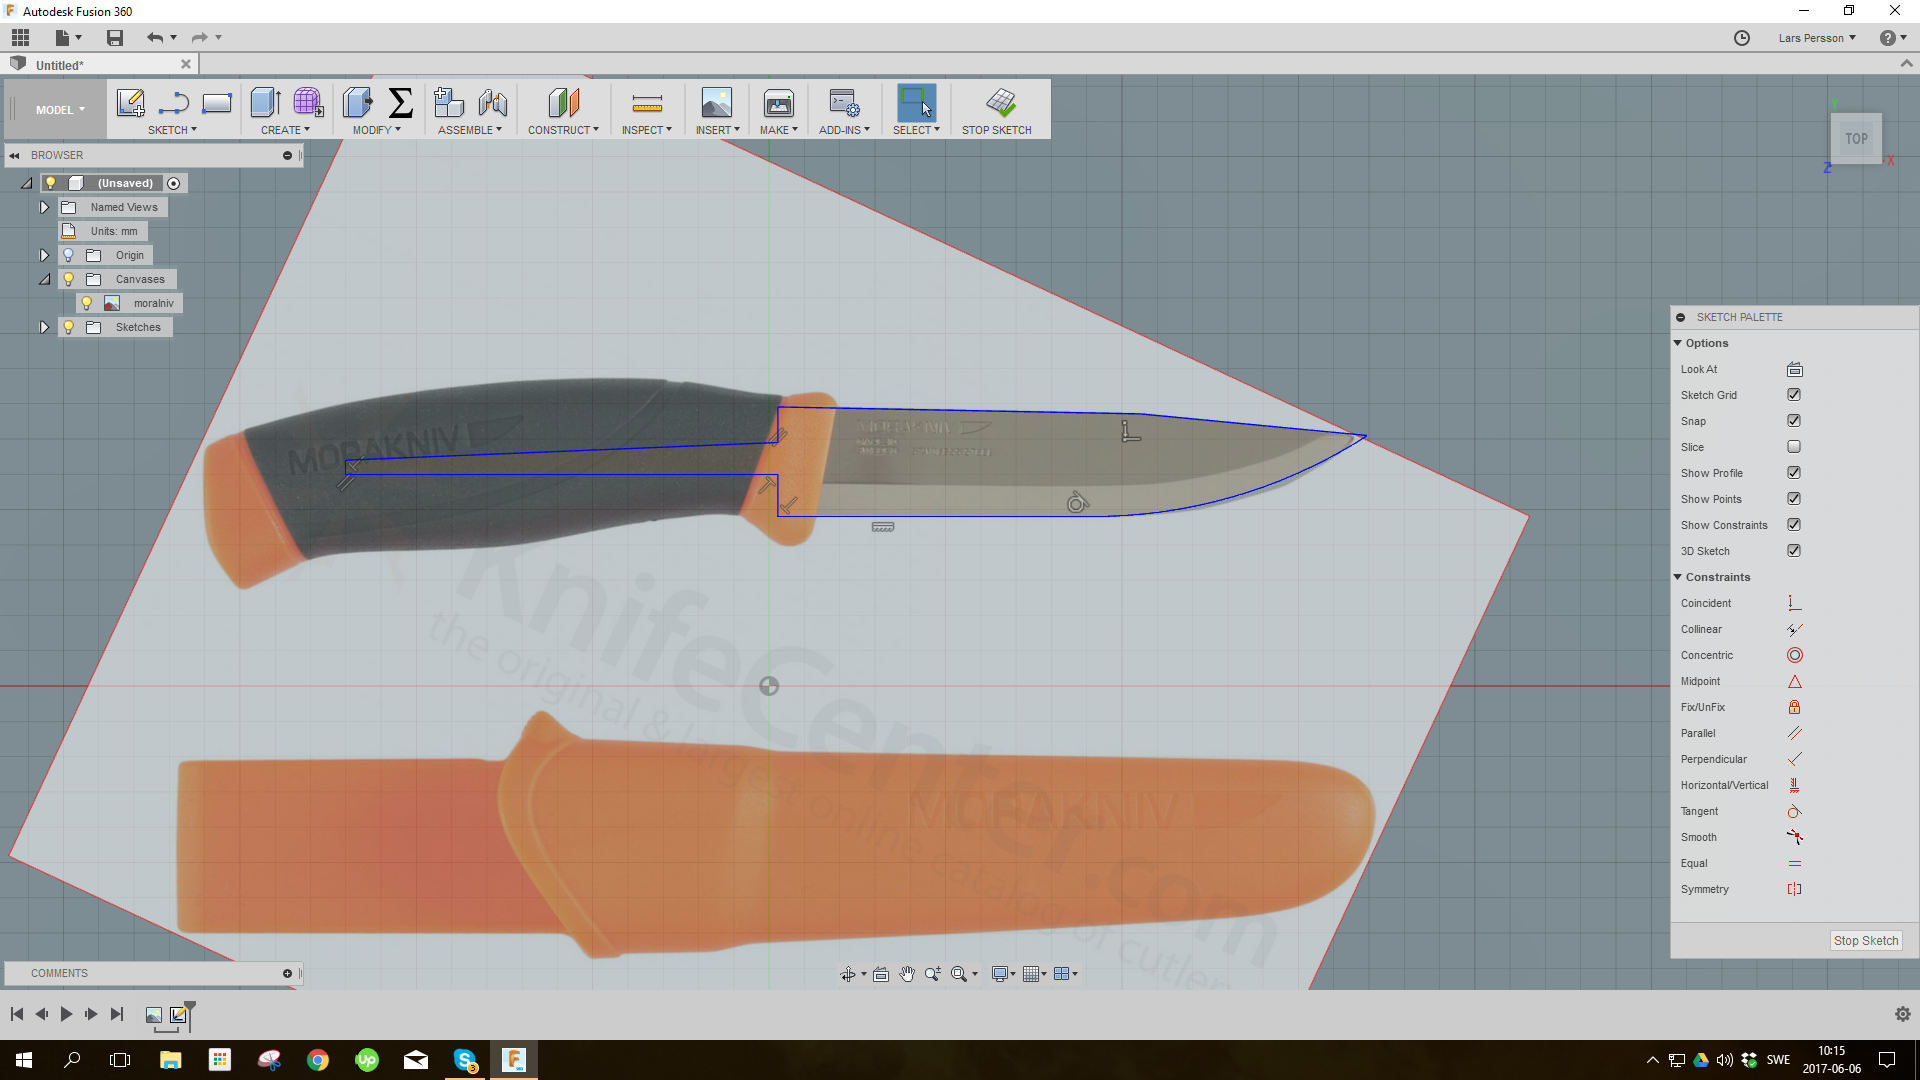.png)
Step 3. Extrude the blade to a thickness.
.png)
I set the options to symmetric extrusion, so that the sketch is in the middle and the extrusion goes both up and down 1,5 mm, making a 3 mm thick blade.
Step 4. Create an edge to the blade.
Edges can be made in a whole lot of ways. this is a very fast and simple one. The extrusion was 1,5 mm in each direction. If we put a chamfer to the two edges that are exactly 1,5 mm deep, then the chamfers will meet at the middle creating a nice edge.
Showing only the upper one here.
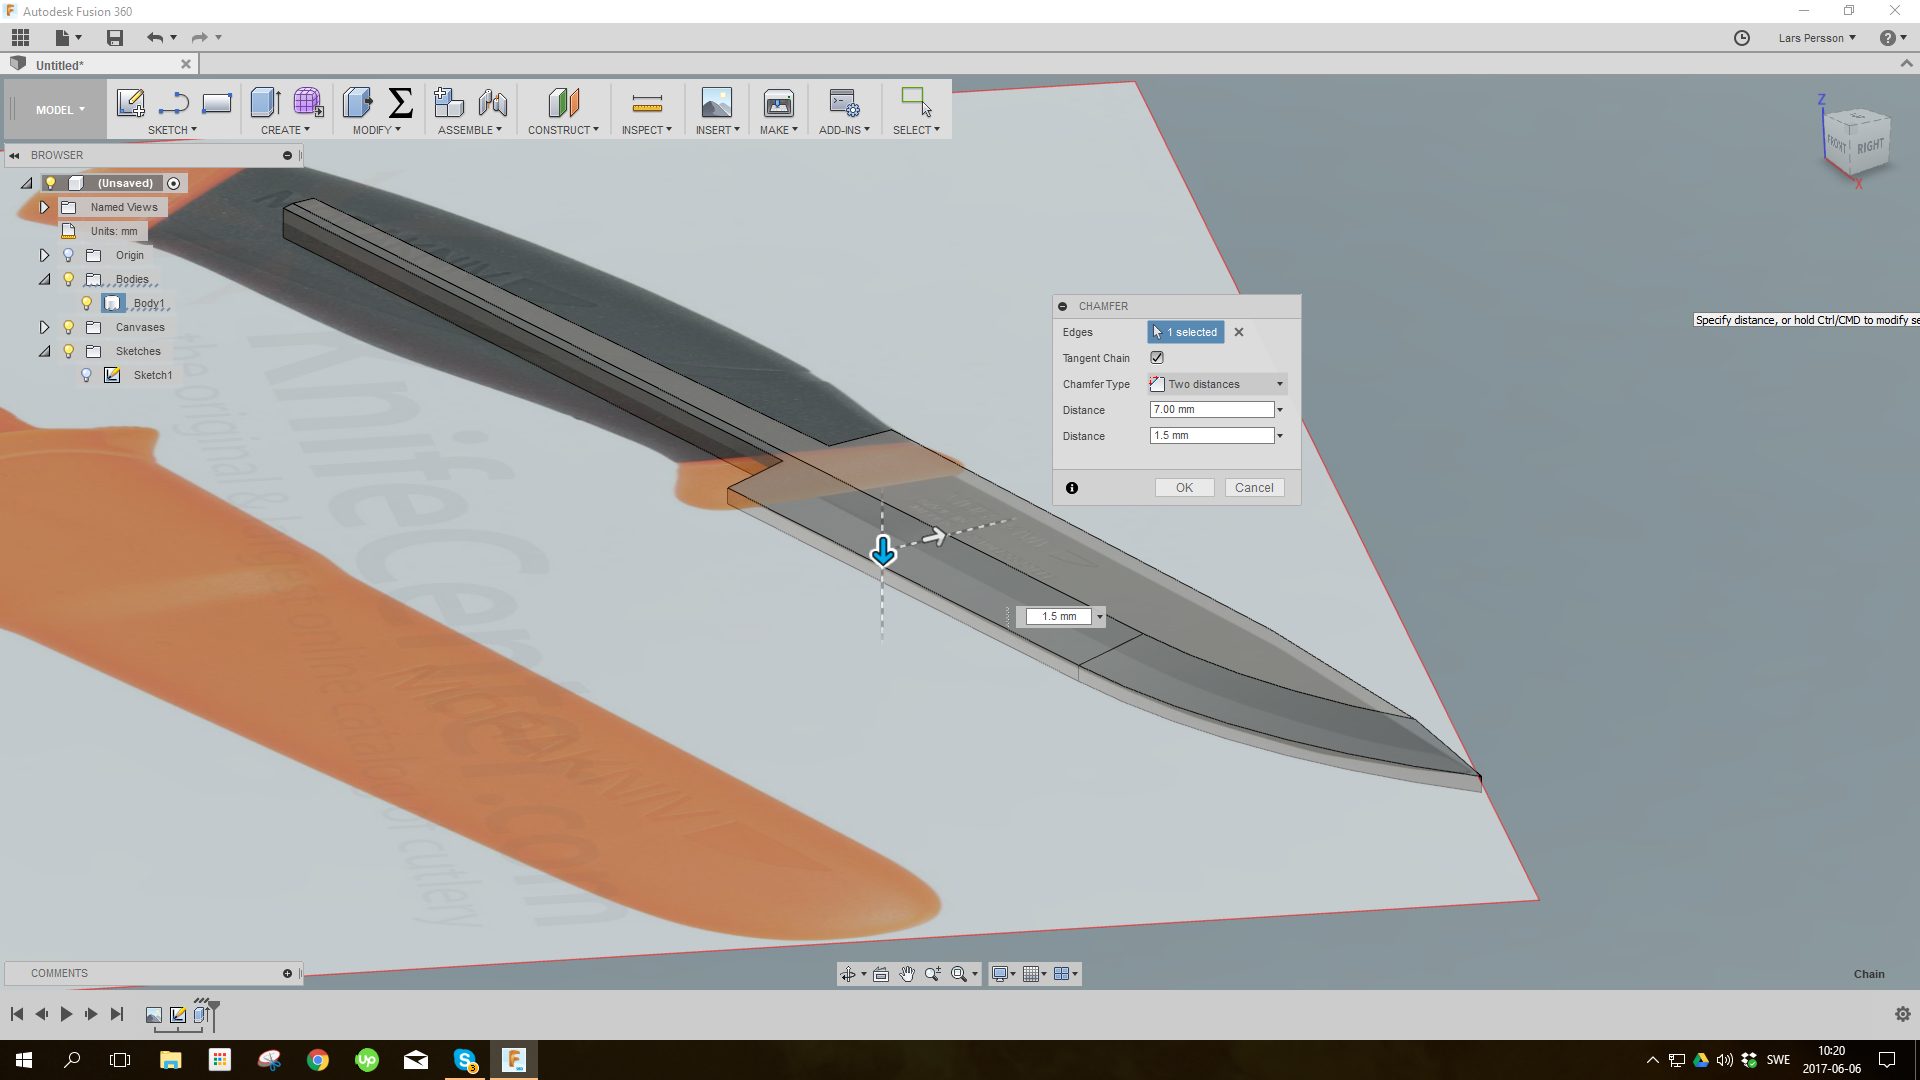.png)
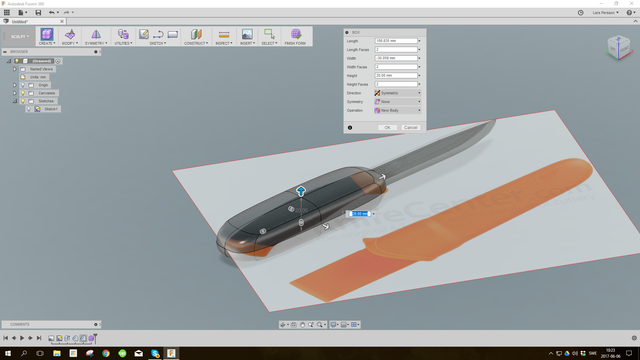
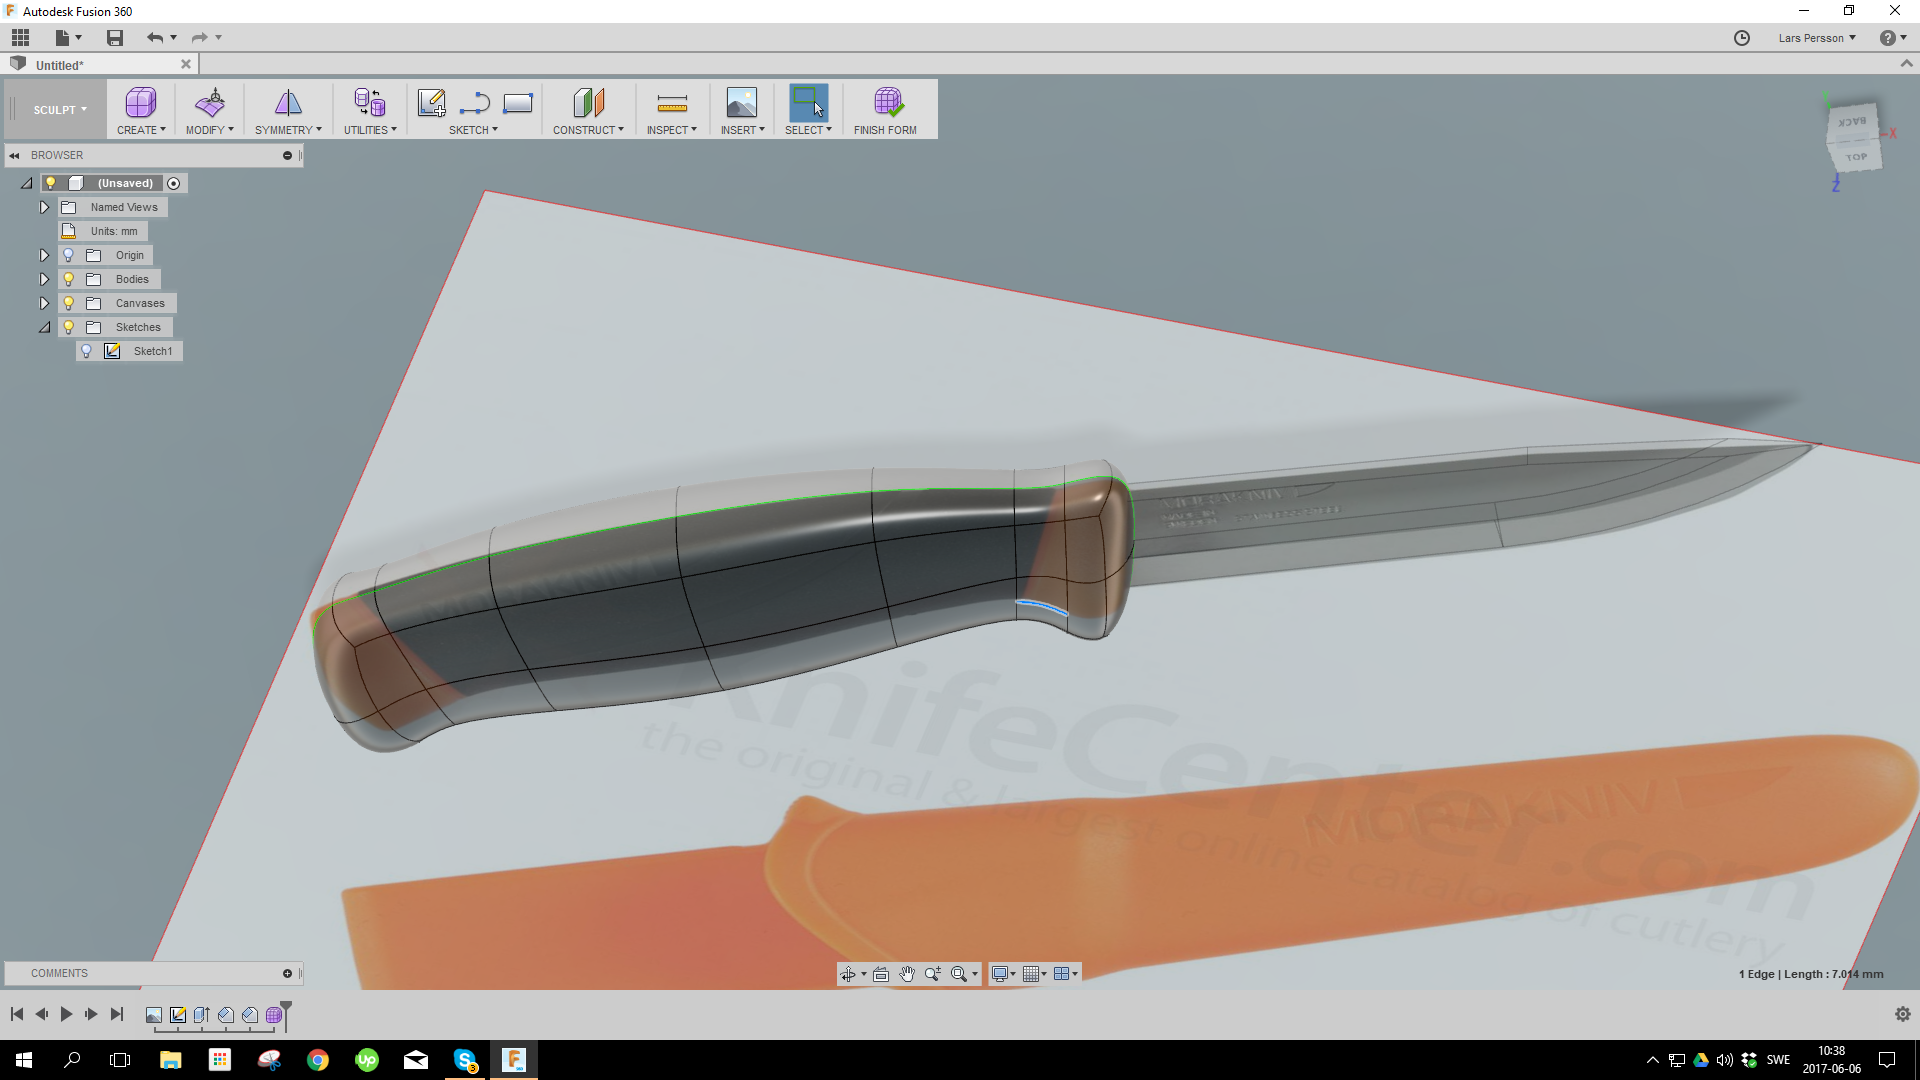
Step 5. Create the handle.
With the blade done, now we only have to make a nice handle. The sculpt environment is excellent at this. Click the purple box named create form in the create meny. The T-splines free form sculpting environment is very nice to work in. You push and pull on edges, points and faces and model the object as if it where of clay. there are plenty of tutorials on this on Youtube.
.png)
Create a box and start to nudge the edges around so it resembles the handle on the canvas.
.png)
After a short period of time (10-15 minutes) this is the result.
Step 6. Split the body into end and forward butts.
Create a sketch looking down on the knife. Add two lines wher you want to split the handle.
.png)
Use the split body command and split the handle.
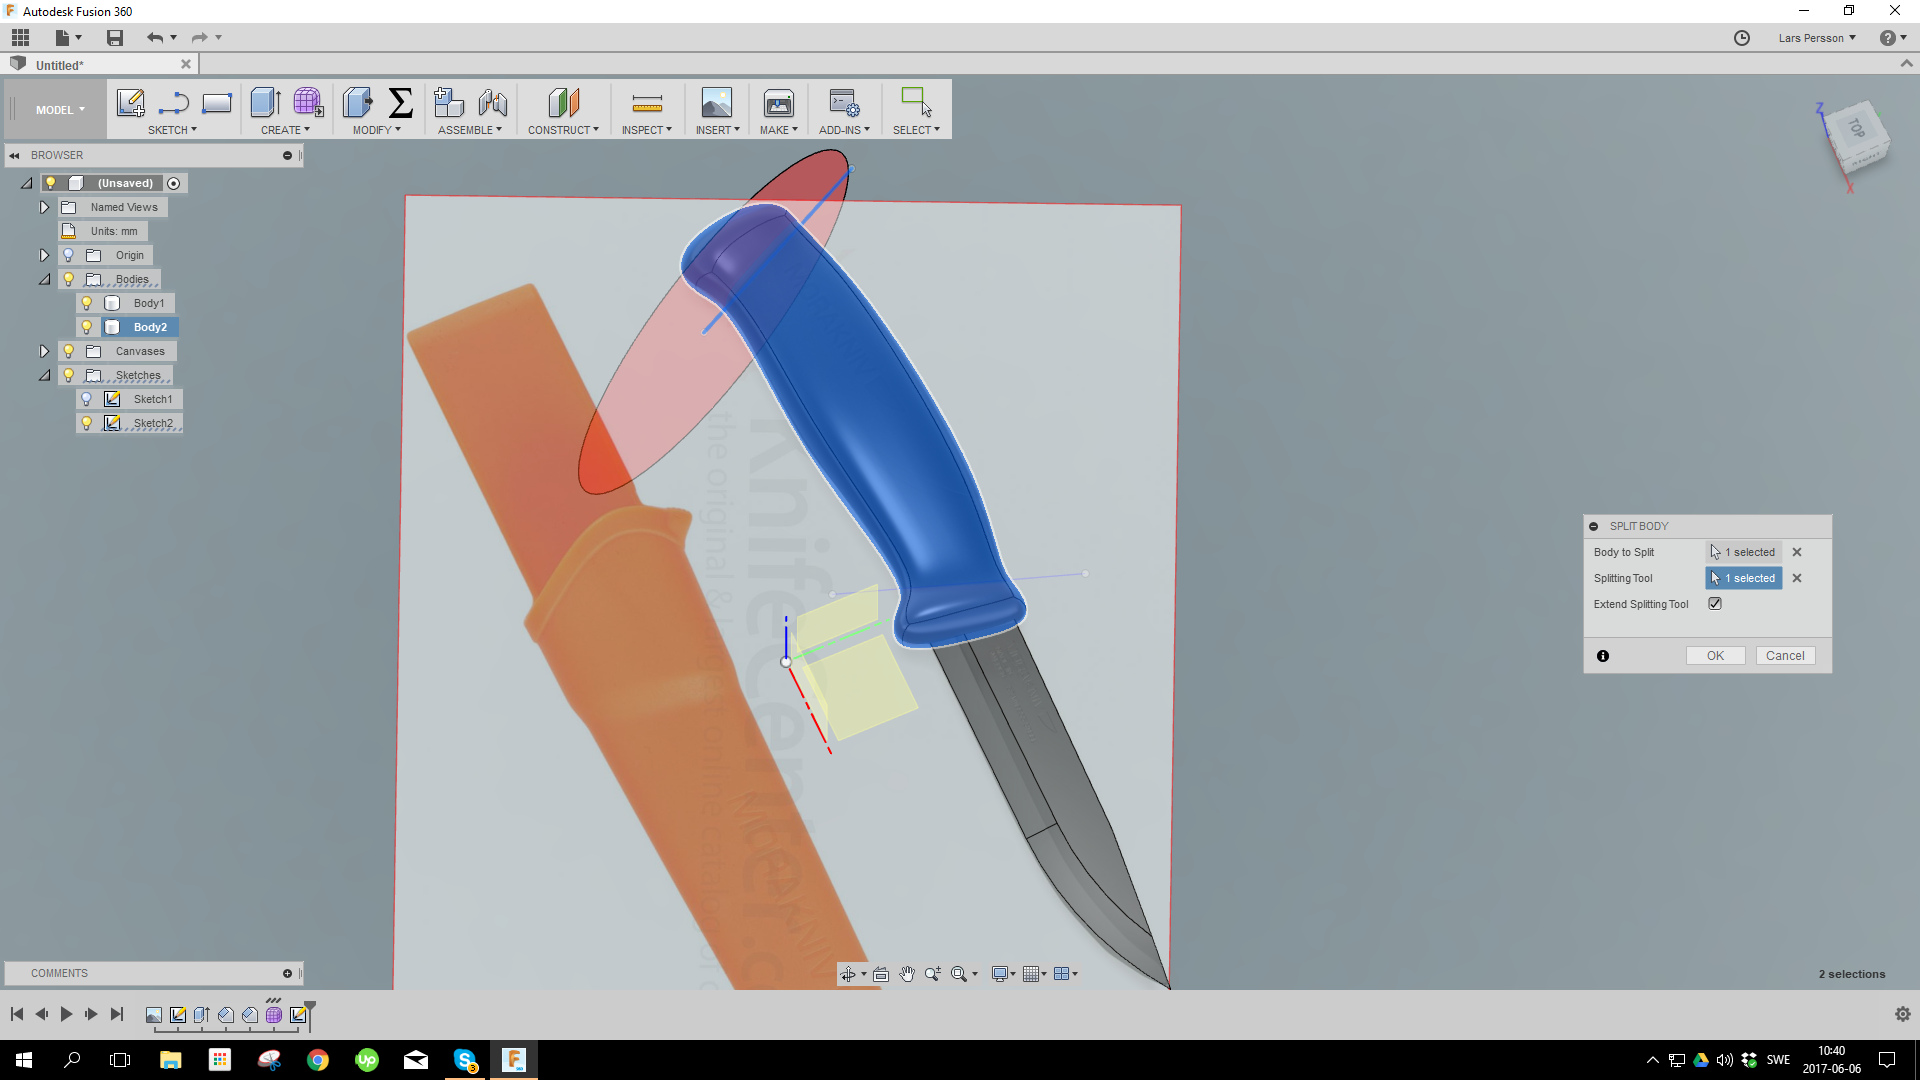.png)
rename body parts to appropriate names to easier keep track of them.
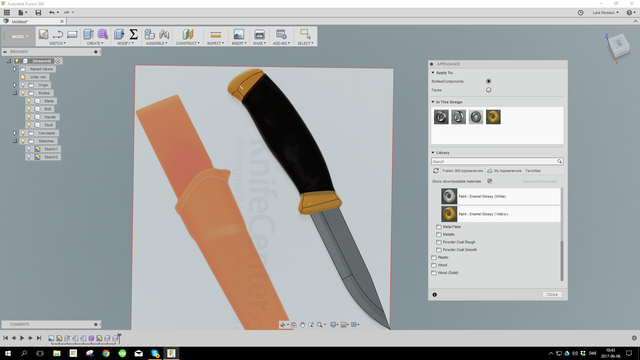
Step 7. Apply appearances to the surfaces.
Klick the button A or bring out the appearances dialog box any of several ways. browse materials and colors and drag an appearance onto the surface or body you want to apply it to. Here I am going for a stainless steel polished blade, soft rubber handle and glossy plastic for the butts.
.png)
Step 8. Render it
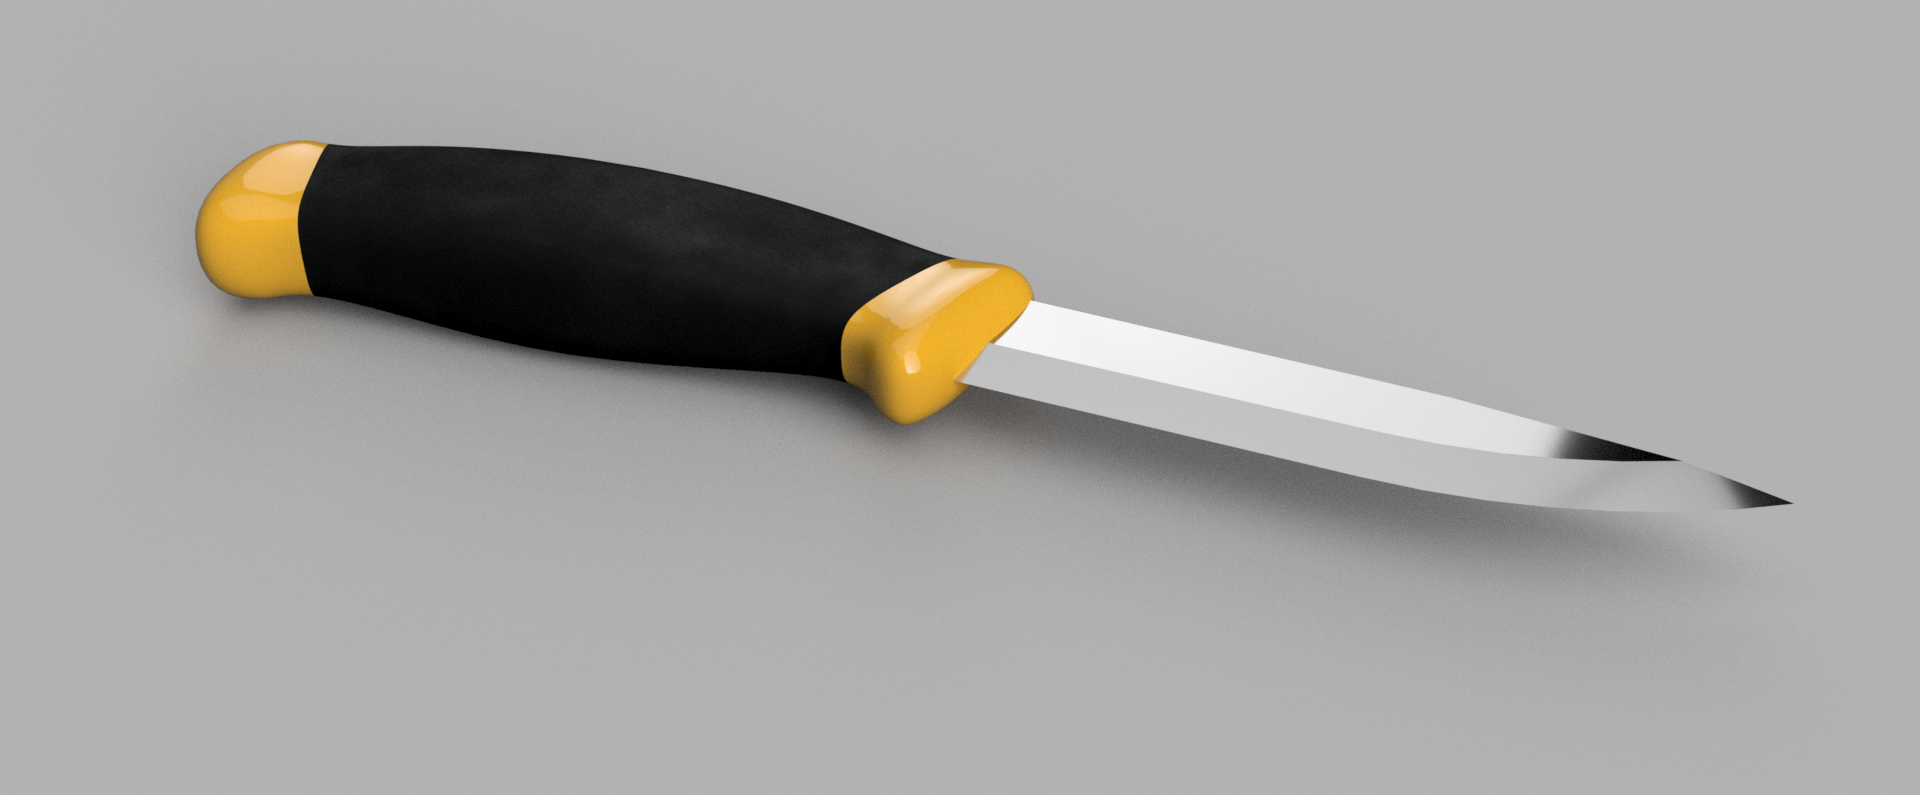
Fusion has a really simple rendering environment but it creates astonishing images!
End result:
The tutorial is great. It's very practical. I like it。
Thanx a lot!
that all right!
that's freaking amazing, one of the best things I saw today !
Thanx a lot! I have more coming :-)
Well done! Very nice tutorial.
Thank you very much
Congratulations @lazzelazer! You have completed some achievement on Steemit and have been rewarded with new badge(s) :
Click on any badge to view your own Board of Honnor on SteemitBoard.
For more information about SteemitBoard, click here
If you no longer want to receive notifications, reply to this comment with the word
STOPIf you want to support the SteemitBoard project, your upvote for this notification is welcome!