Building a DIY grill to BBQ like a Texan
All right, in honor of camping before I go on my trip here's a post about how we(mainly my brother in law did the hard work, while I helped find the materials I had for ideas) built our own grill one year.
Using only what we could find in the backyard.
It actually worked pretty well, and I'm still kind of sad that my husband didn't let me bring it along when we moved because to him it always seemed like "trash" and all.
Boo, very useful trash it was! He did love eating the meals cooked on it, even if he is too stuck up to approve or participate in our ways of redneck ingenuity.
First of all, we needed a stand to put over the fire. I had a set of old lawn chairs that I couldn't trust anymore, because this one broke when I was sitting in it.
It was a horridly humiliating moment a few weeks before this build, I was stuck with my rear end on the ground in the middle of it and my legs caught in an ackward pose. Had to stay that way and talk like it was a normal thing, until finally giving in and asking for help up since nobody was offering it. LOL.
Moving right along, nothing to see here... I wasn't going to let anybody else meet that same accident and sit in these dangerous chairs ever again. Just not to be trusted.
The actual frame was great, really strong! Only the fabric had been weak. So it would make the perfect base to put up over a fire.
Next we needed a grate to make a grill out of. This was actually originally the door to a dog crate, but my puppy always managed to get the cage apart if you tried leaving her in there. So we just left it off and then I had used it to block the hole in the gate she managed to escape the yard through. Houdini lives on, reincarnated.
I also used the two main plastic parts in the backyard as little cheap tables turned upside down, they even have four round indentations that work great for cup holders!
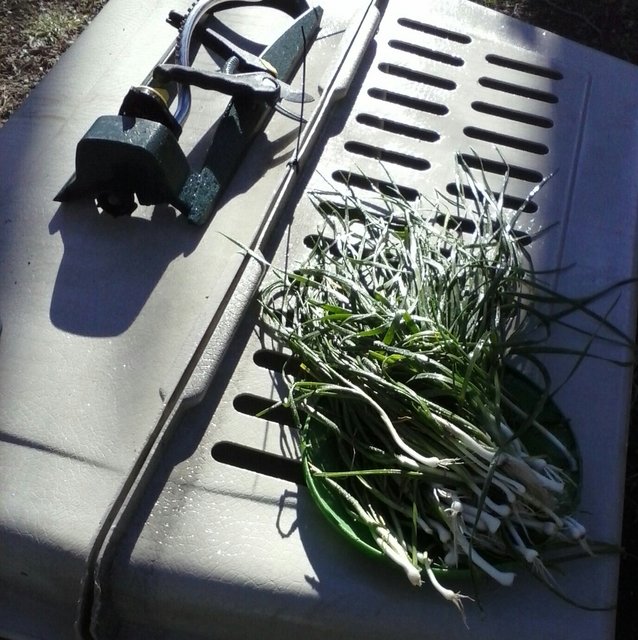
This was the original crate, in this case I was turning it into a strainer while I sprayed the dirt off from these babies. The "grass" in our yard that turned out to be green onions/wild garlic. Good thing my nose kept pointing me to investigate, or we would have missed out on free eats.
Or just to fill up with leaves/etc when doing yard work, those were always handy big baskets. I considered planting stuff in them last year too. Seriously, there were so many ways to find a repurpose for that one dog crate it was well worth having around.
Just not in my husbands eyes... because he never spends any time out side.
- Step One: Find a base, stand it up. I think old folding metal chairs are perfect, there's probably a lot of other things to use too. Look around, get creative!
Our room mates actually had a small one they built from an old water tank in a RV, they pretty just added a chimney to it and made a door/latch. It was incredible how much could actually fit and cook in such a small portable stove.
It was like a mini scaled version of what's done at this link, the same idea anyway. Building a killer DIY BBQ with old water heater
I also just found this one using toolboxes, oooh! DIY Portable Tool Box Grill
But since we aren't getting into welding and more complicated methods... we just made an open set up like this.
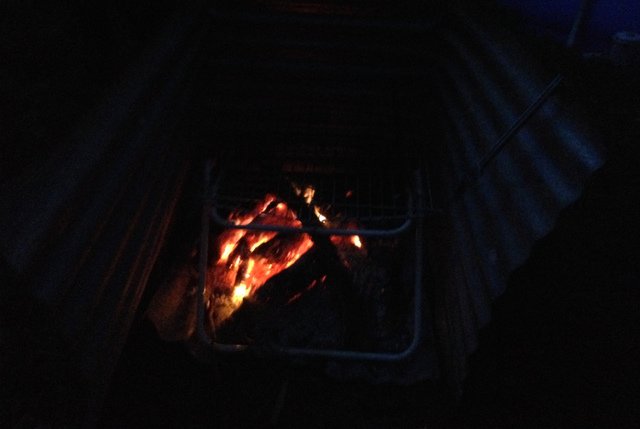
- Step Two: Find a fitting grill grate to put on top. Anything made of trusty metal will do here. If it fits, try it.
Just be sure to test run with a fire and burn off anything extra on them before actually cooking on it, don't breath around that first smoke to be safe.
Old stove or fridge racks? GO BIG! Shelves from various things, or even just something already in your kitchen like pans / cooling racks for cookies and so on.
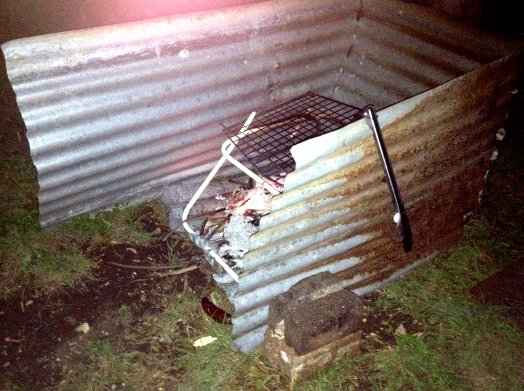
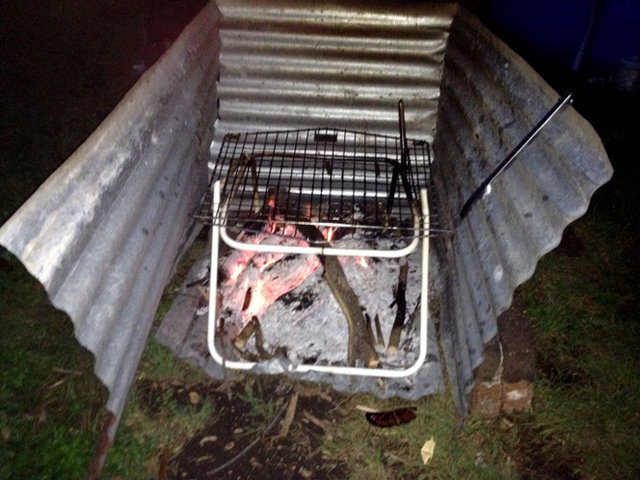
- Step Three: Break the wind, we used old tin. No I don't mean farting, but block the wind from blowing out your flame or making it go too nuts. Also, the tin method works great as a placeholder for hanging your tongs it seems. Yeah guys, I don't think that rust is all too sanitary. Ooops.
It took some manhandling and hammering, at the break of dawn on a holiday, probably woke our neighbors and drove them nuts... but get 'er done. Right?
Fold it around the base area like a frame, leaving front open to work with.
Stacking a few bricks on the side to hold it in place is simple enough. If you want it bigger and to look nicer for a more permanent outdoor kitchen fixture, then upgrade the assorted bricks for some of the concrete block ones to build a real wall.
That may be a plan I have for later when I get a backyard again... it will send me into childhood mode building castles and fort though. I reckon having an actual kid around will help make me pull that part off in a more acceptable fashion so I can blame them.
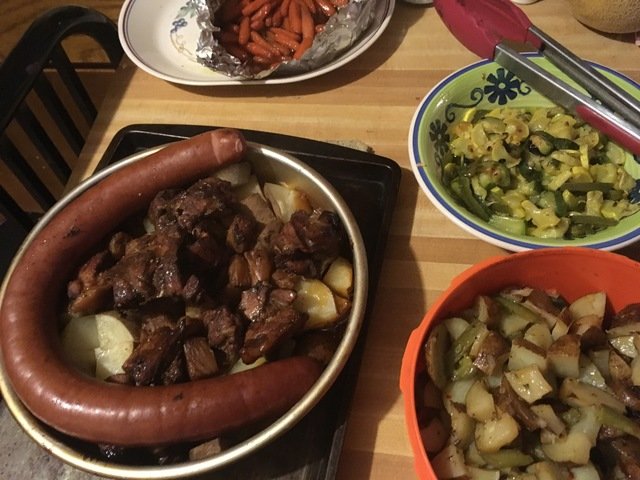
- Step Four: Start a fire up, and throw on the foods! If you drop any like our poor crispy burnt sausage that was too hot to handle, don't worry. We just let the dogs have it once it's cooled and everybody wins.
- Step Five: Nom Nom Nom... happy stuffed face times.
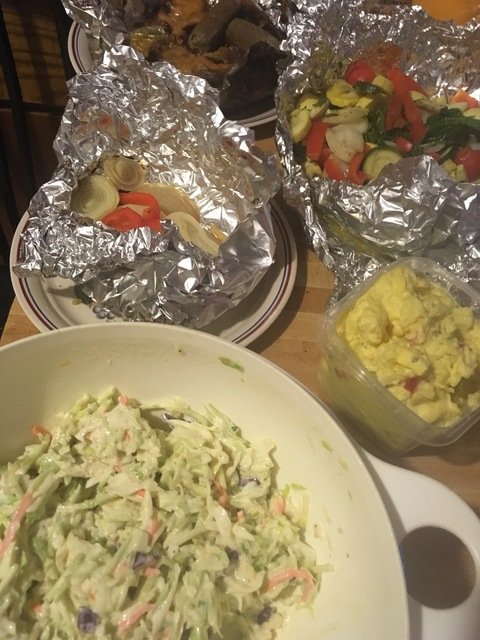
Since I'm vegetarian we cook up a LOT of veggies with assorted seasonings. Usually stuff some mushrooms with a garlic cheese filling. Have a couple of mixes with squash/zuke/peppers/onions and herbs. Potatoes are either hot and spicy or tangy ranch style.
Here I did a full out potato salad AND coleslaw feast. Corn on the cob, and carrots with brown sugar and butter.
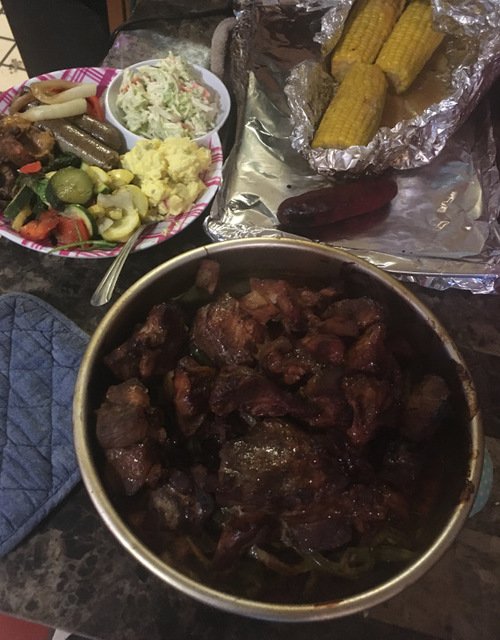
Hubby gets a pan filled up for his meaty fix and I sometimes grab a vegan sausage to go with mine too. Think it took me two sittings to get through this plate, I was so full. Didn't even get to try the corn on the cob that night, or the banana pudding or the accidental snickers pie I made. :)

Thanks for reading! Words and grill pics mine.
Logo gifted by Papa Pepper