SEC S20W5 - Flutter Toolkit – Managing Packages, Custom Application Icons, and Streamlining Navigation
Hello steemians,
I am participating in the SEC S20W5 contest organized by @mohammadfaisal, which is about package management in Flutter. My goal is to demonstrate my skills in designing innovative interfaces while respecting the proposed design principles. This contest highlights different methods to change the icon of an application, and I will demonstrate how this can be done effectively.
Explore Pub.dev: What do you understand by pub.dev? How it helps in flutter development?
From my understanding I can define Pub.dev as the official repository of Dart and Flutter packages which serves as a central platform where developers can find libraries and plugins for sharing and publishing which helps in simplifying the task of Flutter and Dart application development. We can say that these packages provide pre-built solutions for common development tasks like state management network requests, animation and many other features which require too much time to develop them.
For example, let’s take the package like “http” I can use it to handle network requests or “provider” to manage state. This allows me to focus on the unique aspects of my application which significantly reduces the development time and efforts. detailed documentation and updates that make it easy to integrate and maintain in my project
If you are a developer then how can you publish your own package in pub.dev ?
To create a local package for the Flutter project I need to create a separate directory called “packages” inside the root directory of the main Flutter project
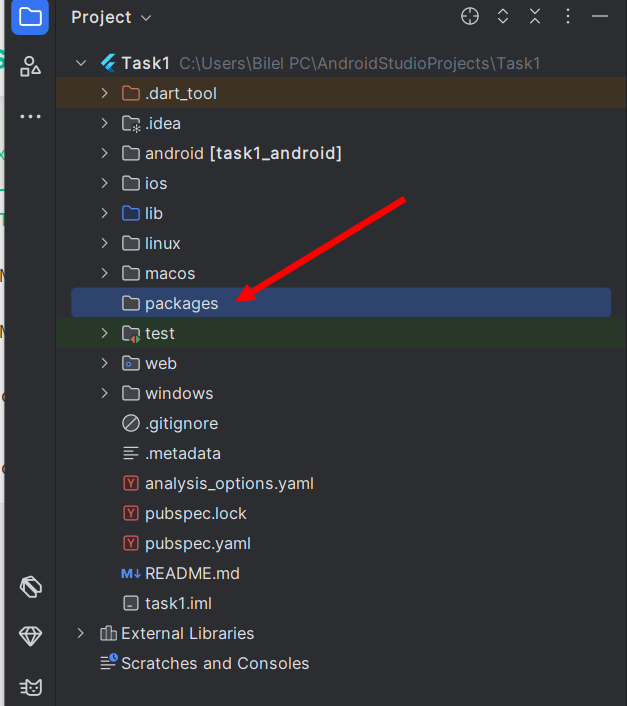
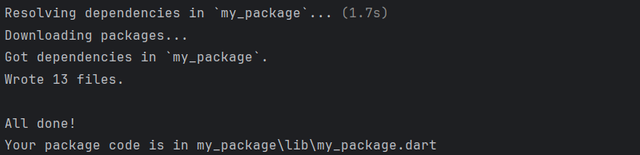
Now I open the project in the terminal and move inside the newly created packages folder After doing that I run the following command in the terminal

I just replace "my_package" with the name I want to give my package This command will create a folder with all the files I need to get started
Now I go to the folder created for my package named "my_package" Inside I’ll find a few important files
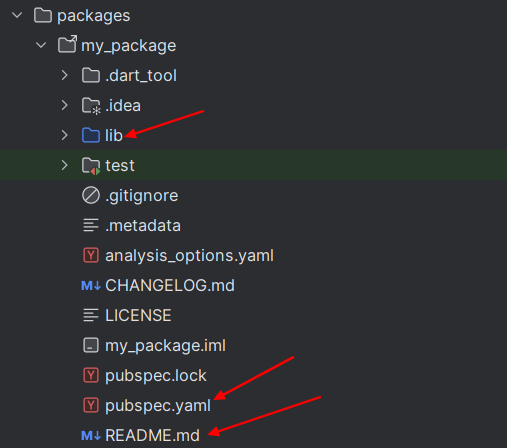
- lib/: This is where I will write my Dart code
- README.md: This file explains what my package does and how to use it
- pubspec.yaml: This file contains details about my package like its name version and any dependencies it needs
I’ll write my Dart code in the lib/ folder I make sure my code is clean and well-documented so others can easily understand and use it I can use /// to add comments that explain what each part of my code does
Testing my package is very important I need to ensure everything works as expected I can write unit tests using the test package which comes with Flutter by default I write these tests in the test/ folder
To run my tests I use this command
flutter test
I make sure all my tests pass before moving on to the next step
Before I publish my package I need to add some details to the pubspec.yaml file This includes the name of my package its version a short description and any dependencies my package needs
Here’s a basic example
name: my_package
version: 1.0.0
description: A brief description of my package
dependencies:
  flutter:
    sdk: flutter
I replace "my_package" with my actual package name and write a brief description If my package uses any dependencies I list them here as well
Once my package is ready and tested I can publish it on pub.dev Before that I make sure I have a pub.dev account
To publish my package I run this command
flutter pub publish
This will ask me to log in to my pub.dev account It will also check if everything is correct with my package Once everything is fine my package will be available on pub.dev for others to use
Pubspec.yaml file: What is pubspec.yaml file? How we use it and explain its components with examples.
The pubspec file in Flutter is short for the words “Pub Specification”. The word Pub stands for the package manager used for Dart and Flutter and the pubspec.yaml file defines important details like dependencies, metadata, resources, and versions of a Flutter project. The file is simple and easy to read thanks to the YAML format that is used to write it. YAML is commonly used in configuration files as it is human-readable which makes it a great choice for Flutter projects. Let’s break down the key parts of the pubspec.yaml file.
Metadata
This section defines basic information about the project For instance I can specify the project’s name description version and author to help identify the project and its purpose
Example:

Dependency Management
In this section I include any external packages that my app needs These packages are essential to the functioning of my app such as networking libraries for making HTTP requests or state management solutions
Example:

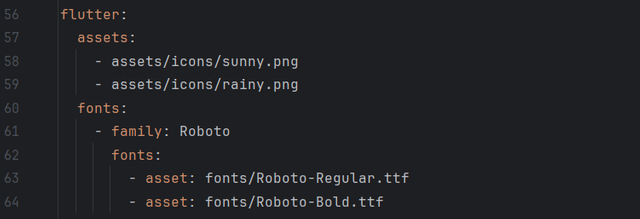
Asset Management
If my app uses images fonts or other media I need to list them here This ensures that these assets are included in the build process and accessible in the app
Example:
Flutter SDK Constraints
This section defines the minimum Dart and Flutter SDK version my project needs It guarantees the app will run properly with the correct SDK versions
Example:

Dev Dependencies
Here I list tools that are only required during the development process such as testing libraries These won’t be bundled into the production build of the app
Example:

Flutter Plugin Management
If my app uses plugins that rely on native Android or iOS code I can specify additional platform-specific configurations This is required for plugins that need direct access to device hardware like the camera or GPS
Example:
dependencies:
  flutter:
    sdk: flutter
  geolocator: ^7.0.0  # Plugin for accessing GPS

flutter:
  plugin:
    platforms:
      ios:
        pluginClass: FLTGeolocatorPlugin
        podspec: ios/Classes/Geolocator.podspec
      android:
        package: com.example.geolocator
        plugin:
          class: GeolocatorPlugin
In this example I configure the geolocator plugin which is used to access the GPS on both Android and iOS platforms I provide necessary details like the plugin class and the Podspec file for iOS and the package and plugin class for Android
Application Versioning
Here I specify the version number of my app Following the semantic versioning system I can track changes and releases Each part of the version number has a different meaning
Example:
version: 2.0.1
- 2 is the major version indicating significant changes that may not be backward-compatible
- 0 is the minor version showing new features that are backward-compatible
- 1 is the patch version indicating small bug fixes or updates
With this version number a major update would move to 3.0.0 a minor new feature would change the version to 2.1.0 and a small fix would update it to 2.0.2
This helps in managing versions effectively ensuring other developers or users know the scope of the changes made in each release
Application Icon: Describe different ways to add Application Icon.
To integrate a custom icon into my Flutter application, I have two main methods at my disposal: the manual method and using the Flutter Launcher Icon package. I will explain each of them.
1. Manual Method
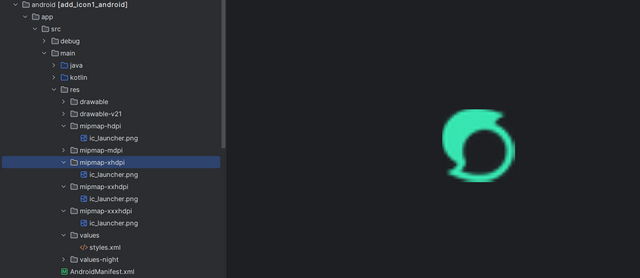
I can opt for the manual method, which involves moving my own icon files into the appropriate folders for Android and iOS within my project. This method requires creating different icon sizes to ensure correct adaptation to the various screen resolutions of devices.
For Android: I need to place the different icon sizes in the "android/app/src/main/res/mipmap-*" folders, where each folder corresponds to a specific screen density, such as "mipmap-mdpi", "mipmap-hdpi", or "mipmap-xhdpi". This ensures the icon is correctly adapted for different types of screens.

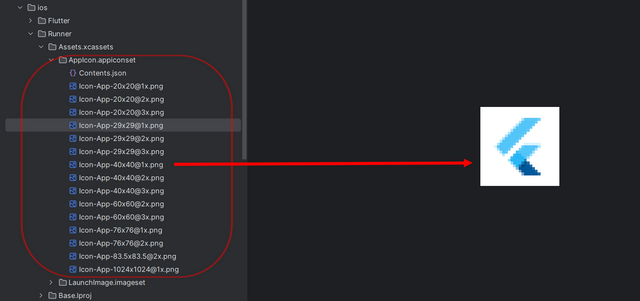
For iOS: The icon images need to be added to the "ios/Runner/Assets.xcassets/AppIcon.appiconset" directory. Again, multiple icon sizes are required to ensure compatibility with the different resolutions of iOS devices.
2. Using the Flutter Launcher Icon Package
A simpler and more efficient method is to use the flutter_launcher_icons package, which automatically generates the necessary icon files for both Android and iOS.
Here are the steps I follow to use this package:
I add the package to my
pubspec.yamlfile and configure it properly to generate the icons.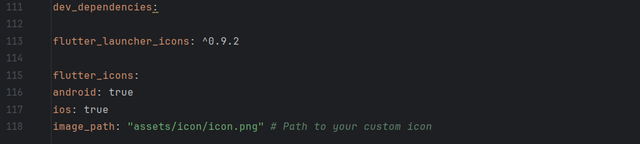
Then, I run the following command in my terminal to generate the app icons:
flutter pub run flutter_launcher_icons:mainThis command will automatically create the necessary icon sizes and replace the default Flutter icon with my custom icon for both Android and iOS.
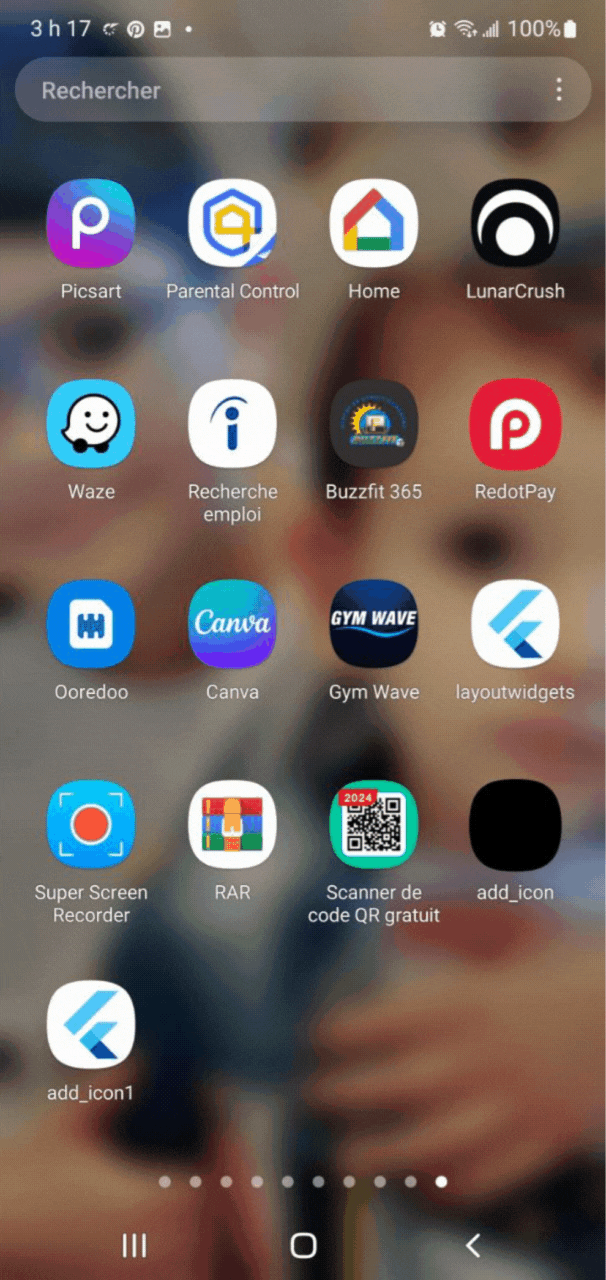
Develop an application and add Icon to the application and represent it visually.
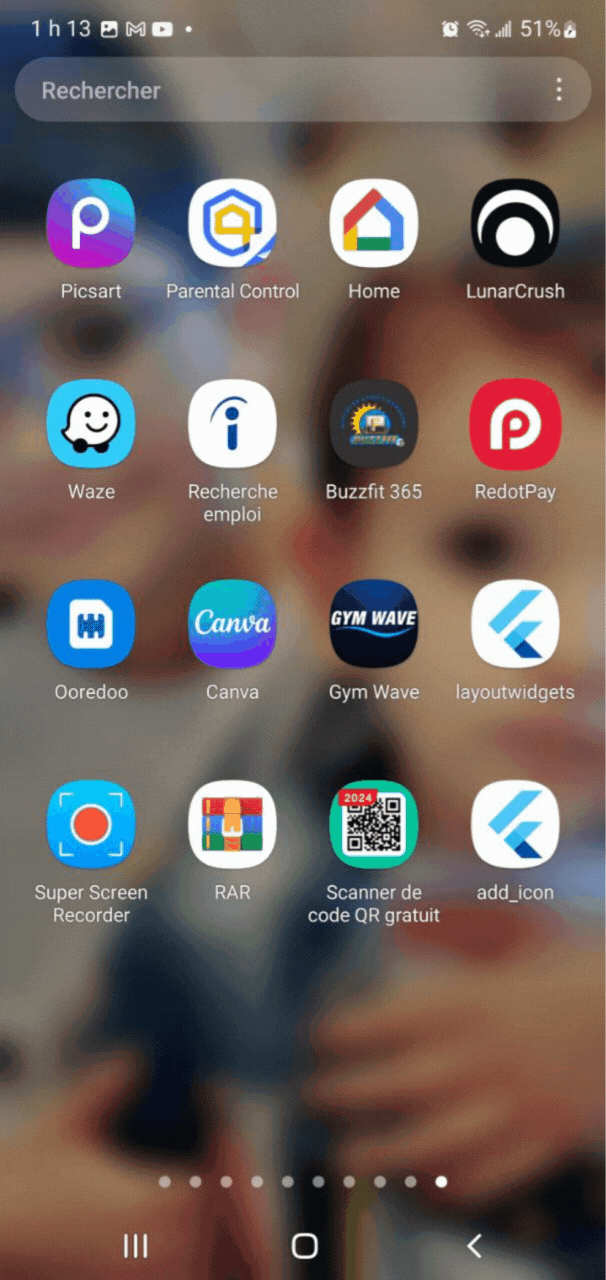
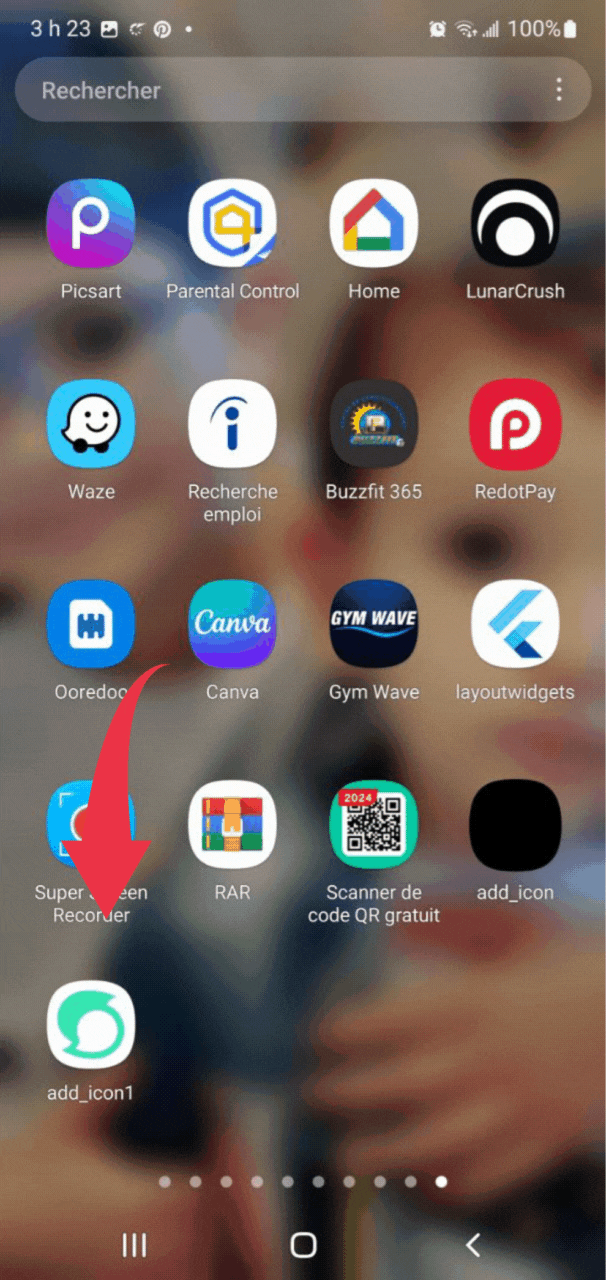
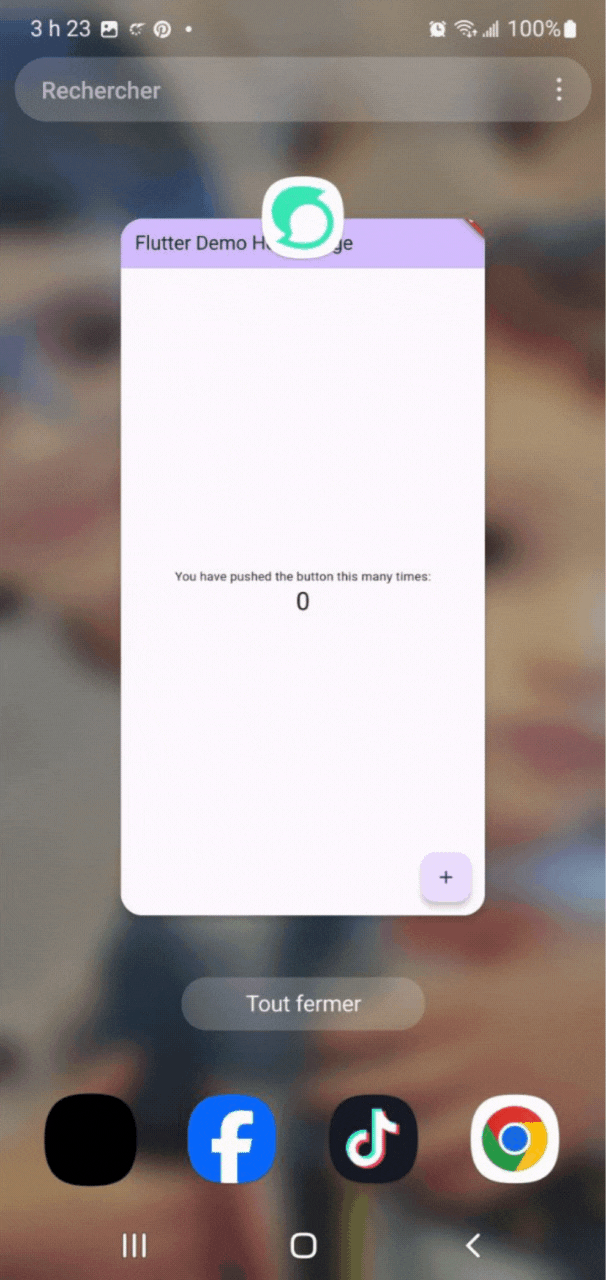
I first tried to add an icon to my app using the Flutter Launcher Icon package, but the icon turned black. After trying several solutions without success, I decided to switch to the manual method. This approach consisted of placing the icon files directly in the appropriate directories for Android and iOS. Finally, this manual method worked and I was able to change the app icon as expected.
Result1
 |  |
|---|
Result2
 |  |
|---|
Project: Develop a "Recipe Book App" browse different categories of recipes (e.g., Breakfast, Lunch, Dinner), view specific recipes. Implement TabBar for navigating between recipe categories, a BottomNavigationBar for quick access to Home, Favourites, and Profile sections and add a custom app icon to represent the app.
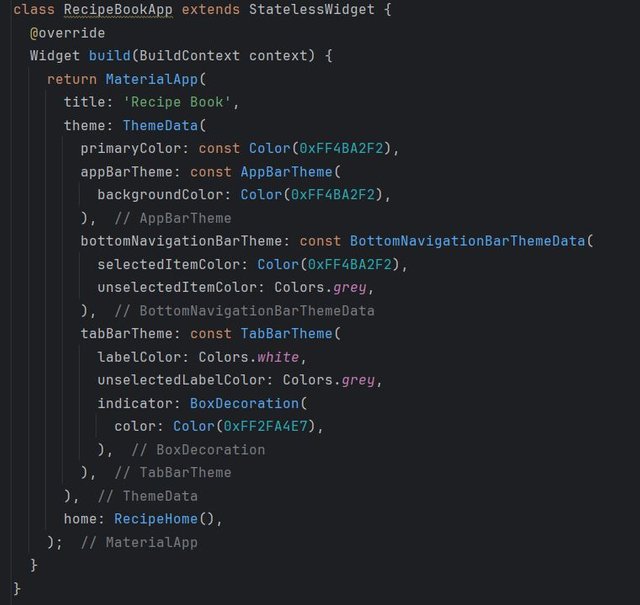
The first code segment in the image shows the definition of the basic structure of the Flutter app. I start with the MaterialApp widget, which is the frontend of the app. I use ThemeData to manage the main colors of the interface. I set the main color to 0xFF4BA2F2 which is a blue reminiscent of Steemit's colors. Next, I customize the AppBar by giving it a blue background and I style the BottomNavigationBar including setting the color of the selected and unselected icons. Finally, I also style the TabBar, changing the colors of the active and inactive tabs as well as the visual tab indicator.
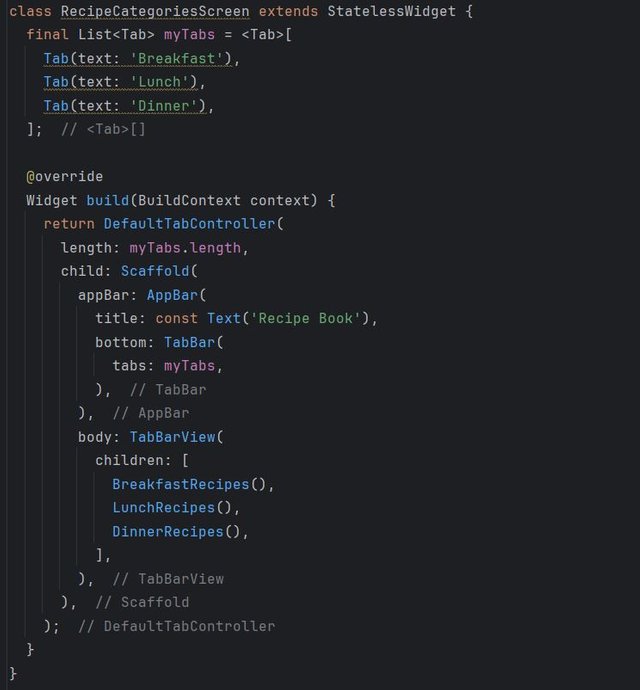
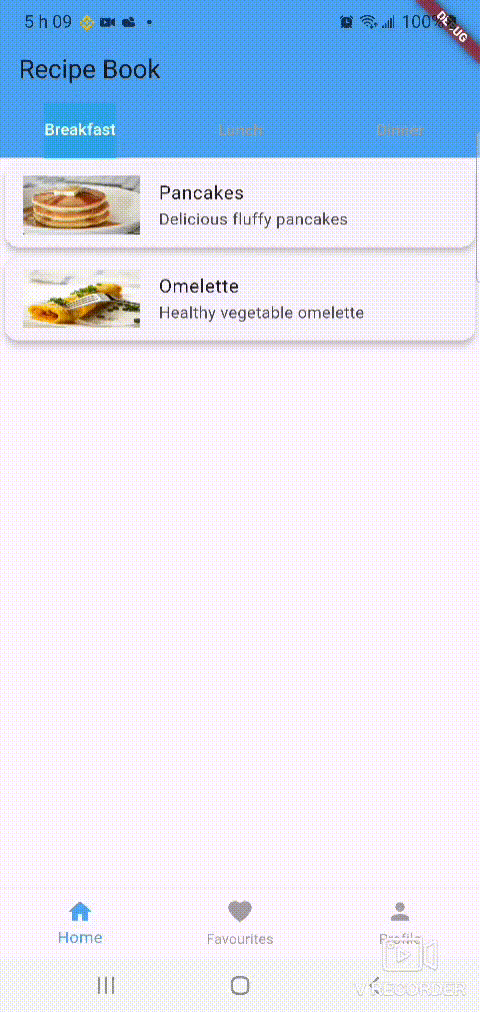
In this code segment, I create a page that displays different categories of recipes. I use a TabBar to display three tabs: Breakfast, Lunch, and Dinner. I associate each tab with a separate view in the TabBarView. This allows the user to navigate between different categories of recipes, and each category will have its own list of recipes. I define the titles and behavior of these tabs by storing them in a list named myTabs.
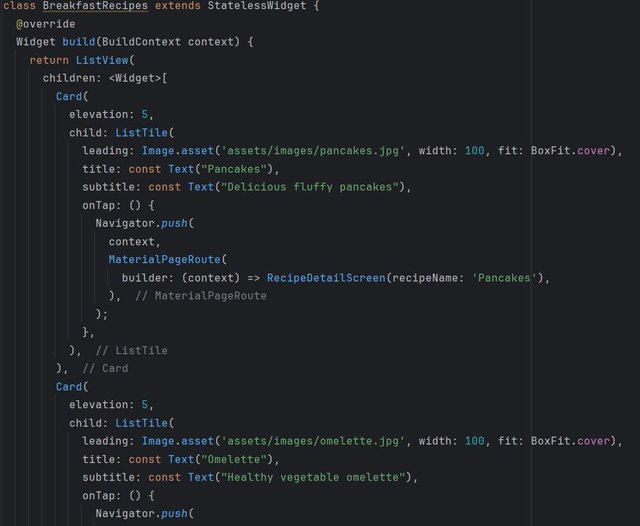
Here I create a view to display breakfast recipes using a ListView. Each recipe is displayed inside a Card, with an image, title, and description. For example, I show a pancake recipe with an associated image and a subtitle describing the recipe as fluffy. When the user clicks on a recipe, I redirect them to a details screen using Navigator.push. Each recipe has its own card, image, and navigation behavior.
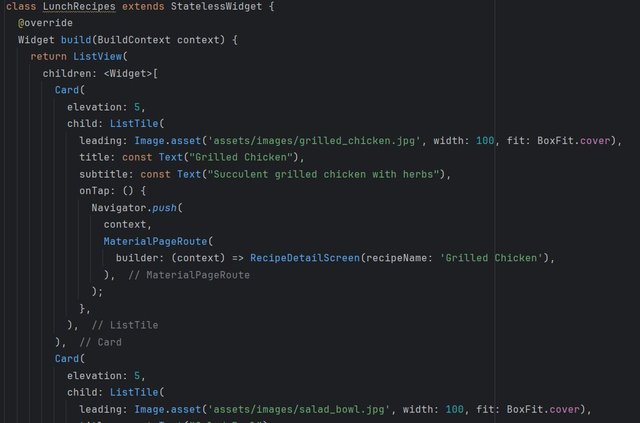
In this part of the code, I do the same thing as for the breakfast recipes, but this time for the lunch recipes. I still use a ListView and Cards to display each recipe. For example, I show a grilled chicken recipe with an image and a description, and the user can click to see the details. The structure is similar to the breakfast recipes, with each card containing an image and some text.
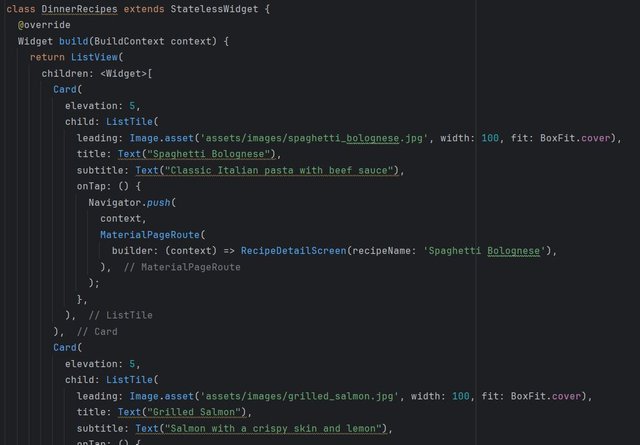
I continue to follow the same logic for dinner recipes. I create cards for each recipe, such as spaghetti bolognese and grilled salmon. Each of these recipes is represented by an image and a description. As with the other categories, when the user clicks on a recipe, they are redirected to a details screen. I keep the layout consistent across all categories.
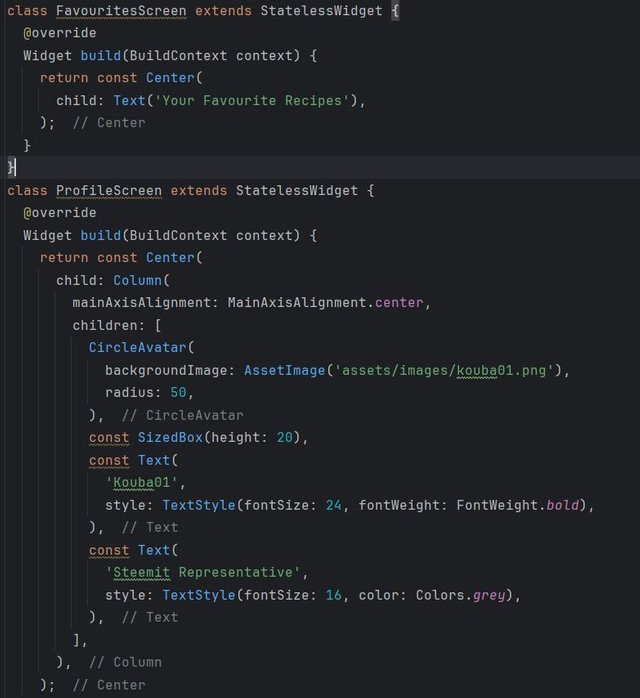
Finally, in this segment, I customize the profile screen to display the user's information. I use a CircleAvatar to show the profile picture, which I load from the assets. Below that, I display the user's name ("Kouba01") and their role ("Steemit Representative"). The content alignment is centered, and I use font sizes and styles to differentiate the information displayed.
Video
Thank you very much for reading, it's time to invite my friends @khursheedanwar, @stream4u, @steemdoctor1 to participate in this contest.
Best Regards,
@kouba01

Upvoted. Thank You for sending some of your rewards to @null. It will make Steem stronger.