SEC S20W2 - Mastering Flutter's Widget Tree, State Management, and Essential Widgets

Hello steemians,
I’m excited to participate in the Week 2 contest of Season 20 of the Steemit Engagement Challenge. This week, I’ve been working on Flutter projects that showcase state management and essential widgets. I’ve developed a profile screen with colorful buttons, a list of fruits with stylized shadows, and an interactive counter to demonstrate state management.
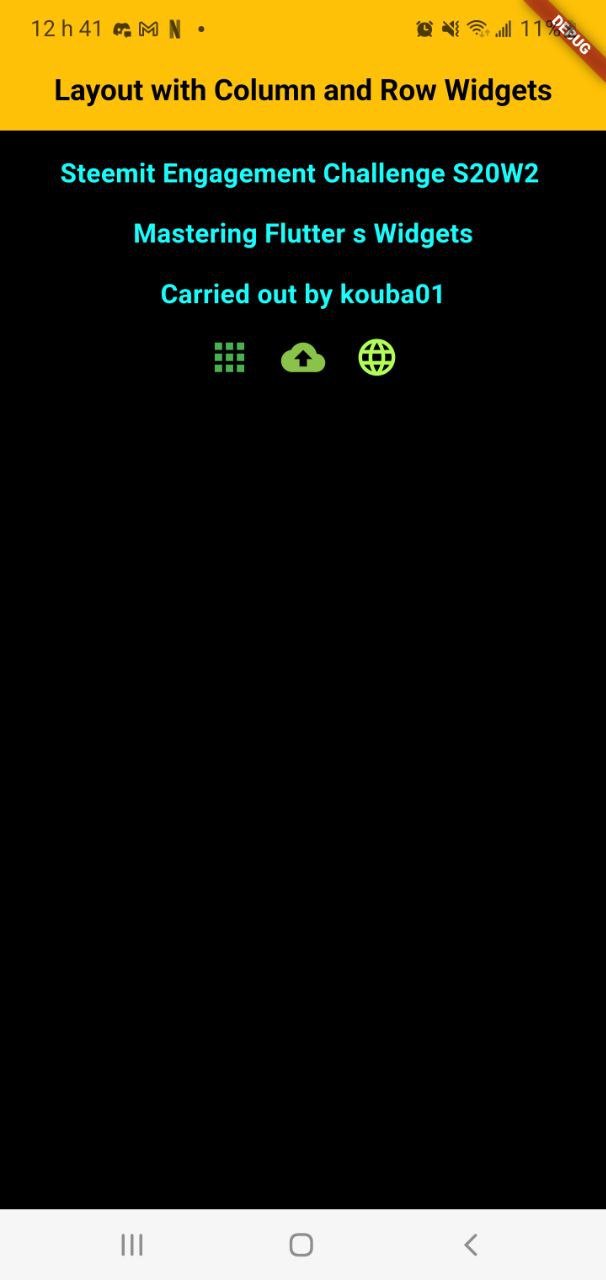
Task1: Create a Simple Layout with Column and Row Widgets. Create a simple UI that displays three text widgets vertically using a Column. Inside one of the Column children, add a Row that contains three icons aligned horizontally. Add some space between the text widgets using SizedBox.
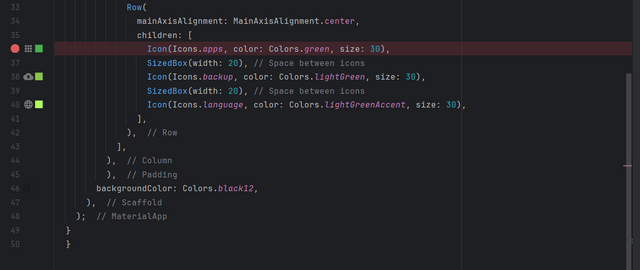
In this code, I create a simple Flutter app with an interface that uses Column and Row widgets. I start by defining a MyApp class that extends StatelessWidget. Then, I set up the basic structure with a Scaffold, which includes an app bar (AppBar) and a body (body).
In the body of the interface, I use a Column widget to display three texts vertically. Each text is styled and spaced using SizedBoxs that I insert between the elements to add vertical space.
Inside this column, I also place a Row widget that contains three icons aligned horizontally. To organize these icons and make the interface more airy, I also add SizedBoxs between the icons, to create horizontal space.
So I manage to create a simple user interface that meets the exercise by using the widgets Column for vertical texts and Row for horizontally aligned icons, while respecting the necessary spacing with SizedBox.
| Code | Code |
|---|---|
 |  |
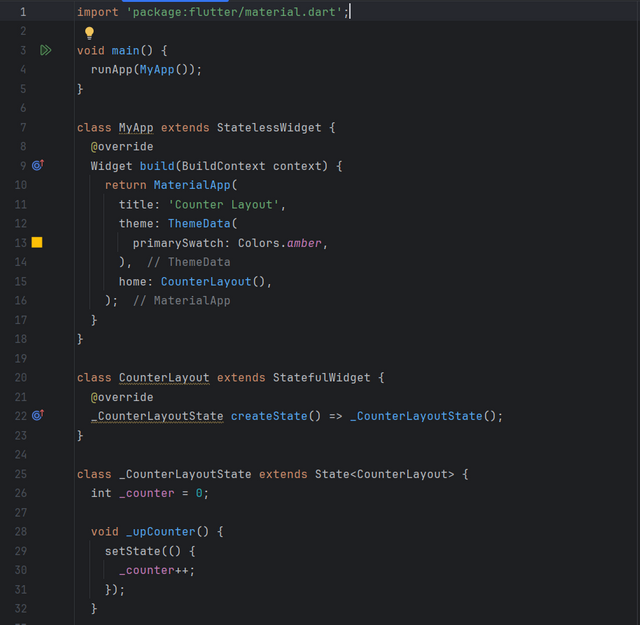
Task2: Build a Stateful Counter App. Create a StatefulWidget that displays a number in the center of the screen. Add two buttons, one to increase the number and one to decrease it. Update the state of the app when the buttons are pressed.
In this code, I build an application that displays a counter with two buttons to increment and decrement it. I start by creating a StatefulWidget that allows me to update the interface based on the state.
I define an initial state where the counter is set to a value (for example, 0) and I display it in the center of the screen. For this, I use a Center widget with a Text to display the value of the counter.
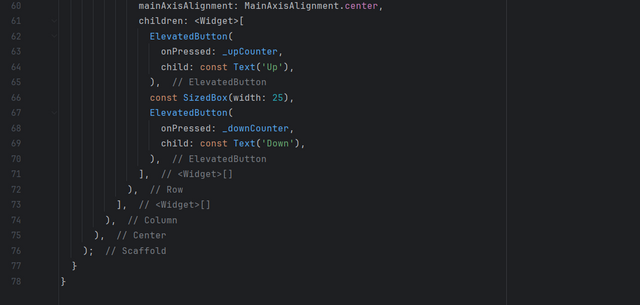
Then, I add two buttons at the bottom of the screen: one to increase the value of the counter and another to decrease it. Each time one of the buttons is pressed, the associated function updates the state by incrementing or decrementing the number, and the interface is automatically refreshed to display the new value of the counter.
Thus, I create an application where the user can interact with the counter by pressing the buttons, and the state of the application is updated accordingly.
| Code | Code | code |
|---|---|---|
 |  |  |
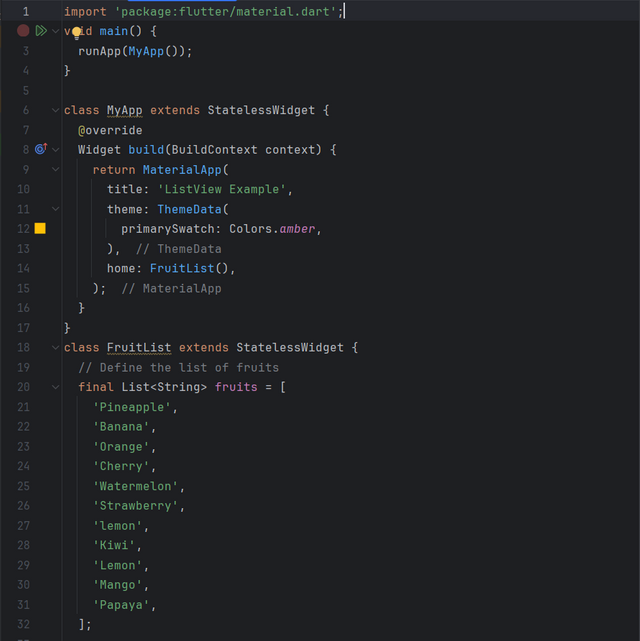
Task3: Create a List of Items using ListView. Create a list of strings (e.g., a list of fruits). Display this list in a scrollable ListView. Each item in the list should be displayed as a Text widget inside a Container with padding and margin.
In this code, I create a UI to display a list of fruits using Flutter. Here is a description of my work:
I define a Flutter app with a blue main theme. This theme is applied throughout the app to ensure a consistent look and feel.
I use a
Scaffoldfor the structure of the screen, with anAppBarnamed "Fruit List".I create a list of strings called
fruitsthat contains the names of various fruits.I use a
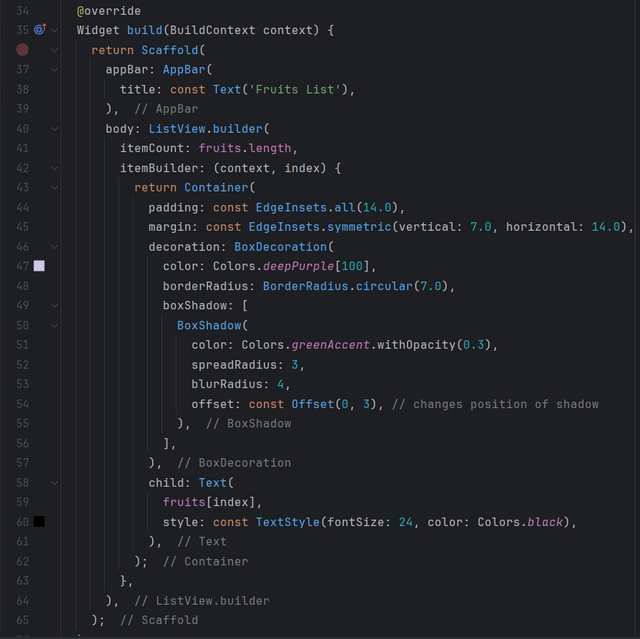
ListView.builderto display the list of fruits efficiently and effectively. This method is particularly suitable for long lists because it builds the items on demand.For each item in the list, I use a
Containerto style the display:Padding: I add 16px internal padding around the text.
Margin : I add a vertical margin of 8 pixels and a horizontal margin of 16 pixels to space the elements.
Color : The container has a light blue background color (
Colors.blueAccent[100]).Text : I display the name of the fruit with a font size of 18 pixels and a white text color (
Colors.white).
| Code | Code |
|---|---|
 |  |
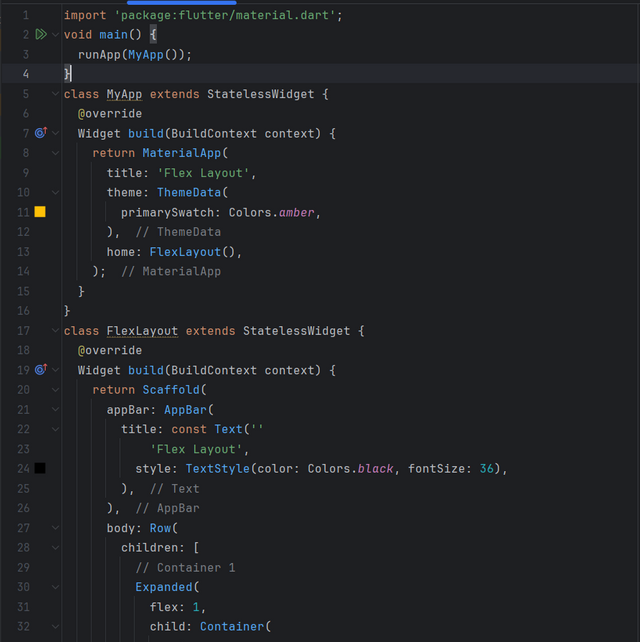
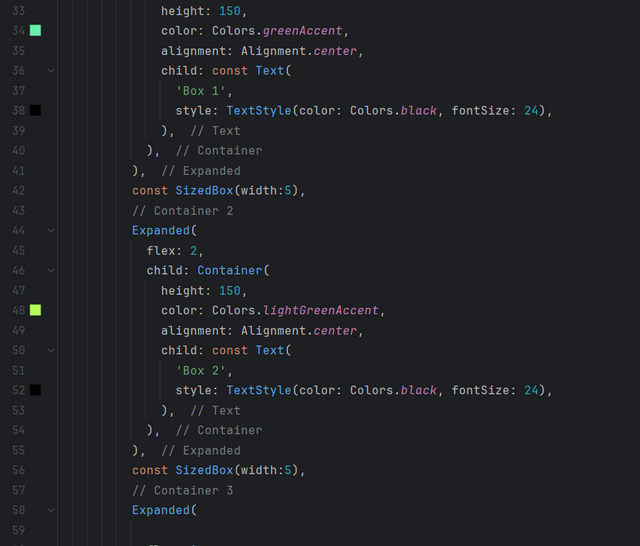
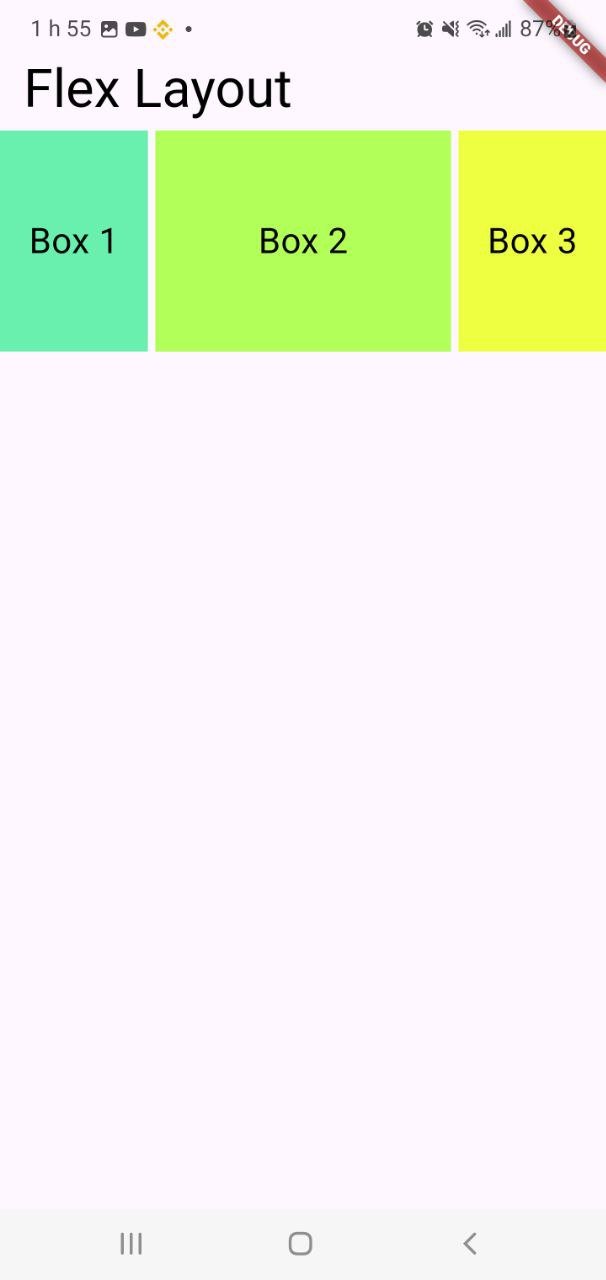
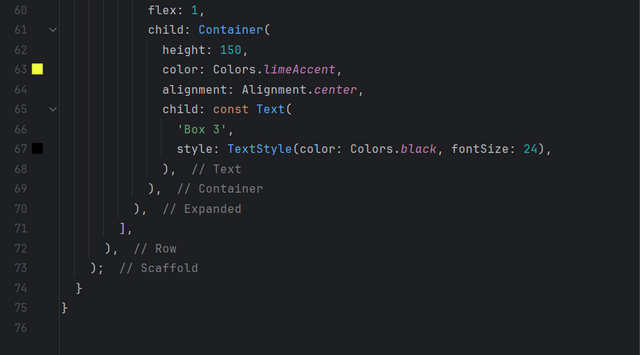
Task4: Explore Flex and Alignment with a Responsive UI. Create a layout where three Container widgets are displayed in a row. Use Expanded to make one Container take up twice the space of the others. Use alignment properties to center the content within each Container.
To explore flexibility and alignment in a responsive UI with Flutter, I designed a layout with three Container widgets displayed inline. To do this, I use the Expanded widget so that each Container takes up a specific proportion of the available space in the row.
I start by creating a Row that contains the three Containers. To make the Containers take up all the available space horizontally, I surround each of them with the Expanded widget. The flex parameter of Expanded is used to define the proportion of space that each Container should take up. Here, the first and third Containers have a flex of 1, which means that they will share a share of the available space equally. On the other hand, the second Container has a flex of 2, which allows it to take up twice as much space as the others.
As for alignment, I set the alignment property for each Container to Alignment.center, which centers the text inside each Container. This way, the text is positioned in the center, regardless of the size of the Container.
This approach allows for a flexible and responsive layout where the Containers are adjusted according to their proportion of space while having nicely centered content.
| Code | Code |
|---|---|
 |  |
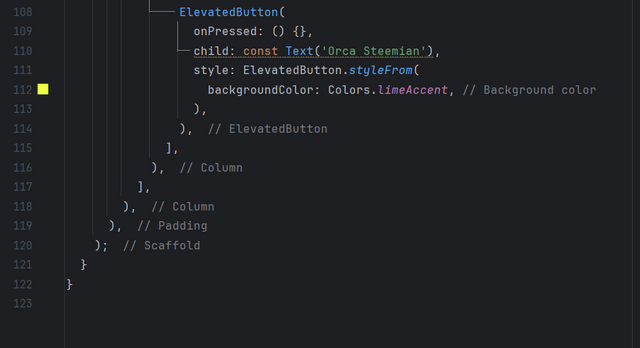
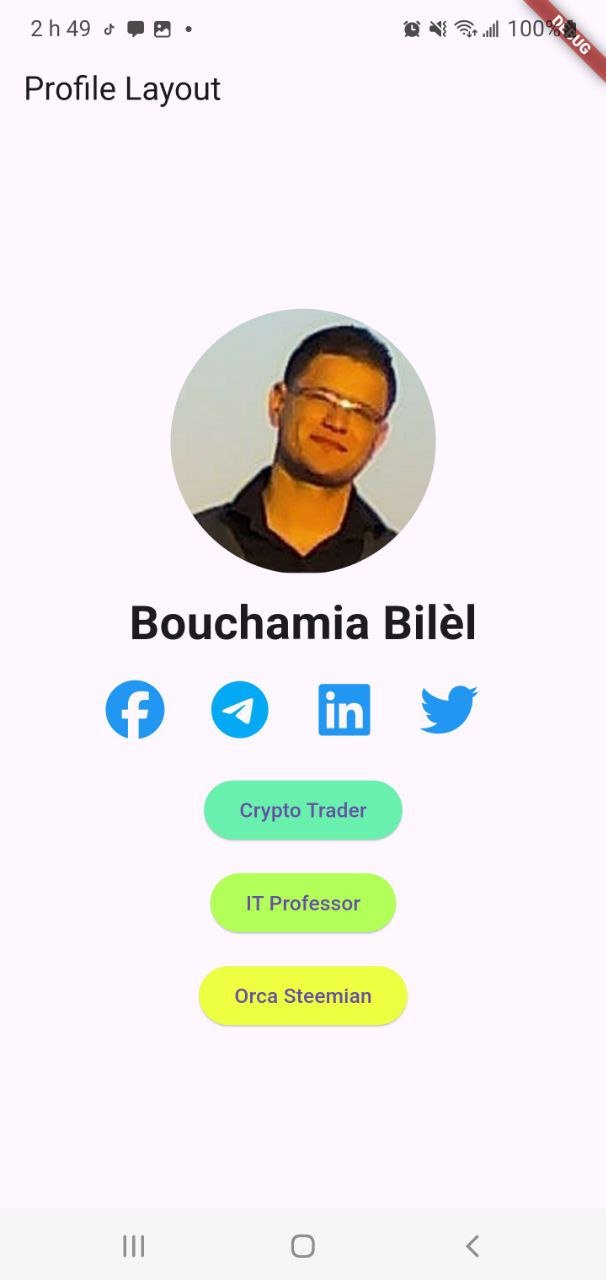
Project: Profile UI: Build a simple profile screen layout using various Flutter widgets. The screen should include a round profile image, social icons in the horizontal alignment, text as name, and buttons representing his different skills and attributes. These all should be aligned using the layout widgets discussed. Use SizedBox where needed.
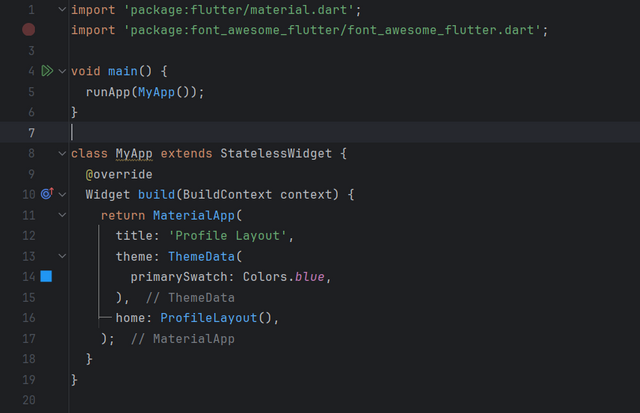
In this code, I create a UI for a profile screen using Flutter. Here's how I designed it:
I define a Flutter app with a blue main theme. The theme is applied to the entire app, which gives visual consistency.
I use a
Scaffoldfor the basic structure of the screen, including anAppBarwith the title "Profile Layout".I display a circular profile image (
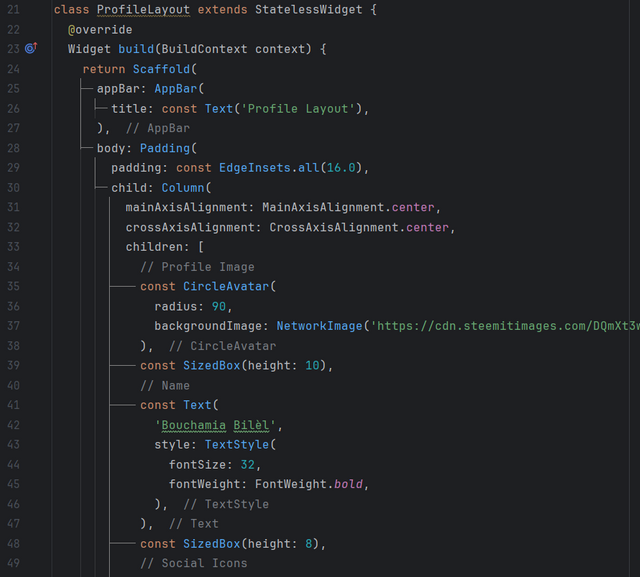
CircleAvatar) with a radius of 90 pixels. The image is loaded from a URL.I present the name "Bouchamia Bilèl" below the profile image with a font size of 32 and a bold text weight to make it more visible.
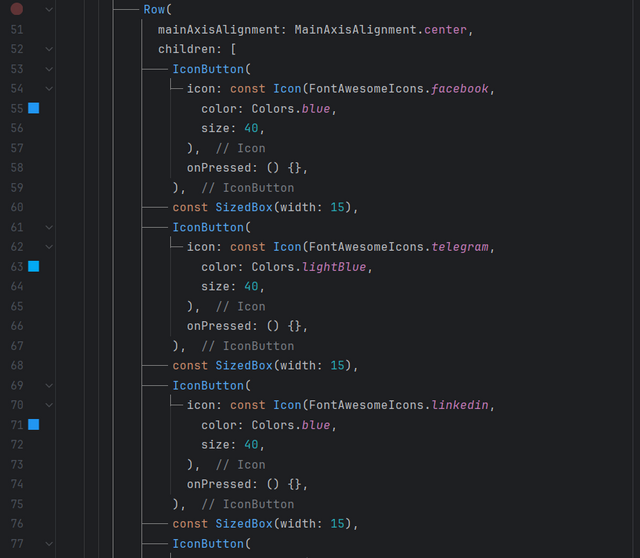
I place several social icons aligned horizontally (
Row). The icons include Facebook, Telegram, LinkedIn, and Twitter. I useIconButtonto make each icon clickable, with a color corresponding to each social network. I separate them with spaces (SizedBox).I create a column (
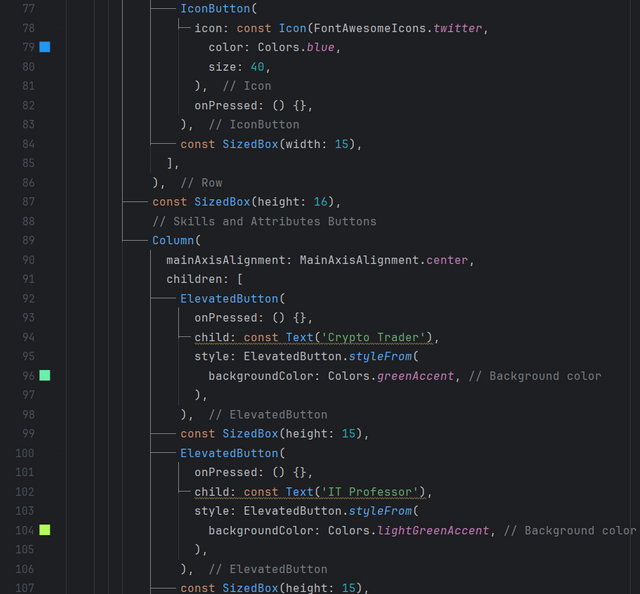
Column) to vertically align the buttons representing skills and attributes. Each button (ElevatedButton) is colored differently:"Crypto Trader" in orange
"IT Professor" in green
"Orca Steemian" in purple
I add spaces between the buttons to ensure a clear and orderly presentation.
Each element is arranged and styled to create an attractive and functional presentation, providing a coherent view of the profile with an appropriate visual hierarchy.
| Code | Code | code |
|---|---|---|
 |  |  |
| Code | Code | code |
|---|---|---|
 |  |  |
Thank you very much for reading, it's time to invite my friends @khursheedanwar, @stream4u, @steemdoctor1 to participate in this contest.
Best Regards,
@kouba01

