SEC S20W1 - A Comprehensive Guide to Flutter Mobile Application Development
Hello my steemian friends I hope you will be fine. Today I am going to participate in the steemit engagement challenge season 20 week 1 by @mohammadfaisal under the umbrella of steemit team. It is about flutter mobile application development. Let us start exploring this week's teaching course.
Introduction to Flutter and Setting Up the Environment
Flutter is a framework which is used to develop the user interface of the applications. It is an open source framework. It was developed by Google for the easy and optimized mobile application development as well as web development with a single codebase.
Flutter offers hot reload functionality which boosts the development process. We can see the changes in real time as we change the code. We do not need to build the app again and again. It is unique because of its fast development and impressive UI. Flutter uses its own rendering engine and its own programming language which is Dart. Flutter provides a set of pre designed and built in widgets. We can easily control the user interface of the applications.
Google has built its own application of Google Pay using flutter framework. So in this way you can guess the potential of flutter framework.
Benefits of Flutter
Flutter offers a number of benefits for the development of the applications. Some important and highlighting benefits are given below:
Cross Platform Development: Flutter offers cross platform development. The developers can develop applications for Android, iOS, web, and desktop from a single codebase. And I think this is the most important feature and benefit which makes it stand out from other platforms and frameworks.
Fast Development: Flutter provides fast development. There are built in widgets which catalyzes the development process.
Hot Reload: This is the most unique and reasonable feature of flutter framework. It gives instant preview of the changes in the code. We do not need to restart the entire app.
High Performance: Flutter applications have high performance because it has its own rendering engine. There is no need of an bridge as for the Javascript we need react native bridge.
Customizable Widgets: Flutter framework provides a rich library of the customizable widgets. The developers can use them to make their desired interfaces.
Documentation: Flutter provides extensive documentation of each widget in the flutter framework. It helps to understand all the workings and features of the widgets used in the development.
Community: It has a strong community and support. Pub.dev is the largest community where we can get many dependencies and plugins for the flutter framework. These make our development process more faster and efficient.
Integration with Google Services: Flyutter offers easy integration with the google services. We can integrate Google Maps, Firebase, Adwords, and Admob in the applications easily.
Install Flutter SDK, set up an IDE
As I have attended the lecture and I got to learn that installing flutter is not hard job. And it looks very easy to handle and understand. So I am going to install flutter SDK in my system.
I am a windows user and I will be installing it on my windows system. So let's see how it goes the installation of Flutter SDK.
- FIrst of all I went to https://flutter.dev/ to download the flutter SDK.
- As soon as the website loaded it shows many beautiful screens of the applications.

source
I clicked on the get started button and it led me to the page where I can choose platform.
Being a windows user I selected the first option Windows.
Then it redirected me to selected what type of applications I want to develop. By selecting recommended option I continued.
I downloaded the zip file of flutter SDK. And the I extracted the files.
After that as per the guidance from the professor I started adding the path of flutter bin folder into the environment variables so that I could access the flutter commands in the command prompt.
And after that I successfully gave the command in the command prompt. But my system was taking time to execute the commands.
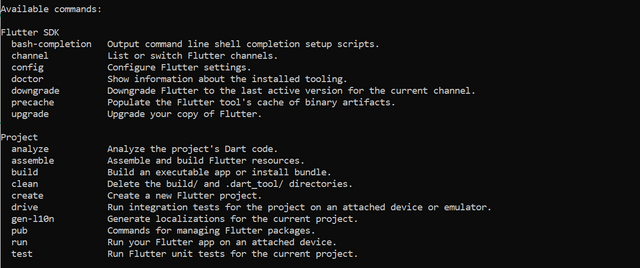
After waiting for some time all the commands and details of the flutter SDK appeared there. And I was feeling myself a flutter developer as things were going forward.
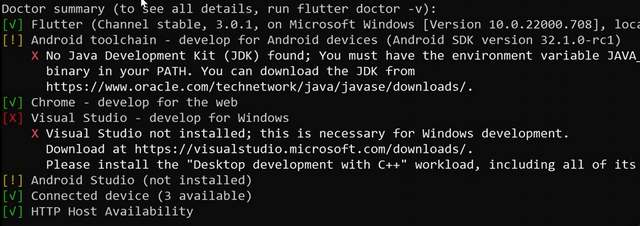
Here I got some warnings from the flutter doctor summary. They suggested me to install these things:
- Android tool chain
- Android licenses
- VS Code
- Android Studio
The first two warnings were because of the Android SDK. I started resolving these issues. I was suggested to download the android SDK independently and I could install it through the Android Studio as well.
So I started downloading Android Studio. I downloaded Android Studio setup from its official website. It was a large file like the flutter SDK.

Finally the android studio was downloaded. I I started its installation. It took a lot of time for the installation. The more time was consumed by the android sdk which was download during the installation. I installed all the required files such as android tool keychain.
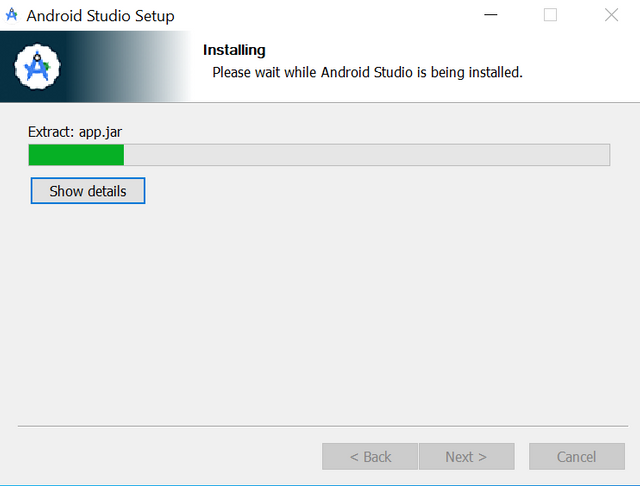
The installation was completed. And now it was the next term to continue my android studio setup.
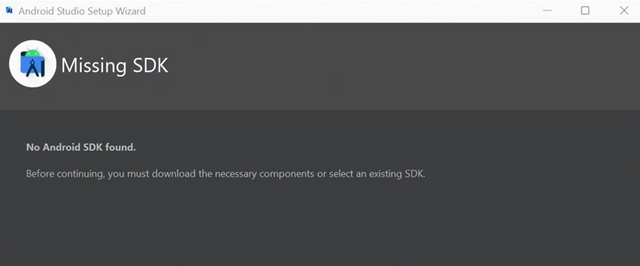
But as soon as the installation was completed I saw the starting notification on the screen that android studio is missing android sdk.
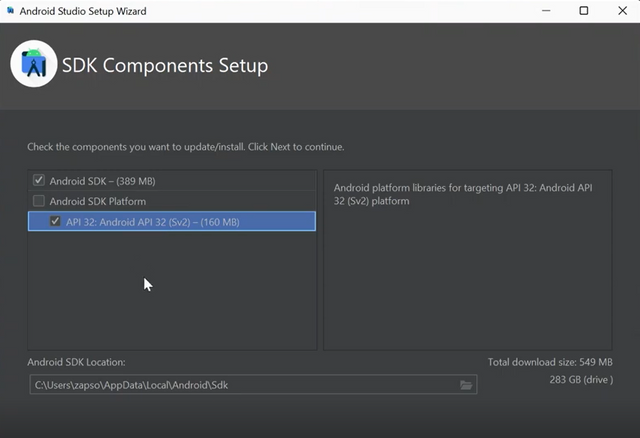
I clicked on the next and it opened the new screen with the android sdk components. I selected all the components and their download started.
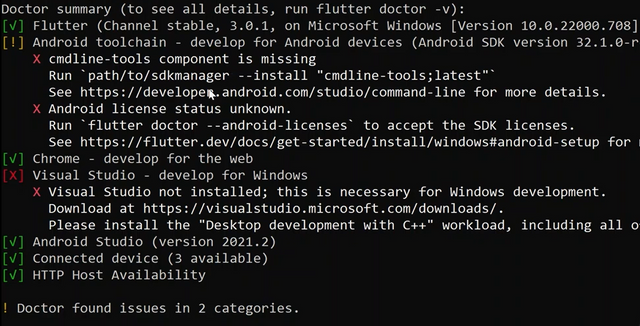
The installation of the android studio completed. I again opened the command prompt and it gave the summary related to the flutter installation. It showed some missing tools related to android studio and android sdk.
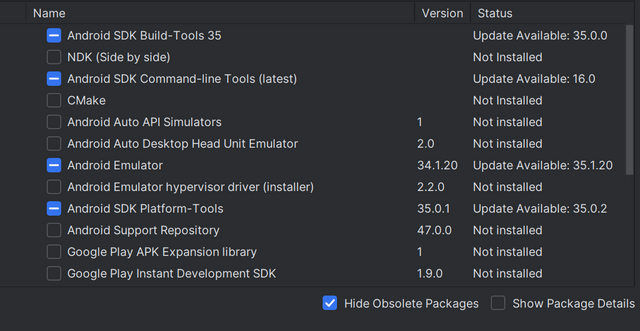
Flutter doctor suggested me that the command line tools components is missing. So for that purpose I opened the Android studio and went to its sdk manager. In the sdk tools there was the Android sdk command line tools. I installed them as you can see its updation was required.
After that the command line tools were resolved then I gave the commands to accept the android studio license for the flutter. And after this the flutter installation was completed and flutter doctor did not gave me any error or warning.
Configuration of physical device
By following the guidelines given by the professor I started configuring my physical device with the android studio. I have an android device. I followed these steps:
- Enable the developers option
- Then I enabled the USB debugging mode
- I connected my mobile device with the data cable
- I selected the option to transfer the data and files
- The device was fetched in the system
- Android studio automatically fetched the device in the studio.
- It started showing on the side bar of the device manager.
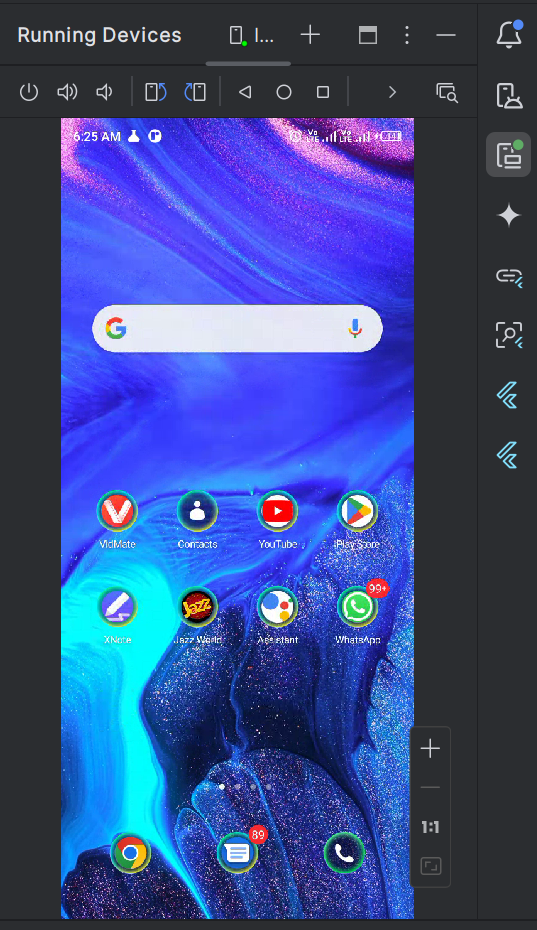
Here you can see the connected physical device which is my android smartphone Infinix Note 10 pro.
DartPad Assignment
DartPad is an online compiler for the compilation of the Dart programs. It was developed by Google. And it is easy to use. So let's start exploring DartPad and completing the tasks.
Write a function that prints numbers from 1 to 100. For multiples of 3, print "Steem" for multiples of 5, print "TRX" and for multiples of both, print "Steemit.com".
Dart language is very simple and easy to learn. For writing the function which counts untill 100 and prints the required numbers. There is the usage of for loop and conditional statements. I have broken down the whole program into sub parts for its better understanding.
For counting up to 100
for(int 1= 0, i<=100, i++)Condition for printing Steem for multiples of 3
 if(i % 3 == 0 )

{ print ("Steem")}
Condition for printing TRX for multiples of 5
 if(i % 5 == 0 )

{ print ("TRX")}
Condition for printing Steem and TRX for multiples of 3 and 5
 if(i % 3 == 0 && i % 5 == 0 )

{ print ("Steemit.com")}
Collectively I have merged all the code in a function named printNumbers() and then I have called this function in the main function.

Here is the input of all the code for printing the required numbers in dartpad using dart language.
 |  |  |  |  |
|---|
There are 27 numbers between the range of 1-100 which are the multiple of 3 so steem has been printed 27 times.
Similarly there are 14 numbers which are the multiples of 5 hence TRX has been printed 14 times.
Lastly, there are 6 numbers which are the multiple of both 3 and 5 so Steemit.com has been printed 6 times.
So it is all about the function in dart programming which prints the required number when the specific conditions are met.
Create a Dart function that calculates and returns the factorial of a given number. Test the function with different inputs.
Let us write dart function which calculates the factorial of the given number.
int factorial(int n) {

if (n <= 1) {

return 1;

} else {

return n * factorial(n - 1);

}

}

void main() {

print("Factorial of 5: ${factorial(5)}");

print("Factorial of 0: ${factorial(0)}");

print("Factorial of 6: ${factorial(6)}");

print("Factorial of 3: ${factorial(3)}");

}
It is the dart program which calculates the factorial of the given number. I have used int n as a parameter to the factorial function. And the factorial function calculates the factorial of n.
Moreover in order to follow the conditions of factorial I have added a condition that the function should return 1 when the value of the n is 1 or less than 1.
And for the values which are greater than 1 the function will calculate the factorial and will return the output accordingly. The functions continues its iterations until the value of n becomes 1.
And in order to test the different outputs I have used different testing inputs. So the function is producing the different output while inserting different input.

Function to calculate factorial of given number

Output of the function to calculate factorial of given number
In the output we can see that the function has produced different values of factorial on giving different output of the base number.
So it is all about the function in dart programming which calculates the factorial of the given number.
Connect a physical device to the computer and enable developer mode and USB debugging. Configure Android Studio to recognize the connected device and run a Flutter app on it. Run a basic Flutter app on the physical device and verify its functionality.
I created my first project. They gave the built in code. I started the run button. Loading started. Firstly the android studio built its gradle and downloaded all the gradle files while the gradle setup. It took time but finally the gradle was built. The installation process of the app in the mobile started.
The files were synchronized with the mobile device. And a pop up appeared to allow the installation of the application in the mobile. I accepted the application and in this way the application was installed.
Here you can see the built in counter app is running in my mobile via the usb debugging.
Sign Up and Log In Screen: Create a basic Sign Up and Log In Screen interface.
So the real game began now. I have installed my Android Studio already while completing the first task. As flutter sdk installation required android sdk. But now in order to continue my flutter development and my to complete the project of the assignment I needed to install the required plugins in the Android Studio.

I opened the plugins section from the left corner. In the market place I searched both the plugins flutter and dart. I installed flutter and it also installed dart plugin. So now I could create a flutter project.
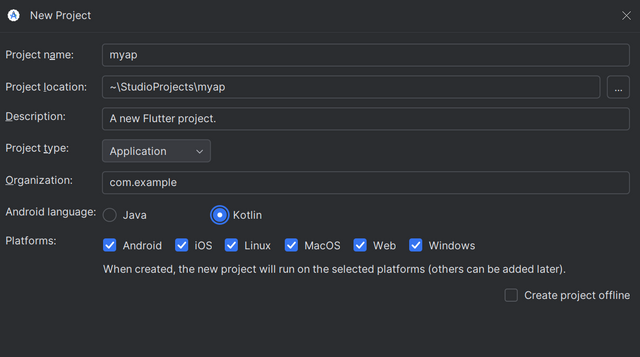
I created my first flutter project. I gave the name myapp and i continued it. It took some time for building the new project. And it gave me the ready made counter application. I removed all the previously given code and started building the interface screens for the Log In and Sign Up.
Here is all the code for the sign up screen interface.
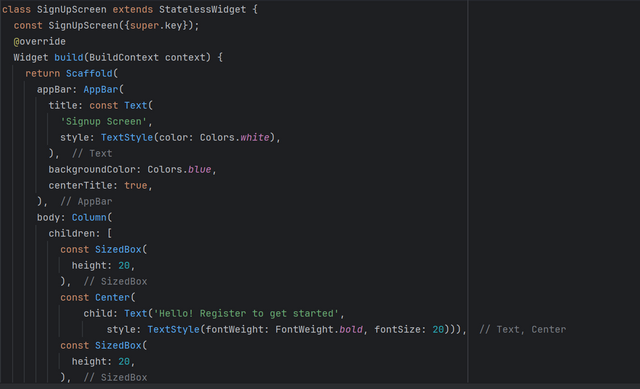
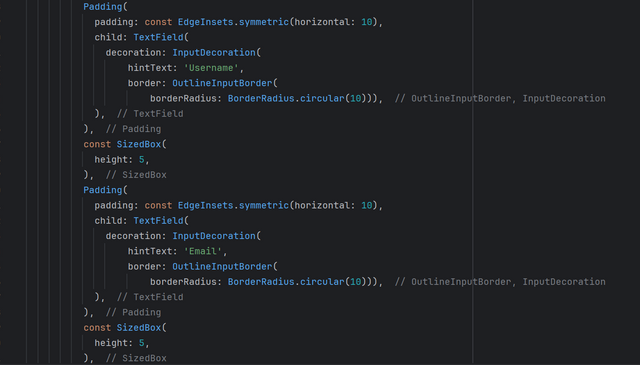
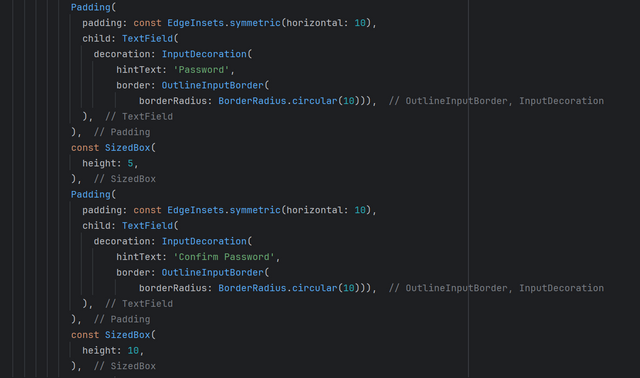
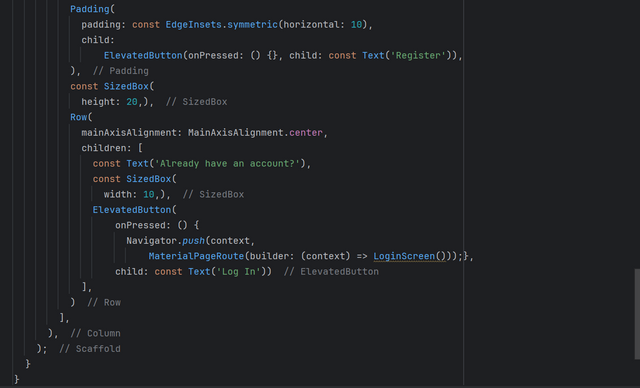
So this is the code for the complete sign up screen interface. In this code I have used different widgets such as appBar, Title, TextField, Text, SizedBox, ElevatedButton, and Navigator to navigate from one screen to another screen. In the sign up screen if we already have an account then we can go to the log in screen by clicking on the log in button.
Here is all the code for the log in screen interface.
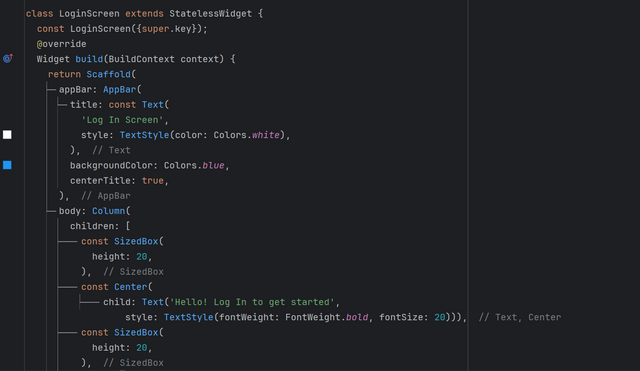
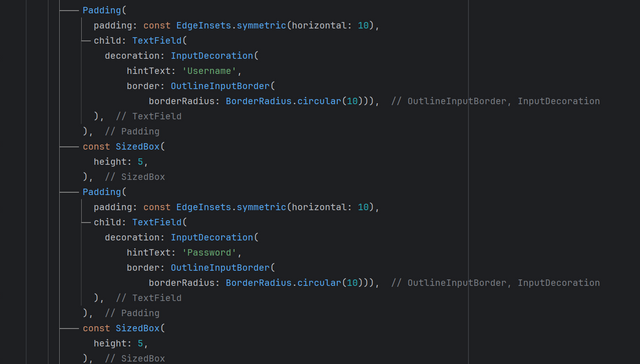
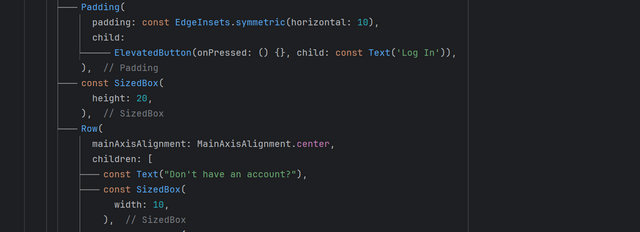
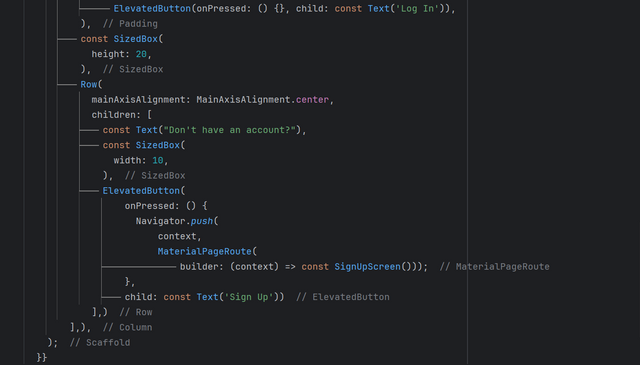
In the log in screen I have used similar widgets as I used in the sign up screen. Both the screens are the same in code with just minor difference of the number of textfields.
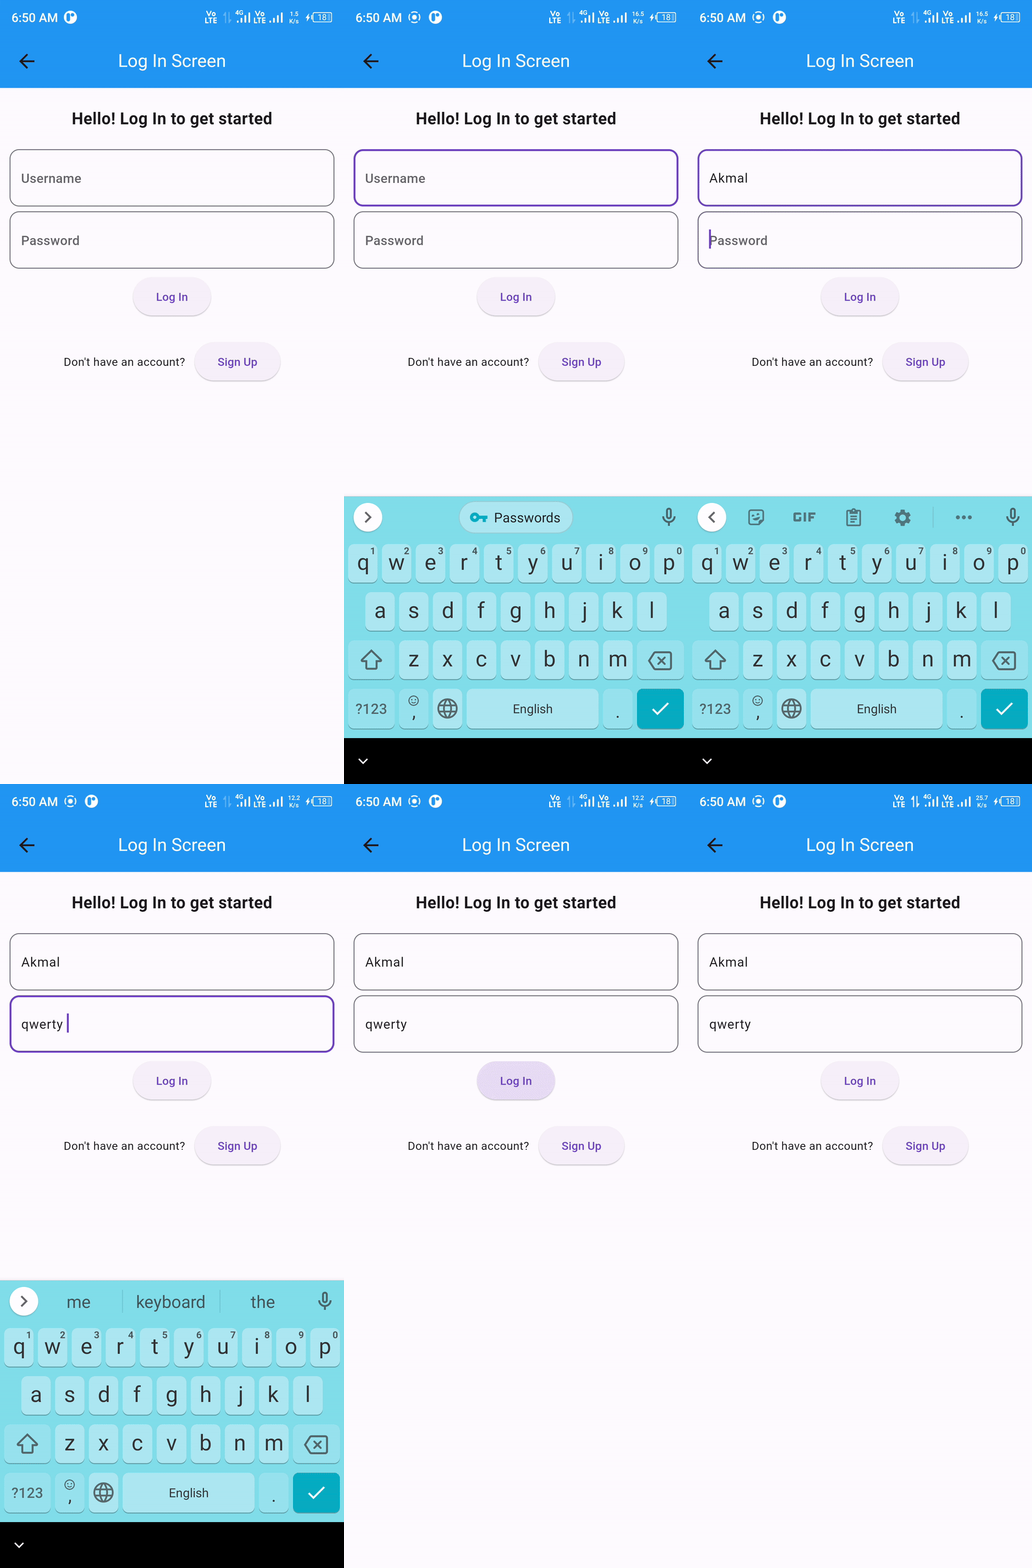
In the log in screen if we do not have an account already then we can simply click on sign up and it will redirect the user towards the registration screen. So it is the log in screen interface.
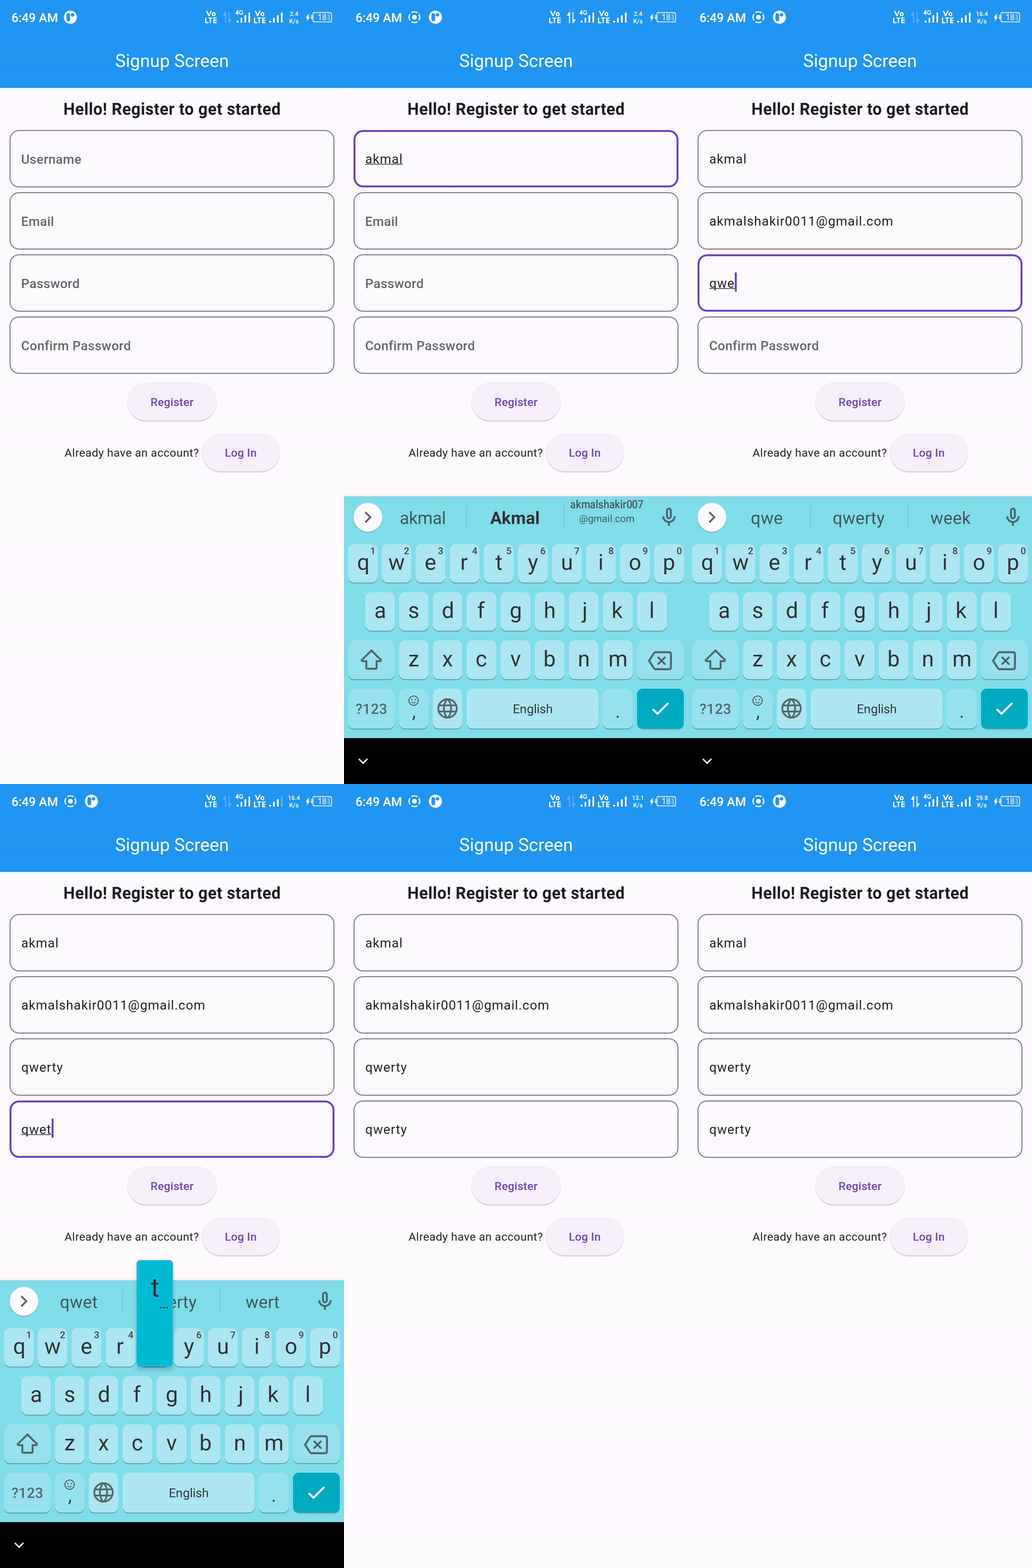
It is the complete log in and sign up user interface.
Upvoted! Thank you for supporting witness @jswit.
X Sharing Link 🖇️ : https://x.com/Shaki70Akmal/status/1834119098357153984
Good job!
This post has been upvoted/supported by Team 7 via @philhughes. Our team supports content that adds to the community.