Help Lose Weight with These 6 Minute Stretches
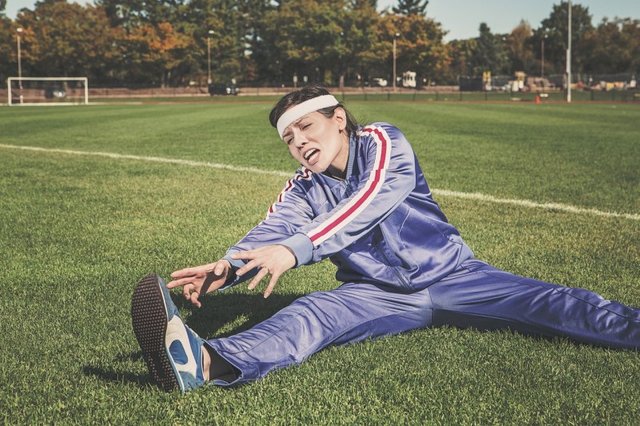
You don't have to hit the gym to lose weight, you don't even need weights! Adding these stretches to your daily routine can help you lose weight when done in unison with a healthy diet. Don't just stop there though, add more to your routine, increase the time, and get creative with it!

Taking a mere 6 minutes a day can make a huge difference not only mentally, but can also help you lose weight!
Stay in each position for 1 minute at a time and if you find one that you feel you are truly benefiting from, feel free to remain in that pose for as long as you like!
Plank
Plank Pose, Phalakasana, Santolasana, or Utthita Chaturanga Dandasana is a workout for our core, in particular the ab muscles of the torso and creates strong shoulders.
Start in Downward facing dog Adho Mukha Svanasana. Then inhale and draw your torso forward until the arms are perpendicular to the floor and the shoulders directly over the wrists, torso parallel to the floor.
Press your outer arms inward and firm the bases of your index fingers into the floor. Firm your shoulder blades against your back, then spread them away from the spine. Also spread your collarbones away from the sternum.
Press your front thighs up toward the ceiling, but resist your tailbone toward the floor as you lengthen it toward the heels. Lift the base of the skull away from the back of the neck and look straight down at the floor, keeping the throat and eyes soft.
Chair
Chair pose Tones the leg muscles excellently, Strengthens hip flexors, ankles, calves, and back. Stretches chest and shoulders, reduces symptoms of flat feet and stimulates the heart, diaphragm, and abdominal organs.
Stand in Mountain pose. Inhale and raise your arms perpendicular to the floor. Either keep the arms parallel, palms facing inward, or join the palms.
Exhale and bend your knees, trying to take the thighs as nearly parallel to the floor as possible. The knees will project out over the feet, and the torso will lean slightly forward over the thighs until the front torso forms approximately a right angle with the tops of the thighs. Keep the inner thighs parallel to each other and press the heads of the thigh bones down toward the heels.
Firm your shoulder blades against the back. Take your tailbone down toward the floor and in toward your pubis to keep the lower back long.
Forward Fold
Sanding forward fold release the hips, hamstrings, calves, cervical spine and rejuvenate your body
Stand in Tadasana, hands on hips. Exhale and bend forward from the hip joints, not from the waist. As you descend draw the front torso out of the groins and open the space between the pubis and top sternum. As in all the forward bends, the emphasis is on lengthening the front torso as you move more fully into the position.
If possible, with your knees straight, bring your palms or finger tips to the floor slightly in front of or beside your feet, or bring your palms to the backs of your ankles. If this isn’t possible, cross your forearms and hold your elbows. Press the heels firmly into the floor and lift the sitting bones toward the ceiling. Turn the top thighs slightly inward.
With each inhalation in the pose, lift and lengthen the front torso just slightly; with each exhalation release a little more fully into the forward bend. In this way the torso oscillates almost imperceptibly with the breath. Let your head hang from the root of the neck, which is deep in the upper back, between the shoulder blades.
Don’t roll the spine to come up. Instead bring your hands back onto your hips and reaffirm the length of the front torso. Then press your tailbone down and into the pelvis and come up on an inhalation with a long front torso.
Bow
Bow pose strengthens the back and abdominal muscles, stimulates the reproductive organs and opens up the chest, neck and shoulders. It also tones the leg and arm muscles, adds greater flexibility to the back, relieves menstrual discomfort and constipation.
Lie on your belly with your hands alongside your torso, palms up. (You can lie on a folded blanket to pad the front of your torso and legs.) Exhale and bend your knees, bringing your heels as close as you can to your buttocks. Reach back with your hands and take hold of your ankles (but not the tops of the feet). Make sure your knees aren’t wider than the width of your hips, and keep your knees hip width for the duration of the pose.
Inhale and strongly lift your heels away from your buttocks and, at the same time, lift your thighs away from the floor. This will have the effect of pulling your upper torso and head off the floor. Burrow the tailbone down toward the floor, and keep your back muscles soft. As you continue lifting the heels and thighs higher, press your shoulder blades firmly against your back to open your heart. Draw the tops of the shoulders away from your ears. Gaze forward.
Bridge
Bridge pose stretches the chest, neck, spine, and hips, strengthens the back, buttocks, and hamstrings, improves circulation of blood, calms the brain and central nervous system. It also stimulates the lungs, thyroid glands, and abdominal organs, improves digestion, reduces backache and headache and reduces fatigue, anxiety, and insomnia.
Lie supine on the floor, and if necessary, place a thickly folded blanket under your shoulders to protect your neck. Bend your knees and set your feet on the floor, heels as close to the sitting bones as possible.
Exhale and, pressing your inner feet and arms actively into the floor, push your tailbone upward toward the pubis, firming the buttocks, and lift the buttocks off the floor. Keep your thighs and inner feet parallel. Clasp the hands below your pelvis and draw shoulders together.
Lift your buttocks until the thighs are about parallel to the floor. Keep your knees directly over the heels, but push them forward, away from the hips, and lengthen the tailbone toward the backs of the knees.
Camel
Camel pose reduces fat on thighs, opens up the hips, stretching deep hip flexors, stretches and strengthens the shoulders and back. Also expands the abdominal region, improving digestion and elimination, improves posture, opens the chest, improving respiration, loosens up the vertebrae and relieves lower back pain.
Kneel on the floor with your knees hip width and thighs perpendicular to the floor. Rotate your thighs inward slightly, narrow your hip points, and firm but don’t harden your buttocks. Imagine that you’re drawing your sitting bones up, into your torso. Keep your outer hips as soft as possible. Press your shins and the tops of your feet firmly into floor.
Rest your hands on the back of your pelvis, bases of the palms on the tops of the buttocks, fingers pointing down. Use your hands to spread the back pelvis and lengthen it down through your tail bone. Then lightly firm the tail forward, toward the pubis. Make sure though that your front groins don’t “puff” forward. To prevent this, press your front thighs back, countering the forward action of your tail. Inhale and lift your heart by pressing the shoulder blades against your back ribs.
Now lean back against the firmness of the tail bone and shoulder blades. For the time being keep your head up, chin near the sternum, and your hands on the pelvis. Beginners probably won’t be able to drop straight back into this pose, touching the hands to the feet simultaneously while keeping the thighs perpendicular to the floor. If you need to, tilt the thighs back a little from the perpendicular and minimally twist to one side to get one hand on the same-side foot. Then press your thighs back to perpendicular, turn your torso back to neutral, and touch the second hand to its foot. If you’re not able to touch your feet without compressing your lower back, turn your toes under and elevate your heels.
See that your lower front ribs aren’t protruding sharply toward the ceiling, which hardens the belly and compresses the lower back. Release the front ribs and lift the front of the pelvis up, toward the ribs. Then lift the lower back ribs away from the pelvis to keep the lower spine as long as possible. Press your palms firmly against your soles (or heels), with the bases of the palms on the heels and the fingers pointing toward the toes. Turn your arms outwardly so the elbow creases face forward, without squeezing the shoulder blades together. You can keep your neck in a relatively neutral position, neither flexed nor extended, or drop your head back. But be careful not to strain your neck and harden your throat.


To listen to the audio version of this article click on the play image.

Brought to you by @tts. If you find it useful please consider upvoting this reply.
Awesome! I really need to do stretching. I haven't stretched in a long time. I have a bad lower back too, and my mom gave me a great list of stretches to do to strengthen the lower back muscles, but of course I haven't done them. And this activity can be done while watching TV, and I could even get some curls in as well....(lifting that remote control is a great work out...lol)
I will be great if add pictures for each pose. Thanks in advance.