Tricks how i BOOSTED my Ethereum mining rate from 3.8 MH/s to 24 MH/s on NVIDIA GTX 970 GPU
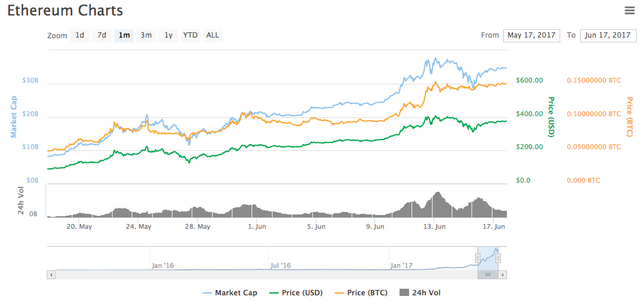
As you may noticed, Ethereum is getting more valuable day by day. So i decided to take a look into mining my own ETH using my Gaming-Rig powered by a GTX 970 GPU.
Problem: Low Mining HashRate
I have used several tools and solutions, but my mining rate was very low and due to that, not profitable at all. After some Research, i was able to BOOST my mining rate from 3.8 MH/s to 24 MH/s - And here is how i've done this.
Analyzing the problem:
At first, i was using Windows 10. I've tried EVERYTHING to increase Hashrate, no luck. Some people on the Internet said, downgrading the NVIDIA driver would do the trick. Ive tried that and i have had more problems than before.
Here's a quote of a developer:
Why is my hashrate with Nvidia cards on Windows 10 so low?
The new WDDM 2.x driver on Windows 10 uses a different way of addressing the GPU.
This is good for a lot of things, but not for ETH mining
Take ACTION:
After hours of research and trying, i have decided to install Windows 8 on my old unused hard drive. Ive installed the latest NVIDIA driver and downloaded the best ETH miner software available.
DOWNLOAD WINDOWS MINING SOFTWARE
Make sure you have created a Ethereum Wallet, you'll need the ETH address now. I've used this: https://www.myetherwallet.com/
Now extract the mining software somewhere and create a file called run.bat ( google how to create a batch file ) INSIDE the folder, where ethminer.exe is located and insert the following code:
setx GPU_FORCE_64BIT_PTR 0

setx GPU_MAX_HEAP_SIZE 100

setx GPU_USE_SYNC_OBJECTS 1

setx GPU_MAX_ALLOC_PERCENT 110

ethminer.exe -G -S
eu1.ethermine.org:4444 -FS us1.ethermine.org:4444 -O {YOUR_WALLET}.r1 --farm-recheck 200
setx GPU_MAX_HEAP_SIZE 100
setx GPU_USE_SYNC_OBJECTS 1
setx GPU_MAX_ALLOC_PERCENT 110
ethminer.exe -G -S
Replace {YOUR_WALLET} with your 0xABCDEF... Ethereum Address ( remove the brackets )
Save the batch file and RUN it. If you like, you can Overclock your GPU using Afterburner or similar tools - it will help to max out your mining performance.
ITS HAPPENING ! BIG PERFORMANCE UPGRADE !
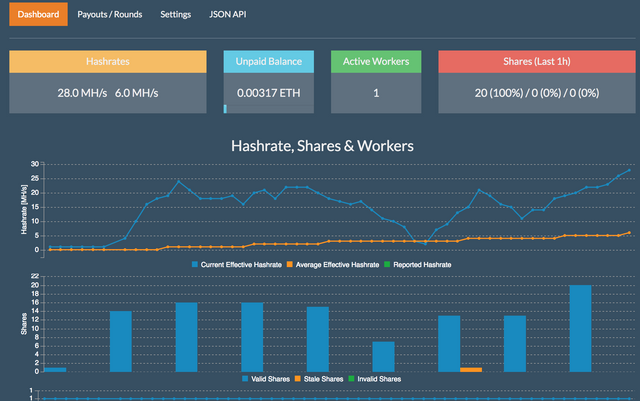
Before using Windows 8 and using this config, i had 4 MH/s, now it is 24 MH/s ! A GREAT improvement !!
Checking the mining results and transferring your own generated ETH coins:
In this tutorial we are using https://ethermine.org/ as mining pool. To validate your results and transfer the coins into your wallet, you'll have to go to ethermine.org and enter your used ETH address inside the navbar on top and click "Check Status". Your personal Dashboard will be opened with fresh details of your Average Hashrate and unpaid Balance. Click on "Payouts / Rounds" if you mined the minimum of 0.05 ETH to withdrawal the coins from the used pool into your wallet. DONE !
This is my first post on STEEMIT - I hope this tutorial helps you - please comment if you had success or if you have problems.
- Your German Politix


Welcome to the platform, I wish everything work out for you. It’s not easy here but not difficult neither but just ask an extra effort, engagement is the key good luck I’m @goodaytraders Start by following people and they will do the same.
Wow, this was fast. Thank you for your advice, i am following you now :-)
Congrats man, I've read you can take it to 30 with OC. Good Luck